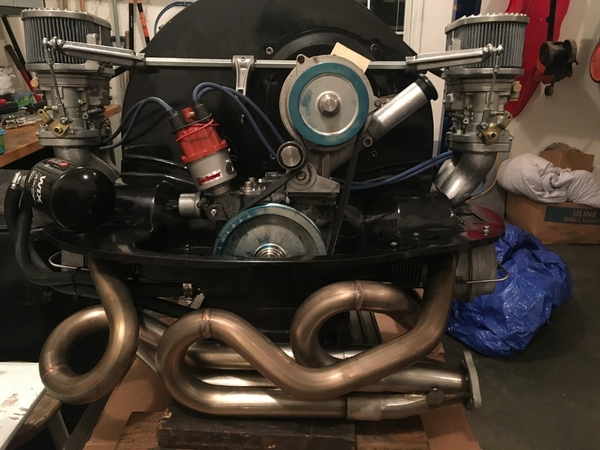
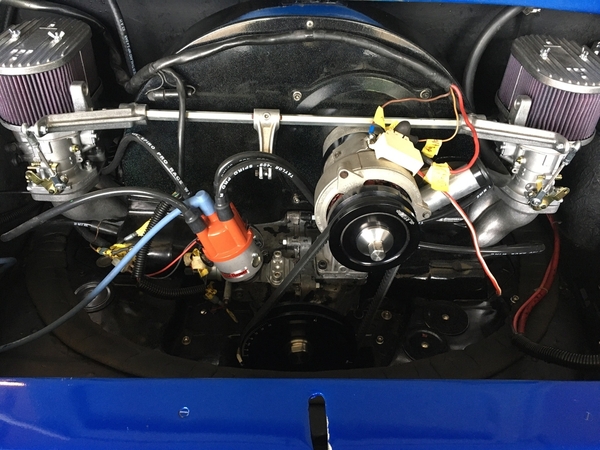
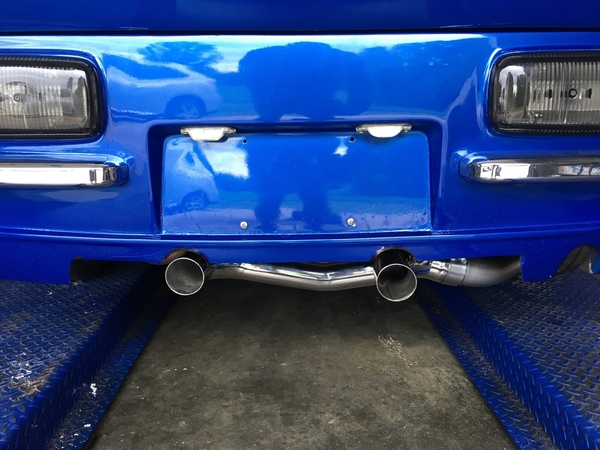
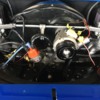
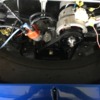
I worked on the engine tin fitment and plugged all the extra holes I won't be using. I installed the new MST "V" belt pulley system and the good wires with boots that keep the air in to cool the engine. I hate the floppy flat boots that don't do anything but let all the pressurized cooling fan air out via the plug access holes. I don't know how any self respecting air cooled guy could stand to use plug wires made like this?

 The engine is looking better. I plan on installing the engine in the Puma tomorrow. and hell yes I am going to put the engine through its paces as Nick of Nick's Garage on Youtube likes to say. If you haven't watched any of the Nick's garage video's you are missing out. 

Puma 2276 finished engine rebuild new pulleys7-21-2020

Attachments

Images (1)
  • Puma 2276 finished engine rebuild new pulleys7-21-2020

I have a set of Taylor plug wires with the ball end that's supposed to fit into the perfectly-flat (yeah, right...) hole in the head tin.  You'd need to be a Gorilla to get them in there and onto the plug so that the metal wire connection locks onto the top of the plug.  And even then, then have a tendency to pop back off over time.  

I mess and mess with the position of that ball versus getting the plug to snap on so the ball is up against the hole but not pushed in to make it seat into the groove around the ball.

Not ideal, but my patience is way too short to get them to work right.  Already had one of those hammer-in-the-wall incidents.

The openings in the type1 aftermarket fan shrouds are not round and flat which would make the ball type boots fit correctly. The openings are a deformed shape and not all the same. Some fan shrouds are better than others. The shroud on my engine has openings that allowed me to get all of the boots to snap into place securely and not feel like they will pop out any minute. I have had other engines that took a ton of pushing and manipulating with a screw driver and never fit securely or get pushed all the way in which isn't ideal either.  I agree, what we have now is not a good design.

Now I am pondering getting some CB 2003 MAGNASPARK II™ 8.2mm Wires with their distributor end 90-degree terminals or trying some Corvair boots on my existing wires.

My existing wires are 8mm.  I don't know if the Corvair boots would fit over them or if I could get the Corvair boots will fit over the terminals.

I also wonder if the .2mm larger Magnaspark wires will fit in the things I use to hold my wires on the shroud.  Maybe that would be a reason to use CoolRydes spark plug wire tube.

I have used zip ties on the flat ones to hold them in place on the wires.

I have a zip tie gun that I have from my years as a sound guy. I believe I have the manga spark wires/boots and instal them by squeezing both sides, then pushing the top into the groove. (My holes are cut out on the bottom which makes this easier. Granted I'm loosing some cooling efficiency in the process per Jimmy) Then I put a zip tie on the top of the boot, push it down toward the spark plug, and squeeze the gun."

FWIW, I've found for all things rubber, a little dab of "plumbers grease," available at any hardware store, is worth it's weight in gold. It's pure silicone about the consistency of Bosch distributor grease. 

FWIW II: really nice pandit guns are available on eBay for a good price. I guess the guys who build airplanes, who install 500-600 ties a day "wear them out" and sell them on eBay. For us DIY-ers, they'll last a lifetime. I've had my current one since 1995, and it still works perfectly. 

The Bosch air seals work fine for me. I installed the seals on Ford EDIS wires(1990 Escort coilpack). They don't slip and slide at all.

I have a couple Thomas and Betts ty-rap tools. They really work best with the manufacturer's own zip-ties, but work on other ties OK. I'm very particular about the cut ends sticking out. Flush-cut ties are important! Those sharp edges really slice hands!
@DannyP posted:

 Flush-cut ties are important! Those sharp edges really slice hands!

I can't count the number of times I sliced the back of my hand reaching into a rack to unplug the connectors in the back of a piece of gear.. It was a long time ago. A couple of years into the big time, everybody got the word that that (poorly trimming the tie) was a really bad rookie mistake. 

That's why I love my pandit tool. It does it perfect every time. 

Last edited by dlearl476

In my world, it's hard to find guys who will even trim the tys. Nobody (and I mean nobody) will pay for a T&B ty. I'm the guy who does it "right"-- trims the excess wire, crimps a new terminal, ties the loom, and cuts off the excess tail with a dikes. It takes a little bit of time, but it's very, very nice for the net guy to open the panel and see something that looks a bit orderly.

I apprenticed with a guy who told me "we're not building a watch here, son", but it's nice when somebody thinks a little about the next guy who will work on a piece of equipment.

Last edited by Stan Galat

Yeah, I completely hear you Stan. Most people are in so much of a hurry to get done, get paid, go home, and get to the next job that it mostly looks like an explosion of wires happened.

I was taught by people who cared about the future AND the next guy that has to go behind you. The world is a selfish place anymore. ME, me, me.........screw the next guy.

It really doesn't take any more time to care about what you leave behind once you make it your habit to actually care.

If I can't get to the head of the ty-rap with the tool, I'll trim it with a pair of electrician's shears, which most people call scissors, which they are NOT. Then I'll rotate the head of the ty so that it isn't where the back of your hand or knuckles can get sliced....

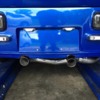
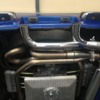
Puma update. I had a marathon engine install session yesterday. I started on the install around 4:30 Pm and heard the wonderful sound of a well built balanced high performance 2276 Type 1 engine around 2:00 AM. I was working alone and it takes more time as I slowly lower the car down on top of the engine that is sitting on a narrow table on wheels. I have to keep running back and forth from the lift controls to the engine having to manipulate it into and around the engine compartment floor and keep from damaging anything. I had the engine lined up with the lower studs in the transaxle holes and couldn't get the engine the slide into the transaxle.  After taking longer than I would have liked I found that the A1 header coming out of the no. 3 cylinder was hitting the left (drivers side) Kafer bar. The A1 exhaust wasn't designed to have a Kafer bar setup I guess. I removed the offending bar and the engine slide right into place. I bolted the engine in and hooked up all the wires. I then mounted the oil filter under the engine compartment floor. I may need to build and protective shield to deflect heat from the header and protect against thrown rocks and such from the rear tire.

 The moment of truth came and I turned the key, I heard the hum of the electric fuel pump, hooray!  I hooked the wires up correctly and this setup has it's fare share of wiring. I turned the key further and the engine fired up at once. This thing is a monster! The air pressure coming out of the tail pipes is in the leaf blower category. The A-1 exhaust does a good job to quiet the engine but what a wonderful sound. The engine has been dynamically balanced and it makes a huge difference. After letting it warm up for a bit I blipped the throttle and man this engine sounds mean. It revs up and back super fast and crisp, no slowly floating back to idle for this engine ( I hate when engines do that)  I had a scare after this because the clutch pedal pressure didn't feel right and I had images of having to take the engine back out again. I then realized I hadn't adjusted the new clutch cable that I had installed while the engine was being rebuilt. I installed a new throttle cable as well all while I had the pedal cluster out for maintenance. Well it was late and my wife thought I had lost my mind, Have I ? I did swear off air cooled engines 2 years ago but yet here I am. I surrender, I love the damn things. I dropped into bed with a sore body and a smile on my face, dreaming of driving the Puma the next day. This thing should really move. Can you tell I like to go fast? I think I am really going to love this engine.

Puma Kafer barPuma 2276 finished engine rebuild 7-20-2020Puma new 2276 installPuma engine tin sealPuma A1 sidewinder w-Dual tip

Attachments

Images (5)
  • Puma Kafer bar
  • Puma 2276 finished engine rebuild 7-20-2020
  • Puma new 2276 install
  • Puma engine tin seal
  • Puma A1 sidewinder w-Dual tip
Last edited by Jimmy V.

Be the way. I wanted to post pics of my plug wire boots snapped into place. The fan shroud on this engine and the CB ported and welded intakes allow for the boot balls to snap in place nicely. I have had engines were this wasn't the case. It is amazing the amount of work CB has done on the port matched intakes they supplied to go with the Ultra Mag plus cylinder heads. They had to open the big beef intakes so far as to need to weld them up because they broke through the intake walls. The heads have similar welding were the porting was so large it broke through the wall. 

Puma Plug 1Puma plug 2Puma plug 3Puma plug 4

Attachments

Images (4)
  • Puma Plug 1
  • Puma plug 2
  • Puma plug 3
  • Puma plug 4
Last edited by Jimmy V.

Danny, The engine builder ran the cam in on several 20 minute 2000 rpm sessions. I posted a video of a few seconds of the cam break it. He uses VR1 racing oil which has a ton of the ZDDP that cams and lifters like. The guy I use is very detail oriented and builds really nice engines for a fair price. He builds a lot of vintage Porsche engines and engines for off road racing and drags. He has been doing this for over 40 years. I was glad to find he was still in business. The guy doesn't advertise and doesn't need to. Word of mouth has him piled with engines and transaxle to build. His name is Bill Westerfeld his company is Westerfeld Enterprises, in Harrison Oh.

 He is currently working on the Type 4 that I bought from Chris Sutton's classified listing on this site. I am going to have him build it into a monster type 4 with 2.8 L displacement. It will be really nice. I will be selling the type 1 that I just installed in the Puma and this monster Type 4. Pass the word.

Last edited by Jimmy V.
@DannyP posted:

I was taught by people who cared about the future AND the next guy that has to go behind you. The world is a selfish place anymore. ME, me, me.........screw the next guy.

If I can't get to the head of the ty-rap with the tool, I'll trim it with a pair of electrician's shears, which most people call scissors, which they are NOT. Then I'll rotate the head of the ty so that it isn't where the back of your hand or knuckles can get sliced....

When I built racks for Broadway shows, chances are "the next guy" would be me. And even if it wasn't, it was a small enough community that the next guy would know I built the rack. 

I have a special pair of "shear cut" dykes that I only use for trimming zip tie ends. They cut the end flush, just like a pandit tool does. 

image

Attachments

Images (1)
  • image
@Jimmy V. posted:

Puma update. I had a marathon engine install session yesterday. I started on the install around 4:30 Pm and heard the wonderful sound of a well built balanced high performance 2276 Type 1 engine around 2:00 AM. I was working alone and it takes more time as I slowly lower the car down on top of the engine that is sitting on a narrow table on wheels. I have to keep running back and forth from the lift controls to the engine having to manipulate it into and around the engine compartment floor and keep from damaging anything. I had the engine lined up with the lower studs in the transaxle holes and couldn't get the engine the slide into the transaxle.  After taking longer than I would have liked I found that the A1 header coming out of the no. 3 cylinder was hitting the left (drivers side) Kafer bar. The A1 exhaust wasn't designed to have a Kafer bar setup I guess. I removed the offending bar and the engine slide right into place. I bolted the engine in and hooked up all the wires. I then mounted the oil filter under the engine compartment floor. I may need to build and protective shield to deflect heat from the header and protect against thrown rocks and such from the rear tire.

 The moment of truth came and I turned the key, I heard the hum of the electric fuel pump, hooray!  I hooked the wires up correctly and this setup has it's fare share of wiring. I turned the key further and the engine fired up at once. This thing is a monster! The air pressure coming out of the tail pipes is in the leaf blower category. The A-1 exhaust does a good job to quiet the engine but what a wonderful sound. The engine has been dynamically balanced and it makes a huge difference. After letting it warm up for a bit I blipped the throttle and man this engine sounds mean. It revs up and back super fast and crisp, no slowly floating back to idle for this engine ( I hate when engines do that)  I had a scare after this because the clutch pedal pressure didn't feel right and I had images of having to take the engine back out again. I then realized I hadn't adjusted the new clutch cable that I had installed while the engine was being rebuilt. I installed a new throttle cable as well all while I had the pedal cluster out for maintenance. Well it was late and my wife thought I had lost my mind, Have I ? I did swear off air cooled engines 2 years ago but yet here I am. I surrender, I love the damn things. I dropped into bed with a sore body and a smile on my face, dreaming of driving the Puma the next day. This thing should really move. Can you tell I like to go fast? I think I am really going to love this engine.

Puma Kafer barPuma 2276 finished engine rebuild 7-20-2020Puma new 2276 installPuma engine tin sealPuma A1 sidewinder w-Dual tip

WooHoo! Great news!  I'm thinking the planets are aligning.  I just got an email from AirCooled, my brake parts just came in after 2 months on back order. I hope the Karma extends to Ed and his front beam issues. 

Update on the 2276 engine install and tune:

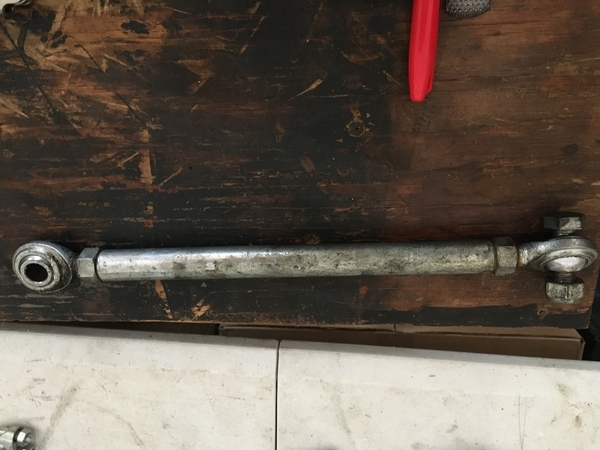
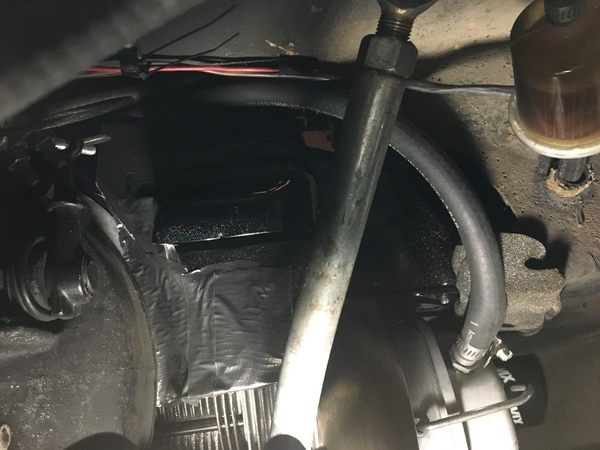
 I heated and bent the Kafer strut that I removed to make clearance for the engine. I don't know exactly what the bar is made of but I heated this thing for over 20 minutes and it never turned red or anywhere close to it. I had a 5' pipe on the bar and finally got it to bend enough. I quenched it in oil to retain the hardness and re-installed it in it's place.

 I am in the process of putting some road miles on the car and getting the carb jetting perfected and the timing set where it is happiest. My oil temps are staying around 190 which is good in my book. I am placing the engine up for sale, so pass the word. 

Puma Kafer barPuma 2276 Kafer bar bending 1Puma 2276 Kafer bar bending 2Puma 2276 A1 1.625 sidewinder muffler & large oil pan

Attachments

Images (4)
  • Puma Kafer bar
  • Puma 2276 Kafer bar bending 1
  • Puma 2276 Kafer bar bending 2
  • Puma 2276 A1 1.625 sidewinder muffler & large oil pan

I was going to get the 2003 Magnaspark plug wires from CBP with the boots Jimmy likes.

But, when I went to place the order they were out of stock.

Now I am going to try Corvair boots on my existing wires.  All the Corvair boots on eBay are for 7mm wires. 

https://www.corvair1.com/ignit...?sort=20a&page=3 has both 7mm and 8mm boots.  My wires are 8.5mm. I am going to try to squeeze them into 8mm boots.

Hopefully they will fit without distorting the boot shape. I vaguely remember doing something similar years ago and the boot was pull up on the ends and wouldn't stay locked into position.

 Think of all the air cooled engines running around with the flappy flat non-boots letting all that precious life giving cooling air out and not forced down thru and over the heads where it is so needed. 

I was going to get the 2003 Magnaspark plug wires from CBP with the boots Jimmy likes.

But, when I went to place the order they were out of stock.

Now I am going to try Corvair boots on my existing wires.  All the Corvair boots on eBay are for 7mm wires. 

https://www.corvair1.com/ignit...?sort=20a&page=3 has both 7mm and 8mm boots.  My wires are 8.5mm. I am going to try to squeeze them into 8mm boots.

Soak the boots in hot water for a few minutes (tap hot, not boiling. Just hot enough you can't keep your finger in it) and coat the wires with a little plumber's grease and they'll slide right on. 

Post Content
×
×
×
×
Link copied to your clipboard.
×
×