Hello friends,

I have purchased a 901 Hood Crest for my non-handled CMC.  I was wondering if I could ask a few questions and tap into the knowledge of the experienced members.

I bought the 901 hood crest due to advice that was given in an old SOC post about its natural curve for the speedster hoods.  Also, from reading up on a few posts I decided that I was going to use the 3M VHB 2-sided tape for the install.

But now that the crest has arrived, questions are starting to arise and my anxiety is rising as well!

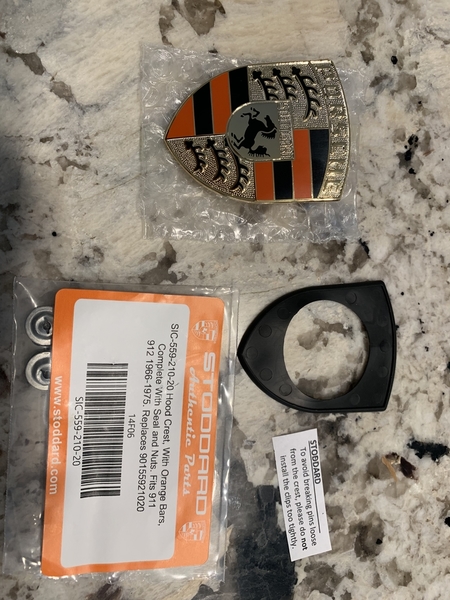
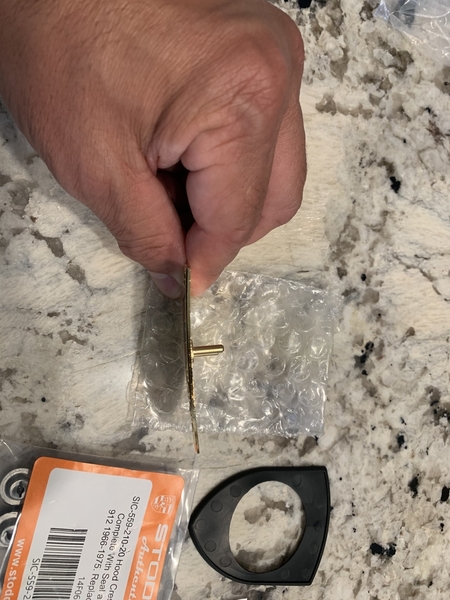
I pictured the posts on the back (that I'm supposed to remove) as coming directly out of the back of the emblem...  but in reality there are circular bases to those posts. I am unsure what to do with those.  I would also entertain alternative installation to cutting the posts, but I am afraid to drill holes for fear the placement may be slightly off, posts not perfect on the emblem, I think this would be a less preferred method to the tape.

The crest came with what appears to be a rubber gasket that goes between the hood and the emblem...  but being that I was going to try the 2-sided emblem tape, I am not sure how to incorporate that gasket on the install...   or if it will look goofy without it being there.

Last, I am unsure how anyone who has tried to install an emblem on a bare hood accomplishes placement and having it be perfectly placed.  Is there a placement / drill guide for the CMC hood? 

I would appreciate your guidance and would like to learn from your successes and failures... 

In summary:

1) Post removal best practices, the circles at the base of the post and how to address them, and alternatives to cutting the posts off perhaps as a last resort?

2) 2-sided tape and the rubber gasket

3) Placement / measurement help

4) Anything that you can think of that may help (and / or) perhaps up-close photos you would be willing to share.

As a side note, I think my wife is starting to think I am having an affair... as I spend countless hours at night on this website!  What a wonderful place.  I will be paying for a supporting member fee, it is worth the cost for what you receive in return.

Thank you very much in advance!

Bob

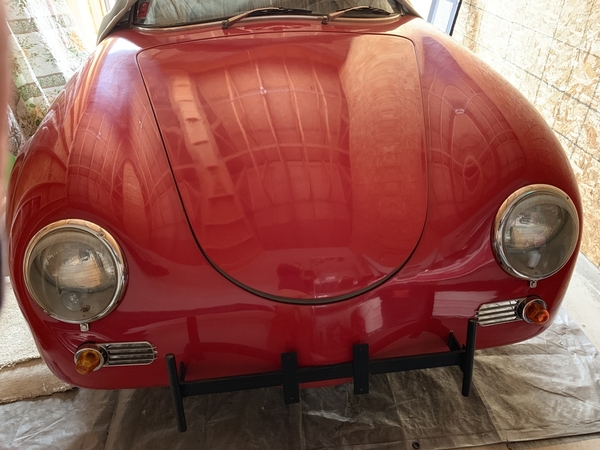
356 Hood Crest front & package contents 356 Hood Crest side curve356 Hood Crest back

Attachments

Images (3)
  • 356 Hood Crest front & package contents
  • 356 Hood Crest side curve
  • 356 Hood Crest back
Original Post

Replies sorted oldest to newest

I used a similar hood emblem as that one, but mine is the original 356 size and is slightly smaller than yours.

Step 1:  I made a template out of cardboard folder material by pressing the emblem onto the folder cardboard while the paper was sitting on a soft-ish dinner placemat.  Once the pins made dimples in the paper, I drilled through the paper so the emblem would fit through it.

Step 2:  Once the holes are drilled, push the emblem pins through the paper.  Your emblem won't fit flush against the paper because of the pin shoulders - be patient, we'll get to that.  With the emblem against the paper, trace around the outside of the emblem with a pencil, then cut along the line and make your template.  It might help to make more than one template, yah never know.

Step 3:  Remove the emblem from the paper and use the paper template to position it where you want it on the hood.  It should be centered left-to-right.   I placed mine 3" up from the bottom of the hood to the point on the bottom of the emblem.  Placement up and down isn't set in stone - where-ever it looks good to you will do.

IMG_0251

Step 4:  Once you have it located where you want it, tape the template in place and drill the holes for the pins using the template as a guide.  Use a drill 1 or 2 sizes larger than the pins and drill slowly and apply VERY LITTLE pressure to the drill. 

Step 5:  Once the pin holes are drilled, measure the OD of those pin pads and, using a drill 1 size larger than the pad OD, drill a dimple at each hole just deep enough to accept the pin pad depth.  Again, drill slowly with very little pressure on the drill bit to minimize cracking of the paint and/or gel coat.  Remember - only drill deep enough to let the pin pads seat in so the emblem sits flat.

Step 6:  Remove the template and dry-fit the emblem to make sure things look good.  When you're done adjusting and satisfied with the look, you're ready to apply the emblem.  I used a small (dime-size) dab of clear silicon caulk on the back side of the emblem to hold it in place while finishing the application.  If you use a bigger dab of Silicon, no big deal - just trim it off flush to the emblem, after it cures, with an Xacto knife - it peels right off.  If you decide to use the rubber gasket (I did not) then NOW is the time to apply it.  A dab of silicon behind the gasket and another one under the emblem will hold things in place while you're adjusting.  

Note:  If the gasket allows the pin pads to go through, you may not have to drill the dimples in the hood.  Think about what is best (with the least drilling) and go with that.

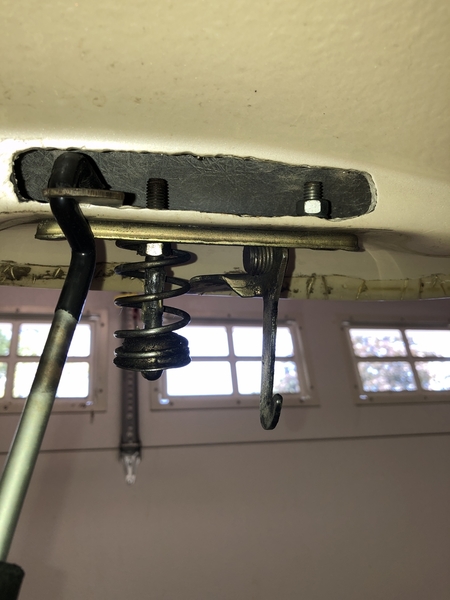
It should have come with tinnerman clips which are designed to press on to the pins from the back side of the hood to hold the emblem in place.  Just press on the emblem from the top side while pressing the tinnerman clips on from the back.  They are bowed - make them bow towards you so the ends hit the hood first.   Just before they bottom out on the pins, re-check the placement/attitude to make sure they're right, then press the tinnerman clips home.  This is mine from the underside of the hood - I only have one locating pin:

IMG_0254

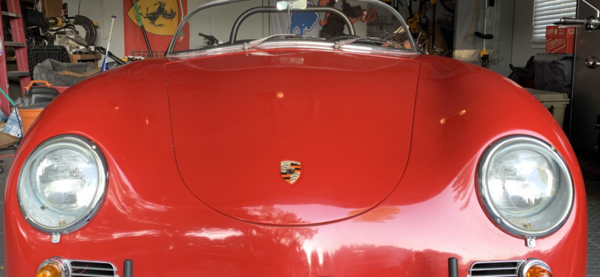
Final step:  Let the silicon caulk cure overnight and then trim off any that squished out around the emblem and you're done.  It should look like this:

IMG_0252

Mine is framed all around by my clear bra material, but you get the idea.

Good luck, and don't be afraid to ask more questions.

Attachments

Images (2)
  • IMG_0254
  • IMG_0252
Last edited by Gordon Nichols

Years ago I added one to a Porsche 914 (ok some say VW-Porsche) front hood.  My car was white and the black gasket gave a nice contrast (plus on a steel car kept out water).  Metal is thinner than fiberglass but you can use a Dremmel tool to thin the fiberglass so you can use the attachment nuts.  The CMC hood is double-walled so a larger hole in the trunk hole would be needed to attach the nuts.  People often like to steal these nice hood crests so the nuts offer extra security.  

Would the membership base be able to provide a photo or two of the hole that needs to be cut on the inside of the hood in order to use the nuts that came with the Hood crest?  I would appreciate that.

I suppose some sort of hood liner would cover a hole like that, should I choose to do so.

Also, I noticed the prongs are not threaded, so the nuts must be a one-way-street... easy push on, difficult to pull off?

Would the membership base be able to provide a photo or two of the hole that needs to be cut on the inside of the hood in order to use the nuts that came with the Hood crest?  I would appreciate that.

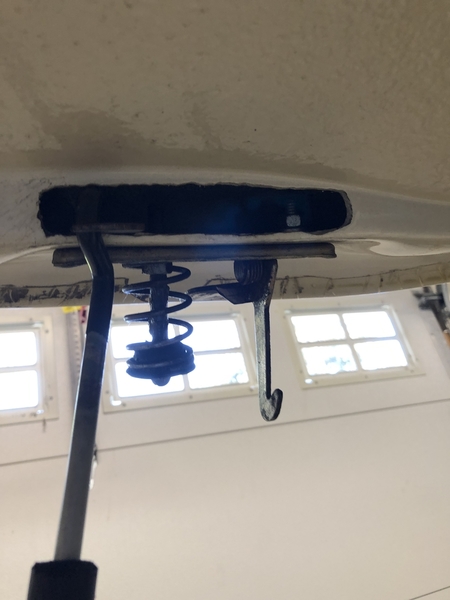
Sure - Later today.  It's not a difficult hole to make and it's the same hole you cut to gain access to the nuts holding the hood safety latch in place.

I suppose some sort of hood liner would cover a hole like that, should I choose to do so.

I didn't need one - it's in a place no one ever looks at.

Also, I noticed the prongs are not threaded, so the nuts must be a one-way-street... easy push on, difficult to pull off?

Exactly.

My hood is a blank canvas.  So I never had the hood handle as a placement guide.  That is why I was nervous about drilling and the placement. 07A9560E-0CE4-49AD-863F-57C288AA01A9

The only placement idea I have so far is Gordon’s 3” off the hood bottom to the point of the hood crest. But given that mine is a full sized emblem, I will have to see if that will look good with this larger hood crest.  

Attachments

Images (1)
  • 07A9560E-0CE4-49AD-863F-57C288AA01A9
Post Content
×
×
×
×
Link copied to your clipboard.
×
×