Stan, my friend Leon is harder of hearing than you. What exactly did he hear? LOL!

And also, I think Panchitos are the absolute perfect head for a 2.0 liter or smaller. Probably still perfectly good for a 2110. And then we have Anand's motor making 200hp in 2332 size. So maybe I'm(we're?) wrong, and you should leave the heads be. 

But you'll always be wondering what if? Perhaps order them regular, and if you don't like it, you can always rework the heads with 42s.

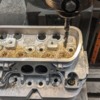
The updates from this weekend were mostly piston/cylinder work.

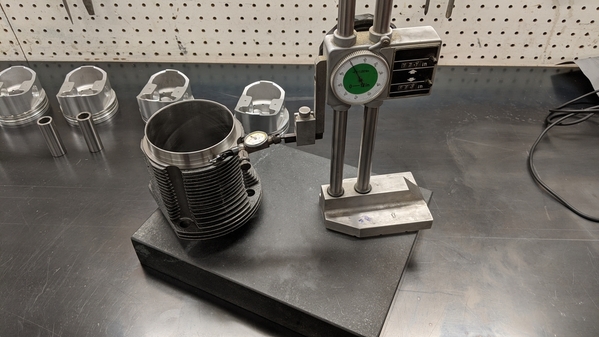
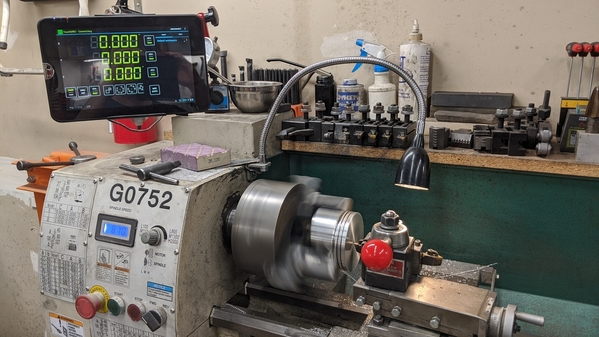
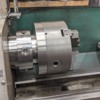
The cylinders came in really nice. All 4 of them measured the same, were round, and had very good clearances with the supplied pistons. One of them, however, had a cracked fin from being punted by a UPS guy. This weekend, Jason got a replacement which was not a perfect match for the other 3-- it was a tad longer (.0015"), so it was chucked up in the lathe and cut down. It's perfect now and ready for installation when the time comes (after a dingle-ball hone).

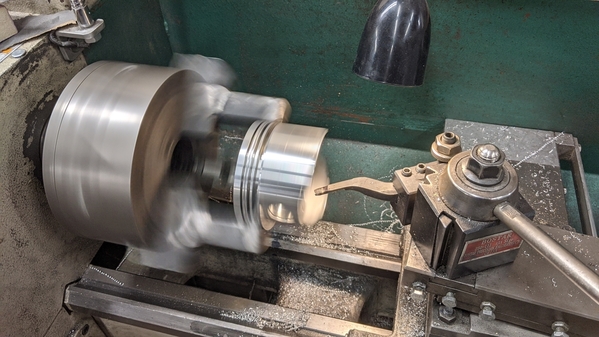
The piston pin heights were off .007" from one another out of the box. This was corrected by trimming all 4 of them on the lathe to get them as close to spot on as possible (.0009" variance). Then he balanced them to within .1 gram. Most folks balance to a factor of 5-10x that.

The Deeves rings and Total-Seal second rings are still on back order, so he's done with pistons and cylinders for a while.

This stuff takes crazy amounts of time and attention, and VW parts are not aerospace quality out of the box, so it's akin to polishing turds into truffles. I'm amazed at guys who can do this and do it really well.

More details as they develop.IMG_20200316_180750IMG_20200315_183854IMG_20200315_183642IMG_20200315_183556

Attachments

Images (4)
  • IMG_20200316_180750
  • IMG_20200315_183854
  • IMG_20200315_183642
  • IMG_20200315_183556
DannyP posted:

Stan, my friend Leon is harder of hearing than you. What exactly did he hear? LOL!

And also, I think Panchitos are the absolute perfect head for a 2.0 liter or smaller. Probably still perfectly good for a 2110. And then we have Anand's motor making 200hp in 2332 size. So maybe I'm(we're?) wrong, and you should leave the heads be. 

But you'll always be wondering what if? Perhaps order them regular, and if you don't like it, you can always rework the heads with 42s.

Leon may be hard of hearing, but he's got great ears for hearing a miss. The dude can pick up on a misfire from the passenger's seat 5 minutes before I can detect it. It's like he's a savant of some sort.

Regarding the heads-- I decided tonight to just leave well enough alone. I'm getting a multi-angle valve job, and we're doing a "fluff-n-buff" cleanup on the runners. They already flow 167 cfm at 25" and .500 lift, so what exactly am I thinking will get better? The valve-job alone should be worth 5-10 CFM.

Pat has forgotten more than I'll ever know. It's hubris to think I can improve on his chamber and port work. I'm leaving it alone.

Last edited by Stan Galat
aircooled posted:

Stan, is that your shop in the photos ?  Looks like someone besides me likes Grizzly Lathes !  I will be getting an new Grizzly lathe in the near future. The one I have is too small and it's close to being worn out now after nearly daily use for 20 years. I like the gunsmith version............Bruce

Nope.

That's at the machine shop in Spokane, WA.

Marty Grzynkowicz posted:

Without reading the entire thread, what was the horsepower target on this motor?

I know you are probably busy talking people back from the ledge as the markets take us back to the stone age, but you don't need to read the whole thread to get the details, just the first page.

150-170 is the target. I'm hoping for the high end of that figure.

There's a cool calculator on Wallace Racing's website that allows you to plug in the CFM of your heads, pick a general class of cam, plug in a displacement (in cubic inches, you'd need to convert), and number of cylinders-- then it spits out a HP number.

It's not perfect, but gets you close. My numbers come up in the 168 hp range (@6400 RPM) using the "street/strip" choice, and 182 hp using the "typical race engine" choice. With the cam I've got, I don't think 170 hp is unreasonable at all.

The heads will limit anything more-- it'd take 180 cfm to get to 200 hp at this displacement. 

Last edited by Stan Galat

Excellent, that what I'm shooting for on my Alfa Project.  Was tempted to go higher, but the engine builder asked me how I use the car.  When I told him how far and often I go with the clubs, drivability was the number one determination.  Let's set up a drive with the Midwest boys as soon as it's safe to be within a car's length of each other


It's time for installment 2 in the "step towards (relative) sanity "series, whereupon our protagonist attempts to restrain Mr. Hyde and allow Dr. Jeckyll full control of his car.

I believe that when we left off (pre-COVID), we were merrily prepping the bottom end. It's a long/boring story, but there was a problem that involved QC with the new case-- a problem which involved the cam bore being offset, etc. The case would be fine for a less involved project, but we all decided that for something with as many "extras", we'd be best off to start over. One step forward, two steps back. The good news is I didn't supply the case, so it's not my responsibility. The bad news is mid-lockdown, it's hard to know when a new case will arrive at the machinist's.

VintageVolks has been fantastic throughout this process-- really, really stand-up guys.

So, attention was turned to the heads.

As discussed, I'll be using the new Panchitos. Normal people just order the heads they want, and bolt them on. Normal people are happy. Normal people don't try to make very nearly perfect things more perfecter. The problem with the protagonist of this ongoing saga is that he has a hard time being "normal", even when normal has been demonstrably better.

My Panchitos were ordered "built" like most people would-- valves, guides, seats, dual valve-springs, and cromoly retainers installed. CB sells them bare for idiots who think they can do better, but I had resolved to be good and try to blend in. I got my heads, and they were beautiful. And alas, I yam what I yam.

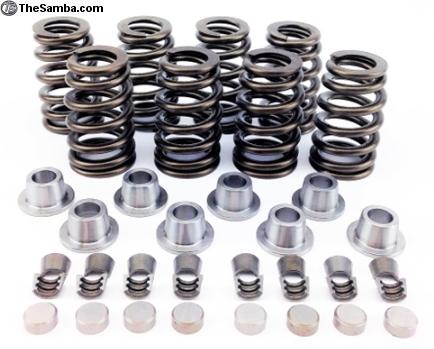
Typical "H/D" single valve-springs lose control of the valves with pretty mild cam profiles at pretty low RPM. I have been looking at bee-hive valve springs for a couple of years. Beehives are single springs wound differently than standard, which allow more aggressive cam profiles and higher RPM without setting up a harmonic that causes the spring to lose control of the valve-train. They've been used in the V8 world for years, but have not been used in ACVWs because of what is commonly available.  There's a guy named Dan Ruddock who's come up with a pretty interesting way to use them in ACVWs. Dan makes a couple of different sets for different applications and calls them "Beehives Done Right". The idea behind beehives is the promise of being able to accurately control smaller valves (like the Panchitos) up to 7000 RPM with very low spring pressures. This is important for a couple of reasons:

High spring pressures create a lot of heat and a lot of wear. Everybody is (rightly) worried about the cam lobe/lifter interface-- this is the primary reason car-guys get all bent out of shape about the zinc and phosphorous content of motor oil. ZDDP in oil is "sacrificial", and is meant to provide a shield between the cam lobe and lifter face in an extremely high shear wear situation. Everything becomes critical with super high valve-spring pressures, and the cam lobes and lifter faces live an exceedingly hard life.

High spring-pressure require very robust components-- straight-cut cam gears, very strong pushrods, and rocker-arm assemblies that look like they are built to hold up a bridge. Big components are heavier, and heavier components require more spring to control. It's a viscous cycle that gets some guys running K800 springs on the street.

... but for me, probably the main consideration is that the friction created by the springs jamming the lifters into the cam creates a huge amount of heat-- heat that goes straight into the oil. Heat that is hard to get rid of. Heat that kills engines.

Unsurprisingly, I decided I had to have them. As I said, my Panchitos arrived ready to go with sensible (not obnoxiously heavy) dual valve springs, valves, guides, and seats. The "Beehives Done Right" kit requires valves ground for "normal" triple groove keepers. CB's heads come with single-groove valves and keepers-- so getting to the beehives would mean removing and setting aside not only the valve-springs and retainers, but the valves themselves. Undeterred, I sourced and ordered 8 new valves and the appropriate kit from Dan Ruddock.

Beehives Done Right

In addition, I decided I wanted to be in the .001% of the ACVW guys out there who run valve-stem seals. The 4 people in America (Bob Hoover among them) who believe this to be worthwhile run early Rabbit valve-seals (P/N: 026 109 675), because they will fit VW valves and the normally used guides (if they are turned down), and the OD is small enough to clear a compressed VW dual valve-spring. Fortunately for me, my machinist is one of the guys who believes in this modification. I found a guy on TheSamba who had a set of TPFE Rabbit valve-seals, which I picked up. TPFE has a very high heat tolerance, as compared to Viton.

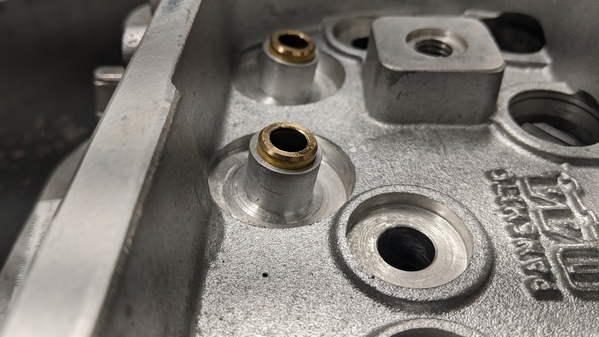
Unfortunately, once the valve-springs were removed, this is how much guide was sticking out of the spring boss:Short Guides

As you can see, there's not enough meat to attach a seal to the guide. This left us three options: 1) cut down the boss to expose more guide, 2) just ditch the valve-seal idea, and steer this ship towards more conventional horizons, or 3)

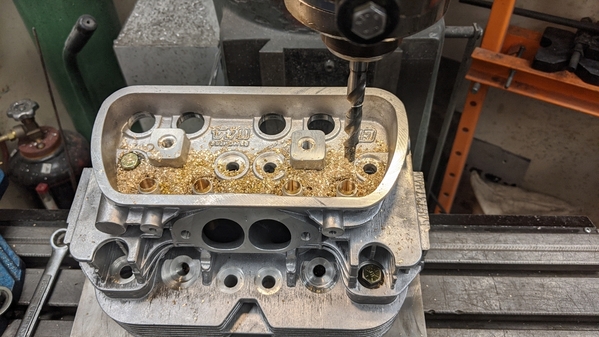
 Point of No Return

So, what we have accomplished is to successfully take a set of fully built and perfectly good heads and proceed to:

  • Remove and set aside the valve-springs and retainers
  • Remove and set aside the valves and keepers
  • Drill out the installed valve-guides

It's a good thing I've still got the seats. I wouldn't want to have purchased complete head for nothing... 

It seems to be raining. I'm happy.

More details soon.

Attachments

Images (3)
  • Beehives Done Right
  • Short Guides
  • Point of No Return
Last edited by Stan Galat
LI-Rick posted:

Stan, how much exposed valve guide do you need for the seals? Are you just going to install a longer valve guide or split the difference and cut the guide boss also?

I like to see .250" minimum of the guide sticking up above the boss in order to do seals.  Most stock guides have somewhere .250-270".  There is no spec for this, so it is sort of hit or miss.  The guides that were in the heads had maybe half that.  No way would there be enough there to grip the seal.

aircooled posted:

Stan, is that your shop in the photos ?  Looks like someone besides me likes Grizzly Lathes !  I will be getting an new Grizzly lathe in the near future. The one I have is too small and it's close to being worn out now after nearly daily use for 20 years. I like the gunsmith version............Bruce

I love my Grizzly lathe.  Its perfect size for what I do and the community support is amazing.  I actually built all the parts a while back to convert the spindle to a D1-3.  I just needed a back plate for at least my 3-jaw chuck before installing it all.  Now that it has shown up, the conversion is complete.  That was the best modification I have done to this thing yet.  Now I can turn in reverse and not unscrew the chuck!

Attachments

Images (1)
  • IMG_20200326_002548

Once the guides were gone and the valves were out of the way, I was powerless in the face of temptation and succumbed (again) to the "while we're in there" syndrome.

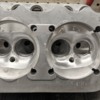
As such, I had Jason (VintageVolks) do a "fluff-n-buff" (insert sophomoric joke here, Jethro) port clean-up. Panchitos come with very well designed "as cast" ports-- they're meant to be ready to go without any porting. Indeed, there's almost no extra material in the casting to remove if a guy DID want to port them, and what makes them so magical is that they flow ridiculously well with a very small port. This is what the "as cast" ports look like:

Panchitos, Raw Ports

There's really nothing to be gained by messing with the ports, but the theme here is "why leave well enough alone?", so we (I) wanted to just remove the casting flash-- no reshaping or enlarging of the port walls, but just a clean and deburr.

Before anybody says anything-- yes, I know the intake needs some surface character to keep the mixture in suspension, but taking it to this level should have no negative ramification. I was going to have VintageVolks put a mirror finish on the chambers and exhaust ports (not for flow, but so that carbon doesn't stick as readily), but stopped the process before it got out of hand (see @Panhandle Bob-- I can stop any time I want to!).

This is what we've got with a bit of 80 and 120 grit and a die grinder:

Panchitos, 120 Grit

We're nowhere near done yet. The new guides will be installed (the heads heated and the guides chilled-- Jason shoots for a 400* temperature delta) and cut for the seals.The heads will be flycut to 56 cc chambers to get 9.9:1 CR with .040 copper head gaskets (assuming 0 deck). If this proves to be too much, I can get back to 9.4:1 by swapping the .040 gaskets with .060 gaskets.

Once the chambers CC correctly, Jason will do a nice 3-angle valve job, and we can turn our attention to the beehive set-up, and the Hoover modifications to the rocker arms.

Stay tuned for the next exciting episode...

Attachments

Images (2)
  • Panchitos, 120 Grit
  • Panchitos, Raw Ports
Vintage Volks posted:
aircooled posted:

Stan, is that your shop in the photos ?  Looks like someone besides me likes Grizzly Lathes !  I will be getting an new Grizzly lathe in the near future. The one I have is too small and it's close to being worn out now after nearly daily use for 20 years. I like the gunsmith version............Bruce

I love my Grizzly lathe.  Its perfect size for what I do and the community support is amazing.  I actually built all the parts a while back to convert the spindle to a D1-3.  I just needed a back plate for at least my 3-jaw chuck before installing it all.  Now that it has shown up, the conversion is complete.  That was the best modification I have done to this thing yet.  Now I can turn in reverse and not unscrew the chuck!

Not to divert Stan's thread too much, as we are prone to do, but how did you pin the adapter to threaded spindle?  How much did it add to the chuck overhang?

LI-Rick posted:
Vintage Volks posted:
aircooled posted:

Stan, is that your shop in the photos ?  Looks like someone besides me likes Grizzly Lathes !  I will be getting an new Grizzly lathe in the near future. The one I have is too small and it's close to being worn out now after nearly daily use for 20 years. I like the gunsmith version............Bruce

I love my Grizzly lathe.  Its perfect size for what I do and the community support is amazing.  I actually built all the parts a while back to convert the spindle to a D1-3.  I just needed a back plate for at least my 3-jaw chuck before installing it all.  Now that it has shown up, the conversion is complete.  That was the best modification I have done to this thing yet.  Now I can turn in reverse and not unscrew the chuck!

Not to divert Stan's thread too much, as we are prone to do, but how did you pin the adapter to threaded spindle?  How much did it add to the chuck overhang?

I turned a locking ring that is a close slip fit over the existing spindle and tapped 3 set screws that fit down into the existing tommy bar holes.  You can see 2 of the 3 set screws in the original picture, 1 at the bottom pointing toward the front way of the lathe bed and the second one pointing straight up.  Then when the machine work on the D1-3 adapter was all finished and I screwed it on the chuck for the last time, I drilled, tapped and countersunk an M6 flat head screw in the bottom of the each pin hole to lock the adapter to the locking ring. I wanted to use M8, but didn't have room in the hole to make it fit.  But really, 3 M6 screws will have more than enough shear strength to hold the adapter on the locking ring.

In this picture, you can see the back plate has a step.  I plan to turn that off when I get my 4 jaw chuck setup with a D1-3 back plate.  That will eliminate about .300" of overhang.

I have not measured to see how much extra overhang there is, but I would guess it is somewhere around a long inch, really its the thickness of the D1-3 adapter.  I rarely do any work that requires more than 6 inches of bed travel, so that was not important to me.  I was more interested in being able to quickly change chucks and have better repeatability when doing so.  My biggest driver in doing all this was to allow for turning in reverse and not unscrew the chuck.  Now that I can do that, I need to make new parting and threading tools so I can really take advantage of this whole setup.

Attachments

Images (1)
  • IMG_20200406_080426
Last edited by Vintage Volks

Thanks, I was very happy with how this turned out. 

Bearing ware may be a valid concern.  Between the D1-3 adapter and the heavy chuck, there is an extra 75 lbs above the stock setup.  Hang that over the bed an additional 1.25" and it may cause extra ware.  I've been running this chuck for years and I just took the spindle out to repack the bearings a month ago and things look good.  So I don't know that it will be too much of an issue but I'll keep an eye on it.

Jason...Now that is really cool ! On occasion I have had to cut threads on the back side. That allows me to run the cutter off the loose end of the stock. I have had to really crank on the set screws to keep the chuck from backing off. This has screwed up the threads on the chuck spindle. Anyway, when I get the new Grizzly I'll contact you again. Thanks for making a totally drifted comment about your lathe too ! .....Bruce

Since CNC machines have taken over, there are a lot of good used Bridgeport and Atlas machines around. Lathes too.  Where the bucks go is on the next ones you buy because you will know what you want then and your accuracy will be a higher priority. Shop around Danny. If you find something be sure to buy all the other tools and accessories that go with them. Those may cost more than the machine itself in the end if you don't ! No Question about it though ! It's just like before you had a floor hoist or even earlier than that.....your first Hein-Werner floor jack with a set of four good steel jack stands!

Bruce

It's been a busy time in Lake Woebegon.

Spring has come and gone (mostly), and your humble protagonist has been busy shoveling money into the boilers of progress. If you recall, this particular project had 3 facets:

  1. The transaxle
  2. The seats
  3. The engine

Most of the focus of this forum has been on the engine (and various interesting rabbit-trails), which I'll get back to-- but items number 1 and 2 are complete, and the car has been back on the road for a month or so with a "spare" 2110 I've got for just such instances. The car went back on the road about a month ago-- just in time for one of the wettest Mays on record. I've only put about 300 mi on it since then, but here's where we are:

The transaxle got taken apart and re-geared (yet again). It got a reground Super Beetle mainshaft, a new (Weddle) 3rd geat, and we reused my .93 4th, as well as the China-Doll 3.44. I also got a new Super-Diff, which means my ZF LSD is in a box waiting for the Canadian border to open so it can be sent to Bruce Twiddle for a rebuild. The box got new syncros and German bearings (as needed), as well as various this-'n-that, which Anthony provided as part of the rebuild. Initially, I filled it with Mobil 1 GL5 oil which proved to be too slippery for the syncros to work. After crunching gears for about 50 miles, I sold some investment property, traded some shards of the true cross, and purchased some RedLine GL4 synthetic 75W/90 from our (only) local speed shop (Winner's Circle Racing). This oil was much better, but I ordered (Anthony's recommended) Brad Penn 80W/90 GL4 dino-oil from Summit Racing, and drained the liquid gold into the waste oil tank (we had a moment of silence). The syncos are loosening up and I'm feeling good about the noises the box is making.

I like the gearing well enough to call this done. 5 forward gears would be better, but my reasons for not heading down that road are well documented. I'm running CB's rhino mounts on both the front and back now, and I installed a spring-center clutch instead of the copperhead disc I've used for years. I've always run a Stage 2 PP in this car, as my wife doesn't drive it. All in all, I think this is a nice setup, and an actual step toward sanity, which was the whole reason I started down this road.

... which gets us to the second part of the program, which was the seats.

I never cared for the seats that came with the car. They were beautiful, and covered with the finest Italian hides, but even though Henry lowered them as far as he could-- they were way too high for me.

I lose track of time, but at some time in the middle-distant past (10 years? 12?), I bit the bullet and bought a set of Fibersteel seats and mounted them directly to the floor on a "flippable" hinge arrangement that allowed the seats to fold forward. It was less handy than it sounds, and took about a month of evenings to fabricate.

I loved those seats, but I had mounted them so that they sat evenly in the car, and Jeanie could barely see over the dashboard. She really did look like an 8 year old, sitting in the front of her dad's 3500 Ram diesel dually for the first time without a booster. In addition, she was uncomfortable in the Gemini Rocketman seats.

It never mattered, because our preferred method of long-distance travel was to buy her a plane ticket, and I would go on a Banzai run to get to our destination. The only firm time about the trip was that I would appear at the arrival door and pick her up in the car. We'd motor around Tahoe or down the PCH for a week or 10 days, then I'd get her back to the airport and beat it home across the country.

In 2017, we did the Tour de Smo in west NC. There are no airports with flights from Peoria in west NC, and it's only 10 hrs or so of driving from Morton to Maggie Valley. My lovely bride agreed to ride along with me. In gratefulness, I bought an EMPI VW replacement seat (which is a Chinese ProCar copy) and bolted it in the car on sliders. The experience was transformative for her-- she loved it. She could see out, she liked the lumbar support, it reclined, it had a head rest, and she was comfortable for the entire trip.

It was also as ugly as a mud fence, sitting there in all it's vinyl glory next to my sper-duper Gemini Astronaut seat
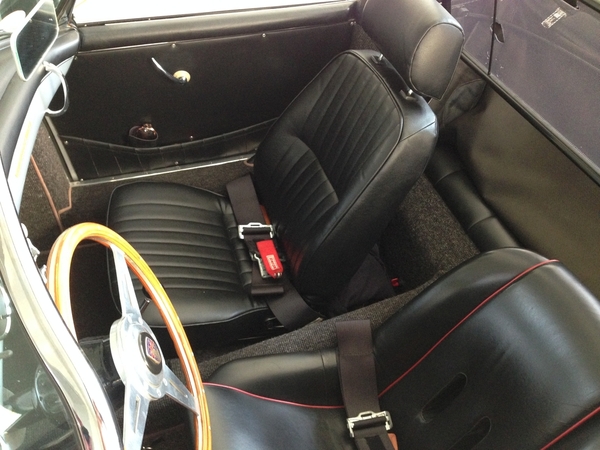
Seats

I tried it out on the driver's side to see how it fit. The top frame of the windshield was roughly even with my nostrils. The seatback felt like somebody had upholstered over a football. It was completely unworkable.

But, as there was no taking the passenger's seat out, I decided I would order a driver's seat, tear it apart, remake the bottom frame, install seat heaters, and get both seats reupholstered in leather. I started on this part of the project just before Christmas.

I wish I'd have taken pictures along the way, but I made a seat frame that reused the springs, but recessed the seat sliders into the side bolsters of the bottom cushion. I cut the seat pad foam on a pretty aggressive angle, so that the foam at the seatback is only about an inch thick, and the springs are skimming the carpet. Even though the seat base and foam were on as aggressive an angle as I could make them, I still mounted them an inch higher in the front, so that the entire seating surface pitches me back very aggressively. I reshaped the rear cushion to take out all of the lumbar. I kept cutting foam until it felt comfortable.

I bought some Water Carbon seat heaters on Amazon, and took them to Twin Cities Upholstery, right as the COVID shutdown was moving into place. Twin Cities was essential, but they were buried recovering chairs and booths for non-essential restaurants all over central Illinois. They still did the job in about 5 weeks, which I thought was amazing.

While I waited, I wired up the seat heaters, adding a relay so that the seat heaters are "keyed". I might have gotten carried away with how I did it, but if a QC inspector from a nuclear plant ever looks at the wiring, he'll be satisfied. It was a good thing the transaxle was out for this part of the program.

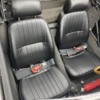
I got the transaxle back in the car right about when the seats were done. I picked them up and put them in at the end of April, then put the 2110 in during the same burst of activity. I'm pleased with how they turned out-- they are comfortable for 2 people with very, very different physiologies, and look like they belong. Don't tell Jeanie, but I think I may like them even better with my older bones.

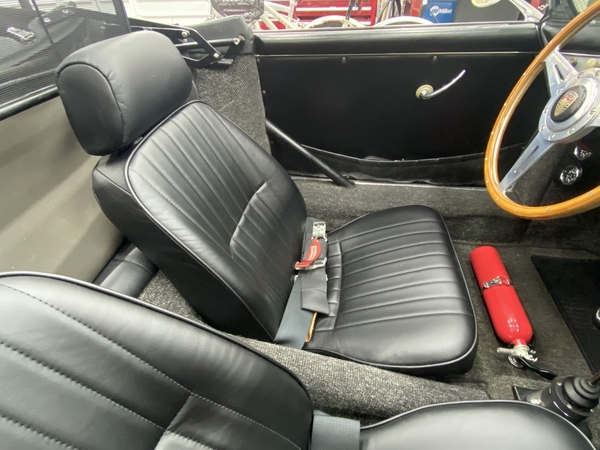
Comfort SeatsComfrot Seats 2Seat Heaters

I'll have an update on the engine as time allows-- but for now, I'm back in business. It feels really good.


Attachments

Images (4)
  • Seats
  • Comfort Seats
  • Comfrot Seats 2
  • Seat Heaters
Last edited by Stan Galat

 Stan maybe there is hope for us other guys who ride solo ... well because

On the seats they look pretty nice I hope they work out ...

If you want to make them lean farther IM reduces or cuts in the sides of the rear seat area to allow the seat to recline.

btw Marty put in a power seat lift for his wife ... I guess I should not have mentioned it

Last edited by IaM-Ray
Post Content
×
×
×
×
Link copied to your clipboard.
×
×