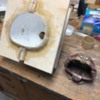
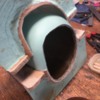
Some of you may have seen my other post titled Subaru Air cleaner. Anyway, I've finished the mould and am waiting for some fresh Mould Release from Maguires. Once I get that, I will form the first "shell" of my air cleaner housing. Next will be the face, hands and tongue out of colored gel coat......Bruce
Replies sorted oldest to newest
That's a very cool process, Bruce! ![]()
Thanks Jim....This is my first attempt at building something like this. It's been fun and interesting as well as rewarding. In the beginning I was working on the little face. Trying to hand carve one out of basswood while camping over the 4th of July. Probably caused by Beer or other performance enhancers forced on me by by no-good friends, I carved it too small and had to abandon it. See pic below. Anyway, I decided to make them out of the same modeling clay as I did for the bowl, then mould them in silicone rubber. This worked out rather well and I will now mould the face, hands and tongue in colored gelcoat in the flexible silicone moulds................Bruce
Attachments
The "AIR GOBBLER" head is out of my mould today. It took 9 layers of glass and resin to get the wall thickness up to 3/16" to 1/4". The Mould cracked open perfectly and out came the green head. Now I will start on the hands, face, and tongue. make them in clay then use them as the pattern in a poured rubber mould, then cast the final ones in the rubber mould supported by a crude fiberglass fixture. The mould for the head was only finished to 1000 grit finish. This way the green gelcoat has a satin finish out of the mould the way I wanted it. I needed to wax the mould 5 times to fill in the pores so the gelcoat didn't stick to the mould on release. You can actually see the 1000 grit scratches filling up with a 20 power pocket microscope !..........Bruce


