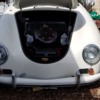
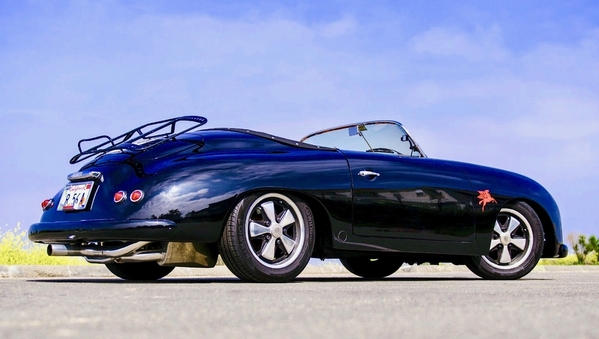
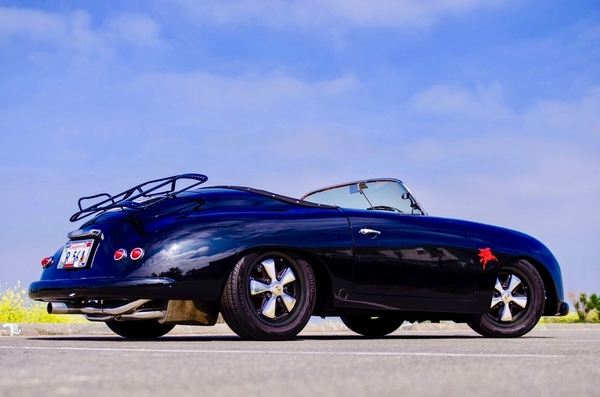
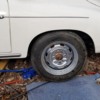
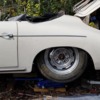
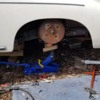
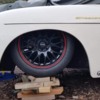
Been a long while. Was in Colorado then to Tennessee now in NewMexico the last year. I have my 356 here and have been pulling in parts for my air ride. Finally have all and put the 356 on blocks to start work.

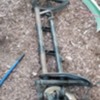
Staring with a balljoint beam. Narrowing 3" on this where my Ghia had a 4". Until I sort out my IRS front design I will stick with the beam and air shocks. The used beam exposed some rust once I got cleaning it. So I cut the lower shock towers off, reinforced the tubes and added a stronger upright between the beam. I will pull my old beam, locate the steering head and the stabilizer, clean, paint, assemble and last...install. All will be good here.

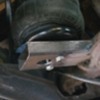
Looking at the rear, torsion eliminators, I installed them to egr these pics. I see I'm going to have to adjust my design for a cross bar to incorporate the bags. Kinda shocked to see the subframe on this has never been painted. This will be time consuming to clean what I can and paint with an anti rust paint. But all will be well.

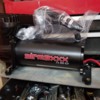
4 gal tank will fit up front with 2-580 compressors. Manual toggle style switches. I used the black plastic ones in the past but they dont fit the cars timeline. Dual needle gauges will let me see my pressures.

The rest of the system will be in soon so I get my fiberglass amp rack, box and under dash enclosure for the front. I dont want speakers in the doors, dont want the wires being run through the door jam.

So, back to the subframe. I have some trim work to do but I think this will lend itself to a nice rollbar idea I have. Come up from the cross beam at the floor, 2 hoops and down the sides of the outer seats to the entry. Should not be too hard to do and safer than nothing.

So much more work to do. But I love this stuff

Attachments

Images (10)
  • received_1260795548002297
  • received_465302342167344
  • received_774178527243817
  • received_381633324132755
  • received_748643529776141
  • received_348828790703981
  • 20220902_142327
  • aaba03f8-d55e-416a-9204-03b424b428b5orca_share_media
  • cbab2291-6fb7-47d5-a697-4b4ba9c462a5orca_share_media
  • 1b535c4b-2cad-48bd-9f55-84c252c723d1orca_share_media
Original Post

Replies sorted oldest to newest

@Robert M posted:

When I bought my Speedster in 2014 there were already speakers in the door. Last September I decided to move the front speakers to the footwell. I cut a hole in the footwell, put a Styrofoam baffle in there for sizing, fiberglassed the back of the speaker, sanded everything, and painted it. The improvement in the sound quality was tremendous.

https://www.speedsterowners.co...t-speaker-relocation

Those baffles work pretty good and help with the elements,  especially glossing back over them. I got in trouble with the wife once when I used some Tupperware for molds on a set of pods I made once. Being that I'm in a convertible I'm not too worried about staging and time delays/effects as long as I can keep it clean, clear and have some differentiation of left and right.


Thanks ! I will check out the front link as well

@MusbJim posted:

@Wright Conceptz

Very cool project! I would have liked to install airbags also. There is another SOCer ( mango smoothie ) who has bagged his Speedster with awesome results. Looking forward to seeing your Speedster with it's new bad-a$$ stance!

I have seen his, love it. I dropped and bagged my Ghia back about 12 years ago....been itching to do my 356 every since I got it....

Attachments

Images (1)
  • 20210206_014615
@Robert M posted:

When I bought my Speedster in 2014 there were already speakers in the door. Last September I decided to move the front speakers to the footwell. I cut a hole in the footwell, put a Styrofoam baffle in there for sizing, fiberglassed the back of the speaker, sanded everything, and painted it. The improvement in the sound quality was tremendous.

https://www.speedsterowners.co...t-speaker-relocation

No new replies allowed on you speaker install... good job. They look to fit good. The key is separation of front and rear if the cone...you achieved that !

No new replies allowed on you speaker install... good job. They look to fit good. The key is separation of front and rear if the cone...you achieved that !

I also cut a hole in the rear wall area of the package shelf, added a custom subwoofer enclosure, and a 10" JL Audio sub. I posted that on one of your previous posts. Your skills are quite obvious so I know you'll get all looking and sounding quite right.

@Robert M posted:

I also cut a hole in the rear wall area of the package shelf, added a custom subwoofer enclosure, and a 10" JL Audio sub. I posted that on one of your previous posts. Your skills are quite obvious so I know you'll get all looking and sounding quite right.

I do recall seeing that. Once I get my roll bar sorted I will see what type/size box I can fit as well as amp rack and such. I have been pondering the idea of a solid rear cover I can lock down fron the roll bar to the back. Possibly build in a vent so I can cut the back out and vent some fresh cool air into the fan portion of the engine. It would cover the subs and amps. Nothing crazy expensive....actually going with some less expensive Blaupunkt amps so I can feel all German...even though they are still made in China. I have an old style radio with a card reader and a line driver. A couple component 6"/tweets up front and that will be enough. Oh well, carry on.... Haahhaahahhahhahaaaa....


Thanks for the comment.

......Update.....


So real quick I had about 2 hrs to get at it... thought I had longer but here comes the lightning and rain...pouring right now....

But I was able to adapt my original design rear air ride from the Ghia to the 356...only a couple modifications....I went from 356 left subframe to right subframe. Once that is done the uprights will be made to fit the arms for the engine/trans. The upper will then be done.
The lower is much the same as my original design for the Ghia as well...but I relocated the lower arm out more to the center of the trailing arm instead of the top. Only a little lower but it will allow for me to do some extra supporting of the arm out. Basically some gussets.
Biggest concern is to make sure the bags are as flat as possible when in no air position and as little distortion as possible when fully aired up.
Goals achieved. I might be able to finish the welding and all on the rear tomorrow...shocked, didnt think I would have the time. Even getting g this much done, I feel good about it.

Thanks.

Attachments

Images (5)
  • Resized_20220909_171749
  • Resized_20220909_181219
  • Resized_20220909_173035
  • 20220909_183542
  • 20220909_183609

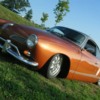
Once I get all to a point of comfort....I might try to repop a hood and deck lid. Do them our of carbonfiber.....I found a white and black carbon fiber that has me drooling..... I was going to repaint like my Ghia.... but man... I dont know. Maybe I will still paint like the Ghia but still do a hood and deck lid and use the orange carbonfiber......

Ummmmm decisions......but I am a long way from that point.

Attachments

Images (3)
  • Screenshot_20220907-102527_eBay
  • Screenshot_20200108-213448_eBay
  • FB_IMG_1579187764501

We have good news and bad news. . .
The 356 will not lay flat. In it's current that is.
I will be redoing everything I have done. I will be doing Exactly what I did before on my Ghia and not stray far. I know the Ghia lays completely out and I can put it on the ground... the 356 will when I am done. The subframe from the factory gets in the way. The snubber mount gets in the way, the shock tower needs to be notched and then establish the bags location. Sound difficult, not really. I already made a "C" notch for the drivers side. I tacked it in place and checked everything...I know where to notch what to notch. I will also be narrowing the rear trailing arms 1" per side. This and some low profile 195/50s should get me on the ground. Currently I have a high side wall tires and they are rubbing, not allowing the full drop. If I left it like it is, I'm looking about 4" from setting the pan on the ground. Drop another 1" due to tires and then notch a few things.....I should be on the ground. I will have to address the exhaust at some point soon as well. It is the lowest part of the car. Oh... by the way passenger side is not the same as the drivers side. So I cant duplicate the "C"notch. Really !!!!!!!! Thats ok I got this and I will fix the fuel line and electrical I see floating all over the place... and I will fix the decklid and the and and.... I'm finding a lot of little things that bother me.... oh well. Will take longer than I thought but she will get done.
She will be right and she will be mine.

Attachments

Images (5)
  • 01f9c778-d1bd-4385-a550-dbbf8737ede6orca_share_media: Full air
  • 709e3b25-0dcd-48b9-a0af-e04d99e563b3orca_share_media: No air, currently as low as it will go
  • 4e90e3d6-8bf5-4e18-a3dd-063279590f33orca_share_media: My "C"notch. But both side wont be the same. Really
  • 1da17168-c23f-4441-84f7-a1412a2dada9orca_share_media: I can still easily gain another inch or so...
  • 747a0419-a7bb-4478-8e4b-30481ac8de17orca_share_media: Cool view, too high still

Well. . . . When I narrowed the beam on the Ghia it took a day to remove, disassemble, narrow and reinstall...
This 356 was quite a bit more than that. 2 supports on each side holding the nose and front bumper with 16 nuts and bolts add in that the original assembly has all the wires running through the beam so I had to relocate them. Also found scotch locks... these are the worst things you can use on an electrical system. I will be redoing all the wires, lines, cleaning the bare metal for paint....anything I can find wrong or in need.
Now back to the 356. Beam fits great once I trimmed back some of the fiberglass inside fender areas. I hope to be able to remove the old bearing races from the narrowed beam, clean the rest of it and get it painted. I'm going to have to press out the old ball joints from the old arms and get some new ball joints, this will keep me from being able to complete the beam but I will be sooooooo close.
Here is hoping for a productive day tomorrow.
My anticipation is the the bearing races will be causing the most issues. I might actually have to go purchase a bearing puller set. We shall see how productive tomorrow is.

Attachments

Images (5)
  • received_809858436834973
  • received_593130415627784
  • received_615781933545461
  • received_475069470974575
  • received_1252961632207767

loving this thread and the look of a dumped speedster.  Keep up the customizing!

Rear: I am concerned about your lower bag mount. The entire weight of the rear is on those:

  • The welds look quite weak (from the pics, i can't see much penetration).  Are you MIG welding it (240V?)
  • I would strongly recommend adding a vertical gusset (or two) to each of mounts.


Front: sooo low! For mine, it was a balance of short shock (to go low) and a longer shock (more travel).  Did you extend the shock towers?  I didn't see that in the pic of the beam, but maybe?

Post Content
×
×
×
×
Link copied to your clipboard.
×
×