Well, finally got the parts out of the body and while the body was only sitting on the VW chassis with ratcheting tie downs, NO BOLTS, bought $250 in come-alongs and chain and hooks and other stuff to be able to lift the body off the floor pan to start on the floor pan restoration.  Floor pan looks decent with cut torsion bar tubes, probably to let car sit lower in the front.  I hope not too low.  Tie rod ends and ball joints are trash. There are no brake parts, to really work with, no brake lines, no calipers, no MC, and looks like someone was going to use dual hyd. cylinders for brake and clutch operation as they cut needed new holes in the front bulkhead and welded up the original VW spot for the MC. So, I have to cut out their patch as I will use the stock dual cylinder VW M/C.  I wish the seller had given me more parts, as he promised in the ad.  You can see the "complete"1641cc engine with dual

weber carbs, is not more than a worn out short block.  But, I am being positive and happy about today's progress.  Body has some stress cracks, but basically looks good. I even tried some car wax and make the back end look nicer.  Going to do all the floor pan and already have a known working engine and transmission for this. Going with a 1974 Super Beetle single side cover IRS, which has the 3:88 R and P and stronger main shaft. First engine will be a 70HP , 1641cc I build, which is enough for daily driving, up to 70 mph.  I am going to install disc brakes up front and drums on rear.  The three matching chrome wheels I don't like and one is badly rusted and forth one is stock VW?  So, found a nice old set of Porsche 914 Rivera style wheels and spent two hours on ONE of them, using aluminum polish to bring back the outer polished area and cleaned and painted the rest of the wheel.  It looks really good and somewhat like the Porsche 911 old style combo with black and polished outside edge on wheels.  Spokes are different, of course, but the wheel somewhat relate to the real Porsche cars. 5.5 inches wide and going with 165/80/15 tires, cheap ones.  I never wear out tires, so cheap works for me.  Well, to keep this shorter, I will take pictures and post them showing parts put on the chassis.  This project , I hope to be driving by the end of August, 2015 and you are thinking HOW ?  I work fast and am a certified Porsche and VW past auto tech and shop owner for past 31 years, so just chalk it up to experience.  I think the gas tank, just bought will clear the hood without modification of the filler neck. Well, will let you know on that. Ad claimed body was from Fiber Fab.  But, paper decal inside the front hood area shows CMC.  The seller got about 99% of his words wrong, not counting what he "forgot" to send me and still hoping for more parts from this seller to cover my paid money amount.  Looks like car, once by previous owner was going to be used for sports car racing or maybe, drag racing.  Not enough left on it to be sure, which way they were going with this Red Speedster.  I have many holes to repair with fiberglass where they cut, for the roll bar.  No parts , other than the doors and door latches have been installed on the body.  I have a lot of work ahead of me.  ---George K. ---  

012

013

014

015

016

017

028

Keeping old VW's running like new .   Past National drag racing record holder.

Attachments

Images (7)
  • 012: Finally, rolled out chassis to restore it.
  • 013: Note, broken and torn rubber boots on parts, rusted rotor.
  • 014: Interesting holes for dual hyd. cylinders for clutch/brake.
  • 015: My baby , hanging from the steel beams of my garage.
  • 016: Flash did not work, but somewhat cool picture.
  • 017: Reasonable body condition, I like RED.
  • 028: Before and after my 2.5 hrs work to restore one wheel.
Original Post

Replies sorted oldest to newest

Oh, Good! The hydraulic vs. cable discussion. I have used both, so here is my take on advantages and disadvantages. I like to tell people when the say how smart I am, that I follow what Porsche and VW engineers did and we know, in the old days, it was cables. Why ? You get good feedback , feel that is, using a stranded cable for the clutch operation. Due to the length from pedal to transmission lever, one wants some way to prevent clutch chatter, so the length plus the cute little , important, bend in the borden tube, provided for a smooth operating clutch system. Also, you know, by feel on the clutch pedal that there is adequate clearance between the clutch release bearing surface and the pressure plate. You do not get any of this "feel" with hydraulics. So, what's good about hydraulic clutch system. One, you can place the engine anywhere and run the fluids to the clutch and also requires less foot pressure. Well, that was one and two points. But, getting the hydraulic slave cylinder to keep the clearance between the pressure plate and the release bearing is difficult. Modern manual transmissions all use hydraulic system, but I know that VW continued to use the clutch cable, well into the 1990's, so from 1937 to 1990's the VW engineers and from 1950 to 1980's, Porsche used the clutch cable. So many years, outnumber the use of hydraulics. Ever consider what you need to carry as spare parts , if you drive your car as much as I do ? Consider with the hydraulic system, you would need the clutch M/C, fluid, slave cylinder and pray your lines don't have a leak in them. Cable ? Carry a $5 cable and that is all you need for spare parts. There is more adjustment with the cable system and with your hand you can turn the wing nut to set up the "end play". Not possible without using tools to adjust the "end play" on the hydraulic system. Hydraulic is designed only for stock pressure plate spring pressures of 1200 to 1400 PSI. Put a 2500 PSI Kennedy pressure plate with your monster VW powered engine , in your Speedster and you have no idea how long the hydraulic parts will last. Amazing, the stock cable will hold up for years, even with heavy duty pressure plates. Into Racing ? I cut an access "hole" in the side of my floor tunnel and IF the cable seemed to be going South ( strands breaking) I could easily change out the $5 part between race rounds. With the hydraulics, you need to carry all the various components to stay in competition. Even for street only use, I like the access hole to change out the clutch cable and tools needed are only your hand, with a good lubed wing nut and access hole. It cannot get easier than using your hand to change out the clutch cable. But, I also carry a spare throttle cable and fan belt, so I am not stranded somewhere in West Texas, on the side of the highway. My cars are driven daily. You figured me out. I like the old cable system. With the "feel" of the cable set up, I know, in drag racing starts, depends on the track surface, I could adjust how I pressed the clutch pedal and ride the pedal, to "play" with getting the best traction on the tires. With hydraulics, you have no feel for what is going on and it is either ON or OFF , nothing in between. But, you can place the hydraulic system parts anywhere you want them and not so, with the cable system. One more point. Let your car sit up for too long and the rubber seals on the hydraulic M/C and/or slave cylinder will dry up and leak, just like the same problem with brake cylinder and/or caliper seals. Only six months and you might find you need to replace seals. On the cable, it can sit for years and still work. Me, very old fashioned. It's the KISS theory.
---George K. ---

George:


As an alternative to rebuilding the section where the master cylinder mounts, you could buy a new "Napoleon Hat" section and use what you need to rebuild that area.  When the M/C is mounted, there are supposed to be a couple of spacers inside of the hat section on that side to keep it from crushing when the M/C is bolted in.  IIRC, they are either swedged in or welded to hold them in place.


Beyond that.....a lotta work, indeed!  Been there, done that (as have a number of others on here).  If you have any questions, feel free to ask - many of us have been through this and come up with clever ways to get these cars assembled and on the road.


2-1/2 hours on one wheel to clean it up?  That's nothing.......I had a complete set of Fuchs 5-spokes from an older 911 and wanted to polish the spokes to make them look nicer.  Didn't know how hard Porsche anodizing was.  Took 4 days of sanding and polishing PER WHEEL!  Damn good thing I'm retired and have the time!


I joined the ranks of those who contribute to the web site. My credit card balance went UP.  Is there some way to print out the CMC manual.  It has helped me plan for work in the coming days, up to page 10 and I have built several dune buggy and sand rails from ground up and restored too many VW Bugs, so have some idea of needed work in various areas.  On the M/C area, I am going to try to cut off the welds they did and regain the original hole the M/C goes through.  On those spacers, they are only pushed through the two bulkheads and most times, missing from where some Yahoo did a brake job and the spacer dropped down between the two bulkheads or it came out with the rusted bolt and the nice mechanic tossed it in the trash.  Nobody makes those and I have a very small supply of the right spacer I have taken from old bugs.  You are right in that without that spacer, you crush the two bulkheads together and do not get a tight fit to hold the M/C in place. The CMC assembly manual states to drill and tap 1/4-20 to hold down the body to the frame.  I don't like that approach and will see if just drilling holes through the metal plate and using SS bolts and nuts will work, instead.  I would place the bolts, Heads up, to no interfere with carpet. Just an idea. Also, wonder about support of the front nose of the body as they show some kind of make-shift support in the assembly manual.  VW used two bolts and rubber cushions to hold the front body to the top of the front torsion beam assembly.  Seems like there should be some support in that area to prevent the fiberglass from cracking. Lots of small things to work out.  Retired ?  Vacation time ?  Retirement funds ?  Who are these people ?  I have been self-employed and never made much money.  I would scare all if I told how little I get from social security. Most people cannot live on the small amount and neither can I.  So, I continue to work on the old VW's.  Until they take me away , by some people in white coats and with nice jackets for me and I think there is a song here, to sing.  "Taking me away " ?  The good news is that with the floor pan exposed, easy to do the brake work and run the pedal assembly and cables, suspension parts, etc.  My IM , last owned speedster was based on the 1965 VW chassis and while it did handle good, I like the IRS and Ball joint set up. 

George   Looks and sounds like you'll have your work cut out for you, you'll need to start from square one to make it right and safe....Set the body aside and concentrate on confirming the chassis has been shortened properly, cables tubes are correctly reconnected ( a must )  then rebuild the suspension, brakes etc. I have been there many times...feel free to dialog me with questions as they pop up.  


Alan  aka Drclock

Last edited by Alan Merklin

Amazes me the number of people that say they can't live on Social Security.  Duh, it was never meant to be only source of funds in retirement - there's retirement plans, 401Ks, IRA and investments and savings. Hope those that didn't save have been nice to their kids!


Yes you can download the .pdf file and then print it off.  I found very little difference between the 4 out there - so with the latest.  Yes there is a support for the nose section that goes just ahead of the gas tank.  Its made from simple pieces of angle iron.  There are also fiberglass flat panels that go to enclose front of the front wheel well.  They get bolted to bumper brackets and fiberglassed to rest of inner wheel well.


What a mess the PO made cutting out body for the roll cage!  That wasn't visible in the SAMBA ad --- think I commented that it was an un-molested body.  I take that back. 

One has to make money to put it away in some retirement plan. My ex got most of mine, very little there. By the time I got close to age 62, SS told me I had not put much into the system ( based on low income) so it is what it is. I agree with you, but never made but enough to pay monthly bills. Never on welfare, if that makes you feel better. On the body, yes, un-molested in the ad, did not apply. Waiting on the Porsche gauges, the rest of the Weber carb parts and the other 30% of missing parts, promised to me. Want to bet they never show up ? I do have those fiberglass panels for the front and wondered where they went. Thanks for the input. I guess I have to fabricate some metal brace up front to support the body. It's a learning experience. I learned to live on very little, from early age with a single Mom, so I am not complaining about the SS amount and I get low cost medical through the VA, so things are not too bad. Everything I buy and own is paid for, so this mess of speedster parts are "paid for". Like marriage, it's for better or worse. More parts would be better. I paid only $200 for the four useable mags and new tires are only $200 + tax. They are nice to me, at Discount Tire. ---George K. ---

I got 4 real Porsche 914 2.0L Fuchs off CL 3 years ago when I was in VA for $120!  I spent several days removing the anodizing (use oven cleaner) and polishing them. The right bolts were tad costly.  I'm tempted to sell them and go with replica 911 5 bolt Fuchs - I'd make some $$$.


Hope the advertised parts do show up - makes me made when I've obviously been shafted!

Originally Posted by George4888:

Well, finally got the parts out of the body and while the body was only sitting on the VW chassis with ratcheting tie downs, NO BOLTS, bought $250 in come-alongs and chain and hooks and other stuff to be able to lift the body off the floor pan to start on the floor pan restoration.  Floor pan looks decent with cut torsion bar tubes, probably to let car sit lower in the front.  I hope not too low.  Tie rod ends and ball joints are trash. There are no brake parts, to really work with, no brake lines, no calipers, no MC, and looks like someone was going to use dual hyd. cylinders for brake and clutch operation as they cut needed new holes in the front bulkhead and welded up the original VW spot for the MC. So, I have to cut out their patch as I will use the stock dual cylinder VW M/C.  I wish the seller had given me more parts, as he promised in the ad.  You can see the "complete"1641cc engine with dual

weber carbs, is not more than a worn out short block.  But, I am being positive and happy about today's progress.  Body has some stress cracks, but basically looks good. I even tried some car wax and make the back end look nicer.  Going to do all the floor pan and already have a known working engine and transmission for this. Going with a 1974 Super Beetle single side cover IRS, which has the 3:88 R and P and stronger main shaft. First engine will be a 70HP , 1641cc I build, which is enough for daily driving, up to 70 mph.  I am going to install disc brakes up front and drums on rear.  The three matching chrome wheels I don't like and one is badly rusted and forth one is stock VW?  So, found a nice old set of Porsche 914 Rivera style wheels and spent two hours on ONE of them, using aluminum polish to bring back the outer polished area and cleaned and painted the rest of the wheel.  It looks really good and somewhat like the Porsche 911 old style combo with black and polished outside edge on wheels.  Spokes are different, of course, but the wheel somewhat relate to the real Porsche cars. 5.5 inches wide and going with 165/80/15 tires, cheap ones.  I never wear out tires, so cheap works for me.  Well, to keep this shorter, I will take pictures and post them showing parts put on the chassis.  This project , I hope to be driving by the end of August, 2015 and you are thinking HOW ?  I work fast and am a certified Porsche and VW past auto tech and shop owner for past 31 years, so just chalk it up to experience.  I think the gas tank, just bought will clear the hood without modification of the filler neck. Well, will let you know on that. Ad claimed body was from Fiber Fab.  But, paper decal inside the front hood area shows CMC.  The seller got about 99% of his words wrong, not counting what he "forgot" to send me and still hoping for more parts from this seller to cover my paid money amount.  Looks like car, once by previous owner was going to be used for sports car racing or maybe, drag racing.  Not enough left on it to be sure, which way they were going with this Red Speedster.  I have many holes to repair with fiberglass where they cut, for the roll bar.  No parts , other than the doors and door latches have been installed on the body.  I have a lot of work ahead of me.  ---George K. ---  

012

013

014

015

016

017

028

Holly teardown project man!!! Jay Leno's Garage has nuthin' on you my friend, this is a serious project and I laud you wholeheartedly for taking this on George.I guess this just takes Time, Tools, and some major Testosterone....oh yeah and $$$$!

For what it's worth I was rummaging through an old book store today and found an original CMC Sales Package including a Catalog of cars, a Buying Guide and Components list, as well as a Field Representative Agreement. What was interesting and might explain your seller's reference to Fiberfab: All the Documents from CMC stated at the top of each Document "Classic Motor Carriages & Fiberfab International", specifically in the agreement the first line stated "Whereas Classic shall also mean Fiberfab International".  They must have either been partner companies or Classic owned Fiberfab. Interesting tidbit I thought.

Best of luck on your build and we all want to see this baby on the road!!! 

As the punk rock songs goes " It was a love affair, Jesus and my hot rod." Back in 2000, built a cheap race car in two days, non-stop work, no sleep, went to the drag strip with my race Bug, won 1st. place in ET bracket 14 seconds and up. I do weird things. The CMC speedster ( Fiberfab?) will take longer to put together. I do want to try to make it look good and complete. I hoped to have all the brakes done today, but got sidetracked cleaning an engine case, picking up more carb cleaner and washing clothes, so looks like late Monday, will be able to attack the brake system and install the bought parts on the car. I have all the rear drum brake system, from past Bugs I have owned, so only putting in new wheel cylinders. The rest is good used rear brake parts. On the front, went with the low cost EMPI disc brake kit. I have used these in the past with little problems. About $260 for the front disc brake kit and $30 for all new metal lines, is my brake expense, as the kit comes with rubber hoses , bearings and new M/C. ---George K. ---

Welcome to the madness, George!  We are almost neighbors.  I live in Lumberton, about 20 miles north of Beaumont.  You can check out the progress of my Speedster in my build thread.  Slow going, but a lot of fun.  I have some previous VW experience and it helps.  If you have questions, just ask.  There is a wealth of knowledge on this forum and a lot of very helpful people!


I have heard good things about your engines.  I will be in the market for an engine in the future and plan to give you a call if you're still building them.

Hey , Gang.  Been working on the chassis and trying to turn a lemon into lemonade.  If you look at the past picture of the area where the pedals mount, you saw someone welded in a metal plate to cover the stock hole. They also cut and welded in what I think was for separate Neal M/C for brake and clutch.  I spent one hour to grind off the welds and gain access to the stock M/C hole. Then, made a 1/8 plate for added strength on the pedal side.


Someone asked for more "enter" keying, for more paragraphs. Okay, done.  Here is a picture or two of the latest update and work on the floor pan, suspension , entire brake system, only need to install the transmission and the chassis is finished.  Someone did a good job on cutting the tunnel and doing the many tubes inside it, properly, so cable ran through them, like stock.  Amen !  Enjoy the latest on my project. 


I have a mild 1641cc with dual 34ICT Weber carbs, ready and good single side cover 3:88 R and P , Super Beetle transmission ready to be installed.  So, good progress for off and on work during past 10 days.

001

004

009

008

001

004

009

008

Attachments

Images (4)
  • 001: Coil over shocks to get frame up to stock height
  • 004
  • 009
  • 008
Money back ? The seller would not do that. He is supposed to be sending the missing parts, which were ID'd in the ad. Still waiting on about $2000 in parts. The "complete" engine sent with the car body was only a worn out and bad short block. I build engines and repair VW's for my main income, so have complete engines sitting here, so gave the man a pass on what would cost most about $2500 in parts and labor for some rebuilt engine. I don't know if his sent transmission works, but have three known good ones, in my shop , so let him slide on that . At least what he sent was good parts, other than the engine. I am waiting on a reply from the man, named on the VW title, which match the floor pan serial number. I would like to find out if he knows when the CMC body was bought and this speedster project started, as title is dated 2000, but that means nothing but when he got the 1970 VW Bug. It would be fun to know some history on this unfinished speedster collection of parts. I am selling off some of the VW parts which came with the purchase . So, have two rusted, but otherwise good rotors and new drop spindles for front. The calipers were frozen. I put together a new front disc brake kit and will have it for sale in an effort to regain "some" of my money. Still waiting on the Porsche gauges, Weber installation parts, tail lights, license plate light fixture and many other missing parts. The key thing is IF you don't work on your own cars and own a VW repair shop, like me, you would be hiring an attorney to get your refunded money. The seller got lucky with me, as the buyer. Where they cut the fiberglass for the roll bar, those cut pieces are in a plastic bag. Interesting ?

Latest on my CMC project.  I put the transmission on the chassis and all the cables and adjusted the rear brakes to see that the emergency brake works.  I used the EMPI shortening cable kit and that worked okay.  Putting a new coupler was fun, as the way someone welded in the clutch and throttle tubes, both are real close to the shift coupler. 


Here are some pictures of the 1st. engine, only a mild 1641cc with dual carbs, tuned exhaust, all balanced with 110 Engle cam, 40X35.5mm heads, stock ports. I figure about 80hp which is plenty, until I build my 1776cc and that should produce at least 120hp, based on past combinations I have used and testing at the drag strip with math to calculate est. HP.  This 1641cc is not show quality, so please be kind about it's appearance. 


I want to point out a part a machinist friend of mine made for me.  On the throttle pull, which is the same used on all the cross bar dual carb linkages I have used, we placed the middle pull upward, but used the machined aluminum piece, shown in two pictures and this gives a straight pull from the throttle cable to the barrel clamp.  No binding, no funny angles on the cable and you use the stock Beetle cable.  As the stock cable is more than long enough, with the shorter chassis, I will cut off the end and use two barrel clamps, one in the end of that machined part and one extra, for backup, outside the machined part.  I do not like the Mickey-Mouse extensions which they put in the carb kits , which have a set screw pushing onto the throttle cable.  You get more surface area on the throttle cable using the stock barrel clamps.  Sorry, we are not producing these neat aluminum extensions.  I see that someone makes a weird looking throttle tube with a roller on the end of it, so reduce wear on the throttle cable, but that is not as good as my design.  Having the cable pull straight you get full throttle and less wear on the throttle cable.  If you do not have a good friend who is a master machinist, I guess it might cost $150 to copy my extension.  My friend, who also has a street legal sand rail, made several for himself and one for me.  No cost -  from good friend.

            Sheet metal on engine is power coated. I have a counterweighted, eight dowel 69mm crank with balanced stock rods, Mahle 87mm bore kit, Berg wrist pin clips, Engle 110, Brother's base heads, the 34mm ICT Weber kit from EMPI and presently a distributor with points but will go with electronic once the 1776cc is completed.  The exhaust is EMPI with a nice big flat muffler, which sounds great, not too loud but good exhaust flow. Stock clutch set up with mild engine.  Solid rocker arm shafts, CM push rods, Porsche elephant feet adjusters, so good stuff inside the engine.  Engine is good up to 5000 rpm. Oh, type three dual port case with case savers. 

Attachments

Images (4)
  • 001
  • 002
  • 004
  • 008
My birthday comes up on Aug.30th. I have the feeling I will not be finished by the end of the month, even though I work fast. Building a complete car takes some time and daily life things get in the way. It was going to be a present to myself, so will be a late present. A very nice person send me a copy of the 114 page assembly manual and that will really help. Lots of measurements about placement of various items. And, I need to fiberglass in the holes cut for the roll bar, they had tack welded into the body frame.

Lowe's Hardware store, has what is called a "grease pen" called for to mark the fiberglass with templates or measurements, to put on the various components. That I found, after going to many different stores and one call to Crayola company. At Crayola, talked with a nice older lady who told me to look in the "TILE" section at the various hardware stores. Yes, found the marking pencil . It will let you draw lines on the fiberglass , then once the section is cut out, you can wash off those marks. Nothing, Walmart sells in any department would work on hard surfaces. The key factor is you want to wash off the markings, once you are finished cutting out the fiberglass. Do not use any "marking pen" you might find in any store. They sell marking pens or markers to write on glass, but nothing for fiberglass. Fiberglass materials are expensive. The assembly manual said to use the "grease pen" for marking where to cut on the fiberglass. You should have seen the looks of those I asked for this item . A lady, at Lowe's used to work in the tile department, but now works in the paint department. I got lucky that she knew where to find the tile markers. The marker was just as described by the nice lady at Crayola company. If you have small children or dumb teenagers, be sure you read all the back information contained on the Crayola products. The stuff is hard to remove from most things. Good product for long lasting drawings. I think people thought I was making up the name, "grease pen" or just crazy. Well, not making up the name, but might be crazy by the time I get this project finished. Lots of work ! One needs a well equipped garage to build a speedster from the ground UP. This speedster should be equal to a new car, once finished. And, more fun to drive.

I am checking with TMI, a company doing VW interiors to find out if they have any covers for the seats, to save me money. Or, perhaps, they can make up the door panels if I give them measurements ? TMI might also be able to make up the top material for my convertible top. I want to be able to drive this in the rain, so need top and door windows. With time, I might custom fit roll up glass windows. But, later on. Got my 914 Porsche reconditioned gauges in today from a person in Arkansas, as never seen the advertised ones, from the CT. seller. Working gauges, all rebuilt. The 914 gauges were about half price of used Porsche 356 gauges. And, found in a garage drawer at my shop, one 914 - 120mph speedometer, I forgot I had. Went with the 120mph reworked speedo as really, who does 150mph ? Now, if I had the money I would go with the 356 gauges. The windshield parts are so expensive. If I had a dog, it would be up for sale. Cannot afford a girlfriend and/or dog and have money to complete this speedster. Wow, priorities ?

Nice to have original manual NUT they are also here on SOC for donating members - just click on the Resources the Library tab. 914 gauges work great.  Amazing that even though its driven off of 914's 901 trans it is same "gearing" as the VW front wheel hub gearing.  There is an oil temp piece available to replace the 914 emergency brake light flasher.  VDO makes a chrome bezel that covers the original black ones too --- costly but looks more period.  Early 914 gauges had glass lenses which resists scratches - later were plastic but lenses can be swapped out.  914 gauges are big so spacing is tight on dash but nice having a big tach in center.


Last edited by WOLFGANG
My memory is not the best, but I joined as a member and my computer would not print out the PDF file. I don' know why, but also, is it only 30 something pages long ? My assembly manual is 114 pages. That number of pages to print, would really have put a kink in my old computer.

Thanks for the information about the 914 speedometer. I owned three 914's in the past, so did know what you told me. But, did not know about the oil temp available. So, still learning at my old age. Like , I owned them between 1980 and 1990, so long ago one forgets details. On some of my VW Beetles, I replaced the Bug speedometer with the 914 tachometer and used a VDO small speedometer and other gauges, on both sides of that original VW Bug speedometer location. Just held the 914 tachometer in the Beetle dash with one hose clamp, on the backside. I see several speedsters which are advertised having the 914 gauges. Better than the one Beetle speedometer I see on some. Well, if you can afford them. I also see some stock and rather small horsepower engines in many of the speedsters, advertised , for sale. There is such a variety in some of the "options" on these replicas.

If anyone has not noticed, I believe the suppliers of chrome wide five bolt and four bolt VW chromed wheels have stopped making them. Well, this is what my VW retailer told me. Chrome wide five or the four bolt chromed wheels seem to be somewhat the standard on the speedsters. I think, correctly, the 550 used painted wheels and no hub caps. Now, you can find good used stock VW four and five bolt wheels, but to have them chrome plated, ouch, that hurt my wallet. Maybe, the choice might be to use Chrome power coating, one person suggested to me. Less money and provides a close enough finish to represent the original Porsche. Well, originals had painted wheels, like the 550's. I do think most were Porsche silver or gray in color.

I know the 356 Porsche did not come with chrome plated wheels. I went with painted and polished aluminum 914 style wheels, as living only three miles from the Gulf of Mexico and all that salt water, chrome plating is not my friend. And, more so, any chrome plated stuff from China, will not last but one year in my climate and location. That is if you keep them polished with wax. One night sitting outside and chrome plated China parts are appearing with rust spots on them. Seriously, around here, only one night and that is the result.

One in Library is 112 or so pages.  Just need a current PDF reader. 


Mangels used to be the go to chrome after market wheel.  The Brazilian ones were goo but around 1995 they shifted production to China.  Chrome quality was horrid.  I'm on Gulf too - just east of Pensacola (near Hurlburt Field) so feel your pain on crappy chrome. Powder coating was reasonable a couple years ago at $50 per wheel - now it seems to be $80-100 per wheel.  Add $30 demount, remount and balance and it add up to replica Fuchs costs.  I remodeled home recently and saved the oven - so may try the Eastwood kit.

Prices in Texas are lower than in other States. I have given plenty of business to this one power coating place and they return the recommendations to me for sending them new customers. They charge me only $50, at most, per wheel. The local small tire shop only charges me $10 to remove, mount and rebalance one tire. If you buy low, like I did paying $200 for a good set of EMPI Riviera part number 9746, which sell new locally for $120 each, and do the aluminum polish work and painting, I know the Porsche Fuch replicas will cost more than double what I have invested in wheels. And, they are 5.5inch wide to allow a slightly wider tire.

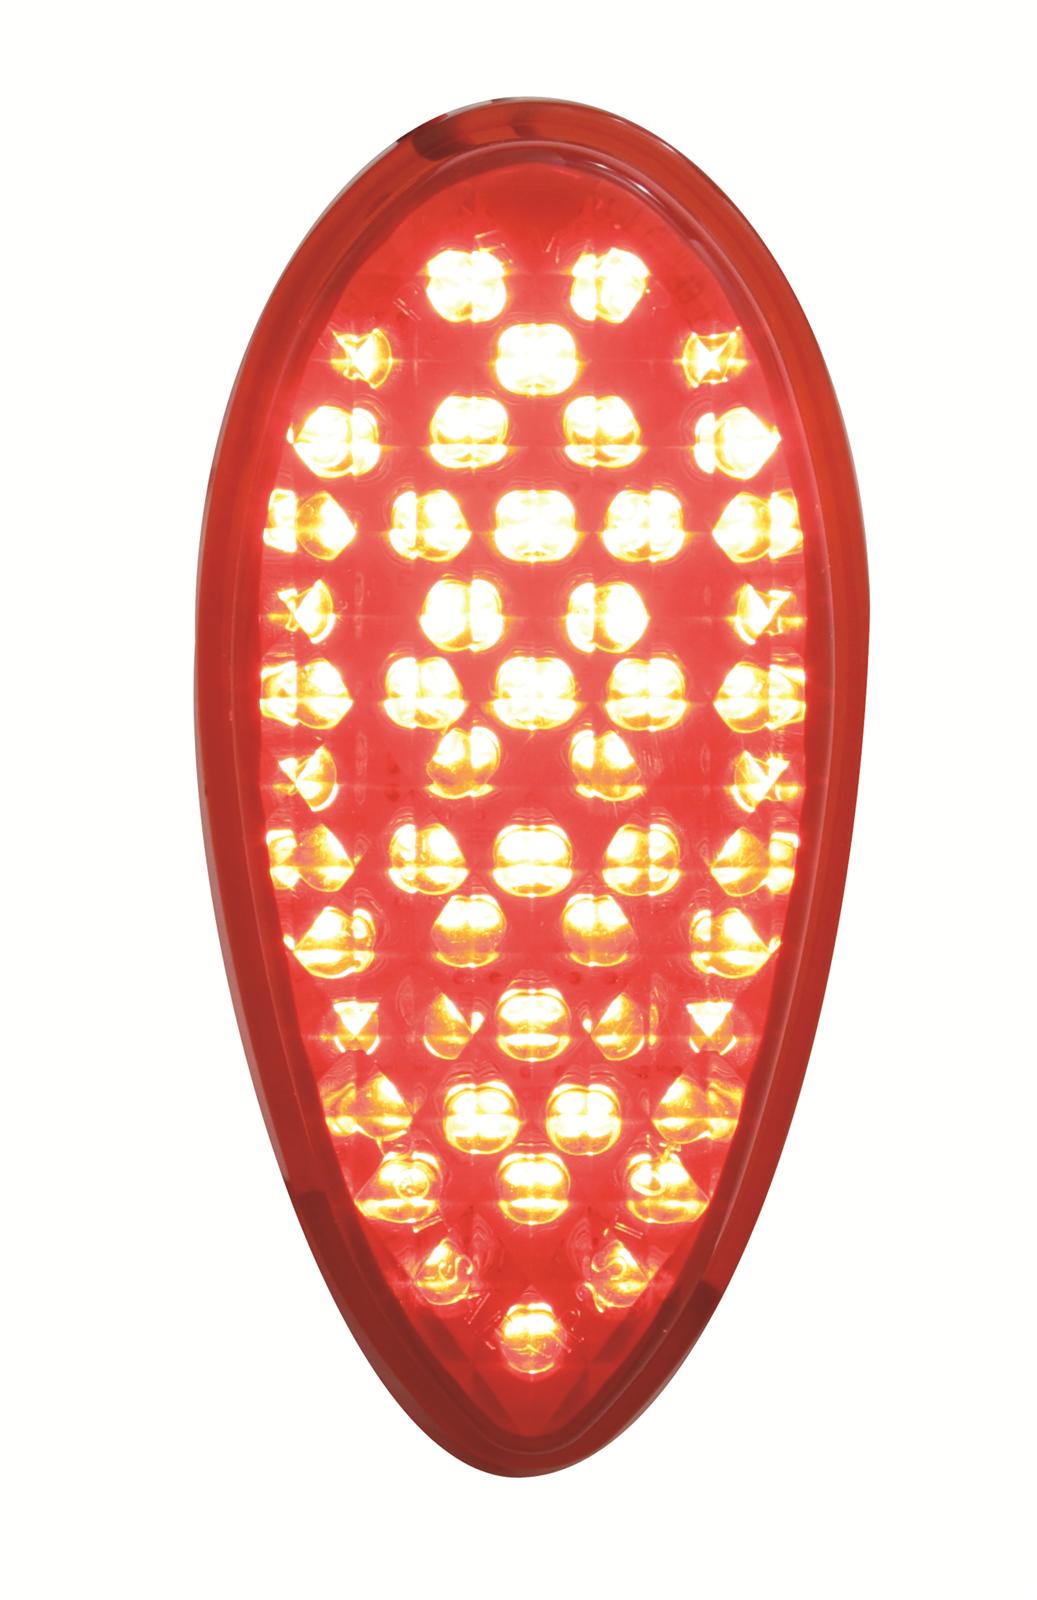
Tonight, I picked up most of the hardware needed to assemble the body parts on the body and that on the chassis. Sent $250 on only hardware, which did not come with the "unfinished" speedster I bought. And, I know more will have to be spent on added hardware. There are many metal support pieces, also left out, by the seller and I can fabricate those with angle iron, but will take up more of my time. I am still saving up for the lower windshield frame and mirror support, rubber seals and new windshield glass. And, looked at the 914 gauges I bought and they look close to new, so happy one seller was honest. The tail lights ? Seller sent me two worn and rusted and dented framed Porsche tail lights. I am not sure I can recycle them, so might be looking at having to spend another $400 on two new aftermarket tail lights. I picked up an EMPI tear drop tail light set, but while they would work with only one bulb, if using a trailer American to foreign converter, they are smaller than the speedster tail lights. But, only cost me $45 plus tax, NEW for the pair. Now, the price was good, but not sure about the looks. They would work and perhaps will have to use these smaller tail lights until I find the normal speedster size tail lights. Being smaller, I would not have to cut a big hole in the body and that would allow enlarging of the tail light mounting hole for the larger normal looking speedster tail lights. I saw one speedster with bullet tail lights, had two lights on each side and that might be something the originals one had on their Carrera models, but not sure. I cannot find them, but have not looked that hard. EMPI makes a good copy for the front turn signals, but those lenses are yellow or amber, not red as needed on the rear of the car.

Well, that's the latest and really missing a lot of metal supports and other parts, which I am sure come with NEW speedster kits. 20/20 hindsight, I wish the person in San Antonio with a clean complete speedster advertised for only $16,000 would have called me , before I paid the man in CT. Missed out on that good deal by three days. I could not reach the SA man, until my money was in the hands of the guy in CT. I am sure that speedster sold fast.

Oh, interesting point about copies of the assembly manual. It shows a copyright in 1985. I went to get an extra copy printed up at the local office supply place and they do not copy anything with a copyright on it. The extra copy was for my work papers, to note things and mark on the photocopy as I complete sections . I found a mini-mart with a photocopy machine and they did not care about the copyright date.

Did you look at this place for parts?  They aren't associated with any builder but apparently supply them parts. Order all parts at one time - fixed $15 shipping.


http://vintagespeedsterparts.com/lighting.aspx


The round rear lights are called Beehives and were used til about mid year 1957 (as supply ran out on assembly line).  Many prefer them over the oval ones.  I used Austin Healey Lucas 494 front turn signal lenses on front of mine - lenses come in amber, clear, red.  They are $36 each from MossMotors.  They could be used on rear but are slightly smaller than the Beehives.  Lenses are glass (except on reproductions) so they don't fade or melt from bulb heat.  They come with single or dual element bases.  The original CMC front turn signals were SIGSTAT (sp?) from an 18 wheeler trailer!  DrClock has used '39 Ford replica LED tail light assemblies from a hot rod supply place.


Ha - Copyright for a company that was forced out of business by state of FL in 1992! I always wanted to print off on legal paper so it has extra paper to make notes on. 


Yup lots of supports made of simple angle iron - bumper supports, hood hinge bits.  Other than hinges though nothing cast or machined.  If you need measurements to build them "we" can measure and provide measurements.

Last edited by WOLFGANG
I find the tear drops for the Ford or from EMPI are too small and on LED's they confuse people. Too many small lights on those small tail lights. I tried some LED tail lights on a Beetle and people complained about which function was working. But, while I knew about these options, thanks for the links.

I did order the speedster tear drop tail lights from Vintagespeedterparts and wish they had more parts, for sale, a bigger variety of what they sell.
I decided against buying a speedster, South Texas location for only $11,000 about three years ago. Now, kicking myself. I could not get away from work for four days, to pick it up and where the man lived, there was no access for a big transit truck to pick it up and he would not drive it away from his property. So, missed out on that good deal. Then, July, 2015, could not contact this man with a nice complete speedster with IRS, ball joints, nice running 1776cc engine in San Antonio, selling for $16,000. That was a good deal, but paid my money to the man in CT. before the S A guy ever phoned me. Missed out on that deal by three days. Oh well, so goes life. You are the man, Bill, nice looking pair of speedsters. Do you still have both of them ?

I made an extra copy of he assembly manual and put those papers into a three hole binder and am using that in my shop and making notes on it. Took the list of needed hardware with me, to Lowe's last night and a nice sales person helped me quickly find all the hardware needed to bolt this mess together. Now, need Santa and his band of Elves to come in and do the work.
Ever notice, you can buy a part, put it on the work bench and it never gets on the car ? I have this problem.
Oh my ! Someone figured me out, calling me Mad person with speedster addition. I guess, if the label said it is a duck, and it quacks like a duck, it might be a duck . Today, extended the enclosed housing to the transmission for the throttle cable. Replaced all the CV joints and boots and packed them and installed on speedster chassis. Painted the rear drums with exhaust high heat red ( looks orange to me) paint for nice detail look, when one looks through the spokes in the Rivera mag wheels. Put the chrome lug nuts on with screw in 14mm wheel studs and the chrome center caps. Those center caps had to be sanded down for me to get them on the wheels. Love these parts from EMPI and on the inside of those chrome center caps, states they are made in the USA? Really ?? Maybe, the company is located in the USA, but bet they farm out the labor overseas.

My silly 1970 VW Rat Rod would not start for the past two days. Turned over but never start up. Now, if you read my bio, I published in earlier post, you know I am some expert engine person. You have no idea how upset I get when my all new parts, VW engine will not start faster than one can remove their fingers from the ignition key. Really, it starts that fast , even in cold weather and car sits outside, all the time. Two days and I am sharing this as it might apply to speedster problems. After changing out four distributors, all new, two new coils, testing every electrical circuit to the engine and test for gas pressure and flow, it turns out, the green ( usually is green) wire lead going from the negative side of the coil to the tachometer had grounded on the body, where someone ( not me) had cut the wire and sliced it together. The car sat in a cow pasture ( Hey, I do live in Texas) for seven years, before I found it and made it into a Rat Rod. There was only three dead mice and one dead Rat found inside the car and they love eating wire insulation. So, to make this shorter, once I removed that wire from the negative side of the coil, the engine starts up fast and runs good, like normal. Two days to find that stupid thing, which was causing me to think I was going crazy. Four new distributors, two new coils, wire testing, fuel testing, cleaned the spark plugs, checked valve clearance, looked for water in the carburetor bowls, none of that was the cause of that problem. So, lost work time today on the speedster project, but have no VW repair work for customers lined up ( means - no income) but plenty of time to work full time , starting on the speedster body.

I am going to look at the suggested tools they shown in the assembly manual and look through my shop for said tools, like hole cutters. I know I have some, but what size ? Don't recall . Also, bummed out about no material for putting on the dash or the pieces which go on top of the doors, with material on them. I have bare seats, but wow, what is needed to make them into speedster seats is wild ! And, missing the sliders. So, guess I need to find some, made only for the speedster seats .

Anyone have some extra , good condition, seat sliders they want to sell ?

Have to take the gas tank for modification to my welder and that should not be a problem as I bought a new 1967 style gas tank. Actually, I am going to do a trial fit on that gas tank, as looks to me it might clear the hood with no modification or I am just dreaming. Worth the trial fit. The after market gas tanks filler neck are not as high or tall as the original VW filler necks. That, I am sure of. If it works with no welding, that will save me money.

For a spare tire, going with the suggested stock wheel with space saver temporary tire. I think that will clear on top of the gas tank between gas tank and hood. That was suggested in the speedster manual.
The old fashioned wooden mouse traps are still the best. Use peanut butter, as the mouse has a harder time getting it off the release mechanism. Greed and hunger kills them. Cheese gets hard, so the peanut butter will last longer. I tried the "better " mouse traps and none worked worth a darn.

Brake note, if I forgot to share this. On the long brake line going from the master cylinder to the rear T, if that line breaks and starts leaking, don't replace the entire metal line as too much work. They usually go bad around the pedal assembly as that is where water, from your shoes or moisture will gather. Just use a new German brake line, which they do sell at most auto parts places, but they only carry up to four feet length. But, that is enough and you need to remove the speedster seat, then join a remaining good section of the old brake line with the new section using a Brass union, size 3/16 and these are also available at most auto parts store. You will need a tubing cutter, but worth buying one, if you don't have it, then normal metric and SAE tools. Makes the job so much faster, than replacing the entire brake line, which needs to be cut shorter, in the first place. And, parts are available locally so no need for some special VW retailer.

Just an updated picture or two.  Also, for safety spent $150 on 12 ton floor stands, placed under the speedster body frame.  I will start working on the body soon.  I thought 12 tons capacity might be enough. No, needed their raised height and also AC brand was less expensive. The other brand lifted the same height, but cost double and same warranty.  The range is from 20 to 30 inches.  I added one 2X4 on each one to spread the load better and stabilize the body from moving. 

Attachments

Images (4)
  • 003
  • 004
  • 030
  • 031
Post Content
×
×
×
×
Link copied to your clipboard.
×
×