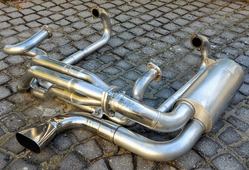
Can’t say for sure on the header but that silencer with the exhaust tip is definitely the work of Turbo Thomas.
Black German square weave would fit nice too. The black car, the black carpets, and the red interior bits would look quite nice too.
Sorry, only flicked through your thread. Just a thought but if you need it to be a bit quieter. Then call (rich) at Turbo Thomas as get him to price it up to re pack the exhaust. Depending on how old it is. Perhaps all the lagging has blown out.
Thanks @RichardMaxwell - I think the exhaust is 20+ years old - the engine was built in '97 so I'm guessing the exhaust was built at the same time. It's only got 6500 miles on the clock which ties in to the MOT history on the gov.uk site
So it's unlikely to have blown out, although being that old something may have happened. I'll give Rich a call at some point to discuss repacking.
Or the previous owner just liked it loud...
Your post made me think, though. My engine was first built in 1997, too, then seized after 15 minutes of the first start-up (assembler screw up). I pulled it apart, fixed the seized bearing and re-assembled. It's been running fine ever since, except for a broken stock rocker arm shaft that should have been stronger in the first place. You have to be careful (both in the US and Europe) where you get your parts from and the integrity of the supplier.
Oh I agree, @Gordon Nichols, the PO was obviously in the artillery..
For now, I need to prioritise tasks and first off it’s more important to get the car running well than running quietly.
I got the plywood today for the new floorboards so I’ll cut those out tomorrow - my consulting work is quiet at the moment so in a way I’m quite pleased because it gives me more time on the car! Not a profitable way to run a business but half the point in going part time is precisely so I don’t bust a gut and enjoy life more, especially with the Long Haired General (aka wifey). So what if I can no longer afford the big 5star holidays. We’re not going anywhere in lockdown anyway, and every other day becomes a holiday when you’re not working to make ends meet then recovering on days off to make it through another week.
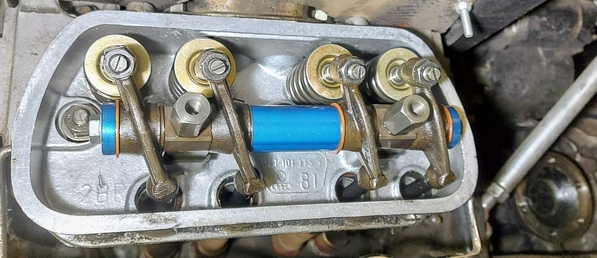
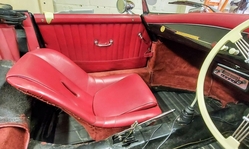
So, jobs for the next week are floorboards cut out, drilled (for seat bolts) and varnished. Seats put back in (I might need to realign the seat mounting holes in the chassis - the driver seat is skewed slightly). Finish wiring the third brake light into the brake light circuit. Finish cleaning up the exhaust system. Replace CV axles. Check valve clearances. If I get half of that done in a week I’ll be pleased. After that it’s removing the carbs, cleaning them and resetting everything to base settings. :-)
And don't forget that during these Covid quarantining times, you have to allow a few extra minutes in the morning to plan your day:
What's for breakfast?
Should we watch "Good Morning Britain", "Lorraine" or "Sky News"? (I know...Not much of a choice, there).
What the hell are those nutty Yanks doing today? (I'm sure we're entertaining the World right now).
and that most important one: "Which end of the couch do you want?"
Just so you feel like you're fitting in, I spent the better part of the afternoon, here, pulling out an old wiring harness for my heater and getting ready to build a new harness in place with some existing wires, then sheath it end-to-end in some sort of cabling cover. God, how I hate doing harnesses in place, not to mention that this one goes from the nose cavity inside the Frunk, back along the underside of the frunk (passenger side), into the cockpit behind the dash far right and then across to the radio in the middle. It will take three separate sheathing operations and gets anchored at six cable clamps along the way (plus two more behind the dash).
Lying on my back under the dash at a damp, 2.5C degrees is not my favorite Covid-related pastime.........
@Gordon Nichols we do have BBC as well - news-wise they're fairly impartial - whch of course means they're vilified by both left and right equally! The present government is doing it's best to defund/close the BBC because they want a version of Fox News, but at the moment it's hanging in there, much like the NHS. The licence fee is £150 a year, which I think is a uniquely British thing - if you have a TV you have to have a TV licence which funds the BBC. Of course a lot of people complain but for that we get 3 BBC TV channels, the iPlayer, 6 radio channels with great music and the best comedy and, of course, Test Match Special (for us cricket fans). I think it's good value but some people don't like the enforced nature of the licensing. We have 5 main terrestrial channels now - Channel 4 came along in 1982 (the year I was at college and watched the Navy Task Force sail from Portsmouth harbour to the Falklands) and that's all we had for years before Sky arrived in '89. Ok, history lesson over (but I do find cultural history fascinating).
I feel for you doing in-car wiring - it's often the least comfortable job and also, for me at least, the most fraught because I'm always on the edge of my knowledge - when something goes wrong I'm invariably out of my depth trying to troubleshoot. I need to wire in a dual tone horn but that means a relay and I know I'll take an age to ensure I get it right! But better slow and right than fast and wrong.
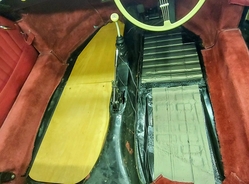
Today I managed to get the floorboards cut out and a first coat of marine varnish applied. I'll do a second coat tomorrow and hopefully Sunday I can fit them. I've put a little bit of sound dampening on the VW floorpan to deaden resonating noise - not a lot because it's borderline useful on a ragtop. I also gave the exhaust a going over with wet&dry to tidy it up a bit. I was considering polishing it but gave up on that idea - not practical for ongoing maintenance.
So, a Sunday evening weekend roundup..
Exhaust is looking much better than before.
First off, a big thanks to @Gordon Nichols for a key pointer on valve clearances. I started adjusting the valves (for the first time) and cylinders 1 and 2 were very tight compared to the 0.006" standard and for some reason I thought 'This isn't right - let's check on here'. So I checked and remembered my engine spec invoice with chromoly pushrods. After that, with the help of a small magnet, it was all straightforward, thank goodness - a 'loose zero'.
The cork gaskets are a bit past it - should I replace with cork or go silicone?
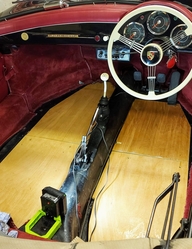
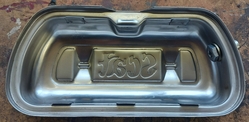
Also, good news on the floorboards. All varnished and fitted:
and I've refitted the carpet.
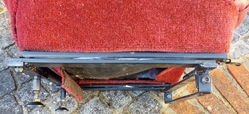
The seat height works correctly (as per Chesil factory build) with the combo of plywood floorboard and low seat runners compared to no floorboards, as proven here:
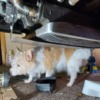
Finally, I got the CV axles out today, with thanks from a little helper:
Attachments
I’m not familiar with “silicone” valve cover gaskets but they sound like the “C Channel” gaskets that CB Performance sells with good success.
I’ve used both the cork version and the composite versions with good luck on a pair of CB Perf. Cast aluminum Bolt-on valve covers. I load up a meat marinating syringe with grease and shoot a 1/8” bead of grease along both sides of the gasket, ( cut the end off of the marinator needle for a single bead port), smear it out on the gasket and install. Watch out for gasket “pucker” when installing. That causes a big leak.
I never use RTV on valve cover gaskets. RTV makes it extremely difficult to remove and clean up the cover at the next valve check and when I use the grease they don’t leak and they remove more or less easily.
Also, you have bolt-on valve covers. Please check the torque on the threaded stand-offs for the bolts - the stand-offs hold the rocker arms in place and you don’t want them to loosen up. Same torque as the regular rocker shaft nuts.
For the cover bolt seals, I cut o-rings about 1/4” thick from a length of 5/16” ID rubber fuel hose, slip them onto the bolt and run the bolt in. I don’t torque them, just run them in til they hit the rubber, then another turn or two, whatever feels good.
At first glance, I thought I saw a hamster ![]() ... cute dog.
... cute dog.
Nice progress.
Silicone valve cover gaskets do exist, or at least did at one time.
I've been told by a couple of people with vast experience that the rubber gaskets are problematic. I have cast CB covers with the bales and NAPA sells a 6 pack of cork gaskets for $8.99. I can live with that I, too, smear them with grease before install, although I do it the old fashioned way. If nothing else, it keeps them in place while you put them on.
I don't know of the rubber gaskets would work better or worse on bolt-on covers
Thanks for all the tips on rocker cover gaskets, guys. @Gordon Nichols - although there may be rocker cover stand-offs for bolts, the actual rocker covers are 'standard' clip-fit (with vent hole).
The silicone gaskets are £22 compared to the cork gaskets at £2. I'll go for the cork and grease combo..
@IaM-Ray she's a rescue Jack Russell with some Cairn/Westie mixed in to give those pointy ears and long hair. :-)
Attachments
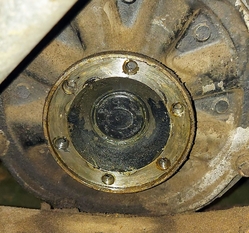
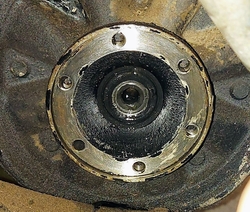
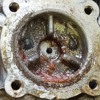
Another quick update on CV joints/axle replacement. The side of the car where most of the oil/grease was sprayed around the gearbox, I spotted there was no cap on the centre of the drive flange and it looked 'reet mucky' as a friend from Leeds would say. I'll have to clean it up and investigate further later today but a quick google shows I probably need to replace this, the circlip and a seal as well?
Good side (right)
Bad side (left):
Attachments
Back in the 80’s, when I used to daily drive an aircooled VW, I would use spray adhesive to glue the cork gasket to the valve cover. I would then smear a little grease on the exposed side and install. Spray adhesive, when used properly, sticks great, the gaskets don’t get sucked in and can pop the covers off and on a few times before the cork needs to be changed. YMMV.
Exactly Rick. I have the aftermarket cast fake "Porsche" valve covers. I use contact cement on both the gasket and valve cover, wait 10 minutes and stick them on.
Then I smear a very light coat of grease on the gasket. I usually get about 3 years and 3 valve adjustments before needing to replace.
I picked up 10-12 when the rubber-impregnated cork were available. They seem to compress a little less. My valve covers are bolt-on, no bails.
we used permatex,dont know if they still make it..doesnt not come off skin:}
Permatex is rugged stuff. They used to sell a line of "Permatex Aircraft Dope and Gasket Seal". It came in a cute little bottle with a brush attached to the cap. I used it once and managed to get a little on one hand. It gave me what looked like a liver spot that took years for that stuff to wear off! ![]()
I guess Perma, was the operative word. ![]()
Everything comes off skin with the right chemicals LOL! Skin too.
Permatex, POR -15 and GM black windshield cement are all with you until you have generated new skin.
Any particular grease @Stan Galat @DannyP @LI-Rick? Moly (CV) grease, Lithium, General Purpose?
Grease for what purpose? Different slick'ems for different things. ![]()
For the valve cover gaskets, just about anything: Regular automotive general purpose or molybdenum grease (my favorite, cause it gets all over everything amnd makes my wife think I'm doing something useful out there), white lithium grease, that green or purple stuff that the auto parts stores sell, whatever. All you're trying to do is get the gasket moistened such that it'll kinda-sorta stick to the cover while installing, and swell very slightly once installed, when the engine heat thins the grease out to flow and let the gasket try to expand and seal.
Be careful when installing the cover/gasket, as they always seem to bulge out somewhere as they try to escape while you're focused on getting the cover aligned. Oftan you can't see the bulge/gap and tighten things down only to later find a massive oil leak caused by the gap. No gap-osis allowed.
Thanks Gordon. You correctly guessed I was talking about the valve cover gasket seal. I was wondering whether one wanted the grease to melt slightly or not, given the heat. I’ll order some cork gaskets tomorrow once I’ve figured out what I also need to order for the leaking flange seal (above). Always worth combining orders to reduce overall postage costs.
The valve covers need to come off at least 1x/yr to adjust the valves. I like the cork gaskets, and until now I've used CSP valve covers. I reuse gaskets at least once or twice. I've not needed any adhesive, but then again there are retaining clips to keep the gasket from sucking in on the valve covers I've been using.
I also wipe the sealing surfaces with a dab 'o grease (which only serves to keep the gaskets from sticking to the head the next time I remove the covers). The kind of grease is pretty much irrelevant, since it isn't really doing very much besides being a bit sticky when you are assembling things (which is a good thing). but I've never been able to stop the valve covers from weeping. I guess I'd rather have that than a 2 hour job scraping adhesive off the covers and the heads (and then still having them leak).
With the new engine, I'm running stock German valve covers and bales for the first time. We'll see how it goes.
Your mileage may vary.
Stock valves covers and bales ( in good condition) seems to be the best to avoid leaks. While everyone has their own method to seal, I use a very thin layer of silicone gasket maker only on the valve cover side of the gasket from the L & R top corners , down the sides and across the bottom only wiping any excess away. I've never had VC leaks since doing this way.
Ok, bulk pack of 10 neoprene/cork rocker cover gaskets ordered (£6.75, around $9.24 for comparison), 2 final drive flange seals (£6 each - figured I might as well do both rather than just one), and some new exhaust gaskets for when I refit the exhaust.
I tried to buy a new fanbelt (ok, alternator belt) because I don't know the age of the existing one, but I'm struggling to find the correct-sized replacement. I've not yet dismantled the 911-style shroud to see how the alternator is mounted, but I measured the old belt and it was 860mm (about 33.8") OD and 10mm wide. None of the belts available in aircooled stores come close to this length - at minimum they are 900mm. Any suggestions, please?
Now I've got my Dellorto Super Performance handbook, I've started to dig out the carbs from the engine bay and begine the careful process of cleaning them. For now I'm working on the right carb only and even to my uninitiated eyes it's filthy dirty!
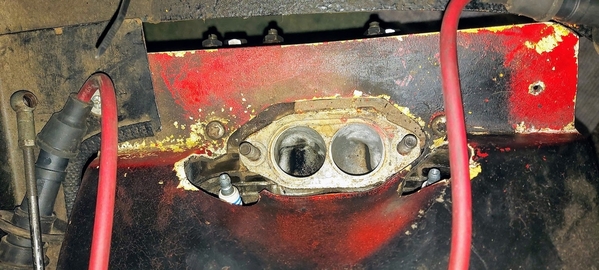
 First off, pull the plug leads then thank goodness for small hands as I squeeze them into the gap to get a 12mm spanner on the manifold bolts. You'll see here the fibreglass shroud cut away to allow access, but it's been a bit bodged to make everything fit.
I know a lot of you will say ditch the shroud and go back to standard cooling, but this is a learning car for me and I don't want to spend unnecessarily. I'll go with what I have for now and if I get another I'll go the stock route.
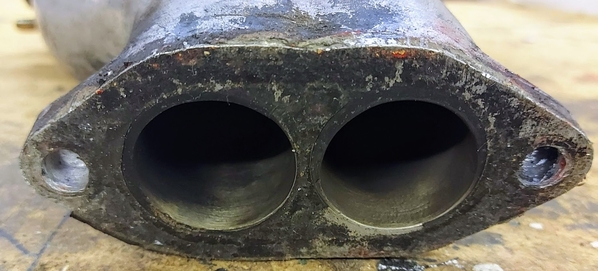
Anyway, you can see that, as well as loads of crud on the manifold (bad seal, obvs) there's red paint(!), which means the manifold has been bolted down onto a corner of the shroud, so no wonder the car was popping and banging.I'll have to get the dremel out on the shroud once I remove it.
The PO was charged a a few hundred quid by his preferred aircooled 'specialist' to clean the carbs before he sold me the car and I bet all they did was take off the air filters and stick an air hose down the intakes. No noticeable cleaning took place (nor did they clean out/replace the fuel filters). If you want something doing properly, do it yourself, eh? To be fair, £200 would barely cover the time needed to strip down one carb, let alone 2 and the rest of the fuel system.
The gasket is pretty mangled as well so that wil be replaced.
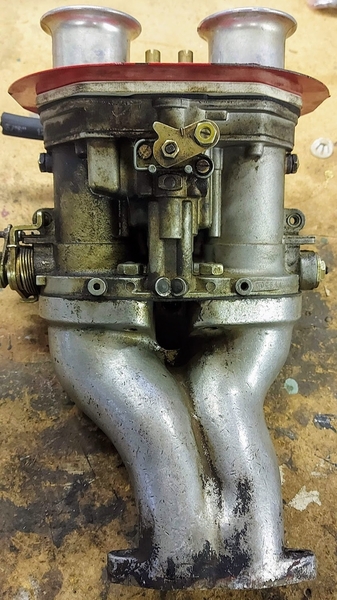
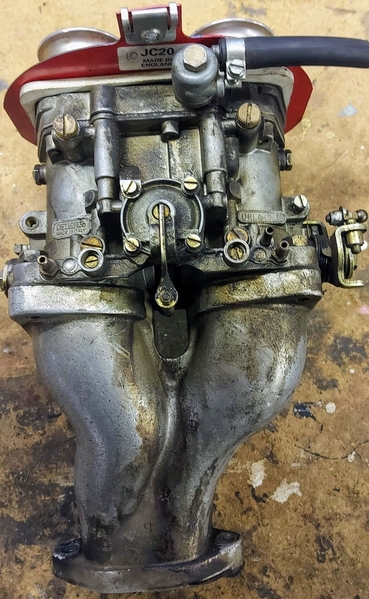
So, here they are in all their mucky glory:
The distributor uses a vacuum advance from the right carb. Also the No1 cylinder mixture control screw was wound out 4.75 turns compared to No2's 3 turns. I'll check the left carb but that might explain why the exhaust pics on a previous post are sooty for 1 and 3 and clear for 2 and 4?
Anyway, time to start stripping the carb down and cleaning everything up. I have my trusty air hose and an ultrasonic cleaner large enough to take one whole body, and some Simple Green (which is tricky to find in UK, but reasonable price). I'll document everything on here (as a carb novice) in case it's useful - if I search for 'DRLA' on this site all I find are old adverts for owners selling them!
One thing I will say - the way these carbs are mounted means it's almost impossible to adjust when in place. The adjustment screws are all facing outwards and there's precious little space in a Chesil engine bay.
Attachments
So, a few more pics of the first carb disassembly.
First off, I open up the fuel intake filter and all this falls out!! Yikes
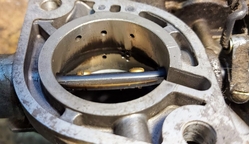
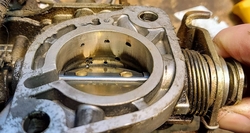
Then the butterflies showing some soot on the barrels, even when closed:
Jets (including more dirt):
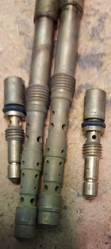
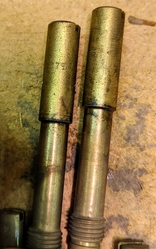
Left to right, idle jets are 58s, mains are 175s, starter emulsion tube 80 (with free debris!).
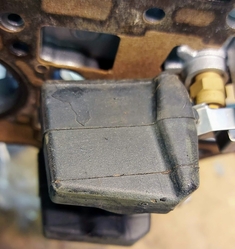
Floats look very old and worn.
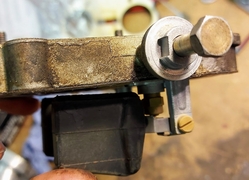
The fully open position looks about right but the 'full' shut-off position looks a bit high, so will check and adjust this later.
Attachments
A question for carb afficionados, if I may. If my main jets are 175, but I've no idea if they're right for the car or not (because it's not run right in my short ownership before taking it off the road to check ovef and refurb the car) , which service kit should I buy from Dellorto - the one with 150 main jets or the one with 170 main jets?
I know that's like asking 'how long is this piece of string I'm holding behind my back' but it's worth a shot! I presume in the absence of options, I'd go with the nearest (170) and see how it goes. Any advice appreciated. If none, I can always ask Dellort to perhaps swap out the jets in the service kit with 175s. Given how poorly the car has run due to so much dirt and crud in the system, I've no idea how well this car can run. Just cleaning the entire system through should make a significant difference.
Thanks, Martin
Martin, main jets and idle jets are not normally changed during a rebuild. All gaskets, O-rings, float valves, and accelerator pump diaphragms are the usual parts in a rebuild kit.
The only real way to know if your jetting is correct is to read the plugs(which is difficult for the main jets) or to use a wideband O2 sensor to read them real-time.
About 2.5 turns out is a good point for Dellorto idle screws. When the car is running well, if the screws are less than 2 turns out is an indication of too large an idle jet. Conversely if the screws are over 3 turns out, running well, the jets are probably too small.
It is easiest to mount the manifolds and carbs with the engine out, but you gotta do what you gotta do. Definitely grind down that offending red fiberglass, just enough to clear the manifold. Make sure you seal the air leaks in the shroud wherever you find them. I have a 911 shroud in my Spyder. The belt should be available at any auto parts store that is not aircooled-specific. I get mine at a local NAPA store. I'm hoping you have a similar type of store in your country.
You may need to make/modify a screwdriver to make it short enough to get to the screws. It's tight working outboard of the carbs in ALL Speedsters. Some are worse(CMC and Vintage), some are better(Beck).
Martin: I futzed around with my Dellorto 40's for Years before I finally threw in the towel and sent them to a professional at Blackline Racing here in the states.
When they went out to them, this is what I had installed for jetting:
These carburetors come stock with:
60 idle jets
140 Main jets,
180 air correction jets,
35 accelerator pump jets and
34mm venturiis.
I had drilled the Mains out to 162.5 (happens to be a drill size) to overcome transition hesitation, which never went away.
This is what they had when I got them back from the rebuild, set up to my engine specs by Dave Hogland at Blackline Racing in Utah, who set them up on a flow bench and then tested them on a 1915cc engine (mine is a 2,110).
The jet sizes are:
.45 idles
1.30 mains
160 air correctors (to slow down the fuel through the main jets to overcome hesitation)
.35 Accelerator pump jets
32mm Venturis
E-Tube = #2
They are now so smooth they feel like fuel injection. I love 'em.
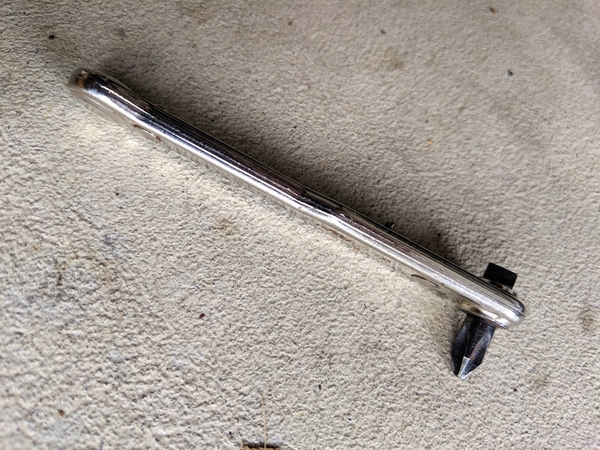
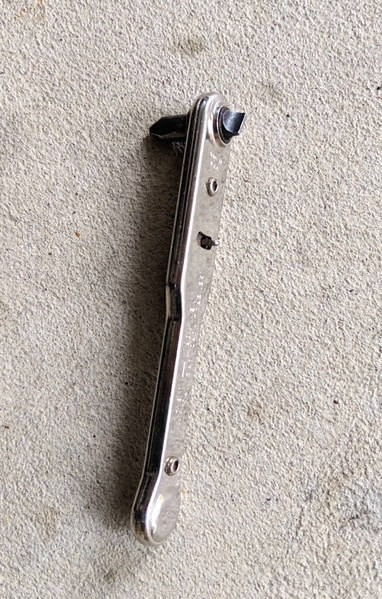
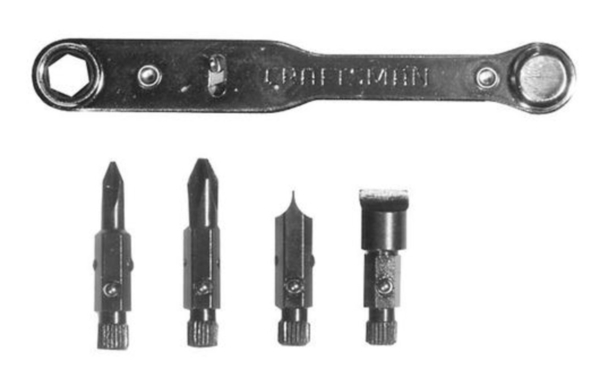
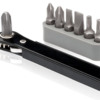
Martin, a few years ago I found this handy tool at a local Ace Hardware. Double-sided with Phillips head one side and standard on other side and reversible ratchet action. End-to-end it's 4.5 inches long. Perfect for turning those carb adjustment screws in tight spaces. If I had an extra one I'd send to to you. ![]()
Attachments
.
@Martin's Eleven (UK) and @MusbJim , this little gizmo was available for years from Sears in the US (# 41469) , but seems hard to find today (and probably harder in the UK),
But, it's just a small 1/4 inch ratchet with some bits, so seems like this would do the same from the UK Amazon site:
And oh (sometime later), here's the link at Ace in the US for the one Jim posted.
.
Attachments
here is on flea.. here or here on the Can Sitecan amazon A very small 1/4 drive socket could be made to hold a bit... just saying
@Martin's Eleven (UK) posted:A question for carb afficionados, if I may. If my main jets are 175, but I've no idea if they're right for the car or not (because it's not run right in my short ownership before taking it off the road to check ovef and refurb the car) , which service kit should I buy from Dellorto - the one with 150 main jets or the one with 170 main jets?
I know that's like asking 'how long is this piece of string I'm holding behind my back' but it's worth a shot! I presume in the absence of options, I'd go with the nearest (170) and see how it goes. Any advice appreciated. If none, I can always ask Dellort to perhaps swap out the jets in the service kit with 175s. Given how poorly the car has run due to so much dirt and crud in the system, I've no idea how well this car can run. Just cleaning the entire system through should make a significant difference.
Thanks, Martin
Are the carbs just dirty on the outside? If your carbs aren't leaking (gas or air) then you don't necessarily need to tear apart and rebuild. What I suggest is observing how it runs on the idle circuits, buying idle jets and tuning appropriately before playing with mains. This is because if (after getting the mains right) you start changing idle jets (gas or air), the mains will now not be right. You need to get the idle circuit right first! I believe Danny has a good write up on carb tuning and I've always liked Aircooled.net's https://www.aircooled.net/vw-carburetors-jetting-102/
The owner (John Connolly) has actually recommended driving Webers/Dellortos with the mainstacks pulled out in some situations for guys to understand how much you drive on the idle circuits and how important it is to get it right first.
Hope this helps. Al
Gentlemen, many thanks for all your answers. Much appreciated as always. Given the state the current fuelling is in, there are so many things I need to do just to get back to a good basic setup (service the carbs, new gaskets, widening the gap in the 911-style shroud to remove any chance of air leaks etc), that I'll do all of that before I start on differing jet sizes etc.
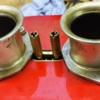
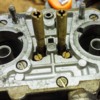
I've disassembled the carb fully and cleaned it today - OMG!
I presume this gelatinous gunk is old fuel sitting and 'reducing' like a good jus..One of the problems of more ethanol in our fuel?
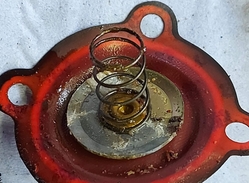
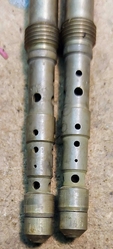
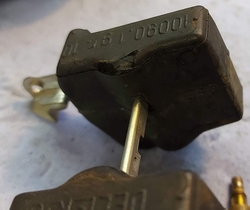
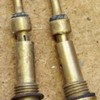
I'll be sending off for a full gasket/O-ring service kit but the question about jet sizes above was because Dellorto UK offer the same service kit with two differing (new) jet sizes. In looking more closely today whilst cleaning everything, I find my Dellorto DRLA 40 actually has chokes/venturis sized 34. And the main jets which had 175 stamped on the long top part of the screw actually had 145 jets inserted in the bottom:
So it all looks a little more reasonable. I'm learning on the job, here, so it's all fun. At least the dirt and gunk everywhere explains why the car would only run roughly on idle jets and as soon as I hit 3k revs the car would misfire and lose power like fuel starvation. I'm looking forward to getting this all
However, there will be an extra expense of new floats - one is split so I might as well replace both (they're around £46/$63 each over here).
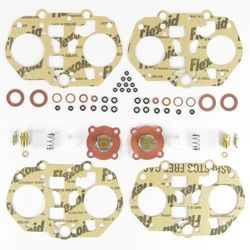
The service kit is £122/$161 for dual carbs:
Total cost (including manifold gaskets) - £219/$300. Not cheap, but this should see the carbs sorted for the next decade. I'm guessing nothing has been changed on this for 20 years.
On another topic, the rocker cover gaskets and flange seals arrived today so I'll fit them tomorrow.
Attachments
@Martin's Eleven (UK) posted:Gentlemen, many thanks for all your answers. Much appreciated as always. Given the state the current fuelling is in, there are so many things I need to do just to get back to a good basic setup (service the carbs, new gaskets, widening the gap in the 911-style shroud to remove any chance of air leaks etc), that I'll do all of that before I start on differing jet sizes etc.
I've disassembled the carb fully and cleaned it today - OMG!
I presume this gelatinous gunk is old fuel sitting and 'reducing' like a good jus..One of the problems of more ethanol in our fuel?
I'll be sending off for a full gasket/O-ring service kit but the question about jet sizes above was because Dellorto UK offer the same service kit with two differing (new) jet sizes. In looking more closely today whilst cleaning everything, I find my Dellorto DRLA 40 actually has chokes/venturis sized 34. And the main jets which had 175 stamped on the long top part of the screw actually had 145 jets inserted in the bottom:
So it all looks a little more reasonable. I'm learning on the job, here, so it's all fun. At least the dirt and gunk everywhere explains why the car would only run roughly on idle jets and as soon as I hit 3k revs the car would misfire and lose power like fuel starvation. I'm looking forward to getting this all
However, there will be an extra expense of new floats - one is split so I might as well replace both (they're around £46/$63 each over here).
The service kit is £122/$161 for dual carbs:
Total cost (including manifold gaskets) - £219/$300. Not cheap, but this should see the carbs sorted for the next decade. I'm guessing nothing has been changed on this for 20 years.
On another topic, the rocker cover gaskets and flange seals arrived today so I'll fit them tomorrow.
Definitely a dirty gunky mess and it's a good thing you're cleaning it all. One, it'll run way better once cleaned and two, you get your hands dirty and will know the carbs inside and out which leads to a better understanding of how they work. When/if there's every another issue you'll be able to diagnose it faster.


