SO Martin, you've got 145 main jets, and 175 air correctors. What AL said about removing the mains is good advice.

My article is good for synching only. Initial adjustment and jetting are NOT covered. I could write a book, and still not cover it all. CB Performance Weber or Dellorto books are pretty good, although they lean REALLY heavy in the rich direction of jetting.

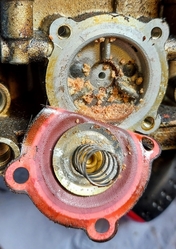
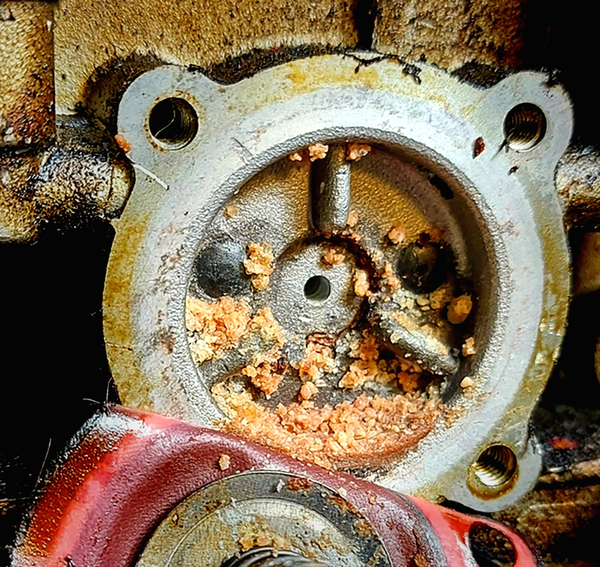
Dellorto UK turned up trumps with a delivery today - super quick service! So a strip down and clean of the second carb and there’s more dirt in the other accelerator pump:

C1E8E7CA-05B8-4B19-873B-046CB742029A

A few hours later and I’m now happy these are clean, back to ‘standard’ and ready to go.

E9016C10-972A-4F8A-8A36-56D9B9B6656BA93F676E-002C-4518-8C54-D2D00621E492
Good to see they’re sequential numbers.

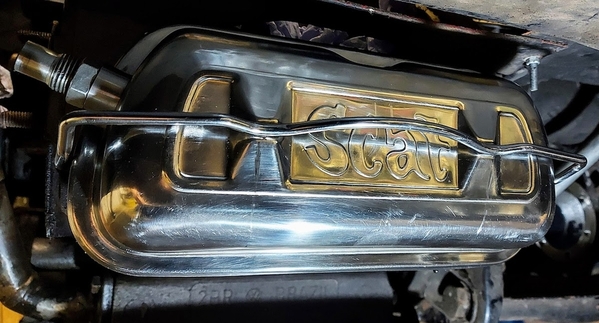
Bitterly cold in the garage today, even with the heater on. Tomorrow will see me getting back underneath the car to sort flange seals, driveshafts and rocker covers.

Attachments

Images (3)
  • E9016C10-972A-4F8A-8A36-56D9B9B6656B
  • A93F676E-002C-4518-8C54-D2D00621E492
  • C1E8E7CA-05B8-4B19-873B-046CB742029A

@DannyP thanks for the tip. I know all about balancing carbs, having a Honda VFR750 which has four carbs to balance, using a Morgan Carbtune. Makes all the difference!

Anyway, I found out today the 150 or 175 option when buying the Dellorto service kit I mentioned in an earlier post was actually referring to the needle valve controlled by the floats, because there was a replacement needle and seat in the kit. Luckily when I removed the seat there was a 150 stamped on the side, so that was a match. Phew.

Apart from the dirt there were numerous other reasons why the carbs were misbehaving. The accelerator pumps look like they were set so that they were always leaking extra fuel into the mix. The floats were mostly set right but one was cracked so perhaps leaking/not floating? The idle mixture screws were all over the place. And of course the manifold gaskets were reused far beyond their natural lifetime so lots of air leaks. And finally the air filters are good looking foam filters but they obviously haven’t been cleaned and oiled in many years. I’ve had motocross bikes before where I’d wash and oil that filter every 2 or 3 rides. So that’ll be the next job for the carbs, but only once they’re refitted. I’ve got a lot to do in the engine bay before that point. :-)

.

Martin, it looks like you're doing a great job of cleaning things up.

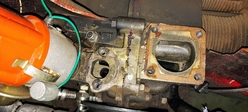
I have Webers, not Dellortos, but they're alike in many ways. One thing I noticed is that your carbs were dirty on the outside, from the tops on down (before cleaning). That's often caused by leaking needle valves. After shutdown, pressure in the fuel lines causes the bowls to fill and overflow out of air passages at the top of the carbs, letting fuel seep down the outsides of the carb bodies. Another symptom of that is a heavy odor of raw gas starting a few minutes after shutdown. The rebuild kit should solve that.

Also, I've been remarkably lucky avoiding the typical 'dirty idle jet'  symptoms that are so common with these carbs. I think the main reason is trying to not let the car sit for more than two weeks without running it, for at least a short while. Granted, this is a lot easier in a mild climate, but there's really no better solution to chronic carb problems than just running some fresh fuel through them as often as possible.

Good luck!

.

@DannyP posted:

... CB Performance Weber or Dellorto books are pretty good, although they lean REALLY heavy in the rich direction of jetting.

I've found that too, Danny, and have always thought that those books had some great information in them (the troubleshooting guide is excellent!).  As for the jetting advice- that's so as a beginner if anything you'll err on the rich side and not melt the engine down (and be looking for them to replace it).  Once you've gained some experience you learn how far you can take it successfully.

Last edited by ALB

Don’t worry MItch, once this car’s running again I’ll be driving it at every opportunity. Even in England, as a biker I know there are surprisingly few rainy days, which means there are a lot of days when I I can wrap up warm and jump in the Speedster with the hood down. I used to have a black and tan Mk1 Miata that was my everyday car and I ran that with the hood down every drive unless it was raining.

Like you I spotted the oily residue outside the carbs and manifolds and guessed it was something to do with fuel backing up. This car has had a few POs, so one never knows the history of maintenance - it’s always good to start afresh and then work from ‘factory reset’.

We’ve got slushy snow this morning at around 34f, so I’ll get the heater going in the garage. At least it’s not as cold as those Navalny supporters had to contend with yesterday in -58f! I will look to swap the old ‘up and over’ garage door for a roller door this year, which will help seal out the droughts.

So, end of the weekend and I'm happy with progress. Got the rocker covers on (thanks for the 'greasing the gaskets' tip - they went in a treat),

20210124_124317

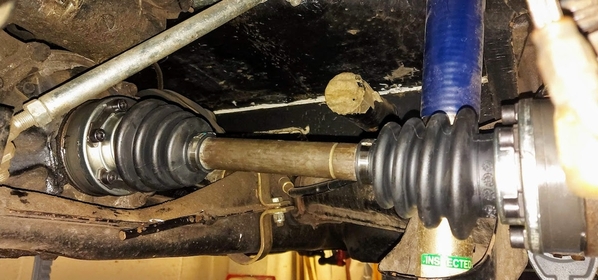
and then new flange seals before fitting the IRS axles (complete CVs and axle both sides). No instructions with them but they look like they can be fitted either way round.

20210124_162106

However, there's a groove/band in the axle you can see in the pic. This now has me worried - is this the right way round? I just checked and at least both axles are aligned this way.

Now it's on to the fan shroud and engine bay..

Thanks again, one and all, for your support and advice. It helps keep me motivated! :-)

Attachments

Images (2)
  • 20210124_124317
  • 20210124_162106

Martin-good progress. I'm ashamed I've been sitting on my butt with ~$1,000 in parts sitting new in their boxes. (I did manage to get my new Beck horn button on)

FWIW, I've had two bikes and now the Spyder with twin 45's and I get 80% of my parts from DellortoShop UK. IMO, the best Dellorto source in the world. Even here in the western US, I get my parts in ~a week, courtesy of HRM Mail.

I, too, have never paid any attention to any specified orientation of the drive axles - I just pick them up and put them in.  And while I've not seen any shafts with that indentation all the way around that yours have, I have seen a few with a protruding ridge all around right where yours has the indentation and others with nothing at all - Maybe be a UK thing?     More than likely, it is there as an aid to manufacturing to hold the bare axle at a certain attitude for the assembly of the CV joints.  I'm guessing here, but that's my story and I'm stickin' to it.

Don't forget to torque the end screws to 25 ft. lbs. and peek out the back side while rotating the shaft to make sure that the far ends of the screws don't hit the transaxle case.

Years ago I drove a Vanagon Westy daily. One winter the CV joints started making noise. I put the van on ramps and slid under to investigate. The grease had hardened and migrated away from the balls in the joint.

Simply grabbing the axle and sliding it from wheel end to transmission end a few times spread the grease around.

Cost: ZERO and silent running restored. That poor 90hp Wasserboxer worked hard pushing that 3600 pound vehicle. It needs all the help it can get!

Probably a good practice to do this every year when you grease the front end and change the oil, guys.

It's said that used axles (swing as well as irs) should always go back on the same side, as you don't want to be stressing them the opposite of the way they were before.  That said, I've never heard of anyone (other than drag racers) breaking them.  As for the ridge on stock irs axles- something in a wee, foggy corner of my brain is saying it goes to the outside, but don't take that as gospel.  I know who to ask and if I remember I'll call him later.  Al

@ALB posted:

It's said that used axles (swing as well as irs) should always go back on the same side, as you don't want to be stressing them the opposite of the way they were before.  That said, I've never heard of anyone (other than drag racers) breaking them.  As for the ridge on stock irs axles- something in a wee, foggy corner of my brain is saying it goes to the outside, but don't take that as gospel.  I know who to ask and if I remember I'll call him later.  Al

I always put CV joints back where I got them-- orientation, etc.

... but this may be more due to being a bit OCD, as the balls almost always end up all over the parts washer (when I take the joints apart to inspect for wear) and go back in no certain order, so none of my effort makes any difference.

This is metaphorical is a lot of ways.

Last edited by Stan Galat

.

Martin, those of us who came of age in the 1960s understand that some things are groovy and some simply are not.

There is no explaining it. No amount of logic or reasoning can account for why some things are groovy. But no one can doubt that they are.

Grooviness is an enduring property. Once something is groovy, it almost always retains its grooviness.

I think I would just try to accept your axles for what they are.

It’s a groovy thing.

.

Mitch, I'm happy to accept the grooviness of driveshafts. :-) I'm chilled about most things in life until I'm not, then those involved soon know. And although I was born in the 60s, I started skateboarding in 1976 and still skate the local halfpipe. So I totally get  and embrace grooviness.

And Gordon, I'll check the torque of those bolts because I think I probably overtightened them. :-(

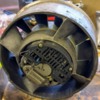
I decided to take out the alternator and 911-style fan shroud today to see what was involved, prior to cleaning everything up. I'll put a few photos up here because I've been unable to find instuctions or how-to's on these things, so hopefully they'll be an FYI for others. Not that anyone would necessarily want to fit them - it doesn't look to be a great way of cooling the engine equally.20200921_173035

Attachments

Images (1)
  • 20200921_173035

So, first off, the alternator and fan metalwork is merely held im place by the aluminium strap, tightened by the two bolts on top.

20210119_145140[1)

Once loosened, the fan unit slides out and two leads unplug from the back.

20210125_142750

This leaves the hole you see here:

20210125_142956

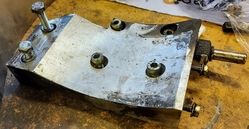
The two metal bands are bolted to a machined base unit that also serves as a blank for two existing holes into the main engine block:

20210125_14300020210125_15134920210125_14420020210125_144213

You'll see numerous issues in the finer details of all of these pics, such as dodgy gasket seals etc. It's like playing 'Spot the ball'..

The other main difference between this engine bay and most 'normal' bays is the need to have the twin carbs controlled in a different way to avoid the fan shroud hump:

20210125_144248

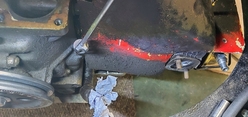
More pics of the shroud prior to it coming out:

20210125_14442420210125_144445

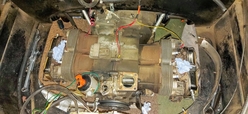
And here's the 'bare' engine bay with the shroud out:

20210125_150654

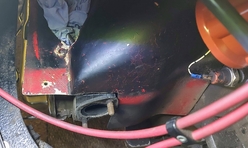
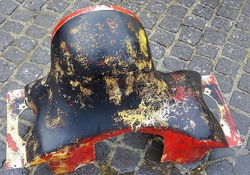
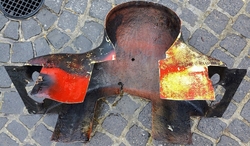
And here's the shroud once I jetwashed it - it blew a lot of the various layers of paint off:

20210125_15340320210125_15340920210125_153419

Plenty of 'dremel tweaks' have already occurred to make everything fit, including space for carb manifolds and sparkplugs. But more tweaks needed. And no internal vanes to route the air evenly over the four cylinders.

So, ideas for cleaning and painting the shroud? Paint stripper or sanding? (I presume paint stripper may be verboten on fibreglass?) Then I guess it's a spray primer and top coat but with high temp paint.

Hope this helps.

Attachments

Images (16)
  • 20210119_145140(1)
  • 20210125_142750
  • 20210125_142956
  • 20210125_143000
  • 20210125_144200
  • 20210125_144213
  • 20210125_144248
  • 20210125_144424
  • 20210125_144445
  • 20210125_145827
  • 20210125_150654
  • 20210125_151349
  • 20210125_151413
  • 20210125_153403
  • 20210125_153409
  • 20210125_153419

@Martin's Eleven (UK)- Have you thought about putting a late model doghouse fan shroud back on it?  "And no internal vanes to route the air evenly over the four cylinders" does not begin to describe how unbalanced the 911 style is- your engine will love you if you get rid of that thing.

For a good read on 1 guy's attempts (and what it took) to make it work-

https://www.thesamba.com/vw/fo...p;highlight=bergmann

PS- you can use some strippers on fiberglass

Last edited by ALB

Al, relax a little. That is the Bergmann shroud you're talking about. The one Martin has uses an actual Porsche 11-blade fan and alternator. I wouldn't buy anything from Bergmann. Nothing at all.

A 911 axial fan is a completely different animal from a hamster wheel 356/Beetle fan.

Martin, I have that same hunk of aluminum base for the ring. Mine has a stainless steel strap to hold the ring, it works fine. Really easy to line up the pulleys too. I'm running a 5" dry sump pulley and a stock 911 alternator pulley. The pulley ratio is fine.

I have the same setup as Martin. I took a later year(mid-70s) plastic tailcone/vane assembly and modified it a bit. It bolts to the back of the alternator. It has two steel vanes riveted to the plastic cone on the 3-4 side of the engine. These require trimming to clear the shorter shroud. I also bent them a bit to force the air toward #4 as much as possible. The key is to also seal as much as possible between the fan and shroud and top and sides of the case to remove all the air leaks. I used foam window weather-stripping in various thicknesses, the kind with peel and stick adhesive on one side. I also made my own sled tins from aluminum sheet, tucking them behind the fiberglass and bending a smooth radius then keeping parallel to the case edge, with the opening to the rear. I cut holes for my J-tubes to pass through.

The sealing and modified vanes keep the CHT within 10-15 degrees Fahrenheit of each other. The sled tins lowered the CHT a further 10 degrees across the board. If you seal the edges from leaks, you then create even pressure across the cylinders and heads. The whole thing works like a forced air plenum. There is plenty of pressure too, the fan can cool 6 cylinders.

I had monitored the CHT with 4 separate thermocouples, one on each head just next to the spark plug. I drilled a small hole and threaded a 6mm bolt into the heads and used ring-style K-type thermocouples. It's the way Aerovee(which are for homebuilt VW-powered aircraft) engines monitor their temps. I fact that's where I purchased the thermocouples.

I have a crossbar/hexbar linkage, but I don't know if that will work in a Speedster. The twist pullrod linkage should work fine as long as there's no slop.

Last edited by DannyP

His words Danny- "And no internal vanes to route the air evenly over the four cylinders". It doesn't matter who made the shroud or what fan it's using; if there's no directional work inside the thing won't come close to even temps from cylinder to cylinder.  I stand by what I said.  Just look at all the work you did to make it work satisfactorily.

Guys, as always I appreciate all your input.

Al, yes I'd seen that thread - it was one of the first I found when initially googling for fan shrouds. Hence my comment about no vanes inside. It was meant to be a non-partisan comment, just a plain description of the situation.

To my mind that thread is similar to a cross-section of Speedster owners - all the way from those who just want to drive their car regardless of what's under the hood, to super-knowledgeable, technical experts who want the absolute maximum from their engine and/or the perfect engineering solution. I stand somewhere in the middle. I can learn from and appreciate the technical expertise in analysing the problem and going to huge efforts to make things work perfectly, and to be honest the techie geek part of me really loves reading this stuff (I try and bore my wife silly with this new-found info, but for some reason she sticks her fingers in her ears, goes blah blah blah and walks away!), but also I realise that:
a) my driving, wile spirited at times, will never put this car under extreme strain
b) I live in England, so cooling is not so critical as in hotter climates and
c) my engineering skills are minimal.

And whilst I would rather put everything back to stock cooling, that is a level of spend I'd rather not do on a 'learning' vehicle. This is part of the deal with myself on my first Speedster - spend where necessary, learn as much as possible but don't go for perfection.

So Danny, I'll follow your lead to a large extent and look to fabricate some kind of simple internal deflector to redirect some of the air towards no. 2 and particularly no. 4 cylinder. As you know, the fan casing has deflector vanes already cast into the rear to cause a swirl effect. I'll also look to fabricate some sled tins, because I appreciate the aerodynamics of the whole situation.

And I stand corrected, in double-checking the securing straps they are indeed stainless steel. :-) And the crossbar/hexbar carb control doesn't fit in a Speedster with a 911-style shroud, hence the twist pullrod fabrication that sits behind the shroud (looking from the rear bumper).

However, I will be working on the 80/20 rule - it's relatively simple to achieve 80%  improvement but the final 20% takes ever increasing effort/money (which I won't be doing). But I do plan to seal the hell out of the engine bay to maximise the effectiveness of the fan.

Meanwhile, I'll be sanding down the shroud, getting the dremel out to make the carb manifolds fit properly, checking threads of manifold studs (some are a bit cross-threaded) and figuring out how I can tidy the engine bay. I'll also run a compression test whilst it's easy to do so. One thing I noticed was the non-standard dipstick/oil temp sensor: it doesn't seat properly at the top of the dipstick tube, there's around a 5mm gap, which I think has been letting oil spray out.

Thanks again, and tune in soon for the next episode of Mothy's Garage Adventures!

Martin, two things:

1.  "the twist pullrod fabrication that sits behind the shroud" (from your photo) is called a "Bell Crank" throttle linkage.  Lane loved his and there are a few more on here.  A slightly different version was also used on the original 356 engines, too, sitting upright between the distributor and generator.

20210125_144248

2.  Many of us with 1,915 and larger engines with the added 'sump under the sump' have found that the crankcase pressure is enough to cause oil to seep out of lots of different places, including the dipstick.  One way to minimize this (if you have that added sump) is to run your oil level no higher than halfway between the two indicators on the dipstick, which should put you half a quart low.  Nothing bad seems to happen (there's lots of oil in the sump) and it stops pushing oil out everywhere.

2a.  There are two versions of the dipstick temp sensor:  One that drives a temperature gauge (I have never actually seen one of these, but have heard rumors of their existence) and another that is basically a switch that closes to cause the oil light in the dash gauge to illuminate.  Gene Berg sold those for a while (Might still do).  

Just a heads up.

Gordon - I love the 2a. It reminded me of The Spanish Inquisition

Spanish_Inquisition

"There are two points to consider - 1, the bell crank. 2, the crankcase pressure leak. 3, the dipstick sensor. There are three points to consider.."

1. Thanks for the info - FWIW the bellcrank throttle linkage works fine and I'm completely happy with it. Easy to maintain and tweak.

2. Good point, well made. I will endeavour to follow your advice on this.

2a. I've not traced all the wiring on sensors etc to give a definitive answer, but I know when I wired up the disptick the wrong way round the temp gauge immediately went to max as soon as I switched the ignition on. Once fixed, the gauge worked ok. I'm sure there is another sensor somewhere. I presume this might be it?

20210125_145100

I'll remove the dipstick and test for a current in a boiling cup of water.

Attachments

Images (2)
  • Spanish_Inquisition
  • 20210125_145100
Post Content
×
×
×
×
Link copied to your clipboard.
×
×