I am trying to assemble an original CMC side curtain from a 1991 kit, and I am the third owner. It's been 8 years for me now and I got the car on the road this past Summer. My question today is: Do I drill the holes bigger on the S/S outer plate of the mounts to fit the tiny carriage bolts and O-ring seals? Nothing is said in the CMC manual other than to use these items. Or should I find some matching S/S Screws to fit the cap nuts that I have? I do not have a clue why they would use carriage bolts - as the square post portion of the bolt does not fit the correct hole size of the mounting plates. I plan to use 3/16" Lexan to replace the junk that came with the kit. I also noted the Rubber Trim that I got with it doesn't look the same as in the drawing in the original manual and is pretty old. Is there better stuff out there? Thanks for your help in this matter.
Replies sorted oldest to newest
Hey Ed yes use SS screws and not carriage bolts but... before you go much further, look at this thread here. Use the magnifying glass thingie on the right side of the black band at the top of this page to search for "side curtains," and "plexi" and you'll find more tutorials.
Your best bet is to dispose of any of the old rubber and canvas bits from the CMC kit and buy stuff that works from McMaster Carr or similar. McMaster I think also has the ferrules or tube fittings you'll be using to make the holding pins fit in the tops of your doors—in case those are MIA.
That's all I got.
Have you looked into Troy Sloan's Cruzin' Windows? Do a search here.
I have a CMC and used the CMC mounts only at the rear of the windows, but did something a lot different on the front mounts.
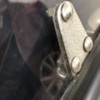
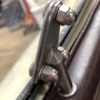
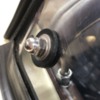
For the rear mounts, I used small stainless steel carriage bolts and drilled a hole in the mount just big enough to accept the square shank of the bolt head as a press fit, so just make the hole a little too small, then place an O-ring under the screw head and press the bolt into the mount, then screw the acorn nuts onto the other end, like this:


I used washers under the nuts because the threads were a touch too long so this worked well and looks good. You could also use lock washers. I also made rubber gaskets between the mount and the plexiglass (cut piece of bicycle inner tube).
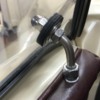
Up at the front, I went with a 5/16” stainless bolt bent as a mount to allow a little fore/aft movement to install the pegs into the door easier.

 It’s just a bent, 5/16” stainless bolt with the head cut off (door end) and the threads cut long enough to thread the Acorn nut on but short enough to compress the rubber washers a bit and hold everything firmly together. I used a bolt because Stainless Steel is notoriously hard, brittle and difficult to thread (at least with my die set) so it was easier to cut off the end than cut new threads. This bolt mount could work as well at the rear but I discovered that after I made up these windows.
Anyway, this set-up works great.
Attachments
Thanks for all the help. I plan on using some of the original parts that came with the kit. I am the 3rd owner as the last two not only could not mount the body to the frame, but had no running engine, no wiring, and cut taillight and back-up light holes in the wrong places. You should have seen the holes that one of the guys drilled straight down on both sides to mount the windshield that went all the way thru. It was also painted with the wrong type of paint that checked yet never saw daylight. All redone and has been on the road just over 100 miles so far. This club of ours has saved me a lot of time. I am in Ketchikan, Alaska that is on an island and only a couple of local hardware stores and a NAPA auto parts store. I don't think the last owners even knew of the www.speedsterowners.com. or used the internet to find what parts they may have needed. Lucky for me I used to work for a VW dealership when I was in High School in the 60's. Been a fun project - again thanks for all the help.
We had one other owner/builder on here from the Juneau area, I think, years ago, but he’s been silent for some time. We once had a member from Whitehorse, Yukon Territory, but he retired to Niagara, New York years ago.
There is a tremendous amount of building knowledge on here and we’re all willing to share it. Don’t be afraid to ask questions, and enjoy your Speedster!
Gordon, the guy in Juneau 9 or 10 years ago would have been my friend Don P. who sold this project to me. Figure 13, Page VII-15 in the CMC Manual says, "Additional stud for side curtain flaps" But I noticed when you did the "Installing a Stay Fast Top" that it showed you used an inside snap near the bow mounts. I was thinking water off the side curtains would run back and go to the inside - or does the weather stripping divert that for you? Should one use 2 snaps - one in and one outside? Lucky for me the original vinyl top material is still in okay condition as it was left in a tight plastic bag all these years (22). I am guessing that a guy should attach the top material to the front bar on the windshield first, before using the little support bracket that is on the bow mounts that tightens things up after all things are in place. I am planning to use a small electric heater inside the car (that's already in a heated garage) to help soften the vinyl top for fitting it. (No hot sunny days here). It rains ALOT here in S.E. Alaska, sometimes 180" per year so now you know why I have low miles on the car so far. Wish me luck ...
OMG!
It's "The Brotherhood of the Traveling Alaskan Speedstah Project"! You should write a book! (or get @Sacto Mitch or @Stan Galat or @edsnova to Ghost Write it for you).
First, I did not use the CMC top because it got chewed on by renegades from a mouse condominium in my shop attic. Probably not as large as a robust Alaskan mouse, but chewy little buggers nonetheless. I used a Haartz Stay Fast top from Vintage back in the early 2000's and I believe it is a bit more flexible than the CMC vinyl. Just resign yourself to the fact that, in your climate, the top is never gonna get warm enough to be really stretchy so getting it taut is probably good enough. @Alan Merklin may have some thoughts on this, too.
That said, yes, I pulled the side window pocket material down at the rear of the door and attach it to the inside of the body (rear seat area) just behind the door to pull the bottom of the pocket tight. There are also snaps along the top material leading to the corner at the rear of the door.
I can post photos if you need them. The top, when up, forms a pocket around the side window but at the rear of the window the pocket turns into a perfect air scoop, dumping gobs of cold air right in behind the seats. I made my side windows about 2" - 3" longer so they fit into the rear of that scoop/pocket better and seal it up with the weatherstrip. No water can get in there, either. The rubber weather strip from CMC works OK, or you can check out McMaster Carr or Amazon to see what else is out there that might do a better job.
"I am guessing that a guy should attach the top material to the front bar on the windshield first, before using the little support bracket that is on the bow mounts that tightens things up after all things are in place."
Yes. Get all your snaps in place, get the windshield bow in place and latched down and then pull your tensioners up at the bow attach points to tighten things up. When working right, the tensioners push the top bows upward a bit to make everything tight-ish. Refer to my top install article on how to pull the top material over the windshield bow for the right tension. Don't over do the tensioning as the windshield is a weak point and can easily crack. Carey Hines at Beck can send you a new one if that happens.
Yup, people in the lower 48 usually don't realize that SE Alaska is a rain forest along the coast. I was a Ham Radio operator in the 1960-1974 period and did phone patches for the Coast Guard base on Ketchikan back to New England (there were a bunch of "Down Mainers" stationed there) and heard all about the almost constant rain. Keep your toes dry! A good friend of my family was Sandy Bicknell over in Juneau. He was a developer and, for over a couple of decades, a big asphalt producer, too. He originally drove to Juneau looking for work in a red, 1963 Porsche 356 Cabriolet. His wife raced Sled dogs all over the Territory. The couple are Legends back here in Massachusetts, although Sandy died a couple of years ago.
.
@Gordon Nichols posted:....He originally drove to Juneau...in a red, 1963 Porsche 356 Cabriolet. His wife raced Sled dogs all over the Territory...
So, finally we discover who the Cab's heating system was designed for.
.
I was out in the garage this morning and got some more photos for you. The first is that infamous "pocket" at the rear top of the window opening. You can see how the extended window was shaped to fit right up into the pocket to close off the gap. Any water blown up in there flows down along the rear of the window and off outside (see second photo).
And now for the hokey part, but it works - I extended the rear of the side windows about 2" so that they seal against the fabric better and totally close up that gap. Even though they're longer, they don't cause any problems when working the doors. I have also run the door weather strip right to the top of the opening to seal the small gap that was still left. There is a strip of clear bra material (7 mil) along the tops of the doors so the window seal doesn't affect the paint.
This is that equally infamous inside snap that you talked about. All it really does is pull that inner flap taut to give the side window sealing tab something to seal against.
And here is another shot of the inside snap, next to the tensioner mechanism which is in the "low tension" position. Remember that I used the VS top, which is a bit lower, overall, than the CMC so you can see that I had to lower the center top bow a bit to make everything fit and look good. I went for the lower look to resemble a Hot Rod "Carson Top" and while it's not a flat-top like a real Carson, it's pretty low. Might not be for you if you're much over 5' 6" !
Attachments
Just so you know, the Bicknell's never drove to Juneau. No highway there yet road wise. I worked my career on the Alaska ferry system that changed their name to get Federal funding (in 1969) to 'The Alaska Marine Highway System'. These ships are used to service villages and towns throughout the state's coastline. The larger ships used have passenger accommodations and food services aboard as in some cases you are on a ship 5 days or more. AMHS runs vessels from Bellingham, WA and as far as the Aleutian Islands. Your friends may have driven up thru Canada into AK then down to Haines, AK to then take the ferry just 4 1/2 hrs. to Juneau. Later on, there was a road from Whitehorse to Skagway, AK that would have saved them several hundred miles of driving. I hope these notes are not considered advertising. (L O L)
Love the pictures - Thanks for posting. The weather strip shot on the outside looks great and should seal good. I sure hope they are still making that weatherstripping. I will have to make my side curtains longer too. Thanks for showing that.
I mocked up my side windows using pieces of scrap paneling left over from something. It was roughly the same thickness and IIRC I cut the piece long, then cut it in half vertically and overlapped the two halves to dial in the final length as I messed with getting the curves right on both ends.
My brother drove up there in 1965 after the big earthquake. He was driving an Austin Mini 850 at the time. The job he went up there to fill was gone by the time he got there so he left Fairbanks at 7am on a Sunday morning and arrived back in Central Massachusetts the following Thursday morning. He was a little nuts..... The entire front of the mini had to be repainted/re-glassed from stone chips on the roads and each headlight had a clear plastic, domed shield over it to deflect rocks. The windshield had something like 27 star cracks in it.
I just remembered that the Coast Guard guys from Maine stationed in Ketchikan were a little surprised that it was warmer there in winter than the east coast of Maine. They came from Lobsters and you guys have Salmon. One or two of them (there were five, all from central Maine) ended up staying there. This was back around 1970 or so.
Yep - a lot of guys in the USCG retired to this neck of the woods. I also worked with several that had either retired or left the Coast Guard to be working on the Alaska Marine Highway System. All staff aboard our ships have to be in the U.S Merchant Marine and the USCG is where you go to get your documentation to be in the Merchant Marine. Good guys to work with as they had all been around ships before. And yes Gordon - I fish a lot for Salmon. We can it, smoke it and can it and of course we freeze some too. AND the saying goes: Back to the subject at hand, can you get a shot of that weatherstrip and measurements of its width etc. as I am going to have to order some. E-bay works great as well as Amazon, but others are good too. Anyone out there know the parts numbers as well would be great. I think this project should be completed before next spring.
I looked and I don't have part numbers for the sealing rubber so I did the next best thing and here they are with dimensions:
You buy it by the foot. The last I bought was from Amazon but I'm sure it's elsewhere. The small bulb is used against the windshield frame and the lip tab is used around the rest of the glass. These are regular rubber, but I toyed with the idea of using EPDM foamy stuff - Maybe next time.
At the windshield corner posts, I snug up against the rear of the post with the 1/2" bulb, then transition to the inside of the frame, which does two things: (1.) It puts the top half of the "glass" inside of the frame so passing semi-trucks don't suck the glass outward (it is captured by the frame) and (2.) you don't have to follow a big curve and the straight glass against the inside of the frame makes a good seal.
Here's the top half:
And below, the bottom half. Another reason I used the mounting bolt, up front, is to allow me to bend the bolt's curve to get the angle of the glass along the inside of the windshield frame just right (which the CMC mounts don't allow you to do). Another thing I did was to use a heat gun on the bottom front glass corner to bend it in just a bit to fit into the corner better - No stream of rain into the car from the corner anymore.
Here's the top of the window glass showing the extra seam stitched in (my wife did it on her Quilting machine) to capture the top of the glass seal better AND, again, keep the glass from being sucked out by passing trucks. The top seal fits into the top material pocket and seals nicely AND you only lose 5/8" or glass area all around. When the top tensioners are tight you can close the door with no fuss - Here they were loose so the top droops.
The bottom edge sometimes gets sucked out 1/4" or so when passing a truck, but not often. I believe this is cured on VS cars (maybe others) with a short strap snapped between the glass and door's top bumper but I've never needed it - No water usually gets in there. I have thought of using 1/4" thick plexiglass, maybe on the next iteration, to cure all of this bending stuff, but what I have works and I drive a lot in the late fall and early Winter and have cured all of the major air leaks. Still working on the other 217 little ones as I find them, but my gas heater makes them irrelevant.
Attachments
Thanks again Gordon. Those pictures will do the trick. And the provided measurements will save me trial and error. I like the heating and bending and the way it makes things tighter. Did you apply for a patent ? I bet I am not the only one that went your route. With the slight bend and seal the door closes okay too. I will be getting a couple of SS bolts my next trip to town.
I'm a strong proponent of plexiglas or lexan side windows with round pop-out airplane-style vents. The windows seal better and improve visibility and the vents can drastically improve comfort. Unfortunately I don't have any pictures of the ones I made.
The most difficult part is getting them to seal fully where they meet the windshield. The flat side windows are tough to match up to the compound curve of the windshield such that they don't interfere with the door, keep water out, and don't get sucked out when driving on the highway. I never was able to make mine fully waterproof, but it was a huge improvement over the original side windows.


