Replies sorted oldest to newest
Excellent work! That is beautiful.
Thanks to Google translate I can say:
C'est très beau!
Great job!
thanks to my Okie translater, I can say:
Looks finer than freckles on a frog!
Bravo! Jolie.
The West Coast translator says "way cool, Dude!"
Will Hesch posted:thanks to my Okie translater, I can say:
Looks finer than freckles on a frog!
Out here we say, "that's finer than frog hair (& that's pretty fine)".
Good job, man.
My translator and me say you : THANKS ! ![]()
Hi everyone, I've been lurking in the background for a few months taking in all the great topics. My father started his project back in '92 with one from CMC, he got it to a point where it's completely road worthy minus some interior finishes and a few exterior blemishes that came from CMC. He's gotten older and hasn't done much with it so I offered to take the car and finish what he started (i'll post pictures in another thread).
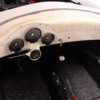
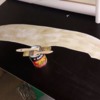
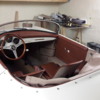
I am curios as to how this edge is finish(attached) to the body? any idea's, thoughts as I am looking to start the dash project this winter.

Attachments
Cant help you with that question, as your mad skilz with interior work obviously far exceed mine, so I have no doubt you can figure this one. But I can welcome you to the Madness, so consider that taken care of.
Hello, @VinceH, and Welcome to the Madness! We might be able to help a bit more if we knew (vaguely) where you live? Someone might be able to stop by and show off their dash trim or sumthin.... I began my CMC experience a year after your Dad, back in 1993 (Holy, God! Was that thirty years ago??)
Wow.... Another white CMC. Not a lot of white ones around, and do you also have the Burgundy vinyl interior, like me, or is that Walnut brown?
Anyway, there has been, in the past, a raging debate on how far the dash vinyl should go towards the matching door trim. Lots of VS cars were built with dash trim short-sheeting the ends until the latest owner of VMC started extending his out a bit more. Much celebrating of the replica faithful followed.
I assembled my dash trim without the input from this austere group (or is that Motley? Pro'bly the latter) and just used common sense about what matched to what and what looked good and that's the CMC way!
OK, so here are a few photos I just took, with comments:
I wanted to avoid the corner snap of my tonneau (which was installed before the dash trim (and that I have honestly, never completely used) so I angled the vinyl from the edge of the corner post to the edge of the dash bumper because it looked good to me. The dash bumper end angle follows the line of the door opening.
Another angle of the same spot. I figured out where the dash cover needed to end by placing the dash rubber bumper and drew a line with a pencil onto the dash (Let's see you guys with black cars do that!) then folded the end of the vinyl under on itself to finish off the end of the cover (Upholstery glue helps, here). Everything got glued on with 3M Upholstery Adhesive in a spray can (And Don't get any onya!)
This intersection, above, looks better than this in real life (and remember that the door is open in the photo), but the dash bumper-left should, in my opinion, match the space and angle of the door bumper to make a smooth transition. You may have to compromise with both bumpers (or add material to the end of one) to get them to mate evenly. Like on the body, a 1/8" gap between the dash and door bumpers is Nirvana. Something close to that is enlightened. Obviously, I was not enlightened, but it still looks pretty damn good. If I were to do it today, I would probably extend the top line over closer to the door bumper to edge to make the transition more seamless.
And here's the Macro-Lens close-up, showing where they meet and how they intersect.
Remember to fold the material under where-ever it ends to make a nice, neat, finished look. Staple the vinyl to the backside of the rubber bumpers - No upholstery adhesive really needed, but if you use adhesive on the bumpers it won't hurt anything - It just makes it harder to assemble and arrange everything. I only used adhesive on the dash cover itself to keep it from moving around. The rubber bumpers aren't going anywhere and they anchor the cabin end of the dash vinyl.
Lastly, I attach the dash bumpers from behind and used a trick so that I don't have any mounting screws showing. I got some 10-32 wing nuts with nylon stop nut inserts and some 10-32 threaded shaft. Position the rubber bumper where you want them and drill through them and right through the dash. Screw the shaft into the wing nuts with enough length to go through the bumper and dash, plus about 1/2 inch beyond the dash material. Use Locktite red on them to anchor the shaft to the wing nuts. Push the threaded shafts through the bumper and embed the wing nuts into the rubber bumper deep enough to be flush or a little deeper than the top of the wings. I used a Dremel with a cutting wheel to remove some rubber material to accept the wing nuts flush. Under the dash, put on a washer, a star lock washer and a nut, spin them tight and you're done. Go have a beer!
OH, and one last thing...... EVERYBODY uses some sort of trim strip under the dash bumpers to finish off the look, and everybody uses Silver because, well, that's what Porsche used! Silver looks kinda blah against Burgundy/Walnut and white. Seriously consider a gold trim strip (see last photo, above). No one will think it's weird and it just looks right. Even the PP's (Porsche Purists) think it's right and Porsche correct when they see it (but whadda they know?)
Attachments
Attachments
Thanks for all the reply's so far, let me clarify, the picture I showed is from a previous posting I dug up back from 2017. Like I mentioned, I've been lurking in the background sifting through a lot of useful information. I liked how he finished the dash and would like to recreate this one mine. I'll do another post with more info.
Thanks everyone.
Gordon's way is neater but "period correct" is to sock a trim screw in it where no one is gonna look. +1 if you use a flat blade screw instead of the ubiquitous phillips head.
Is it recommended to 1st sand the dash a bit prior to gluing the cover on? I have since changed my mind about waiting to finish the dash. I've just removed the windshield and starting to prepare with mockups before cutting the vinyl to shape.
Sanding the dash where the vinyl will be glued on would help, for sure. The gel coat might make glue adhesion difficult so just rough it up with 100-ish grit paper just to rough it up and make the contact cement bond better.
That's what I thought, just wanted to get another opinion. thank you


