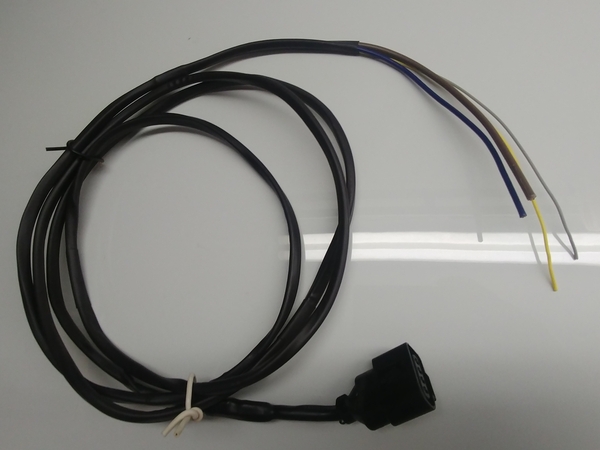
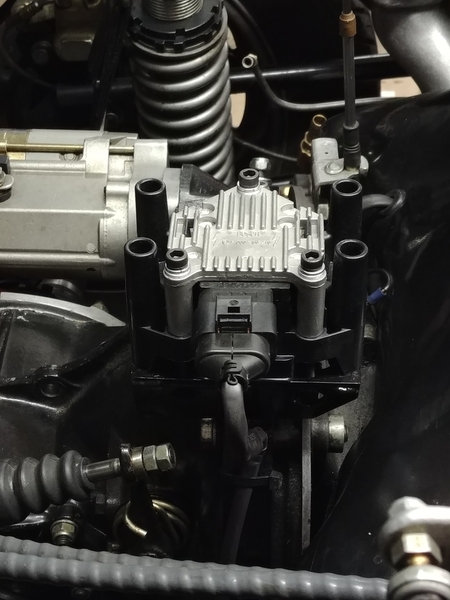
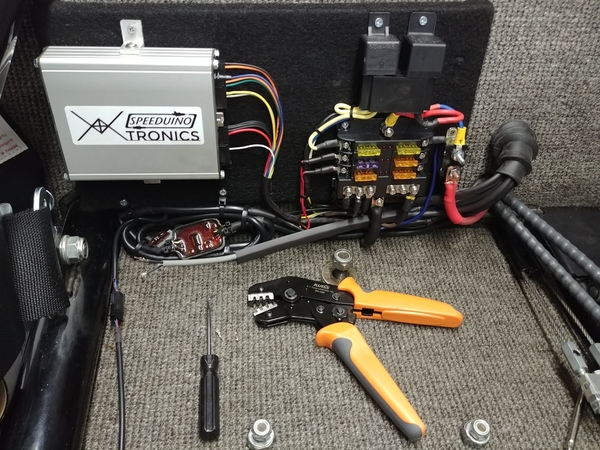
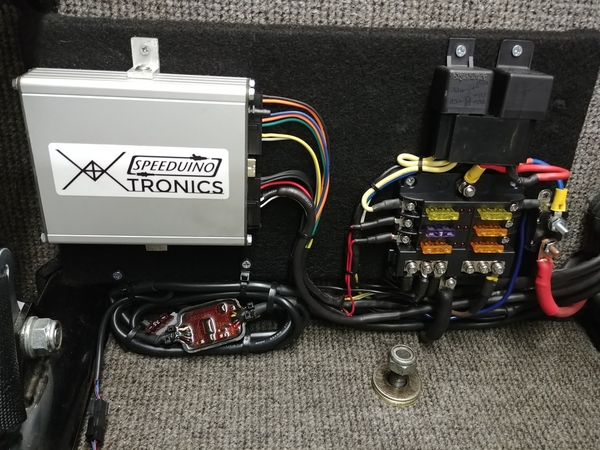
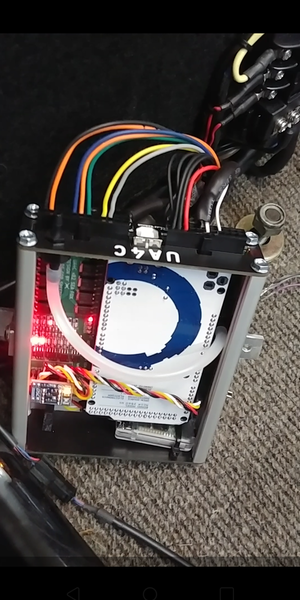
I got some stuff delivered. The coil connector didn't fit, it was for a much smaller VW 4 pin. So I sent it back.

Mike Pickett graciously mailed me an extra he had, that's on the way. Thank you, Mike! The coil is a Bosch and looks exactly like Mike's.

I saved some money on IAT and CHT sensors, I got them both from Ballenger Motorsports for $53 shipped, way cheaper than CB. Plus, they came with pigtails too, so I saved about $60 on sensors and connectors. They are both 1/8" pipe thread, so very small. I got my injectors too, and 4 connectors. I'll post a pic when I install them.

I did some work on the fuel system. I took the fuel rails, injectors, air filter tops and velocity stacks off the throttle bodies. Cleaned up the whole she-bang.

The throttle bodies measure 48mm on the bottom, and 49.5mm on top. The velocity stacks measure 46mm at the bottom. I'm seriously considering making aluminum shims to make them 44 or 45mm throttle bodies, albeit with 48mm throttle plates. If the smallest point is 46mm, there is no need for a bigger hole/passage IMHO. The only thing a larger passage does is lose velocity. I may see how it runs first, this might be a non-issue with injection vs. carbs. The injectors are below the throttle plates. I know that the top of my manifolds are bigger than the bottom of my 44mm carbs, but I didn't measure them.

I decided to use a Subaru fuel filter. All the connections on the pressure side are hose barb(8mm or 5/16") under the tank, so I'll use some Continental EFI hose and those fancy EFI clamps bandied about in that other thread(Jimmy's). The regulator is ready to go and the fuel pump works. Everything on the pressure side in the engine bay and on the entire return side is 6AN. I'm going to drill a hole in the top of the fuel tank and install a 6AN bulkhead fitting. There will be a metal tube inside the tank that returns fuel to the bottom of the tank: no bubbles. I need to run another 5/16" metal hard line down the center. It's 58" long so a 5 footer is perfect. As I found out before, 5/16" fuel line is good for 350hp.

Currently working on plumbing/hose/fittings parts list. I'll be starting this in mid-October.20200913_185425[1]20200913_185446[1]20200913_185514[1]20200913_185843[1]

Attachments

Images (4)
  • 20200913_185425[1]
  • 20200913_185446[1]
  • 20200913_185514[1]
  • 20200913_185843[1]

Finally starting on the actual build, after all the parts and pieces have been gathered.

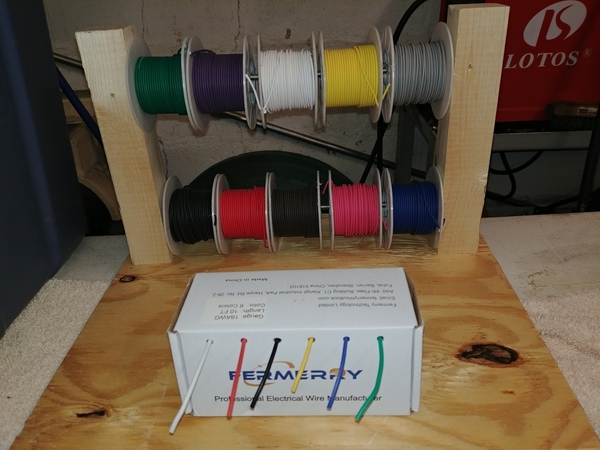
@Alan Merklin it's funny you posted about the wire storehouse. Wire came in loose bundles. I found these reels on Amazon for a few bucks. I made this rack yesterday:20210126_113129

30 feet each of 10 colors of 22 gauge.

10 feet each of 18 gauge in 6 colors.

Well at least I'm starting it. I'm doing spark only first then will add the fuel after I get it to run on carbs. I think it's a good plan.

Attachments

Images (1)
  • 20210126_113129
Last edited by DannyP

I just realized I never finished my parts list and costs.

I was at $810, but saved $60 by buying the CHT and IAT sensors from Ballenger Motorsports, so we're at $750.

I spent $210 on Amazon back in October for Gates Barricade EFI hose, clamps, fittings, adapters, some AN braided hose and fittings for the engine compartment, a fuel pump clamp, and even an adjustable aluminum AN wrench.

I spent another $40 at Advanced Auto getting some copper/steel fuel lines for feed and return through the tunnel.

I may have spent a few more dollars at Jegs or Summit buying a bulkhead fitting and teflon washers for the fuel return fitting in the tank.

I'm right around $1000, like I figured, except for the sweat. I've decided to go for idle speed control via  a stepper valve, so that valve and housing and vacuum hose will get added when I figure it out. I'll be using the built-in ports in the CB throttle bodies to add a "calibrated air leak" to control idle speed.

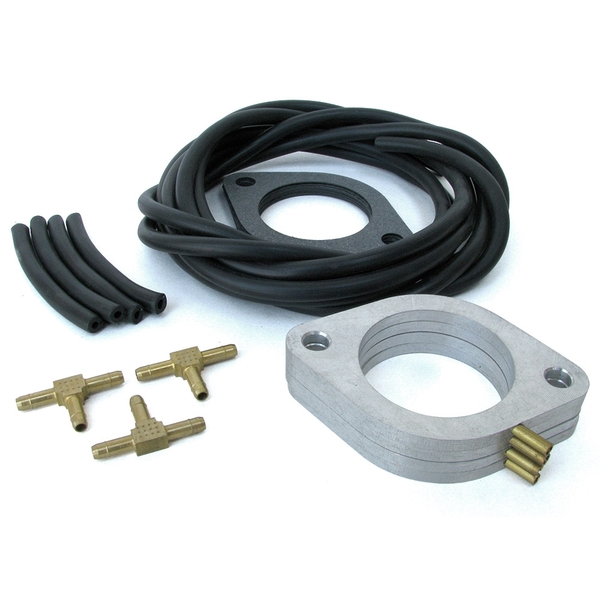
SpyderMike from the spyderclub.com most graciously(BIG THANK YOU!) sent me his CB vacuum reference kit. This installs a spacer under each throttle body with a small brass fitting to allow all 4 intakes to couple together. This hose gets routed to the ECU's onboard MAP(manifold air pressure) sensor. I'm hoping to hide the vacuum hose under the fan shroud.

vacuum kit

I spent some time today laying out the wiring on paper. I've got 28 wires to route to and from the ECU. Some are already there: power, ground, ignition, tach, three fused relays, and four wires to the fuel pump up front. For the fuel pump I'm stealing my trailer light harness that ran through the car when I flat-towed.

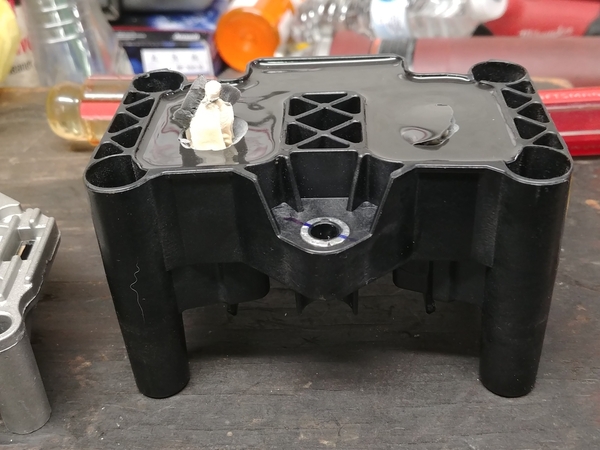
I've got to make a new coil mount for the Bosch "smart coil" to replace the "dumb" one from the Ford Escort(Megajolt).

I'm running new wires to the VR crank sensor, CHT, IAT, TPS, coil and injectors. That should keep me busy for a while...

Attachments

Images (1)
  • vacuum kit
Last edited by DannyP

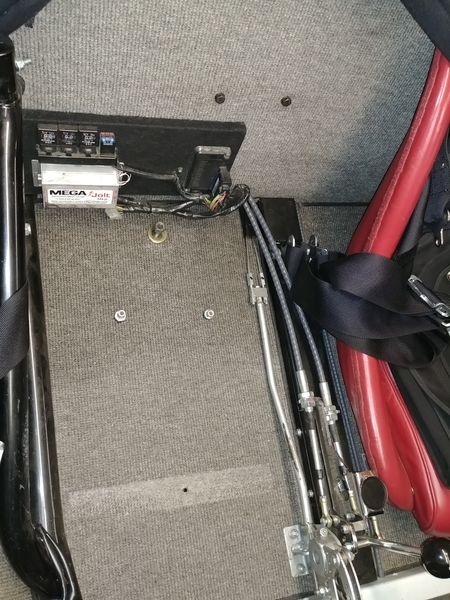
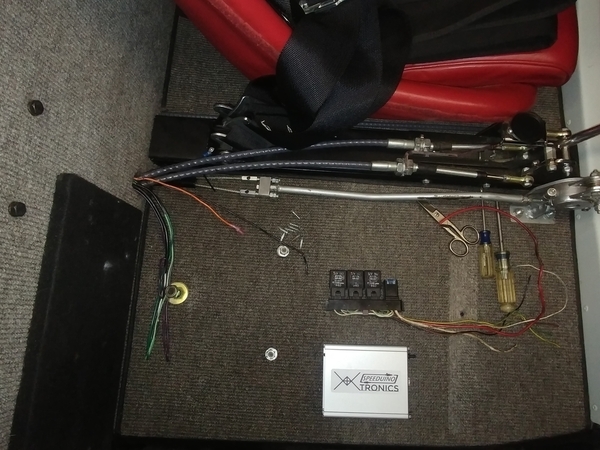
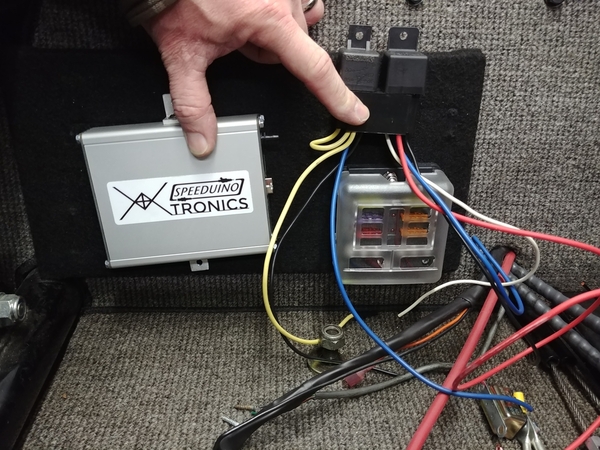
I removed all the Megajolt bits and wiring. I also ordered a 6 fuse power and ground distribution block for $15 delivered, should be here tomorrow. It's 3.5" square, so it should fit nicely on my back board.20210130_141844

I'm reusing my old relay board, it's from a 1990 Subaru. Very thin and compact for 3 30 amp relays.

The wires coming through by the shift cables are the Vintage harness. Black is switched ignition, orange to the tachometer, light and dark green to the GM oil temp sender, and purple to the oil pressure idiot light. The last three have nothing to do with the EFI, but the harness needs to be inside the cockpit. I'll heat shrink and tuck them under the board.

I'll connect the ground bus to the steel center tunnel and run an always hot lead to power it all.

I also found a Chrysler idle air control(IAC) stepper motor and wire pigtail for $10 on eBay. I'll make a manifold out of a hunk of aluminum and put a tiny breather filter on it.

$1025 so far.

Forward progress.

Attachments

Images (1)
  • 20210130_141844

Chrysler IAC showed up, so I'm off to the metal place today to see if I can get a 2" x 2" aluminum chunk for the IAC manifold.

The fuse panel showed up too so I've mounted that and am starting the wiring(and recording the colors and gauges for a schematic). I ran an 8 gauge(already had) feed to a 40 amp circuit breaker($5), to a couple relays(already had), then to the fuse panel. 8 gauge ground buss next then the small and tedious wiring begins.

I used my new ratchet Molex crimper for the 3 pins on the VR sensor, that thing is SWEET and well-worth the $23 price. Shielded cable is a MUST on VR sensors. One heat shrink later and it looks perfect.

I bought a later VW Beetle plug wire set($37) and proceeded to cut the coil ends off. I made up and 8mm silicone wire set using the Ford Escort wires with the VW coil ends. A little silicone spray and they went together nicely. The Ford wires are the perfect length when the coil is mounted near the transmission, and the plug boots are a perfect snap fit on the plugs and with the Bosch air seals.

$1067 so far. These projects all have price creep, don't they?

Pictures later, I promise.

As promised, I have some photos. Didn't get that much done today, had to deal with a repair shop that couldn't get the OBD plug to work for a yearly emissions inspection on Michelle's Subaru. There was nothing wrong with it. Of course.

20210204_181607

I didn't want to Velcro or tape the ECU to the board. Not a big deal to cut a couple small pieces of aluminum angle for mounting. The 6-32 screws had to be cut very short to not interfere with the board. Good size comparison of the small ECU.20210204_194241

Hybrid Ford Escort 8mm silicone wires with VW New Beetle coil ends and old Beetle Bosch airseals.

20210204_204256

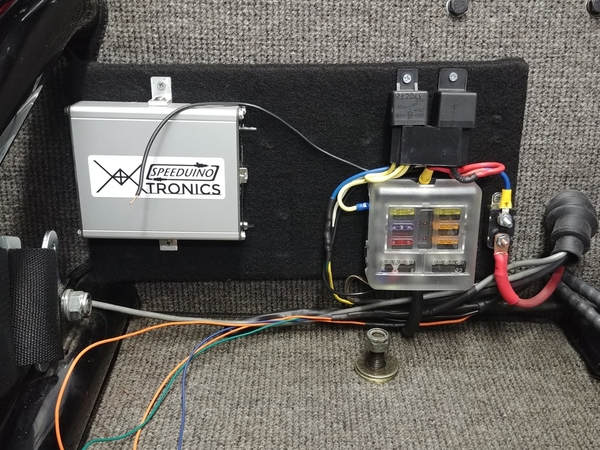
Decided to scrap the Subaru relay panel. I'm using a 40 amp circuit breaker on the main feed, a 40 amp Bosch-style main relay. Then another 30 amp for the fuel pump. The 6 fuse panel distributes power to the ECU, O2 sensor, coil, pump, and injectors. It'll lay out like this pic above eventually.20210204_204737

Waiting on some 6 x 70mm bolts to mount the coil. Thankfully I don't have to re-make the mount, it's welded to the transmission strap.

Tomorrow, some serious wiring. Maybe I'll fire it up on Speeduino ignition and carbs soon.

Attachments

Images (4)
  • 20210204_181607
  • 20210204_194241
  • 20210204_204256
  • 20210204_204737
Last edited by DannyP

I did some more work today. It's coming along nicely.20210206_141428

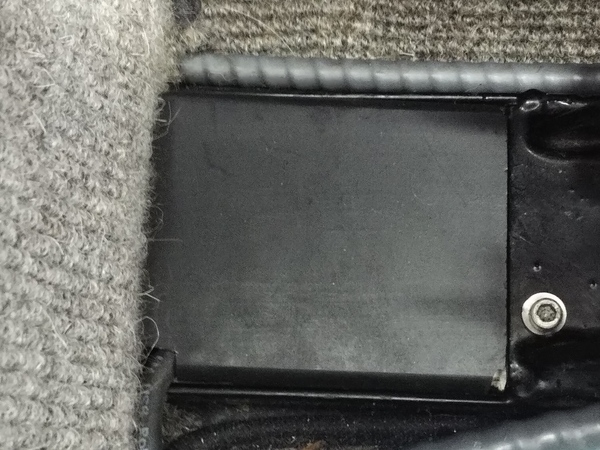
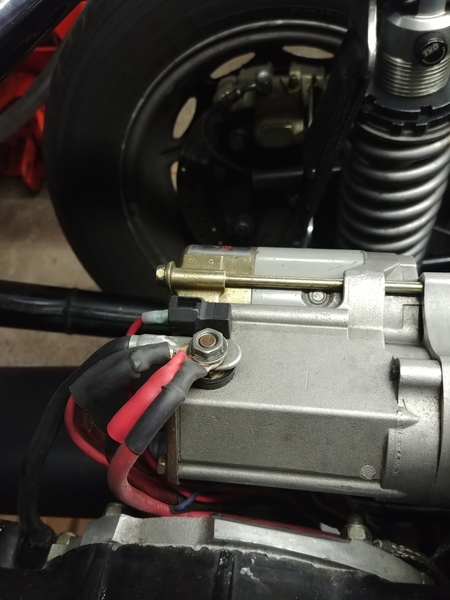
This is the ground attachment for the whole system. Crimped the ends with a big hex crimper with multiple dies. Then marine heatshrink and star washers under bolts. You can see the brake, clutch and fuel lines in the 1" high tunnel.

20210203_100012

This crimper, cutter, and ends was $30 on Amazon.

20210206_141453

Greg makes custom fiberglass covers for between the seats. Finishes it off nicely. I cut a small slot in the lower left corner.

20210206_183437

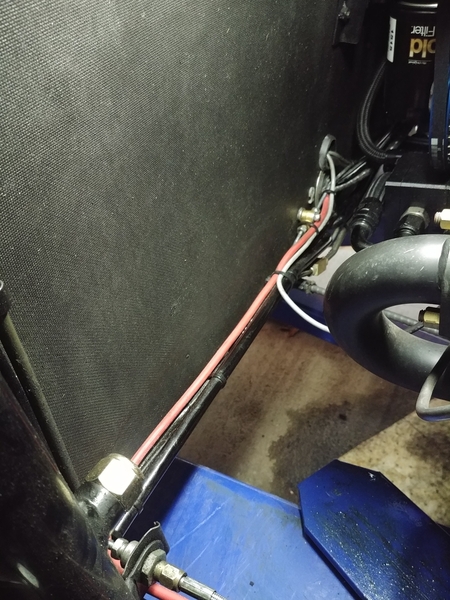
The EFI feed is closest to the camera.

20210206_183454

It runs down the left frame rail then acrid the firewall toward the center. You can also see my VR sensor wire. It is grey 2-conductor with shield. You can also see the firewall grommet.

Attachments

Images (5)
  • 20210206_141428
  • 20210203_100012
  • 20210206_141453
  • 20210206_183437
  • 20210206_183454

More:20210206_183630

The other side of the firewall grommet and 40 amp system circuit breaker.

20210206_183621

All that power and ground stuff is done. Main and fuel pump relays are done. Tomorrow I'll move on to ECU connections. Once I power the coil and terminate the VR crank sensor and tachometer at the ECU I can fire it up.

I tested my work so far, and no smoke was released or fuses blown LOL!

I have some boots on the way to cover the circuit breaker studs.

I'm really pleased with the way it's coming out. That little fuse panel is sweet too.

Attachments

Images (2)
  • 20210206_183630
  • 20210206_183621
Last edited by DannyP

Good evening. I did a lot of wiring today. It took a long time to make and run the coil harness. Four wires: power, ground, and two small wires to control the two smart coil drivers in the pack.

I am sleeving as much of the harness as I can in heatshrink. I bought it in 8 foot rolls, but you can only get a couple feet to slide over at a time.20210207_122423

That's the only picture I took today. I also installed the wideband O2 sensor and ran that wire toward the ECU.

Pretty much all the wiring has been run except for injectors, TPS, head temp and intake air temp. That will come later when I do the fuel portion.

Michelle was a valuable help fishing the wires through the firewall grommet, which is now curved and impossible LOL.

Tomorrow I'll work hard on terminating the ECU wiring, then maybe fire up on spark and carbs.

Attachments

Images (1)
  • 20210207_122423
Last edited by DannyP

What we need is a pause every so often, and then get a synopsis of what's been going on by Pintel and Ragetti, those two wayward pirates from the Caribbean with a knack for getting to the heart of things:

Pintel and Ragetti

"Well, he started out with a perfectly good, running car but desired a bit more, so he decided to go whole hog on a computer-controlled engine management system, but he wanted to do it in steps so he started with deciding on what major parts to use and ordered some and got others from local junk yards.  Then he worked on the wiring for everything and had to buy a few tools (he loves tools and has a lot of 'em) to complete some of the larger connections.  

"Meanwhile, some of his parts began to arrive (even though deliveries are delayed by the Pandemic) and he could begin to piece together the fuel system and make necessary modifications to major parts.  The wiring has been progressing while he has made the harnesses in the car, many of which are always visible, as neat as possible and added lots of fuses and circuit breakers for added safety and to prevent the loss of wire smoke from the Lucas parts.

About those British, "Lucas parts", most recently, he has conducted the "Lord Lucas, Prince of Darkness" test for his combined British, Teutonic and Middle Earth electricals and found that no powered smoke escaped, so he will soon be testing the ignition side of the project by "Releasing the Kraken"........  
Oh,  Sorry....   No Kraken just yet....  
But he will be starting the engine with the new Engine Control Unit (ECU) and, once that is successfully done he can move on to installing the fuel delivery system and checking for more smoke.

Come back again, soon, as we discover more things to tell ye!"   -   Pintel and Ragetti

Last edited by Gordon Nichols

I got a lot done today. I was happily wiring away when my coil bolts came in the mail.

So I took a break from wiring. I drilled and tapped the three holes. I had to put some ALB lightening holes in my bracket(but only for bolt clearance), there is a piece of steel angled under the flat part the coil bolts to. A bit of masking and paint and:

20210208_165356

Then back to the wirework.

20210208_190704

I tied up the O2 sensor wiring under the ECU, that came out a couple feet long. It's OK for now. Those Amazon crimpers are totally awesome. After over a dozen perfect crimps, I'm sold. I pull-tested every one. I don't think I'll ever solder another Molex pin again(that's how I did the Megajolt harness in 2008).

20210208_190722

The fuse box is all done except for the injector harnesses, one for each side of the motor. Driver's side will also have the TPS. Passenger side will have the wires for head and intake air temperature sensors.

20210208_202533

And all done for today. I powered it up, seems OK. Main relay clicks, then the fuel pump relay clicks on for 6 seconds to pressurise the system. O2 controller powers up and reads 19.0(no fuel i.e. full lean).

Tomorrow I'll get the laptop out and start testing. I'll pull the plugs and spin it over, checking for crank signal. Then I'll throw a timing light on it and verify a fixed(10 degree) value.

If that checks out, new plugs in and FIRE it UP! Maybe load a spark curve first LOL?

Attachments

Images (5)
  • 20210208_165356
  • 20210208_190622
  • 20210208_190704
  • 20210208_190722
  • 20210208_202533
Last edited by DannyP

What's the little potted thing under the Speeduino box?

Yup...  Crimped Molex terminations are the way to go.  Properly done, they make a stellar connection and with a hand-held crimper you can work almost anywhere.  

We didn't have Amazon as a go-to when I was working so we bought the crimpers (both hand held and bench) from Molex for astounding $$$$$$$. The hand-held equivalent of the one you show (very similar to mine) was a shade under $300 bucks!  (and how do you spell "Rip-Off?"

Nice progress there, Dan.  Your thing of beauty is becoming more beauteous, inside and out.

The little potted thing is my wideband O2 controller. I thought I had posted pics, but I guess not.20200826_12153120200831_12375020200831_161615

The wires are really long. I can shorten them later.

Yeah I couldn't justify $300 crimpers. $23 knock-off, absolutely.

Thanks Gordon.

More later, I should be testing for spark.  It's snowing so I'll be in the garage today.

Attachments

Images (3)
  • 20200826_121531
  • 20200831_123750
  • 20200831_161615
Last edited by DannyP

Ah....   I see you're using the lab potting technique we used on cables in the 1980's.  We had forms for some of them but others, especially for pre-production quantities, we did free-form with masking tape - worked great.  You really can't beat submersion potting for anything in a hostile environment (and your car, at any speed, in rain, qualifies as a hostile environment).  

Snow's just starting here at 10am.  Another 6" due here in the snow belt of central Mass.     We're sitting somewhere around 2'+ on the level after compaction.  I'll be working inside where it's warm.  Just checked to see if the velcro adhesive on my heater controller stuck after I heated it up before applying.

It's still sitting there, stuck under the radio.  

Life is Good

Attachments

Images (1)
  • Life is Good

20210209_134422_HDR

That is a very clean 36-1 toothed wheel signal. I loaded up a 16 x 16 version of my 10 x 10 Megajolt spark table.

Tunerstudio has some really cool features. It has interpolation. Put a value on either end of a row or column in any table, highlight, click interpolate, and all the cells in between the two fill in equally. Sweet.

Tomorrow I'll be firing it up hopefully.

Attachments

Images (1)
  • 20210209_134422_HDR

Thanks, Martin.

I know it's been a few days since I posted. I hooked everything up and thought I was ready to fire it up on spark only. That seems to be the hardest hurdle for almost every install.

There is an option in spark setup for output either "going high" or "going low". It depends on which coil you use, most are "going low". This didn't make too much sense to me, but going low has no voltage on the output, goes "high" for a couple milliseconds(which is the dwell time) to charge the coil, then goes low to fire the coil. Special thanks to Mike Pickett for the assist!

Tunerstudio is set going high initially which leaves 5v on the output basically all the time the key is on, except when the coil fires. The output goes low to charge, turn goes back high to fire. The problem with this is that coils burn out, just like in the old days with key left on and points closed.

20210210_133035

Oops! New coil from NAPA, $90 with tax. Ouch. I could have waited for $60 shipped but... This little option in spark setup is obviously crucial. The good news is the coil driver, the smart part, is OK and I'll save it in the tool/spares bag in the car. It simply unsnaps from the coil. You can just see it on the left.

The Lucas Druid Gods should be happy 😊. I let out some sacred smoke from the coil. It got HOT and smelled funny! Nothing else was harmed, thank goodness.

I changed the setting in Tunerstudio and mounted the new coil. I tested the coil outputs both by watching the ECU LEDs flash and hooking the outputs to my mini-oscilloscope. Good to go. Then tested at the coil connector, OK. Removed coil driver and tested the driver output, and good once more. Final test, hook it all up and test at the wires with an inductive timing light. And good, ready to start!

Fuel pump fuse in, fill the bowls, a few pump squirts, and success! It runs!

I also have video of my AFR at 14.5, sliding down(richer) to 13.5 when fully warmed up. On carbs. You CAN get them lean and running well on carburetors.

I have some short video but get errors when uploading even though the files are only 10mb mp4. I took a couple screenshots instead.Screenshot_2021-02-13-09-42-01Screenshot_2021-02-13-09-41-36

Attachments

Images (3)
  • Screenshot_2021-02-13-09-42-01
  • Screenshot_2021-02-13-09-41-36
  • 20210210_133035
Last edited by DannyP

Once it was warmed up and idling smoothly I got the timing light out again and verified that TDC was EXACTLY TDC.

I was a few degrees off, but that is easy to change the timing offset with a couple clicks in the software. You can set it anywhere between 0 and 360 degrees of offset. It was set for EDIS at 90 degrees and I ended up at 95. No more timing light, ever. I hope. It's really difficult on a Spyder. I tape an inspection mirror on the end at a 45 degree angle, coming in from the driver's side(don't touch the cylinder 2 J-tube!).

Anyway, now that it runs I can move on to the fuel portion.

No. Not OBD. No emission testing either. There is a USB connector on the ECU which I used for initial setup and testing.

But then I did purchase, program and install a Bluetooth transceiver. It cost about $10, and is I link up with either my laptop and Tunerstudio OR my phone with MSDroid(MegaSquirt Droid) app for on the go access and changes. I can store and load multiple tunes that way.

Post Content
×
×
×
×
Link copied to your clipboard.
×
×