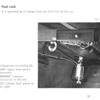
A BIG THANKS to all who contributed to the spare tire solution. Took the aggregate advice & purchased a new 4.5" wide-five wheel from JBugs & a 135 - 15 tire from Amazon. It's a close fit for sure & the 'sweet spot' where the spare fits & the lock mechanism works properly is very small with 22 PSI in the tire. (Curious why the ideal location is not dead center on the floor). I drilled thru the floor & outfitted hold-down hardware using the Greg Leach twin eye-bolt method shown herein. Used a piece of angle for the crossbar & dipped it in vinyl to add a little grip & avoid scratching the wheel, then mounted the spare upside down for a little more stowage. The frunk mechanism works well as long as the spare stays perfectly fixed. My only concern now is that the tire could move slightly when taking a hard bump or a quick turn & possibly pop the lid wide open... creating a nightmare situation. I will likely take a couple pounds of pressure out of the tire just to be cautious. The weatherman is predicting a 60 degree day here in SE PA today & I am dying to take 'the car out for another spin. Above all, I gotta tell you guys something you all must obviously know already. This car is an absolute riot to drive. It's much more fun than a barrel of monkeys & any of the 6 nice 911's I've enjoyed driving over the past 40 years. My goal was to get myself back to the 1950's sportscar driving experience one last time. You know... the feel, sound, & aroma that Porsche's NVH engineers have all but completely designed out of the car. This little pipsqueak-on-wheels has accomplished just that. I actually laugh out loud again every time I go thru the gears. Tom Buchanan... this VS is a gas & a half.
Back-on-the-road Starvn wrote: "The frunk mechanism works well as long as the spare stays perfectly fixed."
Usually they have to be slightly towards the front or the tire will sit on the gas tank and hit the hood up nearer to the gas tank, which sticks up above the floor.
To alleviate the spare moving down towards the front, I added a piece of 2" X 2" X 12" long aluminum angle stock that is pressed up against the bottom (front) of the tire to keep it in place when braking - just like a chock block. That's held in place with a couple of 1/4 X 20 stainless bolts through the frunk floor (I used carriage head bolts to look nice and not deface the tire). It won't go anywhere with that in place.
If you have a low profile battery a 155 15 will fit laying on half the battery
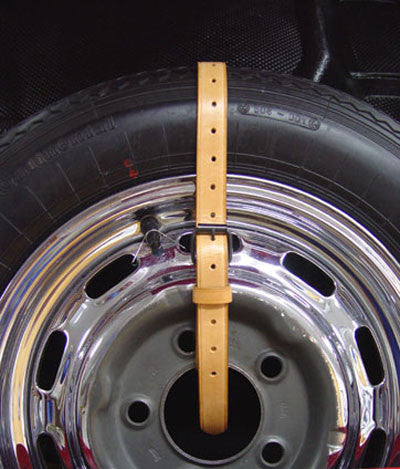
Add an authentic-looking leather tie-down strap to keep it from sliding around.

Did you make the reserve tank function work for your car which includes the pet cock below the dash like shown ? Nice looking
I'm betting, Ray, if it's an original tank, complete with the petcock below the dash, that the reserve tank function works...
ALB posted:I'm betting, Ray, if it's an original tank, complete with the petcock below the dash, that the reserve tank function works...
I think your right AL, I forgot how mine worked but here is a pict Auf & Zu
It probably simply was a height oriented feed rather than a part moving in the tank. Simple but effective and I had to use it once ![]() I have to admit as a kid?student I found the bottom on a lot of cars and even my 2004 IM with the TypeI tank.. the gauge was a pain at best.
I have to admit as a kid?student I found the bottom on a lot of cars and even my 2004 IM with the TypeI tank.. the gauge was a pain at best.
When I built my new IM I never thought of doing an original tank but had one custom made in aluminun that was placed lower and ahead of the 911 suspension but protected by the square tube frame. It holds 15 US gal or 45 liters. I still miss the originality of the 356A and petcock but I have a huge trunk now.
Attachments
Alan Merklin posted:WOLFGANG posted:I've used that hammer finish spray paint on rusty parts and it looks great.
There's an idea
Have you heard of a Rust convertor called EVAPO-Rust
I use it all the time... If you can dip it in there or simply soak the area for X hours or days it really makes a nice job. You can help it along with a wire brush and restore just about anything and you can reuse it.
I would do all the rim seams with it and wire brush them and when you are satisfied use whatever rust prevention paint you want and they look like new.
On some areas I have to sand as well if you are unwilling to wait. IF you soak for a week anything can get fully converted if no grease is present .
This is what I used to get the Hockey game fully restored. It is NOT an Acid.


