Good to know! Now if I could just fit in a 914. ![]() .
.
@Teammccalla posted:. .. They don’t know or care if it’s “real.” They just love it because it’s magnificent just as it is. They don’t even know what it is; it’s just “OMG look at that car!!”
And that's the fun of it- as you said, most people "just love it because it's magnificent just as it is". As far as they're concerned it's real all right- it's right in front of them, and whether it's fiberglass with VW underpinnings (which are for the most part more period correct than a lot of replica Cobras, and no one bitches about those!) or steel doesn't matter . The "OMG just look at that car!" means it's something special you don't see every day, and even most car guys will appreciate a Replica Speedster for what it is.
If someone, after looking at it and seeing all the work you've done, turns his nose up at your lovingly re-created Speedster (or Spyder, or Coupe), you know he's not 'really' a car guy. When what matters is having the provenance of a Porsche vin # and he can't appreciate what's in front of him there's really no hope. With so many older Porsches' street experience limited these days to trailer rides to and from the show field, if it wasn't for our 'plastic abortions' a large chunk of the population wouldn't know anything about Speedsters at all.
Unfortunately, too many people own Porsches (new and old) for (what I consider) the wrong reasons- for prestige and/or as an investment. The idea that their car belongs on the road doing something magical is lost on them. A lot of Porsche owners are just not car guys.
While admiring a Speedster at a Sunday morning show an' shine at a local park a guy said something disparaging (no P vin#, it's plastic, it's a cloaked VW, I don't remember exactly but 1 of the usual comments); I asked him, "have you ever been in a replica Speedster?". He hadn't, of course, but that wouldn't stop his almost spitting on what was in front of him. He wouldn't even consider that it could possibly be a fun car to bomb around in. After finding out he drove nothing of consequence (Corolla? Focus? Civic? I don't remember) I told him he had a pretty big mouth for someone who wasn't even in the same game. Funny thing- he didn't like that...
The guy has no experience really with cars except looking at magazines
"I told him he had a pretty big mouth for someone who wasn't even in the same game. Funny thing- he didn't like that..."
That's my boy!
Told him off you did.
"The 901 shifts better than the 915 could ever want to. Yes, 1st gear is weak, so no drag race starts. The 915 is notchy and difficult, not my favorite transmission. I've driven at least a dozen different cars with it, so it's not just one bad apple."
You're correct, Danny. I had a 901 in my previous IM, and it was nice shifting. With a 915 in my current car, the notchiness (is that a word?) is annoying. I've had it checked out, and apparently that's what 915 transmissions are like. The shift from 1st to 2nd is particularly horrid, and I hate it when starting from a dead stop with some jerk in a pickup truck/SUV/etc. is right on my tail. I almost get rammed in the time it takes me make that first shift.
But once in second, the car just scoots, and the shifts are much better, but still not all that smooth. You just have to take a little pause or double clutch when shifting.
Archoil with boron sometimes helps transmissions for noise and shifting… you might try it it is mixed with the tranny oil.
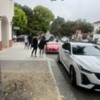
I took my car to Carmel today. I parked it and stood 30 feet away in front of a shop and watched. It brings me joy to bring the walker-bys joy. It really does. They assume it’s real and I don’t correct them. It’s very well done, so why would they question it.
Without exageration 70% of the people walking by stopped either to take pictures with it or gawk. Little kids with huge smiles.
The real joy of the day was washing, waxing with Rouge Zymol, and then driving the 75 minutes down there. The car is just such a pleasure to drive.
Attachments
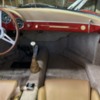
I took my time, and then more time, and then more time, and drilled the dash for the emblems. It turned out perfect. I have compared online to originals and it looks right on the money.
In the photo below you can see some small improvements.
Replica Hickok seat belts. They are slightly off from the original, but capture the spirit. The belts are from the Bay, but I have no idea who manufactured them. The main difference from the Hickok look is the foil decal is rotated 90 degrees. The belt material is also 5-stripe and Hickok is that unique texture. I know where a set of Hickok belts is (belts only) but I’m not sure I care enough to pony up the cash for belt texture.
SMC replica ignition switch. I will have to make a separate technical post on installing it. It took brain power. Haha.
Simichrome switch bezels. The aluminum bezels don’t look right once you put a chrome Porsche switch in. Simichrome gets the aluminum very close to chrome. It doesn’t catch my eye anymore.
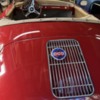
PCA badge. IDK how others do it, but the better way to me seems to be to remove the grill. The PCA bolts need to be shortened, but otherwise easy install.
Projects in process are the gauges. I have all three now, and they will go to PAS for tune up Monday or Tues.
Cocomat templates should be here any day.
Driving light switch on left. I have the small switch, but I am going to let Greg reposition the switch holes, both left and right, to the OEM spots.
LED exterior bulbs. I want them bright. I consider this a safety issue.
Exterior emblems. I will install these after the car comes back from Greg’s.
I blackened the clutch and brake pedals. I ended up not loving the attention drawn to our pedal clusters. I like the two tone look for now.
Air cleaners. The wing nuts fall off and that is “not OK.” Haha. I put regular nuts with nylon internal keepers. I will research whether nylon lined wing nuts exist.
Attachments
@Teammccalla posted:Air cleaners. The wing nuts fall off and that is “not OK.” Haha. I put regular nuts with nylon internal keepers. I will research whether nylon lined wing nuts exist.
You want this kind.

With the dark red inserts, which are heat resistant. The white/clear ones will melt. The size on my air cleaners Is 1/4” x 20, check yours. They’re available on Amazon or any quality hardware store.
Attachments
Excellent. That is exactly what I want.
Alternatively, you can drill the wing nuts with a 1/16" bit and put a simple hardware store spring between them.
I have CB Performance units and they are 10-24 thread.
That works if there are two studs in your air cleaners.
@DannyP posted:Alternatively, you can drill the wing nuts with a 1/16" bit and put a simple hardware store spring between them.
I have CB Performance units and they are 10-24 thread.
That works if there are two studs in your air cleaners.
If you don't drill a hole ... you will be on a wing and a prayer for it to stay on.
Old school hit: In a pinch , just kiss the threaded AC rods with a file, just enough for the wing nut to have resistance on the threads ( yes the nyloc wing nut is better)
If you drill 2 holes in each wing you'll have taken the first step down the path to
enLIGHTenment...
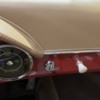
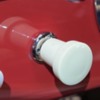
I am over the moon with my switch project. Take a look. That light switch is a VW SWITCH! The left one is an SMC replica Porsche accessory switch. I have seen a few 356 pictures with the flat bezel like this, and I like the look, even though the thicker cone-shaped one is the typical proper look. I am pleased. I had to adapt the knob, and more difficultly the bezel interface with the switch. What do you think?
Attachments
I dunno, Randy......
Looks like a Factory Install to me!
Very far from factory. A machine shop could manufacture these adapters perfectly, but I am not equipped to do it. It takes a lot of McGyvering.
When I did mine long ago I got bezels that fit VW switches from JPS and had black knobs made to fit the VW switches.
Attachments
.
Masterfully done!
Still, there's much to be said for the faux patina of thinly applied acrylic rubbing off a brass Home Depot washer.
They're only hastily thrown together once:
.
Attachments
That looks really fine, @Teammccalla. I gotta up my bezel game on the Spyder.
Thanks, Ed. You have no idea how many hours and different approaches I took to get there. I took it as a mission and a hobby to make it work. Stupid really. I almost broke down and bought some Porsche switches, but I would have wanted them to be perfecto. That would mean restoring them. Fire is not our friend….
I don’t think there is enough room (depth wise) to make the bigger bezel work on a VW switch, but I know @JoelP is running them, so it must be possible. I have some parts to make the knob adapter slightly differently so that it stands off another millimeter. I will update here if I end up doing the knob adapter differently. However, the bezel is done and done.
No one asked … but I used a 14mm to 10mm collar adapter, then a 10mm to 8mm collar adapter, and lastly a threaded 8mm theaded tube. That gives you an 8mm post coming through the dash like a Porsche switch. The threads on the interior side of the 8mm x1mm tube need to be recut to 8mm X 0.75mm to fit the bezel. The final step in the puzzle is hollowing out the tube with a dremel so that the switch shaft fits through. The rest is just cutting to length. One note on that is that the 14mm collar should be flush with the outer face of the dash so that it holds the switch solid in our dash hole, but doesn’t prevent the bezel from snugging the switch up. Second note is to have the 8mm tube flush with the outer edge of the bezel because then it looks something like the Porsche switch. Third note is to use brass on the 8mm tube because you are going to be doing a fair amount of shaping and it’s softer.
I won’t post the knob adapter solution yet because I am still fiddling with it.
Yes, it’s the MADNESS.
@Teammccalla posted:Thanks, Ed. You have no idea how many hours and different approaches I took to get there. I took it as a mission and a hobby to make it work. Stupid really. I almost broke down and bought some Porsche switches, but I would have wanted them to be perfecto. That would mean restoring them. Fire is not our friend….
I don’t think there is enough room (depth wise) to make the bigger bezel work on a VW switch, but I know @JoelP is running them, so it must be possible. I have some parts to make the knob adapter slightly differently so that it stands off another millimeter. I will update here if I end up doing the knob adapter differently. However, the bezel is done and done.
No one asked … but I used a 14mm to 10mm collar adapter, then a 10mm to 8mm collar adapter, and lastly a threaded 8mm theaded tube. That gives you an 8mm post coming through the dash like a Porsche switch. The threads on the 8mm need to be recut to 8mm X 0.75 to fit the bezel. The final step in the puzzle is hollowing out the tube with a dremel so that the switch shaft fits through. The rest is just cutting to length. One note on that is that the 14mm collar should be flush with the outer face of the dash so that it holds the switch in our dash hole, but doesn’t prevent the bezel from snugging the switch up. Second note is to have the 8mm tube flush with the outer edge of the bezel because then it looks something like the Porsche switch. Third note is to use brass on the 8mm tube because you are going to be doing a fair amount of shaping and it’s softer.
I won’t post the knob adapter solution yet because I am still fiddling with it.
Yes, it’s the MADNESS.
Too cool, Randy!
It’s things like this that keep us out there slaving away in the shop at all hours and when we’re asked, “What’cha been workin’ on?” All we can say is, “Oh…. Just stuff….” 🤷♂️ 🙄
My GF thinks it’s nuts. The bezels are basically the same? Hahahaha. Madness.


