I need some direction...

I'm fitting all of the components onto the VMC body that I had purchased, in preparation for the paint.

The mold itself is actually extremely uniform, and all of the body lines line up extremely well. . What I am finding, is that some of the aftermarket cutouts are not straight or uniform. (taillights, horn grills, engine grill etc.) I am a pretty particular person, so am going to re-glass and make those adjustments to achieve what I'm looking for. 

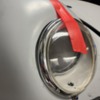
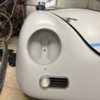
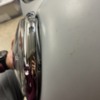
The advice that I do need is for the front headlight buckets. Both sides are the same width, but one of the sides is almost an inch taller. this definitely makes it a challenge when mounting the upper tab that holds the chrome ring, and also would change the distance between the lower turn signal and the light bezel. Also, the bezel itself won't come close to sitting flush against the body at all, with a gap being about  3/4"-1".

The question I have. Knowing that these kits need some modification during the build process. Has anyone come across these bucket issues, with the headlight not fitting at all? do you plane the area and try to reshape it to the surrounding fender? should I build up the two light niches' to at least be the same size? Or am I being too OCD?

My main goals are to have the lights to be perfectly centered, and in distance from the lower turn signal. And both headlights to be the same distance from the vehicle centerline.


Thanks for any input.

Original Post

Replies sorted oldest to newest

CMC's came with no front horn or tail light cutouts.  Measured 5 times - Dremel'd 1.

The headlight buckets were right on - the metal top mounting tab was even mounted.  I can't picture the body being that far off!  That's not something you should have to deal with.  Post photos.

Rear left wheel tire clearance on IRS pans is only recurring CMC issue --- ok, bottom of one door sticks out more than I like.

Thanks. Yeah I’m a little discouraged about reworking things that I had done to save time. As it sits both light buckets  are the same width 9”. the passenger bucket is about 1/4” taller. And starts 1/4” higher than the drivers side. If I split the difference and have the chrome ring sit right on the edge on each side. I can get them within 1/8”. Doing this I will need to move the passenger horn over 5/16 to be in line with the light assembly, and make different length upper brackets to bring up to level. I attached a few photos showing the gaps between the body/light. And the large gap on the passenger side if I positioned the light to match the drivers side. It doesn’t even cover the niche.

Attachments

Images (5)
  • 535FB66E-3002-4700-9347-B5DE03B446CF: It doesn’t cover niche if same position as other side
  • 62A92A4E-A694-41D5-A485-D09F4CF83C4F
  • 66BF2555-E3E8-432F-B4D3-D0CAB43AAA0F: Niche is too far left
  • 9B8C1722-6EED-4FC5-A770-B393783E3903: Perfect position
  • 5A6C34AA-8BFE-4C13-9725-15854D6551FE: Gap if pressed firmly against body

Wonder if other VMCs are like yours.  Maybe one owner will speak up.  Looks like perhaps you didn't cut out the fiberglass behind the horn grill --- right side?  But the left side may be cut out?  Easier if not cut out.  Your plan of slitting the differences is right on.

I suspect a silver or grey or other mid-color (stone grey) will hide some of what you see --- plus adding bumpers/over-rider/fog lights too.

There are threads here on the front wheels not being centered in front.  Remember discussing with prior owner who it really bothered.  He wanted to cut and move the wheel arches on a finished vehicle (a VS)!

@WOLFGANG I have seen a few others that are off as well...

In order for me to get everything symmetrical, there was a lot of work involved to make mine correct. The passenger side horn had to be patched and moved over 1/2" to align it with the light bucket. And both light buckets had to be built up around the edges in order for the lights to be installed at the same level and square. I'm overall happy with the repair, and everything on the front end has had a mm tape measure on it..,  Now I'm dealing with the repairs to the tail lights. . Then its ready for me to start the prep for paint. Here are some progress pics

Attachments

Images (4)
  • before the repair
  • repair process
  • repair
  • repair complete
Post Content
×
×
×
×
Link copied to your clipboard.
×
×