In a conversation with Stan at Carlisle last spring he suggested putting all my efforts into 1 thread so people would know where to find it all. Well, here's the start- 

The idea originally was to lighten some transaxle gears (and other parts) in a bid to get the rotating mass of my Berg 5 close to (or even less than) that of a 4 speed. The purpose of this is to make shifting easier and the synchros last longer. My friend Bruce knows a local guy- Jim- with a Berg 5 equipped 10 second street bug that shifted with a slight grind only into 2nd gear, and only when speed shifting at the local track. 

The trans went back to Rancho where Mike Herbert (who originallly built it and put new synchro rings throughout) claimed upon teardown it looked great but re-assembled it with another new 2nd gear synchro anyway. It came back, got re-installed and again shifted great on the street, shifted fine while testing in the local warehouse district (after hours, of course!) but still had that little bit of a grind going into 2nd running the brackets at Mission Raceway. After all that work (and time shipping the trans back and forth from Vancouver to the LA area and back) Jim was a little disappointed and asked Bruce for advice.

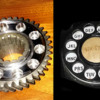
Having just recently taken apart a couple of later transaxles and seeing gears with 'divots' cast around the sides, Bruce surmised it was done to reduce rotating weight (why else would VW put the extra work into parts for an economy car unless it was needed?) and he proposed this to be the answer to Jim's problem. Disassembly, a little machine work, reassembly and voila!- the thing shifts like it's supposed to. Bruce has put together 2 (I think) Berg 5's, both with lightened gears since then and is convinced that for synchro life this a worthwhile modification.

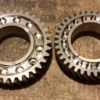
While I was looking for info online I came across an Alfa Romeo club where their transmission guy does this sort of thing to almost every Alfa trans he rebuilds- shifting is smoother (and faster) and with vintage parts getting harder to come by every day, lasting longer between teardowns is a big deal. Anyway-                                 lightened 1st and 2nd idlers
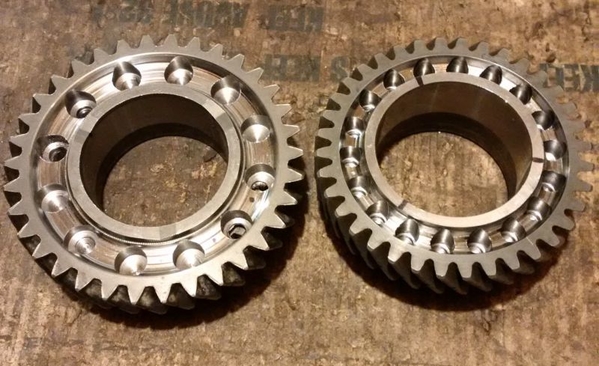
 

1st gear (on the left) went from 788-671 grams, 2nd from 737-617                                   lightened 3rd & 5th

3rd gear started out at 607 grams and now weighs 490, while 5th went from 261- 226. More later- Al

"older Intermeccanica Speedster (still under wraps in the garage) a pic wouldn't show much,what with all the junk piled on it..."


On a lifelong mission (much to my wife's dismay) to prove that immaturity is forever!


"Adding power makes you faster on the straights. Subtracting weight makes you faster everywhere."- Colin Chapman

Attachments

Images (2)
  • lightened 1st and 2nd idlers
  • lightened 3rd & 5th
Original Post

Replies sorted oldest to newest

Gordon Nichols posted:

Do you stagger-drill partially through from both sides or just go partially through from one side?

Also, how difficult is it to drill through hardened gears?

sethsaccocio posted:

Do you drill these on a computer controlled milling machine or a manual mill?

The 1st and 2nd idler gears have synchro teeth on the backside so you can only drill so far, Gordon. You could drill through the matching gears, but they are on the mainshaft and not big enough to be able to do anything with, so they got left alone. 3rd and 5th aren't drilled all the way through because iIrc there are thrust surfaces on the other side. In the odd instance where you can drill all the way through, with set up time being what it is it's easier to drill them all the way through from the 1 side. You just have to be very careful.

The first .035 or .040" on each side is hardened and neither HSS, titanium or cobalt will leave a mark so you have to use carbide bits, which are expensive up here- close to $25 for a 1/8" bit (I broke 2) , 58 or $60 for a 1/4" bit (broke 1 of those too- bet you can guess how hard I yelled!) and the 7/16" bit was over $120! Going through the hard surface and then into the softer middle isn't too bad (remember to keep using fluid to keep things reasonably cool); it's when you start into the hardened surface on the other side where you have to be really careful- a little too much pressure, the drill tip really digs in and snap (this is where I would yell a bad word or 2) goes the bit.  I would start with a center-finder drill go to 1/8", step up to 1/4" and repeat until at the desired hole size. Setting up (occasionally having to clean up the remnants of  someone else's project) , doing the work, putting the 8" rotary table and away (it weighs 115 or 120 lbs and you have to be so careful you don't mark the table surface!) and then cleaning up after myself (I was in a friend's shop) would take 2 1/2 or 3 hours and I'd only drilled 10 or 12 holes. Mind you I'd drilled each hole 2, 3 or (in the case of the 7/16" holes in the first idler) even 4 times. I broke 4 or 5 carbide center finder bits along the way as well.

I did them on a rotary table bolted to a manual mill, Seth. The rotary table makes drilling holes in circular things very easy... 

And you're a funny guy Mitch!

Post Content
×
×
×
×
Link copied to your clipboard.
×
×