4 week rehab!? Mine was nearly twice that and I'm not quite done yet. 77/105 is impressive! Was that at the crank or at the wheels? You're running dual Webers and a stroked cam, so you will produce excellent power. What heads are you running? What cam?

Mine is just a mild 1915 with little old Kadrons and a svda with an electronic ignition. Engle 110 cam and 40/35.5 heads. I'll be lucky to see anything close to what you're showing. Maybe a touch more HP, but nowhere near that torque number. I'm toying with installing 1.25:1 rockers, but I'm not clear what that will offer vs the amount of work it will take. Ultimately I'd like a 2.0l or a 1968 stroker. Maybe someday.

Let me get it running well and then get that cooler installed before I start talking about tweaking the motor any more.
Last edited by TRP
Originally Posted by Teby S:

...and WAL-LAH...   


It's voila, and it's a French word. Honestly; you 'Merican's....


Ted- I don't know if, with your engine, how much difference 1.25's would make. Are the heads on this engine ported? If you have the rockers, then it would be interesting to find out, but I suspect the carbs may not let the combo reach it's potential unless they have bigger venturis installed. Stock vents in kadrons are 28mm, and I would think your engine could benefit from 30's. Once you have it running well, figure out how where it peaks in 3rd gear; remember that it will rev higher (500?rpm), but you want to know where it makes the most power. With the W110 it should go to 55-5700rpm; anything less and the carbs are holding it back.


What happened to fire breather you were looking at? I thought you'd bought it?


Last edited by ALB
Good Morning Al,

This is the same motor. I'm just not sure that I'd consider it a fire breather quite yet. Especially when you compare it to the likes of Teby's 1905 or Mr. Knuckles 5 speed beauty. Until I get er all dialed in, it's just a lil ole 1915...

Good point on the carbs. I actually re jetted them and installed new venturis. I went up to 30-40's. You are correct, stock they came with 28-40's.

As far as the RPMs go, when I got it running on Sunday it was running a bit rough as the timing was jumping a bit due to the aforementioned missing distributor drive gear spring. Even though I had yet to really synch the carbs, at about 2500 RPMs the motor really came alive. It was a kick to watch the tachometer zip up to the red line. It felt like it could still pull bit past 5500. It will be interesting to see how it runs once I get it all dialed in.

As far as I know, the heads are just run of the mill 40/35.5s. No port work has been done. It's good to know that the motor may not benefit from the added expense of the rockers. Maybe I can put that out of my mind, or at least put them off for a bit.

Teby and the rest of the Fresno gang - we should totally go in January. I'll need to check with Alexis, but that would be a blast. I hope to have the motor dialed in enough to drive it that far. If not, I can always bring the daily driver.

Thanks for tuning in...
Ted
Last edited by TRP

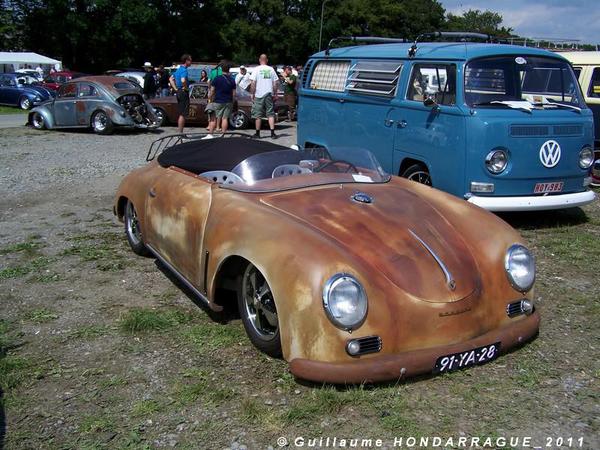
Santa was generous this year. For Christmas I was fortunate enough to receive many fun upgrades for the Speedster.


I scored:


I'll find some time to get the parts installed. Should be fun.


Ted


Last edited by TRP

Ted; your car looks cool, ship shape as they say.  If the 1st and 3rd gears are not engaging on the Vintage Speed shifter, try moving the aluminum shifter base forward a bit.  If then 2nd and 4th don't engage, you went too far, go back to the rear a little.


It has been 24-28 degrees, every morning this week. Damn cold for the Santa Cruz mountains!!  Probably a little warmer your way.


Happy New Year!


Art

Thanks Art! 1st through 4th are working well so far. The one thing I've found it that sometimes I can engage reverse without pulling up on the shift lever. This is problematic because I'm usually tolling and trying to go for second. :yikes: Not fun grinding gears on a brand new trans. I've read up on it and I've found that I need to keep moving the shift base to the left until that goes away. 


The car is currently taken apart while I clean up the pedals and install the roller pedal. 


Where I am so far - 


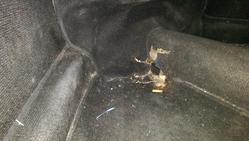
Pulled back the coco mat and removed the two 17mm nuts. Lots of junk in there:

IMAG0129


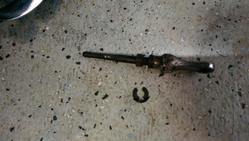
The break pedal piston and the funky little clip that holds it in:

IMAG0131


The old accelerator pedal arm:

IMAG0134


Gunk and goop on the pedal assembly:

IMAG0135


Dirty parts and pedals:

IMAG0140_BURST002


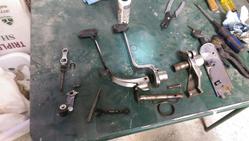
Blown apart for cleaning:

IMAG0141


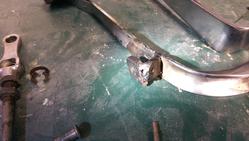
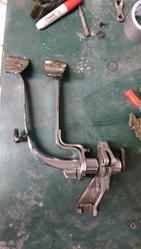
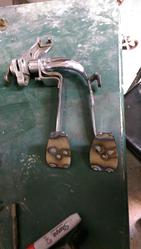
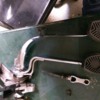
The clutch pedal is an odd arm. Not sure what's going on with the sideways pedal and what's with this nutty little tab?! Al... Al... Al... what were you trying to do here?

IMAG0143


All cleaned up and almost ready to go back in. I just need to clean up the pedals and apply the pedal covers.


IMAG0145

IMAG0146


Ready to go back in! 

IMAG0147


Can't wait to try out the new pedals. I hope they work as good as they look.


Ted


Attachments

Images (11)
  • IMAG0129
  • IMAG0131
  • IMAG0134
  • IMAG0135
  • IMAG0137
  • IMAG0140_BURST002
  • IMAG0141
  • IMAG0143
  • IMAG0145
  • IMAG0146
  • IMAG0147
Last edited by TRP
Another shot of the original pedals before cleaning and modifications. I'm not sure why the clutch pedal was slightly askew and rotated 90 degrees. Maybe Al (previous owner) had a really big left foot? I wonder if the donor car has some sort of hand controls on it? What else could that extra tab on the clutch arm  be used for?

image:2194

Attachments

Images (1)
  • image:2194
Last edited by TRP
Originally Posted by Jan Peter Stahl:

just an idea: maybe it is the Rest oft an self desingned hydraulic clutch sysem


Originally Posted by Lane Anderson - Mt. Pleasant, SC:

That was certainly what I thought.

Ahh... yeah maybe. The tab is threaded. Maybe that's the answer!


Today I'll go out and see if I can get the clutch cable hook to engage without having to jack the car up and undo it from the trans. 


I'm really digging the 356 pedal shape upgrade. It was a modification I kind of whipped together on the fly. I had ordered the pedal covers from Sierra Madre on a whim. I figured one day I'd get around to trying something. Who'd of thunk it'd work so easily.  Never under estimate how a $20.00 or 12 pack will motivate a muffler shop owner into action.  Mike, from Kings Muffler here in town was just about to shut down for the day (at 4PM!) when I asked if he'd be willing to help with a project. I produced the pedal assembly and the pedal blanks I had cut out of some sheet stock. He said "Ahh! The ole bug to Porsche pedal trick..."  I knew I had the right guy! We chatted about his ole 'bug' days. Before I knew it, he had everything all tacked and welded up. He asked if I had a grinder to clean up the welds. I did, so he handed over the parts. I slipped him a 20 and I was off.


I always think that really need to learn to weld, then I find a kind soul who's always willing to lend a hand.


Now the question is, do I cut off that tab on the clutch arm or just leave it as a reminder of ole' crazy Al?


Bob and Gary - thanks for the kind words. This ole girl has been a labor of love. Maybe at the 1 year mark I'll go back and compile a list of everything I've fixed, upgraded, and tweaked over the previous 365 days. As per everyone's suggestions - I will NOT add up the receipts.


Ted

Last edited by TRP
image:2219

image:2221

Yay! All installed and working great! I also dropped in two Crow racing belts. I'm having a shoulder harness bar built to go behind the seats. It will be level with the tops of the seat backs (about shoulder height.). This will appease SWSBO.

Next up are the SETRAB cooler and the new linkage.

Thanks for tuning in...
Ted

Attachments

Images (2)
  • image:2219
  • image:2221
Last edited by TRP

Ha!


I was going with She Who Shall Be Obeyed.  But your version works too!


Today I'm working on some projects on her list of 'to do' items.  Painting the new mantel I built for the fireplace and wrapping up the final newel post for the stair case.


The only thing that will happen with the speedster is that it will get sawdust on it.


Ted

Originally Posted by TRP:

       
Originally Posted by Jan Peter Stahl:

just an idea: maybe it is the Rest oft an self desingned hydraulic clutch sysem


Originally Posted by Lane Anderson - Mt. Pleasant, SC:

That was certainly what I thought.

Ahh... yeah maybe. The tab is threaded. Maybe that's the answer!


Today I'll go out and see if I can get the clutch cable hook to engage without having to jack the car up and undo it from the trans. 


I'm really digging the 356 pedal shape upgrade. It was a modification I kind of whipped together on the fly. I had ordered the pedal covers from Sierra Madre on a whim. I figured one day I'd get around to trying something. Who'd of thunk it'd work so easily.  Never under estimate how a $20.00 or 12 pack will motivate a muffler shop owner into action.  Mike, from Kings Muffler here in town was just about to shut down for the day (at 4PM!) when I asked if he'd be willing to help with a project. I produced the pedal assembly and the pedal blanks I had cut out of some sheet stock. He said "Ahh! The ole bug to Porsche pedal trick..."  I knew I had the right guy! We chatted about his ole 'bug' days. Before I knew it, he had everything all tacked and welded up. He asked if I had a grinder to clean up the welds. I did, so he handed over the parts. I slipped him a 20 and I was off.


I always think that really need to learn to weld, then I find a kind soul who's always willing to lend a hand.


Now the question is, do I cut off that tab on the clutch arm or just leave it as a reminder of ole' crazy Al?


Bob and Gary - thanks for the kind words. This ole girl has been a labor of love. Maybe at the 1 year mark I'll go back and compile a list of everything I've fixed, upgraded, and tweaked over the previous 365 days. As per everyone's suggestions - I will NOT add up the receipts.


Ted


In true honor to the car do it at day 356.
Originally Posted by Lane Anderson - Mt. Pleasant, SC:

Don't get too eager as there are still other is the queue ahead of you, but the work has now started.

Heh. I'm not too eager. The original deadline he gave me has already come and gone.  He told me 6 weeks ago that I had a few in front of me and that it would be a bit. I was hoping it would have been ready for the end of the year. I'm guessing more like end of January. 


Patience young grasshopper. Patience. 


Ted

Ted:  Waiting is hard.


I started building my car when my kids were in Jr. High and my son was hoping I would get it done and would let him take it to his Junior prom.  It wasn't done.


Then he hoped for his Senior prom.  It wasn't done then, either, nor was it done for his High School or college Graduations.


It finally got on the road, a few years pass and he finally got to use it for his wedding get-away car....


This thing sucks... Literally.

Second time this has happened. The new 1915 motor keeps sucking the valve cover gaskets off the valve covers. The first time I attributed it to the scrappy aftermarket chrome bales. I ditched those and put some stock ones on the heads. Those worked well for a bit, but just the other day I sucked another gasket. I'm currently running chrome Mofoco vented valve covers. I'm thinking of ditching those in place of some vented stock Gene Berg units, or actually installing the Porsche 4 cam look alike units I purchased.

The motor is vented out each valve cover with 1/2" ID hose. The two vents meet at a T and are then routed back to a 912 style oil filler housing. The housing has two inlets. One receives the vent from the valve covers. The other simply vents to another 1/2" line which is routed down to a catch can, similar to the stock unit.


I have not vented anything back into the carbs. The only 'breather' I have is the 912 style one from CSP. What can I do to keep from sucking these valve cover gaskets? I guess the simple answer is to keep my foot out of the pedal.

Thanks,
Ted
Last edited by TRP

hmmmmmmmm............Since the crankcase and valve covers are all at a positive atmosphere, you would expect, if anything, the pressure would push the gasket out past the lip of the valve cover.  Is THAT what's happening, or are the gaskets finding their way into the rocker gallery??


If they are going into the gallery, I would suspect the flatness of the aftermarket valve covers where they mate to the head.  If there is a slight angle to the mating lip, especially closer at the outside of the lip than at the inside, they'll pop the gaskets into the rocker gallery in short order.


The fix? Try the fake 4-cam covers you have and see if that cures it.  If not, I might try the Berg stock, vented covers.  If THAT doesn't work, I would glue the suckers in with Permatex blue gasket goop.


gn

I'm very late to the party here -- and it is quite a party. TRP (Ted) you have got the madness big-time.  I am so happy for you!!!  There would be a lot to comment on here, and maybe in due time.  But to jump to the end and the valve cover gaskets, you should, as has been mentioned, use original VW covers and bales.  really.  also, you could try my method for sealing, which I developed and used since the '60s.  Are you using cork?  As they say in NJ: fuggedaboudit.  They make a fiber-flex (?) neoprene sort-of gasket (my local auto parts shop, NAPA has these).  Clean the crap out of the cover, and do what you can to make sure it is as flat and true as possible.  Apply some red RTV gasket maker to the cover, and place the gasket onto this.  Set it aside for a night or day to set up.  When you apply the valve cover and gasket ass'y to the engine, make sure that the head surface is clean.  I apply a bit of silicone grease to the rubber gasket that is in contact w/ the head.  Put it up there and pull the bale over.  give the VC a little tap-tap from one side and then the other to be sure it is seated well.  This should do it.  Also, this application works for many many miles.  You can take the Vc off and replace it many times.  After a while it may harden up abit w/ the engine temp, etc., and will have to be replaced.  Cleaning off the old RTV may take a bit of work, but not too bad.  My two old 356s and the newer Speedster have all had it done this way, and it works.  And I agree w/ Gordon that the engine is not "sucking" in your gaskets. they are just not securely set, and if cork, they compress and harden, and get lose and fall down.


Let me know how this goes.

And when you go to NAPA for those valve cover gaskets, pick up an aerosol can of Permatex RTV dissolver so when you want to get everything removed from the valve cover it'll be a much easier job.


I have used both the cork-style gaskets and the composite ones (usually black, but I've seen green ones, too) over the years with bolt-on valve covers (the worst, I know, but what'cha-gonna-do when you're a cheapskate?) and have about the same luck with either.  I will lean toward the cork ones if I have them, but usually just grab whatever is in the gasket bin.  Usually I'll buy a 10-pack of VC gaskets at VW show flea markets whenever I'm running low, but NAPA is handy, too.


Like Kelly, I just use  a liberal film of automotive grease on the gasket.  Makes getting the cover off later much easier.  If you feel they're gonna distort and leak, Permatex them to the cover.  But I would suspect the flatness of your current cover mating surface.


I remember running out of VC gaskets at an autocross once, so we just ran a BIG bead of Permatex around the valve cover.  It sealed perfectly and lasted way past the end of the season, but I almost had to use Dynamite to get the damn valve cover off.

Last edited by Gordon Nichols

Gordon posted "But I would suspect the flatness of your current cover mating surface."


This I can totally agree with. I've had aftermarket chrome and cast aluminum valve covers on V-8's not seal well, allowing oil seepage or outright leaks and the most likely cause has been the the valve covers have been slightly warped and not sitting true to the mating surface. This has been more prevalent with Chrome steel covers in my experience, though I have had a pair of aluminum that were really tweaked.  Also if using a chromed valve cover it often helps to gently sand off the chrome plating on the mating surface, for some reason when plated the uniformity of the plating is not uniform on the mating surface, and doing the same to an aluminum cover has proven to be beneficial as often the casting on the mating surface is not all that smooth . 

Last edited by G.R.

As for valve cover gaskets the best I've used is SCE hi-temp silicone/cork laminated steel reinforced, nominally thicker than OEM they tend to not creep or move and seal very well and are reusable...expensive at around $35+ each but well worth it, not sure if SCE makes them for VW's though.

The Fel-pro 'Fel-prene' hi-temp reinforced gaskets are another good choice, again not sure if they are made for VW's...Retail is about $30 each, expensive but again worth it and they sealed a slightly warped chrome plated Moroso valve cover on my '33 Vicky's 350sbc after trying several other gaskets that eventually began leaking...never had an oil seepage or leak after installing them.

I think I solved the valve cover gasket issue this weekend.  I tried the FelPro gaskets and they leaked. This time it was the other side. I *almost* drilled a hole in the 4 cam replica covers but decided to just jump to inevitable.  I tapped and vented some original stock valve covers. took about 20 minutes to clean 'em up and get the vents installed. I installed them with some standard cork gaskets. No issues as of yet.


While running down the valve cover issues I found that the oil pump may be seeping somewhere. Boo. I bet it's the silly 'ribbed' aluminum cover that's on there. It's a good melling pump, can I use the original oil pump face plate? Or are there better options? I also found a weeping stud in the sump. I kind of knew the hole was dodgy. It appears to be stripped. I need to replace a stud with a 'step stud' in the sump. I picked up the stud this weekend.  Maybe I'll jump in head long and fix all these issues while I'm installing the cooler / bypass valve.


I'm just not a fan of working with oil lines. They tend to be prone to leaks and major messes.


Ted

Add Reply

Post Content
×
×
×
×
Link copied to your clipboard.
×
×