JEEZE ! Whats happening ? It looks like only one new post in the last four days ! Everybody must be hibernating or something ! Must be waiting for better Spring weather ?

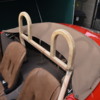
I have my new roll-bar out for powder coating right now. It will be ready next week. This whole roll-bar thing started because of Lane Anderson (whom I've never met) and after I saw his facial photos I decided it's time for seatbelts and a roll-bar. I have named it after Lane, hence, the name LANE ANDERSON ROLL-BAR. (not what you thought huh)

 I actually made three out of wood. The first one went into my fireplace. The second got cut up and redesigned and turned out looking really nice and it's about as good as I could do to blend in with the rest of the curves of these cars. I tried other curves and angles but just couldn't come up with anything that looked better that was functional as a roll-bar and would allow an attachment point for shoulder belts.

To save a long read and to add something to the slack period here on the forum I'll just show the roll-bar mounts in my car and how I attached them. This was not as difficult as it may seem and as you can see, I didn't have to totally remove the carpeting to do it, just peel it back a little. I've posted these photo's before but now they will  have more meaning since I have a roll-bar to show next week. By the way, I can just barely get the top up over the new roll-bar.  ( I'm 5'10").............Bruce

Attachments

Images (6)
  • DSC_0002: Holesaw floor for access to frame
  • DSC_0003: Weld  mounting flanges inside of tube
  • DSC_0006: Weld outside of tube under floor also
  • DSC_0007: Reinstall floor cutouts with JB Weld
  • DSC_0011: Welding spark guard installed
  • DSC_0013: Finished & ready to bolt on roll-bar
Original Post

Replies sorted oldest to newest

Well done, Bruce. I'm interested in seeing what it looks like, and I like the thought you put into it- you indexed the bigger hole and then were able to glue it back in once final fitting was done. I've always thought that taking the rear support bars through the back wall and tying into a truss bar across the tops of the rear shock towers (and supporting that with bars from the frame horns and torsion tube) would be the way to go, but you've given us something to think about. How far away from the main hoop are the back attachment points? Al

Last edited by ALB

Hey ! Guess what ! The powder coat guy just called me and said my roll-bar was ready so tomorrow I should be able to continue this post.

Al...I decided to go forward with the the other two braces and terminate them next to the seats on the door sills. This way they don't interfere with the top when it's put away and this allows the clear plastic rear window to lay flat and unfolded against the rear tub wall. You'll see in the photo's tomorrow. I'm also installing a 3/16" Lexan wind screen on the roll-bar behind my head.

This has been a fun project !.............Bruce

OK...Here's the final photos and a little dialog to go with them plus comments or nomenclature on the photos at the bottom.

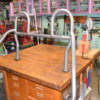
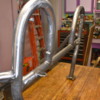
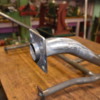
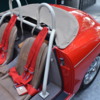
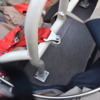
You already saw the mounts so here's the Wooden mock-up. The guy who bent this all up only used my mock-up to bend the five pieces. I didn't have to take the car down to him. When I brought home all the tubes, all I had to do is bolt in the bottom mounting plates, install/assemble the tubes with clamps and duct tape,  tack weld them all together using a level and plumb, remove the assembly and partial weld together. The reason for partial welding is so you can re-install and check for warping. If OK, weld up the rest of the way. If warped, tweak it back to fit properly then weld it up. You will notice that the roll-bar extends thru the mounting plates. This makes it really easy to index and align the entire bar system during construction, assembly and installation plus decrease possible shear of the mounting bolts in an (God Forbid) accident.

I installed/welded four 1/4 X 20 barrel nuts on the bar hoops. This is how I will attach the Lexan wind screen later. I will use rubber grommets in the Lexan sheet to mount it, allowing for vibration and flex of the roll-bar.

So there you have it ! The color is lighter than I thought it would be but that's ok with me. I went to a cars n coffee with it this morning and others seemed to like it ok as well. As I said before. The top will just barely go over it so that concern is handled. The tubing size is 1 1/2 ". I would have liked to use 1 3/4 " but the smallest radius of the hoops would have been bigger making them look weird (not centered behind the drivers head).

I still have the wood mock-up so if any of you like my "Lane Anderson Roll-Bar",  just pay the shipping and copy it. If more of you are interested just circulate it using the same method. The box would be 36" L X 24"W X 2" H and would include the wood bar, brace, and two mounting plates. Oh...the belts are 3" G-Force 5 point...red of course.

With all those belts on me this morning I felt "snuggy" driving to the cars n coffee.......

Bruce

Attachments

Images (9)
  • DSC_4963: Wood mock-up installed
  • DSC_0070: Brace joint & Belt tab on mock-up
  • DSC_5000: Welded but unpainted
  • DSC_5001: Detail of lean wind screen mounts
  • DSC_5002: Alignment tube extended thru mount plates
  • DSC_5003: Finished & installed roll-bar and belts
  • DSC_5004: Detail of windscreen & roll-bar mounts
  • DSC_5006: Finished rear view
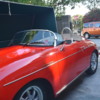
  • DSC_5007: Finished front quarter view

Thanks for the positive comments and suggestions ! Here's some responses.......

Lane....Padding would be nice as you suggested. I'll have to think about that and how I could put some up there by working it in around the Lexan wind shield.  When I Autocross or Drag Race I wear a helmut.  OH !....How does LARB sound for a name of this Roll Bar ??

Frank....Long time-no-hear ! Are you thawed out enough to get "Little Blue" out yet ? In reference to your comment..yup ! Gotta keep that ole noggin active Thank you too !

Stan.......Thank you for your comments ! The Hoops are a shy under one foot wide and center up with your head. The drop legs fit rather nicely by mounting forward and certainly easier than going back and under to connect with the shock towers.  They don't interfere at all with my body or shoulder movements. I checked that out when I had the mock-up installed. At least with the stock seats I have from VS,  there is plenty of room to place them forward like I did.

Here's what I found that I don't like. There is one connection point on the roll-bar behind my head for the shoulder belts. Those two belts go up, over my shoulders on both sides and down to come together again at the Lap buckle. When I tighten my lap and shoulder belts, both of these 3" shoulder belts move together with my neck between them. After my 19 mile round trip to a cars n coffee this morning, I had a rash on both sides of my neck.  Gotta change that and quick !!..........Bruce

Hi Bruce,

Thanks for taking the time to post your projects over the years.  It's very helpful to all of us.  Regarding your chafing shoulder straps, I have some suggestions:  1) go to 2" straps, 2) change the harness bar mounts to dual mounts/seat, as opposed to the single mount you now have, or 3) a combination of 1 & 2.

You may be able to "try" 2" straps for comfort prior to purchasing the real deal if you can find some 2" webbing.  Even an old tow strap would do, or something made for a different use.  You don't care about breaking strength, since your only concern in the beginning is comfort.  You wouldn't need to worry about safety during the trial run, since you'd still have your 3" lap belts in use.

Same with dual mounts/seat: you can attach the shoulder harnesses tight enough on the horizontal brace to determine if a wider passage over your neck area will work.  Once you get the right width figured out, you can weld in new tabs, or just use hardware that is made to wrap around the bar without an attachment tab.

Bruce, SUPERB work!

I don't have a picture of my bar installed, but mine is similar, 4 point and removable. It also is 1.5" and has forward and rear attachment points. It's longer on the front bars because of the smaller driver's compartment of the Spyder. They end up being door bars to give you some side protection, without interfering with your arms or shoulders. No way to use it with a top, as it's too high. But it passes SCCA specs so all good. I don't drive on the street with it, only on the track.

I really like your design, Bruce, I wish the Spyder could be done that way.

Jim nailed it, though. Your shoulder attachment point is a bit too close to your head for one point of attachment. Get 2 separate shoulder belts of the wrap-around-the-bar type. 

I will also add that I had 2" belts all around on the old car and 3" on the new one. The 3" shoulder belts are a bit wide and can irritate the neck, even when spaced apart. You will take some time to adjust to having them on. I got the cam-lock system instead of the old tongue-latch, it is WAY easier to do the lap belts first and then the shoulders before you pull away.

The 5 points definitely hold you in and let you drive harder, especially on the track. 

Thanks Guys ! All good suggestions ! I'm leaning toward dual weld on tabs even though it means another trip to the powder coat shop and another $120.00 Maybe a different shop and a little darker tan this time. However, as Jim Kelly said, do a trial using 3" and 2" webbing first. 

Ray.....I saw a Cobra Replica at the cars n coffee on Saturday with a beautiful aluminum spreader for his shoulder straps. It clamped around the vertical part of his hoops and allowed at least 8" between them. Looked nice too.

Al....I don't think it will pass SCCA. I think they require a six point mounting. My tubes are 1 1/2" .125 wall and that part will pass. I think I will be OK for NHRA. When I go to Irwindale Drag strip on Thursday nights I get to drive without a bar but I must have seat belts and a helmet. Irwindale is a NHRA sanctioned  1/8th mile strip. However, I think the tech. guy there on Thur. nights isn't really up on whats required. I see a lot of funny crap allowed on the strip. Irwindale is going away soon. A developer is going to build homes there. The giant gravel pits across the street are now being filled in because they can't dig deeper and wider without having the city streets cave into the pits. They'll probably build more homes on top of all that once they're filled in. I only live a few miles from there.

Lane....Lane, nope, no royalties, just fervent appreciation of your crash experience. I applaud you for posting the photos of your face afterwards. You really don't look like Benjamin Button....more like Angelina Jolie !  Ha ha.  Hope to meet you someday.

Bruce

Gordon ....."Coastal Living " mag ? My Wife and I got a good laugh out of that ! She reminded me that I wanted to put a thin highlight line of "Burnt Orange" around the wall just under the cabinets though. Never did it and probably wouldn't even see it now with so much stuff. I never got around to installing the non-skid terra cotta tile on the floor either....Anyway, thanks for the kind comment...........Bruce

Have you SEEN Coastal Living?  Everything related to living “on the coast” (doesn’t matter WHICH coast) is turquoise and Pink!

My color-cognicent, quilter wife says that never in her life has she seen a GUY pick those colors for his shop - not even in South Carolina!!  ( Actually, in South Carolina they would probably pick the colors of USC or Clemson    or a black/white checkerboard.  No imagination there at all, it seems).  The Terra-Cotta sounds frikken AWESOME!   Not sure about the Burnt Orange, though.  Would have to see it.

I went for much more neutral “Earth Tones” of paper white and cream (Parchment, really) in MY shop.  With touches of Home Depot orange and Lowe’s Cobalt Blue, along with my Craftsman Red (English) and Stainless (Metric) tool chests.  It all seemed to go nicely with Pearl’s Cream Pearlescent paint scheme.  I gotta tell ya, though........  The shop/garage imagination of what could be in THIS neighborhood is pretty much non-existant.  Putting a refrigerator out there is the epitome of Class.  Hey!   I’ve got a fridge AND a frikkin Welder.......And a LIFT!!!!!   And some pretty awesome Jazz and Blues with a 400watt Kenwood stereo and Sony Pro CD deck!

Last edited by Gordon Nichols

Bruce, with respect to SCCA: It needs to pass the "broomstick test", a broomstick on the windshield to the roll bar. It has to clear your helmet by 2". On our cars, the windshield is NOT even close to structural but on my Spyder passes. You'll also need a 5 or 6 point harness, and ALL open cars require arm restraints. And a Snell helmet, best get a 2015.

Add Reply

Post Content
×
×
×
×
Link copied to your clipboard.
×
×