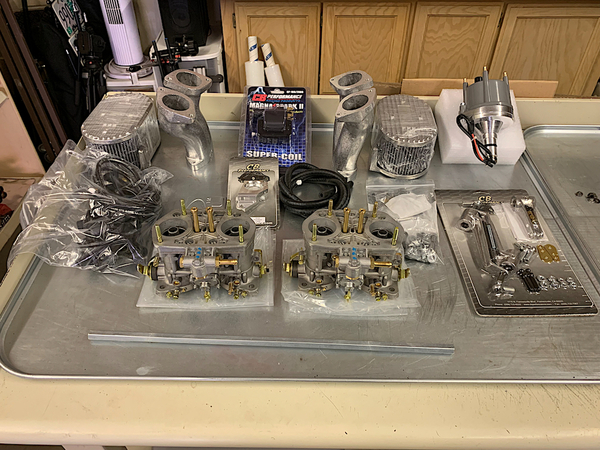
Now this is a cool coincidence. I scoured the internet looking for distributor replacement and ended up at cbPerformance checking out their MagnaSpark II. After speaking with the sales rep guy “David” I was convinced this was the company I wanted to deal with. I’m new to the air cooled scene and still learning my way around the motor. David asked enough questions to help me with my decision.  


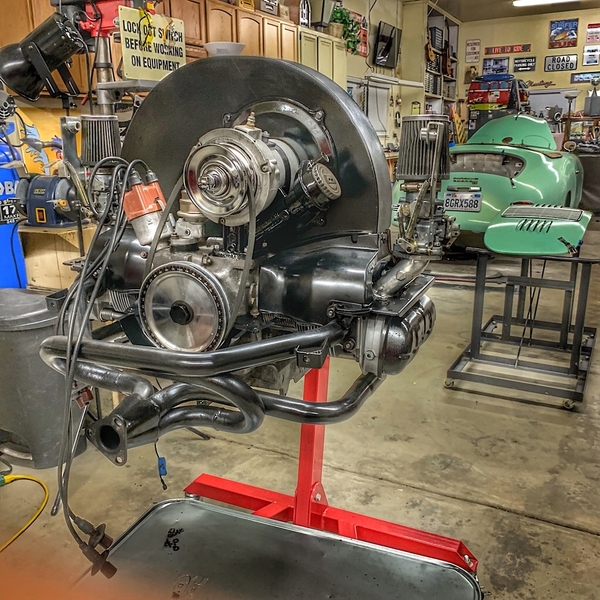
I ordered the MagnaSpark II KIT version. I also ordered the dual Weber 40IDF kit dual carb setup. Those of you that have been following my build thread, I have the motor all back together (minus the MagnaSpark and Weber’s) hopefully this Friday I’ll have it fired up on my test stand.


So what’s the cool coincidence? I listen to this podcast called “Let’s Talk Dubs” on episode 27 they interview Pat Downs @BigPower of cbPerformance which I at the time did not know is a member here. The same man who designed the MagnaSpark!


I have a 4 day weekend coming up, my goal is to get that motor running. I’ll report back fellas!

3283839A-1DA2-4F31-92A4-80D10C341F21


"All I need are big dreams and open highways..."

Attachments

Images (1)
  • 3283839A-1DA2-4F31-92A4-80D10C341F21
Original Post

Replies sorted oldest to newest

I ran an original Magna Spark from the 1990s until this past Spring when I installed a Magna Spark II.   The original was always a good unit, but it was getting on in years and was hard to find advance springs for so I made the switch.  

So far, the new version has been all they said it was in the marketing hype.  I also ran it on a Sun Distributor tester for a while and the curve was smooth and no spark bounce noted from 500 engine rpm all the way to 7 grand.  

Nicely designed and very nicely made.

ALB posted:

We'll all be waiting to hear how it goes! I've heard great things (here, on the Samba and other sites) about the Magnaspark II. Al

PS- can you refresh our memories as to engine specs (or even better, giving us the link to the build thread)?

@ALB, the original post I did for the motor build kind of went sideways so I didn't make any updates.

The motor crankcase has a stock crankshaft and camshaft, it's a 1776cc motor, MAHLE 90.5 pistons. The heads were fly cut  machined by Brother's VW Machine Shop down in Ontario, CA. It was port(s) matched to the original Kadron 40/44EIS dual carburetors it has with, 3/4" spark plugs, 12mm, 3 angle valve grind.  

I'm now installing a set of dual Weber 40 IDF carbs and the MagnaSpark II distributor setup. I also have a set of dual EMPI's carbs but decided not use them. 

Once I get this motor running properly I plan on building a second motor just like it. (I'm looking for an AS41 case if you know of anyone selling one). I'm going to install the 2nd motor into my 67' bus. 

Here's a couple of blogs I have. It helps me document what I've done to my rides. I've done this since 1995, before that pencil and notepad. 

www.vdubuslife.com

www.speedster.life

I have a question! 

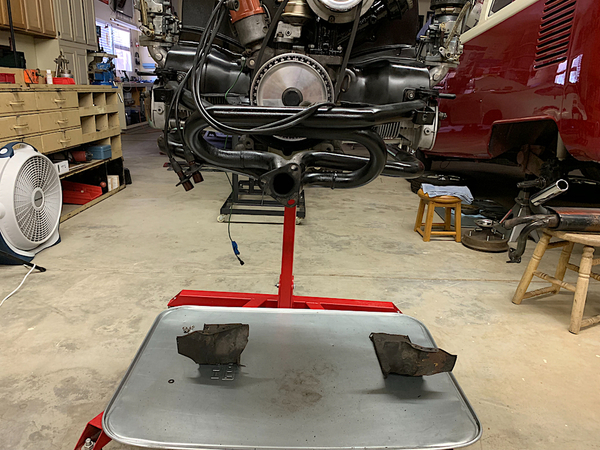
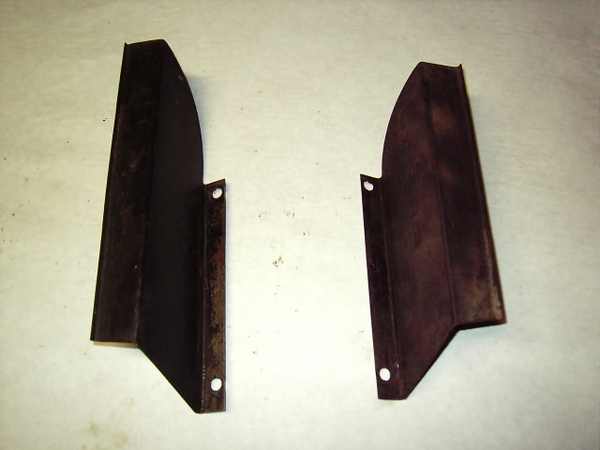
I'm wanting to install the tin sleds that are below the engine. I currently have J-tubes and Miller dual exhaust so no heater boxes. How do you mount the side that is not attached to the crank case? 

Also, what breather box do you recommend? 

Thank you for any input you can provide!

MotorBuild_03_02

Attachments

Images (1)
  • MotorBuild_03_02
Last edited by vdubuslife
Robert M posted:

A lot of members here are using the MagnaSpark dizzies. Pat comes on here occasionally to help people out with technical stuff. He has built A LOT of the motors used bay our members. CB Performance builds the majority of the motors for Special Edition and he's been helping Greg Leach at Vintage Motorcars.

Good to know! I got the parts in today. I may start tomorrow night. 

Do the local Speedster owners ever have a tech day/night? I used to host different gatherings for other rides and motorcycles. Great times for sure. 

MotorBuild_03_01

Attachments

Images (1)
  • MotorBuild_03_01

@vdubuslife wrote- "I'm wanting to install the tin sleds that are below the engine. I currently have J-tubes and Miller dual exhaust so no heater boxes. How do you mount the side that is not attached to the crank case?

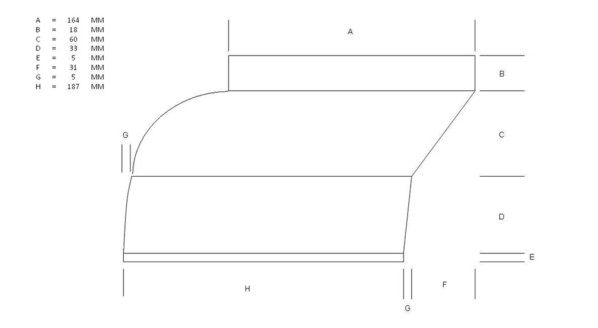
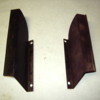
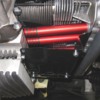
The heater boxes are replaced with 'industrial tins' that keep the spent cooling air flowing out behind the engine. Gene Berg Ent. and I think Aircooled.net sell them or you can bend up a set yourself. More on breathers in the morning... Al

PS- Have you thought of putting 1.4 ratio rockers on the Speedster engine? They will give it a little more power!

Another PS- I checked out the first page of your Speedster blog- you have way more patience than I do for chronicling everything step by step!

industrial tinsindustrial tin passenger sideindustrial tin pattern 1industrial tin pattern 2

Attachments

Images (4)
  • industrial tins
  • industrial tin passenger side
  • industrial tin pattern 1
  • industrial tin pattern 2
Last edited by ALB

I made a pair of lower cooling “sleds” from Al’s templates and they work great.  I live in New England and drive in colder weather so wanted to manage output air better.  These do the trick.

Made templates from his drawings out of file folder cardboard and then mounted the templates to the engine and tweeked them here and there to make them fit, then used the cardboard for the outline, bend points and hole locations applied to HVAC sheet metal for the real sleds.  

Last edited by Gordon Nichols
ALB posted:

@vdubuslife wrote- "I'm wanting to install the tin sleds that are below the engine. I currently have J-tubes and Miller dual exhaust so no heater boxes. How do you mount the side that is not attached to the crank case?

The heater boxes are replaced with 'industrial tins' that keep the spent cooling air flowing out behind the engine. Gene Berg Ent. and I think Aircooled.net sell them or you can bend up a set yourself. More on breathers in the morning... Al

PS- Have you thought of putting 1.4 ratio rockers on the Speedster engine? They will give it a little more power!

Another PS- I checked out the first page of your Speedster blog- you have way more patience than I do for chronicling everything step by step!

industrial tinsindustrial tin passenger sideindustrial tin pattern 1industrial tin pattern 2

Thank you @ALB. I downloaded your drawing and will look into this. I did consider 1.4:1 initially but sort of went to the wayside. On my 2nd 1776 motor I'll give it another consideration. 

I see where the tin connects to the side of the crank case but I don't see where the bolts across attach. Are there 4 mounting points or 2? 

I read a 1973 Type 181 (Thing) had VW tins that can accommodate no heater boxes/J-tube configurations. I'll be going to the local Bugorama show Sunday, hopefully I can find something. If not, I have your drawing for reference. 

Here's the link to the lower sled tin discussion:

https://www.thesamba.com/vw/fo...ewtopic.php?t=401943

Oh! I'll check out the other vendor links you provided too! 

I installed the latest Magnaspark dizzy with the coil pack and wires earlier this year on my 2276 type 1. It's been great. Very smooth. I like it a lot. Best upgrade so far.

My POS Chinese tach doesn't like it though. When I quickly spool up my engine, the needle just keeps on going, sometimes bouncing from max and back. I know I'm not revving that high. If I spool up slowly, it tracks accurately, or as accurately as it can be.

Is anyone else experiencing this? Should I move a new gauge set farther up my need-to-do list?

Thanks, CG.

I was going to suggest that tach adapter as well.

I built my own aluminum sled tins for my Spyder, but they run the other way from rear engine guys, dumping the air towards the trans. My J-tubes run directly under the cylinders, so a hole in the front of the tin was needed. I modified a couple valve cover bails to fix the head edge, and made a couple tabs to attach to the case. Dropped my oil and cylinder head temps by 10 degrees F. The curved aluminum tucks in tightly behind the fiberglass 911 shroud.

The original Magna Spark looked just like a stock VW distributor with the stock-style disti cap and wires.  The disti itself is machined from a steel casting and has a cap of roughly 3-1/2”.

The Magna Spark II has a much larger diameter disti machined from billet aluminum.  The disti cap is roughly the diameter of the palm of your hand (4-1/2”) and has snap-in HEI plug wire connectors.

The most noticeable difference is the billet aluminum housing.

I have run both the original and MS II on my mid-1990s Chinese VDO knockoff tach with no problems on either but I can’t speak to any of the newer tach units.

Last edited by Gordon Nichols

Good evening fellas, I fired up the motor on my test stand using the suggested pre-adjusted carburetor settings for my cbPerformance dual 40idf. 

Question, do you set your initial static timing on the Magnaspark the old method of using a test light connected to the negative coil side and rotating the MagnaSpark 2 distributor until the test light illuminates? Or do you go straight to using a timing light? 

My motor will not idle on its own with me coaxing it along. This makes it a bit of a challenge using the timing light. I’d like to be at a point where the motor will at least idle on its own. 

Have a great week fellas! 

B8563CFF-39A1-4454-8271-8BA3F32A7DDB

Attachments

Images (1)
  • B8563CFF-39A1-4454-8271-8BA3F32A7DDB
Alan Merklin posted:

If your coaxing it along , adjust the idle up so that you can use a timing light to dial it in then reset the idle to about 750 RPMs


I'll give it a whirl tonight. I had set the idle speed screw on both carbs to 1/2 turn inwards once initial contact was made on the set screw. Thank you for the suggestion Alan.  

1/2 turn after the arm makes contact with the screw is way not enough.  As Alan says, turn them both in a bit (like, 1-1/2 turns each) to get it to idle to keep it running.  Don't even try to static time it (static timing with an electronic ignition on a centrifugal advance distributor is irrelevant, anyway) - Just run it up to 2,500 - 3000 rpm and hold it there, then use a regular timing light to set the advance to 30º BTDC and lock the distributor there.  Re-check timing after tightening the locking screw.

BTW and your Magna Spark might be different, but mine peaks advance at 3,175 RPM (call it 3,200) on a Sun distributor machine and I'm OK with that.  Get it up to 3 grand on your engine to set the total advance and you should be fine.  

AFTER you have the timing set properly, THEN adjust the idle speed.  When you get it in the ballpark of the idle speed you want, balance the carbs left and right using a snail meter (linkage disconnected on one side only) for the same flow, then re-connect the linkage making sure it is neither pulling nor pushing on either side.  

Side tip:  Most ignition dwell meters have an RPM setting to use it as a Tach with your test stand.  Make sure you get one with a scale for 4-cylinder engines.

Last step is to bring it back up to 2,500 - 3,000 rpm and re-adjust the linkage on one side only so that they're pulling the same on both sides at that RPM to dial in the linkage.  You can check the draft front-to-back on each side with the snail meter at idle and adjust the air bleed screw on the lower throat on each side to bring it up to match the other throat (same side).  All this stuff should be done slowly to allow it to settle on each adjustment.  Patience is a virtue.

Last edited by Gordon Nichols
Gordon Nichols posted:

1/2 turn after the arm makes contact with the screw is way not enough.  As Alan says, turn them both in a bit (like, 1-1/2 turns each) to get it to idle to keep it running.  Don't even try to static time it (static timing with an electronic ignition on a centrifugal advance distributor is irrelevant, anyway) - Just run it up to 2,500 - 3000 rpm and hold it there, then use a regular timing light to set the advance to 30º BTDC and lock the distributor there.  Re-check timing after tightening the locking screw.

BTW and your Magna Spark might be different, but mine peaks advance at 3,175 RPM (call it 3,200) on a Sun distributor machine and I'm OK with that.  Get it up to 3 grand on your engine to set the total advance and you should be fine.  

AFTER you have the timing set properly, THEN adjust the idle speed.  When you get it in the ballpark of the idle speed you want, balance the carbs left and right using a snail meter (linkage disconnected on one side only) for the same flow, then re-connect the linkage making sure it is neither pulling nor pushing on either side.  

Side tip:  Most ignition dwell meters have an RPM setting to use it as a Tach with your test stand.  Make sure you get one with a scale for 4-cylinder engines.

Last step is to bring it back up to 2,500 - 3,000 rpm and re-adjust the linkage on one side only so that they're pulling the same on both sides at that RPM to dial in the linkage.  You can check the draft front-to-back on each side with the snail meter at idle and adjust the air bleed screw on the lower throat on each side to bring it up to match the other throat (same side).  All this stuff should be done slowly to allow it to settle on each adjustment.  Patience is a virtue.

Gordon, thank you!! I had a chance this evening to work on the motor for a bit. I was able to advance the timing and have the motor idle on its own. The idle is running high but at least I can work with the timing light and tach. 

I do have a couple dwell meters somewhere in the shop that has adjustable cylinder selection. I also have a few timing lights, one of them is the INNOVA 3568. I believe it as the RPM digital readout capabilities. I received my snail meter from cbPerformance last week so I'm covered there. 

Hopefully I can work on the motor tomorrow night and go through the process you have laid out on your post. 

Anyways, thank you and everyone else on this thread. I'm learning a lot! 

Here's a quick video of tonights progress. If you hear anything odd, chime in. I'm not familiar enough with VW motors to detect problems by sound. 

Speedster 1776 Motor

George-

IaM-Ray posted:

I saw the Speedster 1776 Motor video and on it you have two millers are they light ?

The weight seems the same compared to exhaust I've used on big blocks. I guess now that you mentioned weight, I've only carried them with both exhaust mufflers and pipes to the flange. In that case, they are relatively light.

I normally have a wooden stool propped under them to relieve some stress on the test stand and flange. If you're local you can come by and check the exhaust out. 

I finally listened to your engine video - sounds good, but needs to be sync'd (as you already know).  Baby steps on the syncing process.  These things are more trouble to set up than a big block, but once sync'd they're pretty smooth.

Love those mufflers - similar to my Bergs but quite a bit quieter.  What are they, again?

Oh, and I envy that fancy timing light/tach/dwell gizmo.  I think my timing light (a wand powered by 2 "D" cells) is something like 35 years old.......  

Gordon Nichols posted:

I finally listened to your engine video - sounds good, but needs to be sync'd (as you already know).  Baby steps on the syncing process.  These things are more trouble to set up than a big block, but once sync'd they're pretty smooth.

Love those mufflers - similar to my Bergs but quite a bit quieter.  What are they, again?

Oh, and I envy that fancy timing light/tach/dwell gizmo.  I think my timing light (a wand powered by 2 "D" cells) is something like 35 years old.......  

Hi @Gordon Nichols, the mufflers are Miller brand. I haven't had a chance to work on the motor again for the carb syncing process. I'll definitely take my time dialing the carbs in.

I treated myself a year or so ago and upgraded my timing light. Until that point it was an old timing light with no fancy features. I still have my dwell/tach boxes  

MotorBuild_05_01

Attachments

Images (1)
  • MotorBuild_05_01
Post Content
×
×
×
×
Link copied to your clipboard.
×
×