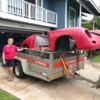
Hi everyone. I bought an old pan-based Intermeccanica Speedster back in August and have begun the rebuilding process. I have to express my thanks to all of you who post information about your cars and share your knowledge. I've found it more helpful than you can imagine. 

body-orig

Oooh baby!

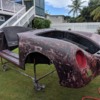
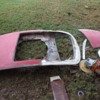
The Car: One of the original California IM Speedsters. I'm not sure when it was built, but the pan is from a 1969 beetle and it has a California VIN sticker. The guy I bought from is a North Shore (Maui) artist who made his millions as an auto racing artist. I had a blast hearing his stories about Steve McQueen and a load of the old F1 drivers. He bought the car used in 2000, drove it for 3 years and then parked it to begin a rebuild. He made great progress on the chassis and drivetrain and then lost interest. The body sat outside (100 yards from the surf) for 14 years with the expected results. The chassis sat in a garage for the same amount of time and was in great shape. After lots of convincing, he parted with it and I got a new project.

chassis-orig

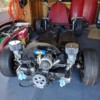
Not bad for sitting unstarted in a garage for 12 years

Background of the Plan: I've built and raced several scary fast cars and sold them all when we retired to Maui (our son and his family live here). Maui has WONDERFUL roads for driving, but also lots of distracted visitors in rental cars and on bicycles. I didn't want a car that tempted me to do something stupid, but I needed something for top-down fun. The last big build I did was a franken-911 cabriolet based on a 1982 911SC chassis rebuilt with the body panels from a 1995 911 Turbo. The engine was originally a 1979 930 (blown up). I bought a disassembled 1982 3.3 930 engine and took the best parts from each. It took me nearly 2 years to complete and put out 425 hp at the crank (de-tuned). So, it was a tribute car to the Porsche 993 Turbo Cabriolet that Porsche never sold to the public (they reportedly made 13 for friends of the family). It was rough, raw, competent and loads of fun. My wife drove it often, but complained about the pedal placement and lack of power steering etc. She had a 1996 911 cabrio that she thought was just the ticket (sold, too). So, my goal was to find a fun, sporty, but not dangerously fast car that we could use on our adventures around Maui. The IM Speedster ad showed up on Craigslist and I was sunk.
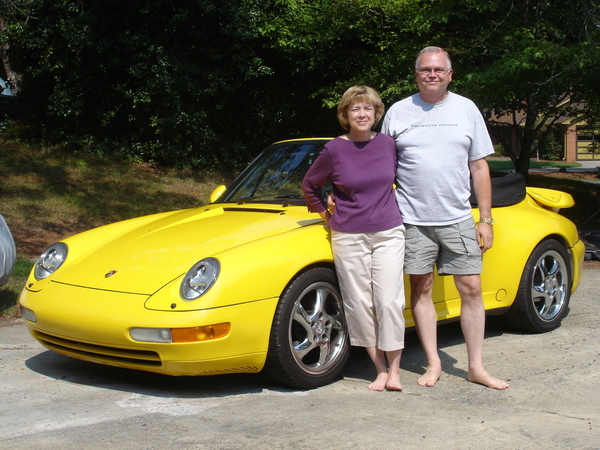
PorscheMM1

Der Beast and my Co-pilot

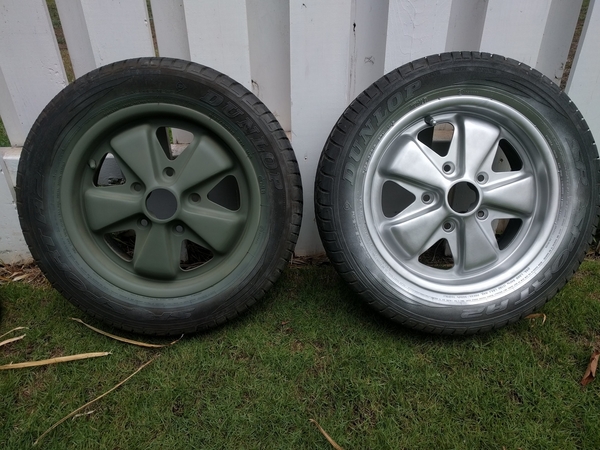
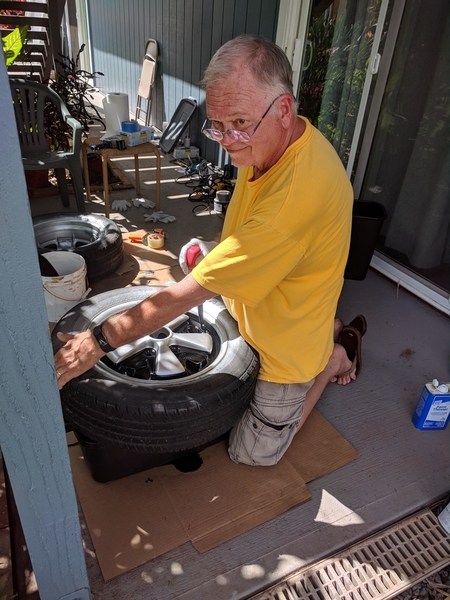
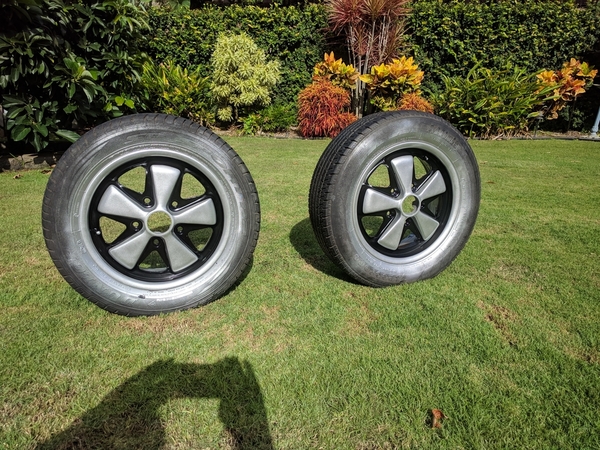
The Plan: We were always put off by snobbishness and the purists who thought that cars should never be customized. It is just a car, and different things make different people happy. I like to customize things and to tinker. I would never want a car that I'm afraid to take out driving. We lived in Rhode Island for six years (sorry Gordan, I don't think we got a chance to meet) and never locked the 911 turbo the whole time (replacing the cabrio top would have been lots more expensive than anything kept inside). The IM Speedster is just what I've been looking for. After talking it over with my co-pilot, we decided on silver paint and tan top/interior. I like the mild outlaw look, so it won't have bumpers and side trim. It came with silver fuchs that will be refinished with the black background, silver spokes Carrera look.  I'm adding an oil pressure gauge, a clock and will try to tastefully add air conditioning (it is Maui). The engine is a medium-tuned 1776 that was freshly rebuild 12 years ago (0 miles on it). It has a new (12 years ago) Rancho Pro-Street IRS transaxle, all new suspension bushings, brakes, etc. The chassis had a new German floor pan and a coat of POR15 (really nicely done and well preserved). The steering wheel had been stolen, so we decided on a vintage Nardi wheel.

Progress Update:

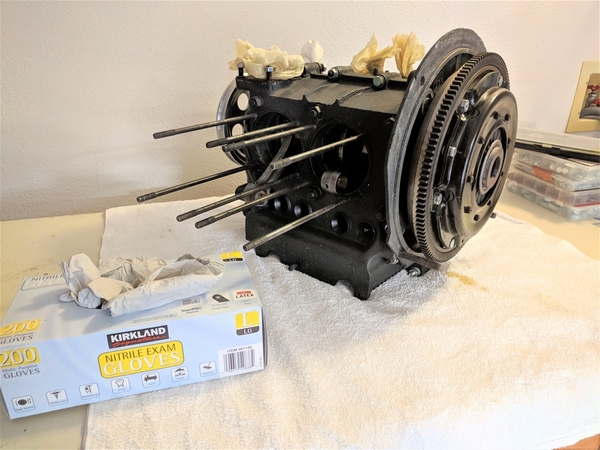
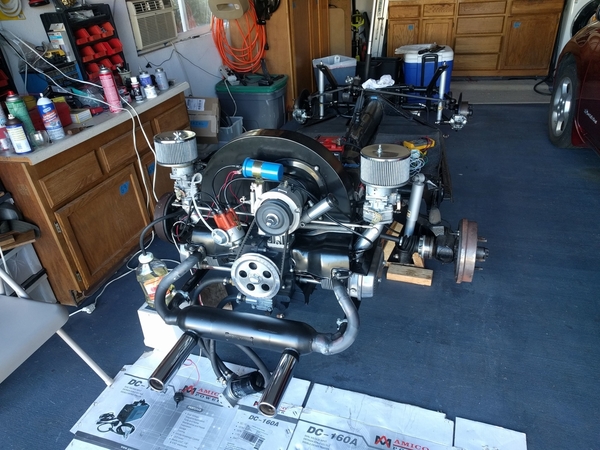
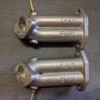
The engine didn't turn over easily so I took it apart. Mild rust had set in and was easily fixed. I put it back together doing a few performance/durability tweaks along the way. The spark plugs showed the classic lean idle problem on two cylinders that comes with most Kadron dual setups. I went ahead and modified the intake manifolds to allow the mixture to swirl a bit more before entering the heads.

One of Kadrons worked perfectly and the other was the bastard from hell. It had gasoline gum left over from 12 years ago when the builder tested it. After 3 rebuild attempts, it finally works and the engine runs well. No Oil Leaks!!!

 longblock

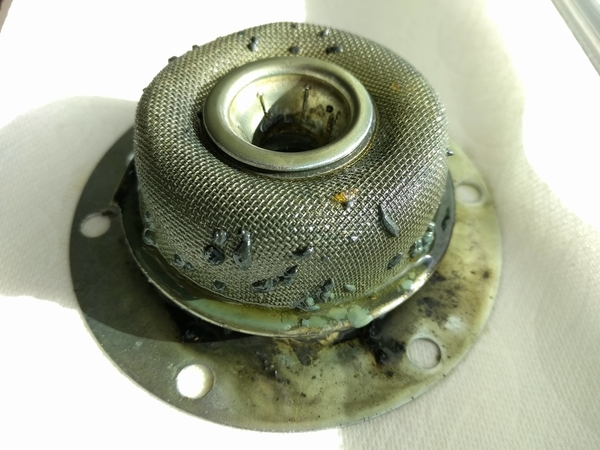
oil-screen

Maybe it needs an oil change...

rustinside

Surface rust and some sticky lifters that cleaned up easily.

IMG_20180906_141647

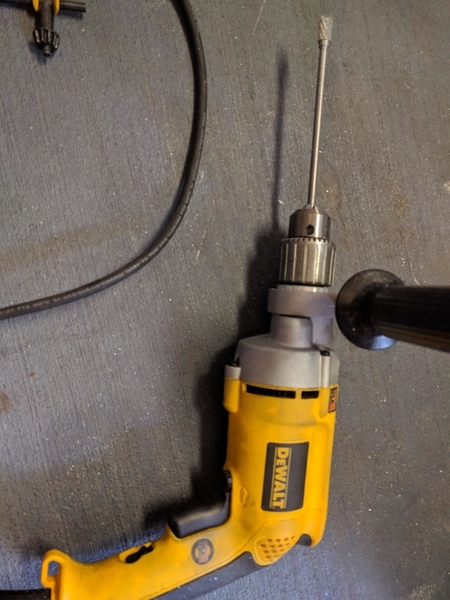
Intakes need some surgery.

IMG_20180906_141554

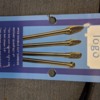
Long shank burrs bought cheap on Amazon.

IMG_20180906_141530IMG_20180906_141746

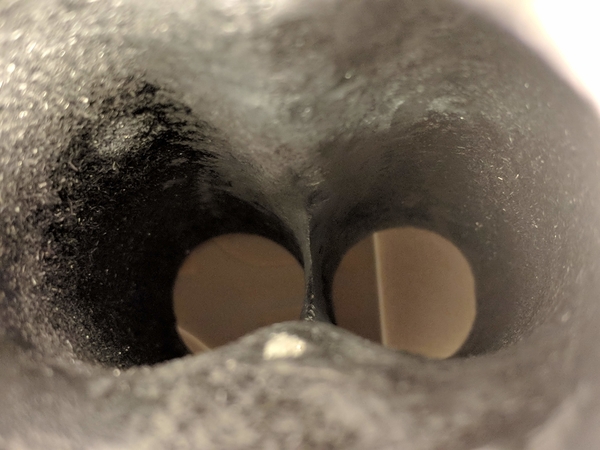
Not much of a chance for air/fuel to mix as it comes from the Kadron

IMG_20180906_142049

Ah, much better (yes, I cut through the side accidentally - easy fix with J-B Weld)

engine ready

It's Alive!!!


The Body

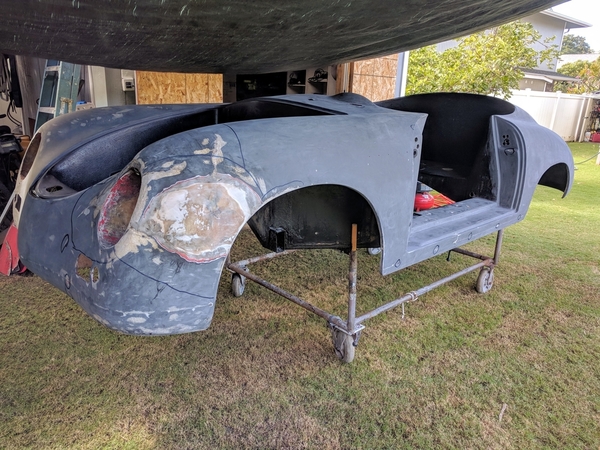
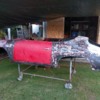
Over a period of time, I applied Aircraft Fiberglass Paint Remover and scrapped off several layers of paint and primer. I then sanded the remaining bondo and paint down and sometimes through the gelcoat. There were lots of little cracks and chips that had to be ground out. There was an unexpected accident repair near the driver's headlight that will need substantial attention.

partheadlightsideunder

rear

IMG_20181010_095313

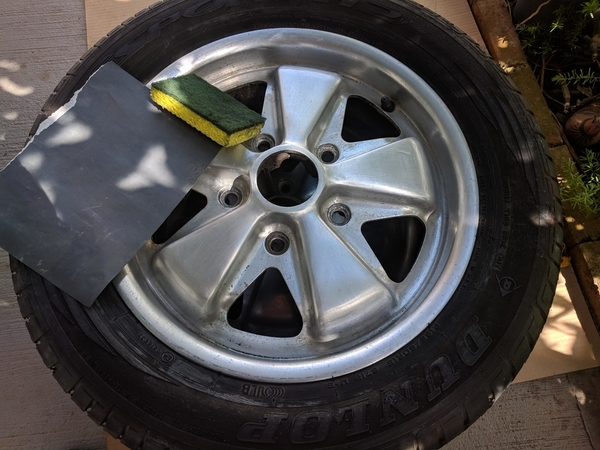
Fuchs need some attention

IMG_20181010_122931IMG_20181011_104450

Why yes, honey, I do know where the turkey baster went...

IMG_20181011_152323

Just what I was looking for. The 18 year old tires have been replaced with Michelins.

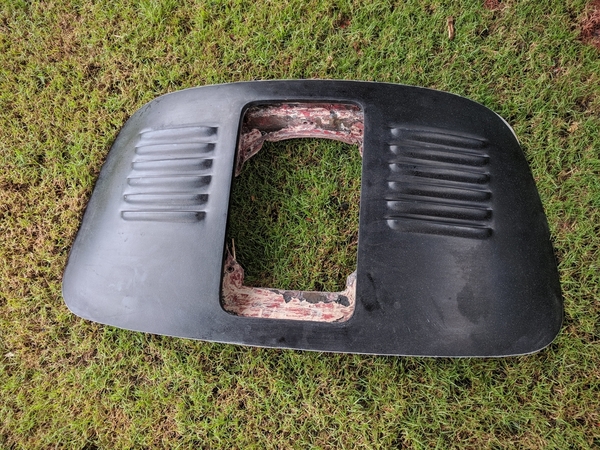
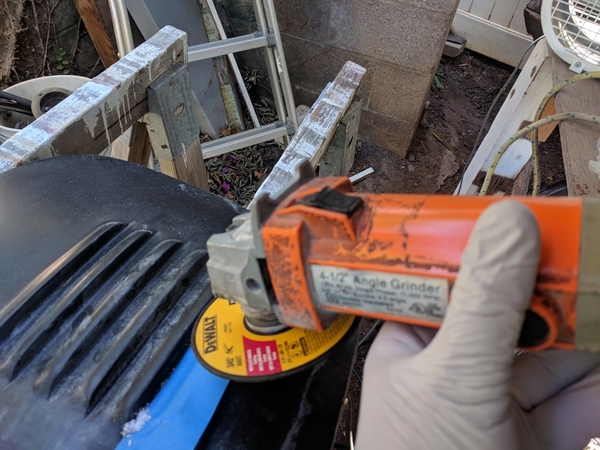
I wanted a louvered decklid for the engine and bought a skin from Greg Leach at Vintage Motorcars. I ended up buying seats, interior, carpet and other miscellaneous items from Greg. He and Anna are great to work with! Greg said to cut the top off of the original lid leaving as much of it as possible and then bonding it to the skin. He suggested waiting to cut out the louvers until it had been bonded. I fitted the base of the lid to the car and fitted the new louvered skin on top. I had to grind a few spots on the lid base to get the skin to fit well. Once it was in position, I drilled two locator holes and pinned the louvered skin and the lid base together. I pulled it out of the car and unpinned the skin. I wire brushed the contact areas and cleaned them with acetone. I used a thick coat of fiberglass resin on both pieces and then pinned the pieces together. I used clamps to hold the skin to the base while the resin set up and let it cure for 2 hours. I then applied resin to the joint inside the lid between the skin and the base and ran a strip of fiberglass around the inside wetting it down with resin and squeezing out bubbles where I could see them.  I then let it sit overnight. Using a cutting wheel on my angle grinder and touching up with a dremel tool, I cut out the louvers (remembering to use eye and breathing protection).

lidchopping

Very scary...

lidchoppedlouvers

Bonded

IMG_20181205_130814

Even scarier..

dremelallcut

Phew!

Next up will be cleaning up the cutouts and doing final adjustments to the decklid fit. I'll post updates as things progress.

Thanks again to everyone for making this site a welcoming source of knowledge, advice and opinion


Mike Pickett

Attachments

Images (27)
  • body-orig: Speedster Arrives and Co-pilot
  • chassis-orig: Chassis
  • PorscheMM1: Der Beast (sold)
  • longblock
  • oil-screen
  • rustinside
  • headlight
  • paintoff
  • part
  • sideunder
  • allcut
  • dremel
  • IMG_20181205_130814
  • lidchopped
  • lidchopping
  • louvers
  • rear
  • IMG_20180906_141530
  • IMG_20180906_141554
  • IMG_20180906_141647
  • IMG_20180906_141746
  • IMG_20180906_142049
  • IMG_20181010_095313
  • IMG_20181010_122931
  • IMG_20181011_104450
  • IMG_20181011_152323
  • engine ready
Last edited by Michael Pickett
Original Post

Replies sorted oldest to newest

You're doing a fantastic job, M_____ (Michael? Mark? Martin? ???)! I can see cutting apart the engine lid being pretty intimidating. How far down did you take the plenums in the intake manifolds? Does it idle on all 4 cylinders now? The friend that originally told me about this mod said it won't change the jetting and power throughout the rpm range will be the same. Did you happen to note what camshaft is in the engine? Do you know if the heads have stock (35x32mm) or bigger (40x35mm) valves? Do the intakes in the heads look like they have any port work done? I'm just trying to get an idea of how much power you'll have and where peak power will be. Glad you're having fun with it. Welcome to the Madness!  And you can call me Al (come on, you know the tune!)

Last edited by ALB

Thanks, everybody. It's a lot of fun and terror, but easier with the information posted on this site. Al, the owner didn't remember the name of guy who did the engine build (said he built "Herbie" but that could be anybody . Here's the engine build specs he shared with me:

1776 cc engine 
Engle 110 cam and gear
Lightened and balanced connecting rods
Lightened (13 lb) flywheel and clutch
69 mm crankshaft (counterweighted)
Piston and liner set (905 mm)
Hardend race lifters
042 racing heads
Electronic SVDA distributor
Reconditioned duel oil relief case
40 mm duel carbs set Kadron style
Bosch blue coil
full flow oil pump (30 mm )
external oil cooler
remote oil filter
chrome moly head studs and case savers
1700 lb pressure plate and clutch kit
EMPI exhaust system
Fully balanced and flowed

The heads have round ports so I don't think they are "extreme." I failed to measure the valves when I had it apart so that's an unknown, too. I suspect it will be fast enough to merge on the few highways we have on Maui and slow enough that I won't be running over many island visitors If you have any HP estimates, I'd love to hear them. Mahalo (thanks)!

Theron, it probably wasn't. This car was up in Sprecklesville (on the North shore near Paia) and hasn't been on the road for over a decade. There's a small company that rents four Speedster replicas here in Kihei (for only $250 per day!). That probably the one you encountered. I see them regularly and they inspire me to dive back into the paint goop and fiberglass fibers. You'll have to come back to visit when this one is ready for a test ride.

Yup, that was one hell of a first post!   We can tell, Mike, that this isn't your first Pineapple Round Up, and it looks like you're having a lot of fun making your car new again.  You've done a remarkable amount of work in a few, short months.  Not everyone on here has a paint-shop dolly kicking around to put the body on while you're working on it!

My guess on your engine HP would be in the vicinity of 85 - 90 honest hp at the crank.  Yes, the head ports sound pretty stock if they look round.  I have a pair of 044 heads which I had further-massaged by a guy who runs a racing motorcycle machine shop.  The ports are now "D" shaped and really flow, but there is precious little meat between ports (1/8") so I've abandoned the head-to-manifold gaskets, sanded the manifold flange faces flat and just use a Locktite flange sealant on them.  Seems to do the trick.

You are very brave to use an angle grinder on those louver openings.  My first reach would have been for the Dremel and then with a very steady hand!  

I also applaud your work on the Fuchs.  I did the same to my set and it took about 4 part-time days each to get them sanded, polished and painted.

Anyway, great work there, Mike, and I'm sure you'll find lots of outlaw inspiration on here from the sublime to the radical.  Pro'bly lots of labor offers from the mainlanders, too, as the winter wears on.  Keep pluggin' away at it and keep posting results.  You're building a great little car that your wife won't need power steering to drive.

Gordon - The Speedstah Guy from Massachusetts

mppickett posted:

Thanks, everybody. It's a lot of fun and terror, but easier with the information posted on this site. Al, the owner didn't remember the name of guy who did the engine build (said he built "Herbie" but that could be anybody . Here's the engine build specs he shared with me:...

1776 cc engine 
Engle 110 cam and gear...
69 mm crankshaft (counterweighted)
Piston and liner set (905 mm)...
042 racing heads..
40 mm duel carbs set Kadron style...
EMPI exhaust system
Fully balanced and flowed

The heads have round ports so I don't think they are "extreme." I failed to measure the valves when I had it apart so that's an unknown, too. I suspect it will be fast enough to merge on the few highways we have on Maui and slow enough that I won't be running over many island visitors If you have any HP estimates, I'd love to hear them. Mahalo (thanks)!

If the 042 heads are from MOFOCO, Michael, they have 40x35mm valves and cast (10%? 15%? I forget...) larger ports, so...

An engine with these components should rev to somewhere around 57-5800 or even 6,000 rpm with power. Depending on the exhaust and compression ratio the engine will produce any where from 85 to close to (or maybe even?) 100 hp and be a very fun engine in your Speedster. Adding 1.25 rockers, ensuring the compression ratio is optimal (close to 9:1 with no sharp edges in the combustion chamber), making sure the exhaust isn't restrictive could add up to 10 more hp (the venturis in the carbs may need to be enlarged from 28 to 30 mm- I'm not sure of how much power the 28 mm vents the carbs come with are capable of).

mppickett posted:

Al, regarding the manifolds, I opened it up until about an inch above the bottom. I haven't had a chance to run the engine enough to check the plugs. It was more of a "while you have it apart" thing. I figured it couldn't do any harm and there was anecdotyl evidence that it helped the idle mixture.

Yeah, this is what a friend tells me (he knows way more about these things than me).

It will toodle nicely around the island with decent power and be a hell of a lot of fun! Al 

Last edited by ALB

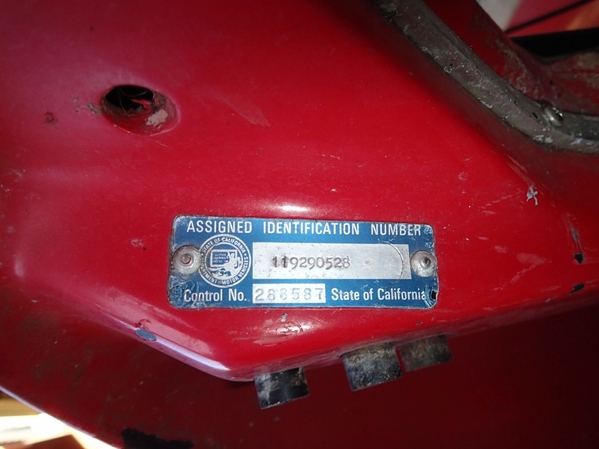
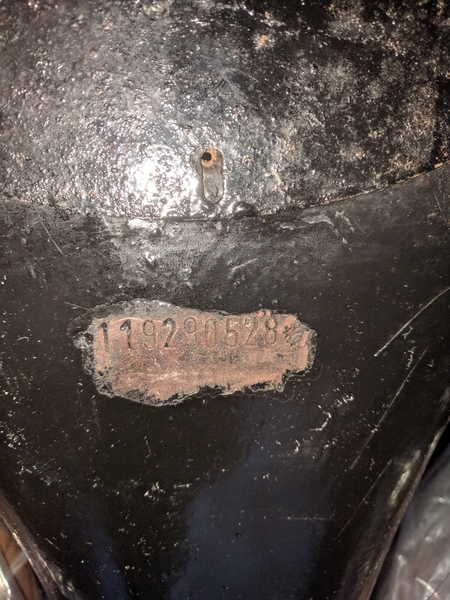
Thought I'd share an "Oh crap" moment that happened this week. I was using compressed air to blow dust off of the body and happened to hit the California VIN tag (decal) just right. It blew a piece right out of the middle.

origVIN

Original VIN tag

aircooledVIN

Original tag after being hit with compressed air

After chasing down the pieces of the decal that had blown into the yard, I started checking into how you get a replacement VIN on Maui. The short answer is "not very easily." I had a conversation with the guy who runs safety checks for Maui county (which includes the islands of Molokai and Lanai by the way). He said as long as the safety inspector can see a VIN number that matched the registration they didn't care where it was located. On a long shot, I decided to check whether the chassis stamp matched the VIN tag. The chassis stamp was buried under about 1/8" of POR15 (not complaining, I didn't have to put it on). It turns out that Aircraft Fiberglass paint remover will take off POR15 very easily. You wait about 10 minutes and wipe it off with a paper towel. 

Sure  enough, the chassis serial number matched the VIN tag and the registration. I cleaned it up some more and gave it several coats of clear paint. When I get it inspected, I'll just get the guy to look under the carpet behind the seats. Whew!

chassisVIN

Attachments

Images (3)
  • aircooledVIN
  • chassisVIN
  • origVIN
Gordon Nichols posted:

Yup, that was one hell of a first post!   We can tell, Mike, that this isn't your first Pineapple Round Up, and it looks like you're having a lot of fun making your car new again.  You've done a remarkable amount of work in a few, short months.  Not everyone on here has a paint-shop dolly kicking around to put the body on while you're working on it!


Anyway, great work there, Mike, and I'm sure you'll find lots of outlaw inspiration on here from the sublime to the radical.  Pro'bly lots of labor offers from the mainlanders, too, as the winter wears on.  Keep pluggin' away at it and keep posting results.  You're building a great little car that your wife won't need power steering to drive.

Gordon - The Speedstah Guy from Massachusetts

Thanks, Gordon. That's high praise from someone with your skills. I really appreciate your contributions to the forum, I've learned a lot. By the way, I was originally from North Carolina and after six years of blowing snow from the driveway and sidewalks while we lived in Rhode Island, I respect New England's resilience to cold weather. The only snow I've seen here is on the summit of Mt. Haleakala (a little over 10,000 ft). I don't miss it a bit.

ALB posted:

An engine with these components should rev to somewhere around 57-5800 or even 6,000 rpm with power. Depending on the exhaust and compression ratio the engine will produce any where from 85 to close to (or maybe even?) 100 hp and be a very fun engine in your Speedster. Adding 1.25 rockers, ensuring the compression ratio is optimal (close to 9:1 with no sharp edges in the combustion chamber), making sure the exhaust isn't restrictive could add up to 10 more hp (the venturis in the carbs may need to be enlarged from 28 to 30 mm- I'm not sure of how much power the 28 mm vents the carbs come with are capable of).

Yeah, this is what a friend tells me (he knows way more about these things than me).

It will toodle nicely around the island with decent power and be a hell of a lot of fun! Al 

Thanks, Al. It's great to have access to folks with your kind of expertise!

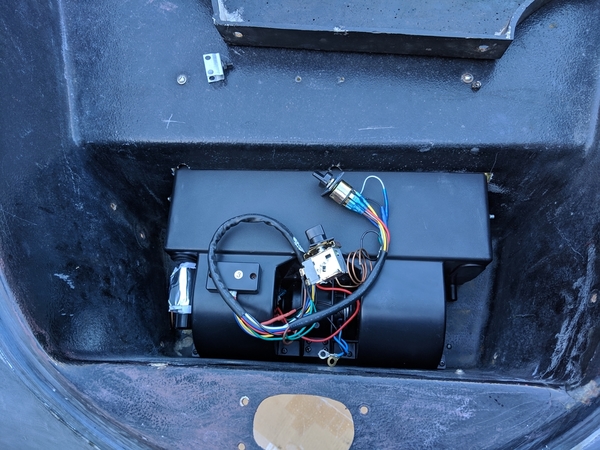
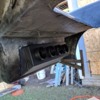
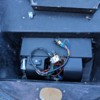
End of the year update: I got the chassis drivable. My wife captured a great video with her saying "Don't do it, don't do it" as I drove it down to the corner and back. I've also been doing some body work to touch up the fiberglass in areas that have seen trauma sometime in the last 35-40 years. Nearly done with that. I'm just completing some modification to the battery box and body front support to allow the installation of a "universal" air conditioning evaporator box. I doubt there's a lot of interest in this mod, but I'll share it for those rare hot weather fans.

The A/C plan: Keep the under dash as clean as possible, route vents to our feet and through the dash to our faces, plan on using it with the top down mostly to increase driving enjoyability, hide the fan & temp controls under the dash (going for visual simplicity).

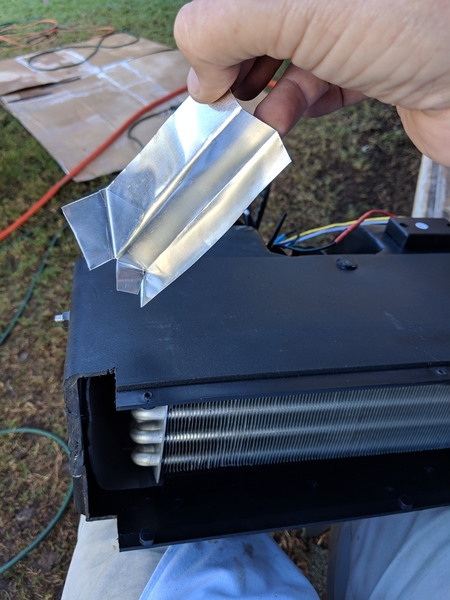
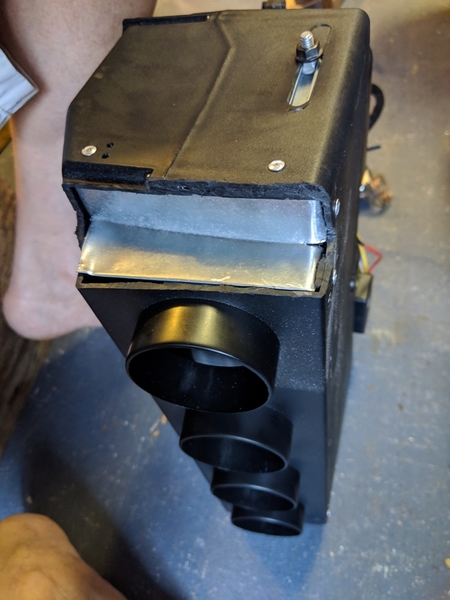
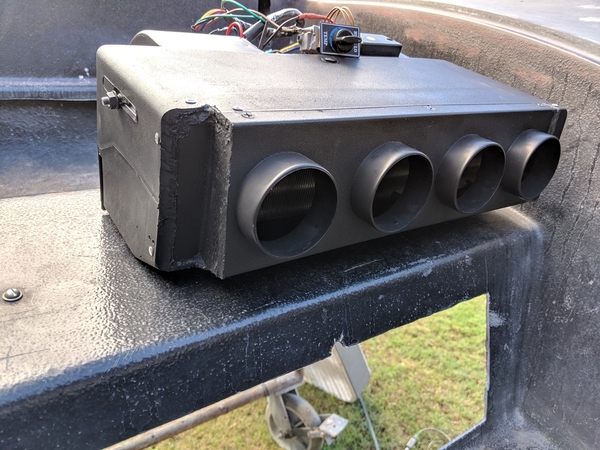
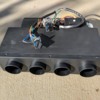
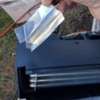
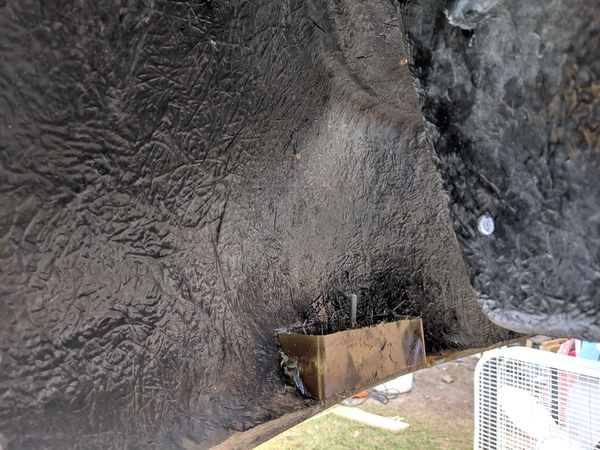
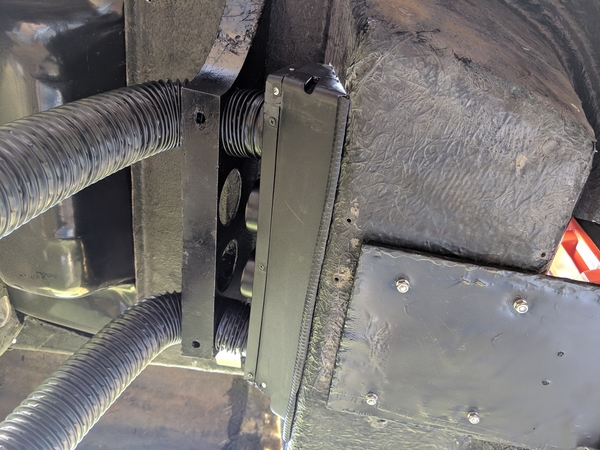
Decisions so far: Coldmaster Universal Underdash kit w/o compressor 404-000DC - Even though I'm not mounting it underdash, the evaporator/blower seems to be a reasonable size and the blower puts out a lot of air (important since it will be used with the top down mostly). I'll be able to use most of the other parts in the kit and the price is reasonablish. i had to slightly trim the steering gear side of the evaporator to make it fit (see pics). I plan on buying a SD7H15 compressor since it is designed for engines of smaller displacement and still puts out plenty of cooling. Big decision - I decided not to worry about recirculating the air from the cars interior back into the blower inlets. It will be all fresh air. This reduces plumbing challenges and fits with the top down use case. I haven't finally decided on the compressor mount. Gilmore gets good press, but I may end up fabricating one myself.

evap

Left side will need to be trimmed back to clear steering gear.

hole

Hole cut into batter box

evap in box

It fits...

evap under

Outlet hoses will go through holes cut into front body support and then over the front axle tubes


evap cut

Evaporator corner notched and aluminum flashing cut for riveting into box

evap rivet

Riveting done and patch in place

Evap Mod

Patch sealed with black RTV and painted to match

support

Front body support cut to allow cooling hoses through. I added two additional fiberglass vertical supports between the holes on the back side to make sure no strength was lost in the support


I'll update after I make some more progress. Hope everyone has a Happy New Year!

Mike

Attachments

Images (8)
  • evap under
  • evap in box
  • hole
  • evap
  • evap cut
  • evap rivet
  • Evap Mod
  • support
Last edited by Michael Pickett

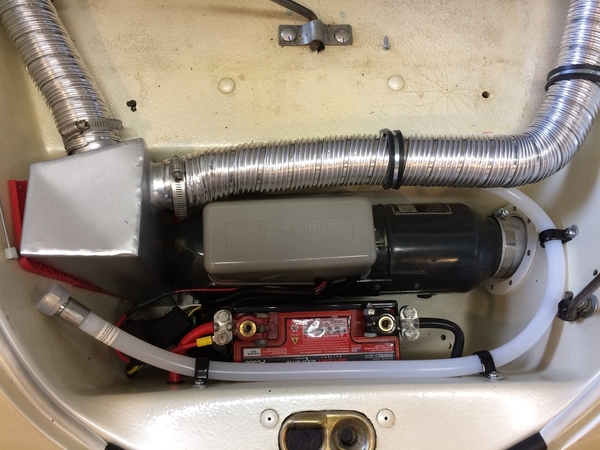
Really nicely done, Mike!  It seems that both you and I saw all that space where the Battery went and thought “ I could really use that space for something better!”

That’s where I stuffed my gas heater, too, but had to go to a smaller form-factor Odyssey battery to squeeze everything in there.

BDB7AA41-C25B-481A-9BB9-4F75CCCDBA60

This is what’cha do when you live in New England!

Attachments

Images (1)
  • BDB7AA41-C25B-481A-9BB9-4F75CCCDBA60

@Michael Pickett said- "Thanks, Al. It's great to have access to folks with your kind of expertise!"

It's just the result of a rather mis-spent youth (way too much time in a friend's shop playing with VW's and drinking too much beer instead of going back to school!). It's nice to know it's good for something...

Anyway- 1st thing- I think you may find the exhaust not allowing the engine to develop it's full potential. IIrc that style exhaust is good to somewhere around 80 hp, while the rest of the engine has the capability to make fair bit more than that. A merged 1 1/2" system would be much better suited to the combo. Sorry I missed it the first time.

2nd thing- Well done with the evaporator box! It'll be interesting to see how the engine reacts to the added work of turning an a/c compressor- I've heard of smaller engines having trouble with air, especially at idle (or when returning to). A longer stroke crankshaft gives the added lower end torque needed to deal with the extra stresses involved. Plus, 2 (or 2.1 or 2.2 or...) liters is so much fun in these things!

Yoda out (for now,but back you know I will be!)

Last edited by ALB
Gordon Nichols posted:

Really nicely done, Mike!  It seems that both you and I saw all that space where the Battery went and thought “ I could really use that space for something better!”

That’s where I stuffed my gas heater, too, but had to go to a smaller form-factor Odyssey battery to squeeze everything in there.

BDB7AA41-C25B-481A-9BB9-4F75CCCDBA60

This is what’cha do when you live in New England!

Nicely done, Gordon! Yep, that's exactly what I thought. We retired out here from Barrington, RI (son & his family live here) and I would have definitely copied your heat solution if we still lived there. Out here, we don't even have a furnace in the house :-)

ALB posted:

@Michael Pickett said- "Thanks, Al. It's great to have access to folks with your kind of expertise!"

It's just the result of a rather mis-spent youth (way too much time in a friend's shop playing with VW's and drinking too much beer instead of going back to school!). It's nice to know it's good for something...

Anyway- 1st thing- I think you may find the exhaust not allowing the engine to develop it's full potential. IIrc that style exhaust is good to somewhere around 80 hp, while the rest of the engine has the capability to make fair bit more than that. A merged 1 1/2" system would be much better suited to the combo. Sorry I missed it the first time.

2nd thing- Well done with the evaporator box! It'll be interesting to see how the engine reacts to the added work of turning an a/c compressor- I've heard of smaller engines having trouble with air, especially at idle (or when returning to). A longer stroke crankshaft gives the added lower end torque needed to deal with the extra stresses involved. Plus, 2 (or 2.1 or 2.2 or...) liters is so much fun in these things!

Yoda out (for now,but back you know I will be!)

Good observations, Al. For now I'm just doing the minimum to get it on the road. I think there's a 50/50 chance I'll have to set up a crank trigger ignition to make space for the A/C compressor, but ...  The wife and I went on a tour in the old '82 911 turbo cabriolet that was such a scorcher that she makes A/C a requirement on our car projects. BTW, the old 911 turbo was sold to a Norwegian sheep farmer sight unseen before we moved out to the islands. He sent me the money and asked if it could just sit until the shipping company could schedule a pickup. Nice fellow.

Thanks for your ideas and help. Those mispent days of youth were well worth it!

Last edited by Michael Pickett

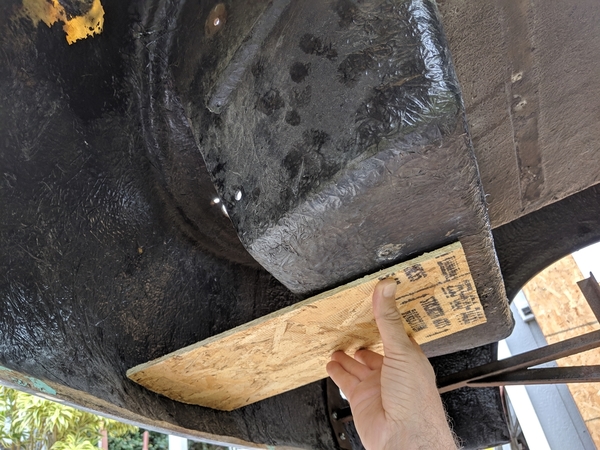
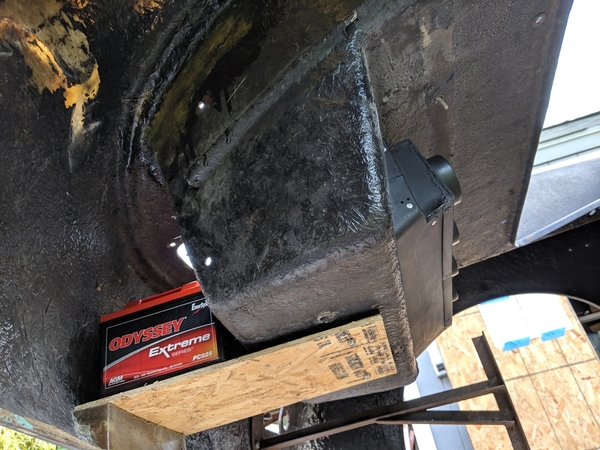
Just a little more front end progress before 2019. I used the battery box for the A/C evaporator so the battery needed a new home. I'm using an Odyssey PC925 battery (around 26 lbs) and wanted to put it as far forward as possible. Here's how I approached it on the IM.

battery

bareboard

Why not in the nose as far in front as possible? Just have to figure out a strong way to support it. I'm thinking it needs a lip to rest on.

mold_for_lip

A little tray made out of aluminum flashing taped to the nose and wiped with oil so it will release seemed like it should work as a mold for the fiberglass.

lip_bolt

It's amazing how much resin and cloth went into that little mold. Halfway through, I stuck a bolt and fender washer into the mold and filled it up around it. Boy, talk about an exothermic reaction - this thing was hot for 2 hours. Be sure to use a level so the lip matches the tilt of the bottom of the battery box, otherwise the board won't lie flat.

testfit

Test fitting the board on the lip and looking at various battery orientations

brackets1

Figure out the battery orientation that fits your nose the best way. Don't forget that you'll need to be able to replace the battery at some point. Since I was making some relief cuts in the front of the battery box to let fresh air get into the evaporator, I had room to sit it vertically. It's still tight in the nose. I drilled a large hole in the board on the far side of the battery where it sits on the lip bolt. Four holes in the bottom of the battery box match up with the support board to give vertical and horizontal support. The strap across the top is just a Simpson Strong Tie strap slightly trimmed and rounded at the ends. The board got three layers of fiberglass cloth on the bottom and two layers on the top.

finalSecure and easily replaceable (without having to disconnect the A/C!) The structural bolt is a little bit overkill, but it  make everything secure, easy to disassemble and it fits the Strong Tie strap :-) Just a note, on my car the battery only fits in from the passenger side and I have to hang the tie-down strap on it while putting it into the slot on the board. Tight fit, but it works...hosesEverything locked down. The evaporator ventilation hoses fit well and should find their way into the dash and floorboard without too much fuss and muss. 

Whew. Again hope everyone has a prosperous, love filled, interesting and fun New Year. May you only get warning tickets...

Mike 

Attachments

Images (8)
  • bareboard
  • battery
  • brackets1
  • final
  • hoses
  • lip_bolt
  • mold_for_lip
  • testfit
Last edited by Michael Pickett
Post Content
×
×
×
×
Link copied to your clipboard.
×
×