Looking good! Being able to see the finish line gets even more exciting. ![]()
Great build and great documentation.
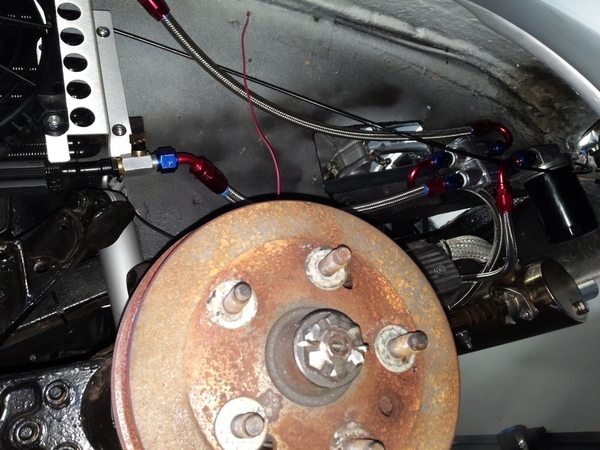
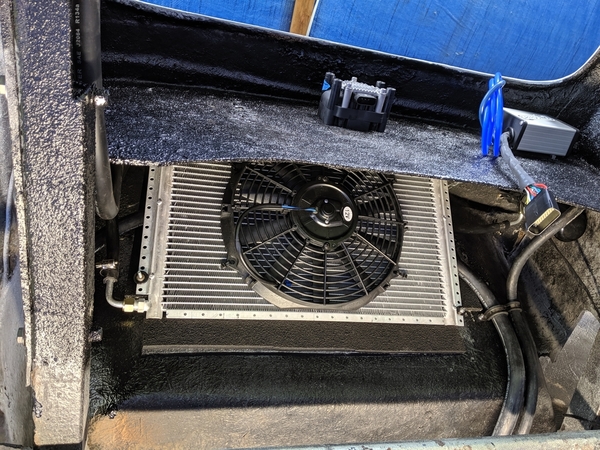
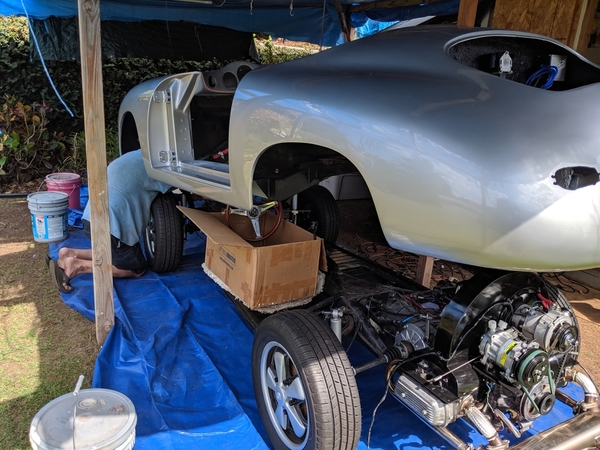
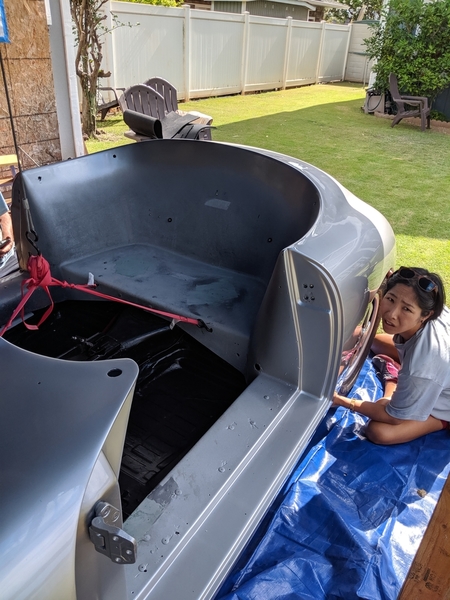
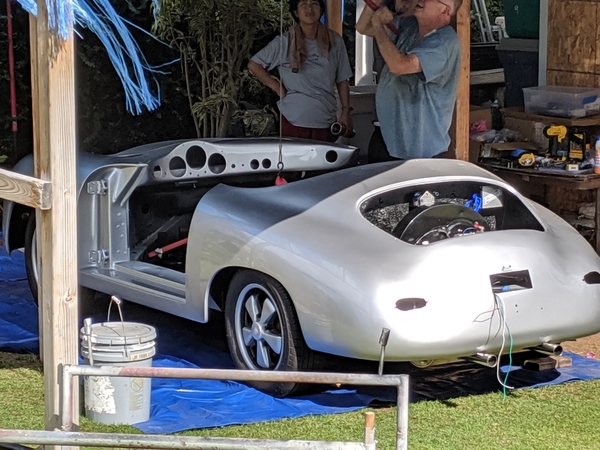
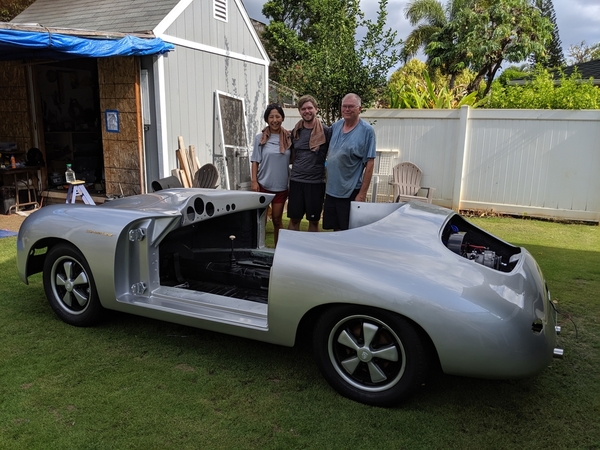
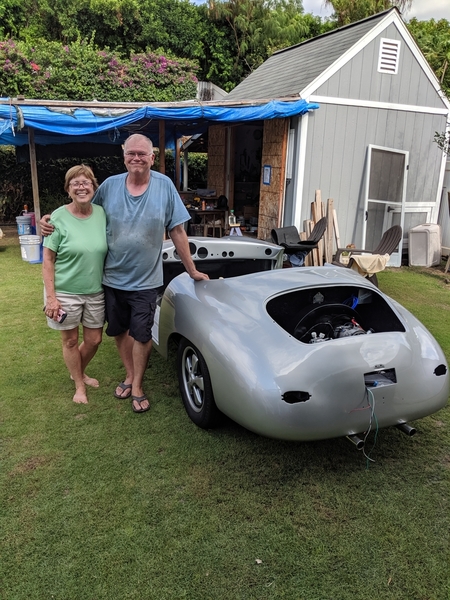
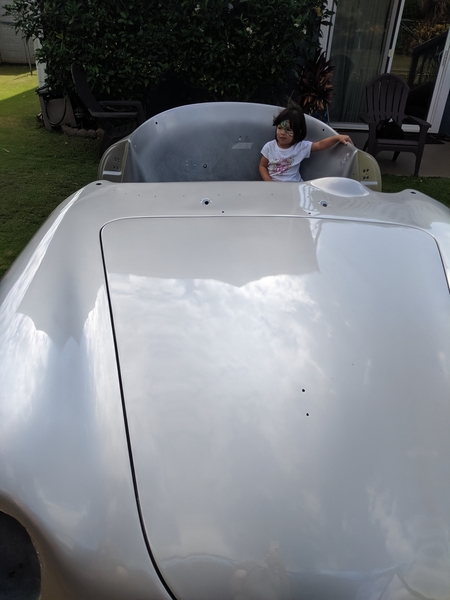
Big day. With the help of Marianne, Kanako and David, we got the body attached to the chassis. Lots of prep work involving the AC condenser, fan, AC dryer, electrical lines and hoses in the space behind the firewall that's pretty inaccessible after the body is on.
Much to my surprise, that involved pretty much all of the AC parts except for the compressor to get the right hose orientations and lengths.
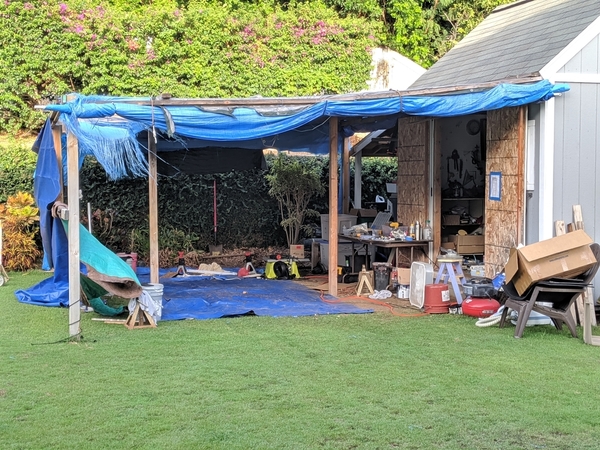
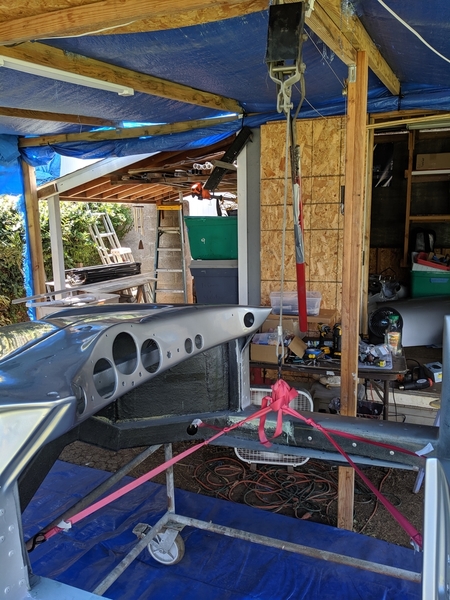
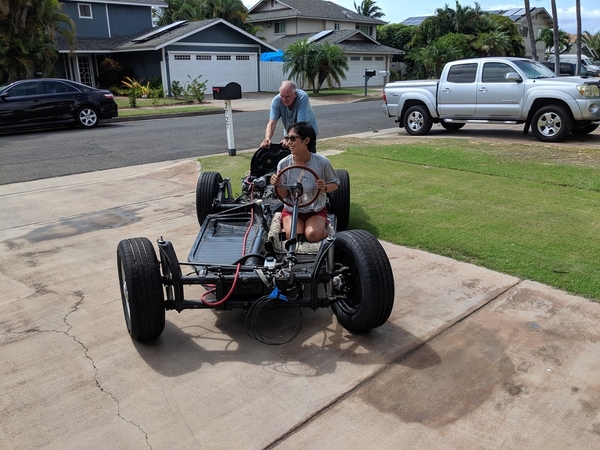
Kana took off the manifolds and carbs and drove to the house of tarp while David and I pushed. I ran the modified come-along while they bolted the corners. It's been just a little more than a year since the car arrived. Being totally honest, I think I've got more than 80 hours in the rebuild already and I haven't even torqued the wheel lugs yet. Who'd have thought?
By the way, the come-along is bolted to a reinforced 2x6 and I welded a 3 ft long 1-1/2" pipe over the short handle to get the leverage I wanted. And painted it red so I wouldn't hit my head on it more than 2 or 3 times.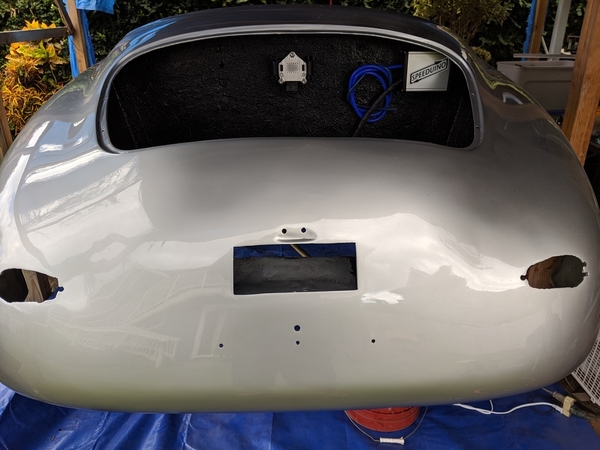


Attachments
Absolutely excellent! Congratulations.
Looking good, Mike!
Very nice! ![]() Should be on the road by, oh, Wednesday?
Should be on the road by, oh, Wednesday?
Very impressive! You are doing a fantastic job!
ALB posted:Looking good, Mike!
To further the comment above, I do love Speedsters wearing alloys!
So did you all get face painted to celebrate the occasion, or just the little one?
Gordon Nichols posted:So did you all get face painted to celebrate the occasion, or just the little one?
Mine was painted with truck bed liner. Boy, that stuff is hard to scrub off!
This morning I decided to read the whole build. MIke, Impressive, most impressive.
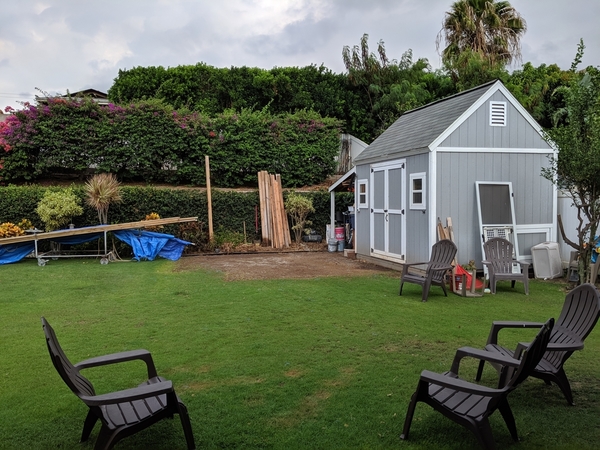
The House of Tarp is empty and Marianne says it's ready for tear down! Fuel pump, AC hoses, compressor, condenser, fan wiring, pan sealing, seat belt installation etc, etc. It starts and runs and was driven from the back yard to the garage for final assembly. Marianne guided me past the clothes lines, house and gates with millimeters to spare. Huzzah!
Now the rest of the parts can be installed in air conditioned comfort...
Ready for tear down!
Link to yard driving video:
https://photos.app.goo.gl/qBAitJBC1pVDvAm97
Attachments
Looking good. Now the home stretch begins and the end of this journey is near where a new one will begin.
Other than disassembling the house of tarp, I've been working in air conditioned comfort for the last couple of weeks. Lots of time setting up the plumbing for the fuel system and the air conditioning. Lots of time fitting and modifying the "new" 15 year old wiring harness that the PO had Henry build for him.
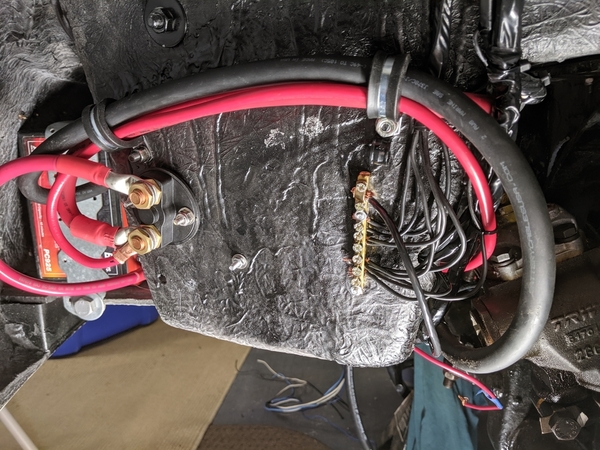
Lots of time setting up 2 additional fuse/relay area (one in the repurposed battery box and one on the engine firewall). Then just hours and hours of crimping, soldering and heat shrink, cutting some things back out and getting it right the second time.
Oh yeah, I've got a battery cutoff switch and some honking big primary, ground wires and grounding buss.
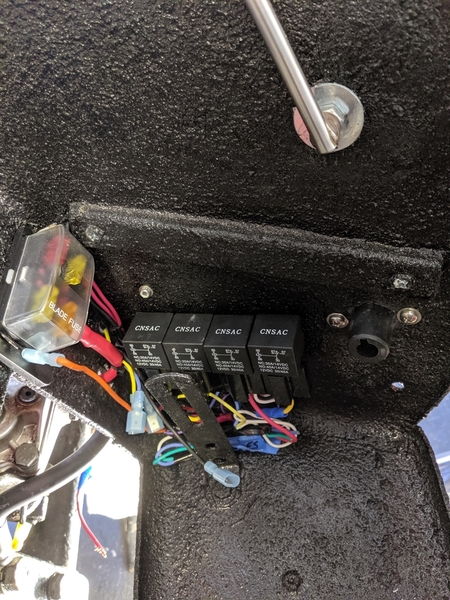
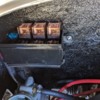
Small fuse and relay area on the side of the AC box (old battery box). These feed the fuel pump, driving lights, windshield washer and +Vs for the radio and phone chargers. You can see the other side of the battery cutoff switch (sans key) on the right. Spare wires from the engine area and the cabin are stored below the relays.
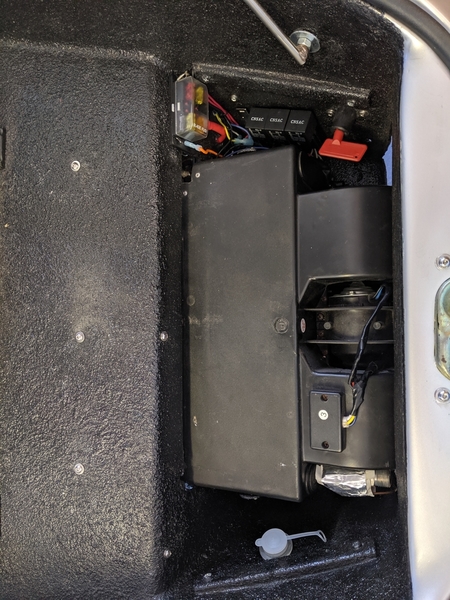
Battery box with the AC evaporator installed. Blower hoses run from here into the dash and footwells. Windshield washer filler neck can be seen on the passenger side of box. The bag and pump are attached on the other side in the wheel well.
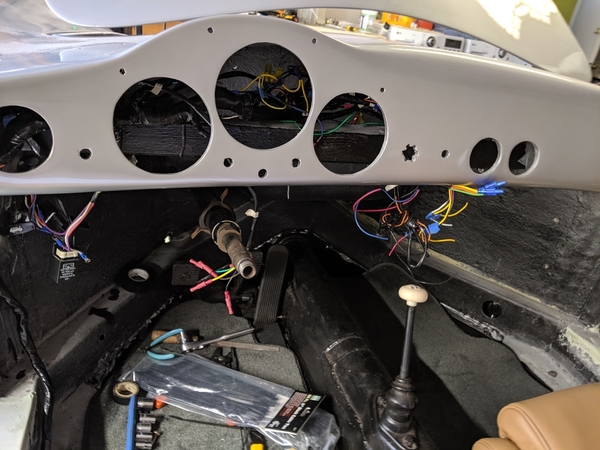
The rear wiring is complete, the dash is 85% the front end is complete, but my parking lights pulse in time with the fuel pump. I'm going to see if adding an additional ground wire improves the brightness. Everything but the alternator light is an LED so things should be pretty darn bright.
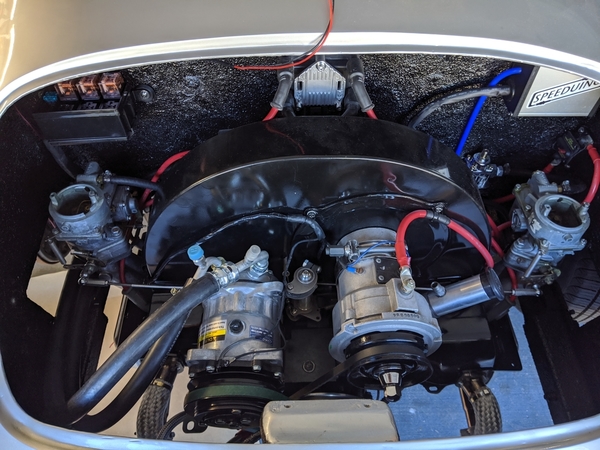
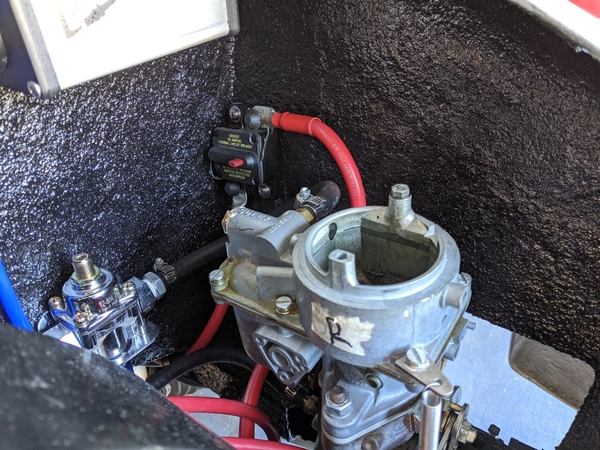
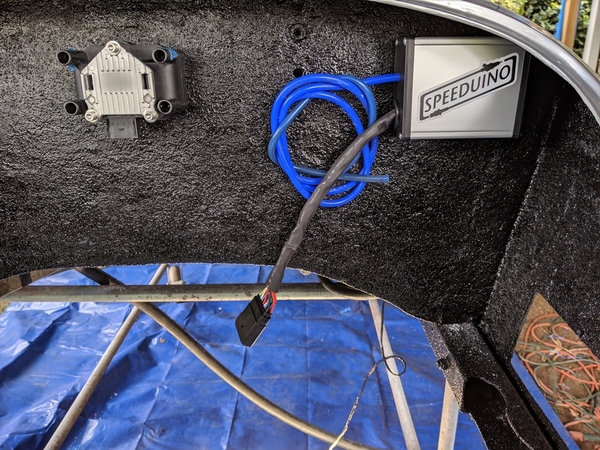
Fuse/relay box for Speeduino, coils, AC condenser fan, AC clutch and oil cooler fan is in upper left corner. Circuit breaker on feed from the alternator is on bottom right, below the Speeduino box.
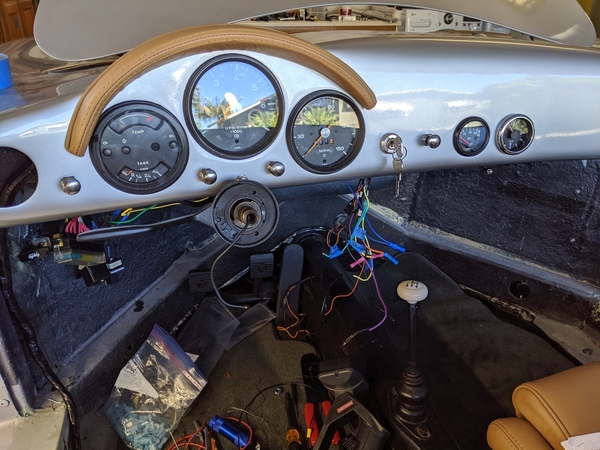
Nearly done with the dash. I'll add the gauge trim rings at the end.
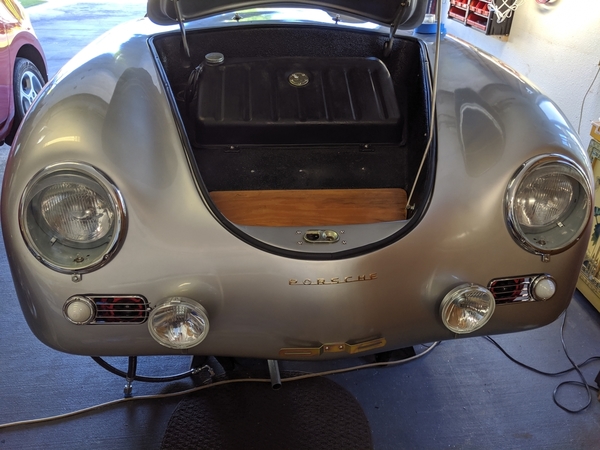
Driving lights automatically come on when ignition is on and switch off if just the ACC switch is on. Battery is tucked way up in the nose.
My biggest sticking point was the flasher relay. Totally unresponsive and then it popped a 15 amp fuse. At first I suspected the new fangled LED flasher relay, but it turned out to be a miss-wired relay socket. I'd complain to Henry, but I suspect that the tech who built the harness 15 years ago may have escaped justice. Fortunately, once I got the socket straight, turn signals and emergency flashers worked fine.
I had a stupifying experience trying to get the horn wiring set up. Turned out that even a shiny copper tab on the steering column won't conduct if the tab rivets and column underneath the rivets are corroded. Oh yeah, 14 years sitting outside on the edge of the beach... I just drilled a new tab mount and stuck a self-tapping stainless screw in it. Beep beep!
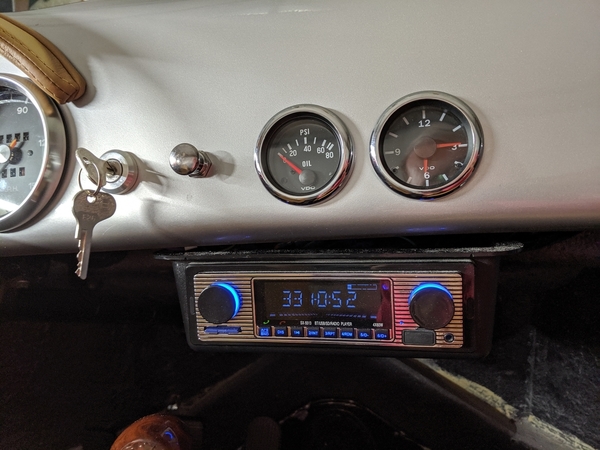
Finishing up the radio box which also houses my fast phone charger, USB charger, AC cabin temperature switch and the circuit that flips on the 'low gas' light when there's two gallons of gas left in the tank. Oh, and it also has a $10 radio. That'll be finished tomorrow and then I'll start on the doors, mirrors, decklid and windshield.
The car started from turning a key in the dashboard switch for the first time in over 15 years. I know I'm getting excited! PS, Marianne is pretty happy that the house of tarp is just a fond memory. We're now having a conversation about when the grass will be back..
Mike
Attachments
Looking good for sure. You might want to run a few extra runs of wiring. Just saying... with all the projects I ended up doing I must have nearly 20 extra wires fed from under the rear seat to under the dash. etc etc
IaM-Ray posted:Looking good for sure. You might want to run a few extra runs of wiring. Just saying... with all the projects I ended up doing I must have nearly 20 extra wires fed from under the rear seat to under the dash. etc etc
I wondering ... nah, it never rains were you are ![]() Intermittent wipers needed...Nah.
Intermittent wipers needed...Nah.
Awesome job & I definitely feel you on the wiring-takes-ridiculous-amounts-of-time-and-wtf?-this-pre-wired-thing-is-actually-wired-wrong trip.
Solid build for sure Mike. That is looking like the most wired up Speedster I've seen. Who knew you could have so many relays and fuses. Probably the way they should all be built.
Actually owning an IM, IMO there is always room to increase and seperate circuits for easier trouble shooting as time goes on. So feel free to seperate some and add a few. Better now than later. H4 headlights for example. etc .
You got ahead of my realization that you might install a radio. I have a Car radio in “attic stock” with a built-in 8-track player that would have been the bomb in there.... ![]()
Gordon Nichols posted:You got ahead of my realization that you might install a radio. I have a Car radio in “attic stock” with a built-in 8-track player that would have been the bomb in there....
Thanks, but the 10 buck wonder was installed first thing this morning. I got tunes. Mostly I listen to jazz, country, rock, blues, classical, gospel, a wee bit of folk, and oldies. But only the good stuff.
Gee, I could have been cruisin' down the road to my old Steppenwolf or Fifth Dimension tapes, darn it.
mppickett posted:Gordon Nichols posted:You got ahead of my realization that you might install a radio. I have a Car radio in “attic stock” with a built-in 8-track player that would have been the bomb in there....
Thanks, but the 10 buck wonder was installed first thing this morning. I got tunes. Mostly I listen to jazz, country, rock, blues, classical, gospel, a wee bit of folk, and oldies. But only the good stuff.
Gee, I could have been cruisin' down the road to my old Steppenwolf or Fifth Dimension tapes, darn it.
Thought you were going to say you were cruising down the road trying to loosen your load and you had seven women on your mind. Take it easy anyway.
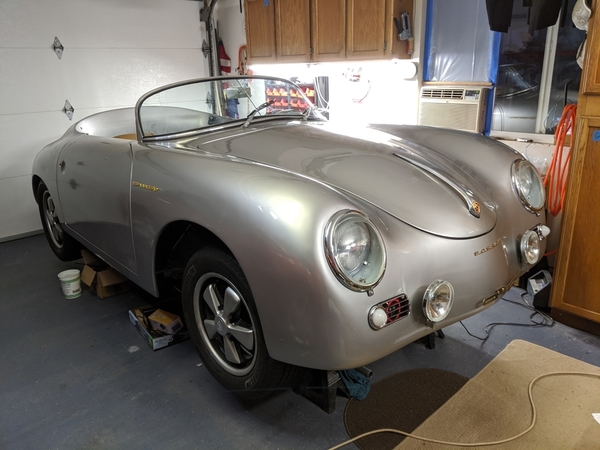
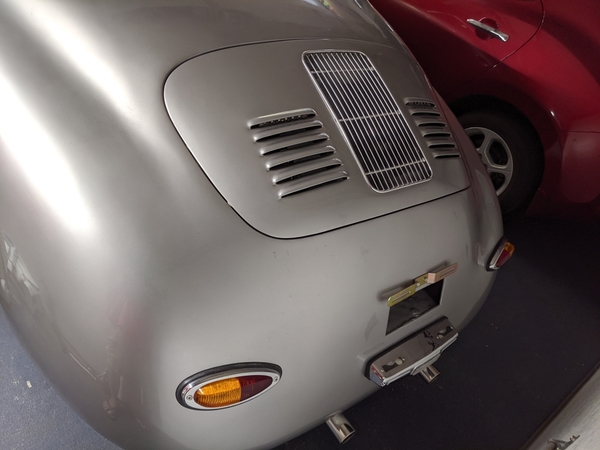
Short update. Wiring is done and things flash, honk and make light. TACH-ADAPT converts ECU tach signal into something that makes sense to the 914 tachometer. Windshield installed (thanks @Alan Merklin and @Gordon Nichols), decklid installed, doors hung. $10 buck radio works!
Trying to finish up the safety things today so the county inspection guys can come over to take pictures. My brother is coming to visit next week and I'd love to be able to take him for a ride.
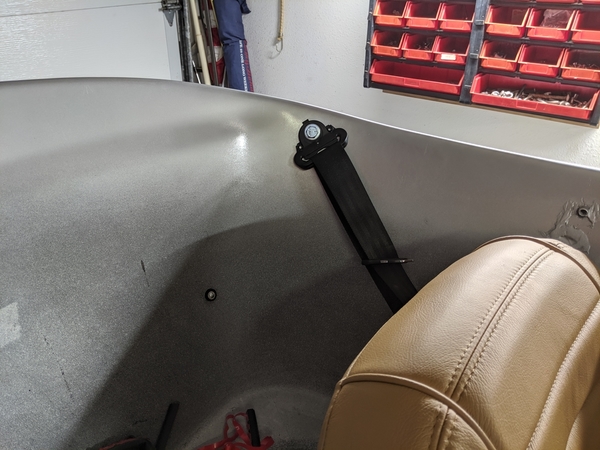
So, installing the door innards, adjusting headlights and finishing up the shoulder harness installation. Still tons of things on the list for after registration, but it's looking real faux sure!
Attachments
Mike If you should have questions that need prompt answers call me, I'll message you my cell number.
I have a question concerning the shoulder harness mounting point. Is it attached to anything else other than the fiberglass body with maybe a large washer on the back side? Thanks in advance for your answer.
Alan Merklin posted:Mike If you should have questions that need prompt answers call me, I'll message you my cell number.
Thanks so much, Alan. You've been essential to this build and I really appreciate it.
Jimmy V. posted:I have a question concerning the shoulder harness mounting point. Is it attached to anything else other than the fiberglass body with maybe a large washer on the back side? Thanks in advance for your answer.
Hey Jimmy, I fabricated brackets that extend upwards from the chassis and terminate in large plates that curve behind the fiberglass. The bolts pass through the fiberglass and the plate.
Here's a link to some pics and more explanation: https://www.speedsterowners.co...4#590585064152345514
Mike
That is perfect. Thanks for the info. I am looking at doing something similar to mount a narrowed Miata double hoop roll bar. I want it to be connected to the metal frame to make it safer and strong enough to handle the weight being put on it as it is used as an aid to get in and out of the car.
Shoulder harness can be attached to the seat back if the seat is a roadster seat and it is below your shoulder. You see some after market sports seat and Porsche seats have a bracket there for the belt to go through.. just saying.
@Alan Merklin - Is the Miata roll bar robust enough to hold things up in a roll-over?
Curious minds want to know........ ![]()
Gordon Nichols posted:@Alan Merklin - Is the Miata roll bar robust enough to hold things up in a roll-over?
Curious minds want to know........
No , I bolt it to the fiberglass tub wall only, it's a cosmetic show bar. David Bayne used a Stainless steel Miata double hoop bar and had it reconfigured into a stout roll bar to his Metal-Craft speedster chassis
I need some advice. The good news is the county director inspections dropped by and said the build looked good. I'll be taking it through the inspection/registration process next week.
The bad news is I'm having engine problems. It runs lean at a low rough idle and after running for a minute or two it starves for fuel and stops (I've got a wide band O2 and can see what's going on). Since the time it was running great, I've added a new inline filter, 10 feet of fuel line, a fuel pressure regulator (1.5 psi) and new fuel lines to the carbs. I have also sprayed brake cleaner (flammable) around the intakes and vacuum balance lines and seen no change.
I've checked the feed line from the tank, the filter before the pump, the filter after the pump and seen fuel come out of the carbs when the carb filter caps are removed. I've tried taking the fuel tank cap off to make sure it wasn't creating a vacuum. I've opened up the pressure regulator and nothing changed. At the end of the day, I decided to pick up a new fuel pump to see if it was weak. I'll test it tomorrow (Pacific time). Wish me good luck and let me know if you have any ideas.
One other thing I noticed, when I turn the steering wheel it feels a little crunchy as it turns. It's a "new" (sitting 15 years) steering box. The steering column is old, old, old so maybe bearings there? Needs lube? It turns just fine but it feels like it needs some attention.
Thanks!
Mike
I think you want about 3 lbs fuel pressure?
I would look at the fuel pressure as well. What brand of regulator do you have? It could be restricting fuel volume and not keeping your bowls filled. It is always the simplest thing in my experience. Good luck and nice job on your car it is very nice.
If you have Kadrons, then 1.5# fuel pressure.
If you have Weber/Dellorto/Solex, then 3# pressure.
Back out of your fuel system "upgrades" one step at a time: Kinked hose/line somewhere? It sounds like a clogged fuel filter so you're not getting full flow - can you by-pass the filter with a short piece of hose one at a time to see if that helps? Do that for the fuel pressure regulator, too. If you have a single filter before the pump, that's all you'll need - one after the pump isn't necessary. I doubt that it's the pump, as it had been working OK before the changes, so I would suspect one of the upgrades. One of the upgrades was that 10' of hose, which is cheap. Get another 10', make sure it has no obstructions and re-install. That's all I've got.
If you can feel the scratchiness in the steering wheel, then I would suspect the bearing at the top of the column, right under the steering wheel. What is in there depends on the year of the VW donor column. 54 - 67, 68 - 70 or 71 - 79 all have different top bearings and different spacers. Long way to ship, but this might show you different ones to get something closer:
What Gordon said about fuel pressure. If you suspect it's the steering box-
http://cal-look.no/lounge/inde...p/topic,19621.0.html
read all of Hotrodsurplus's posts, starting about half way down the first page.
" Crunchy As Gordon said possibly the upper bearing behind the steering wheel, also check to see if the inner shaft is making with the column tube i.e. a rubbing contact forward of the firewall
Fueling problem solved. It was a relay problem. I got fancy and wired the fuel pump relay to turn off if the alternator light was on (fire safety). Something in my setup was wrong and it was taking out the fuel pump relay even if the light wasn't visible. I just simplified it for now and everything works. Tricky problem, but shooting myself in my own foot isn't a novel occurance. I just wish I had thought of it earlier.
It happens, Mike.
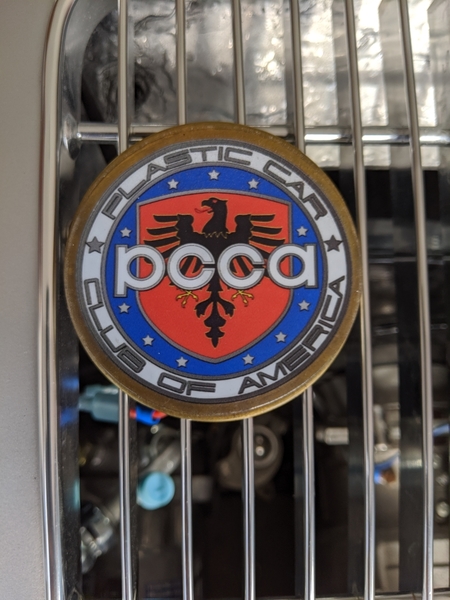
Ok, the DMV gods have smiled upon me. After 15 years, this speedster is back on the road, legally. Still some interior work to be done, but we're legal and enjoying the fruits of our labor. Took a long drive South to the shoreline past Wailea. Beautiful place and fun driving! Of course, it sports a PCCA rally badge.
Mike
Attachments
Awesome, awesome, AWESOME!
I had Pearl out last evening and drove by the country mill ponds of the old Waskanusett mills in, where else? Millbury. Foliage is starting to turn, here.
Must be similar to Wailea, right? ![]()
@Michael Pickett - I just completed reading the entire thread. Great job Brah'! I'm looking forward to seeing your build progression updates!
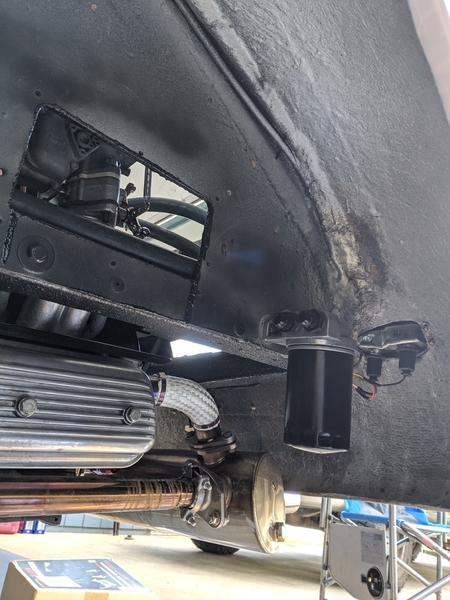
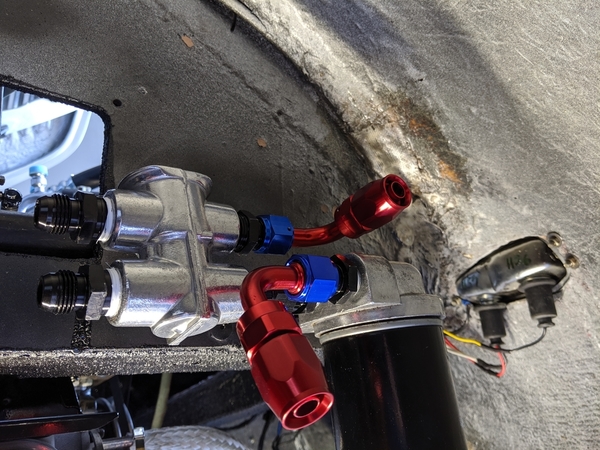
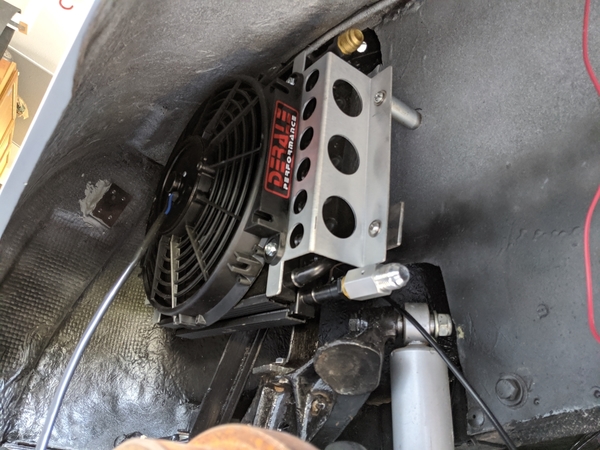
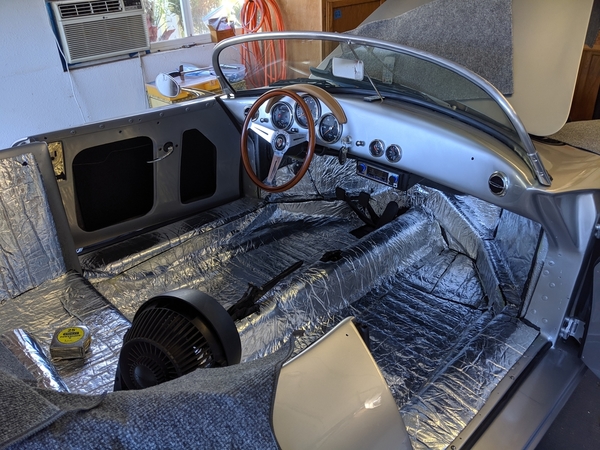
Put a little icing under the cake today by installing the oil filter, oil cooler and thermostat. I decided I liked the cooler in front of the rear wheel instead of behind it, but for the most part I followed the wisdom of the usual suspects on this board (thanks!).
Now onto carpet and reinstalling seats and seatbelts.
Attachments
Attachments
Just watch out for thermal tiles falling off during re-entry.
That car is gonna look SO DIFFERENT once the carpet is in.
I was shocked at the improvement when I put the vinyl dash pad on mine, too. I'll try to find some before and after shots for yah.
Do the door as well ![]() ... Marty had to do them on the second round
... Marty had to do them on the second round ![]()
Do you do much nightime driving? If you do get better lighting for the back. Just saying.
BTW looking awesome.
Here’s my are you sure list do you have enough extra wires running from the front to the back extra speaker wires do you want to roll or switch on your clutch pedal and your brake pedal screwed to the floor for a break and possibly a clutch switch that needs to activate a cruise control and it goes on here’s my are you sure list do you have enough extra wires running from the front to the back extra speaker wires do you want to roller switch on your clutch pedal and your brake pedal screw to the floor for a break and possibly a clutch switch that needs to activate a cruise control how did it go signed ![]()
The IM site has many cars on the way of you need picts
IaM-Ray posted:Do the door as well
I agree with Ray you definitely want to do the doors while you have access. It keeps the heat out and gives a nice thud when closing.
Joe Fortino posted:IaM-Ray posted:Do the door as well
I agree with Ray you definitely want to do the doors while you have access. It keeps the heat out and gives a nice thud when closing.
I did the sound deadening material in my doors AND filled them with speaker batting material. Completely eliminated the hollow door sound.
I'm using a different material inside the doors and between the package area seat back and the engine. It's 3/8" thick heavy rubber mat like they put under the workout machines in the gym. I got it from Amazon and it's called Rubber-Cal recycled floor mat. It's really heavy. I tried a piece out on the driver's floorboard but it was a little bit too thick for the way I've got my seat tracks set up.

Mike
Attachments
Here on Jay Leno is Chuck's car... neat dash a combination of 550 and Speedster. no leather top. @Michael Pickett link here link

Attachments
IaM-Ray posted:Here on Jay Leno is Chuck's car... neat dash a combination of 550 and Speedster. no leather top. @Michael Pickett link here link
Cool, Ray! But wait, that means my chance of getting an invitation to show my car to Jay Leno may be in jeopardy...
Mike, that is exactly the same stuff I used all over the inside of my car. Even against the firewall! I glued it in with DAP contact cement and it stuck well, but after 20 years the stuff in the doors is starting to separate. I bought all of mine from Home Depot as “shop floor anti-fatigue mat”. Comes off a YUGE! roll and priced by the foot, easily cut to shape and gentle massage with a heat gun will force it to take an acute shape. Go easy on the heat as it is like closed-celled foam and will go from pliable to melted blob in half a heartbeat.
Actually most people are using tar paper rolls by COFAX or equivalent from the Orange store, and heating it up with a heat gun and then rolling it with a roller on the inside of the doors....
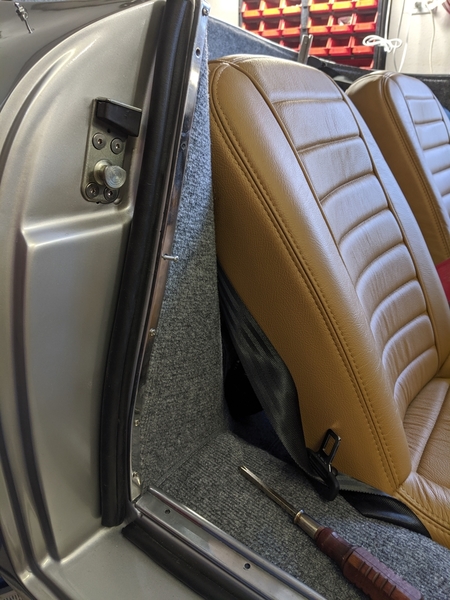
Henry at IM used this on my doors.
I have aluminum pieces like that on my CMC.
Michael McKelvey posted:I have aluminum pieces like that on my CMC.
Thanks, Michael. Probably not just an IM thing, then.
Well, CMC cars were based on the IM cars that were built in California.
Mike:
Speedster with no dash pad:
Same Speedster with color matched dash pad:
I know....... "WOW!", right?
Attachments
That dash looks very good Gordon and yes much more with the finishing touches of leather I have to admit.
Sigh, so now I have to develop dashboard upholstering skills, too. I knew it was a mistake to buy the materials. Thanks, Gordon :-)
The dash is pretty easy. Seeing what you have done to this point, you should not have an issue. 😊
James posted:The dash is pretty easy. Seeing what you have done to this point, you should not have an issue. 😊
Thanks, James. My secret super power is to be able to get something right after only 3 or 4 desperate attempts. :-)
I think I did that in a one-shot. The material is vinyl and while I did it in a garage (no sun to warm the material) it stretched into place with no wrinkles or puckers. Even the rubber bumpers covered well. The material is folded neatly and stapled to the back of bumpers with ordinary paper staples, not construction staples. Both bumpers have PEM nuts inserted from the cockpit side before the vinyl goes on and then after upholstered they are pulled to the dash with 10/32 screws.
mppickett posted:James posted:The dash is pretty easy. Seeing what you have done to this point, you should not have an issue. 😊
Thanks, James. My secret super power is to be able to get something right after only 3 or 4 desperate attempts. :-)
You are still 2 or 3 attempts closer than me, but I don't get desperate until the 4th or 5th, and then I ask help here.
Fitting the windshield to the cowl. Evidently IMs, CMCs and Fiberfabs all have a gap between the windshield and the cowl in the middle area. Some past remedies include Bondo (and painting), grinding the glass to fit, and tipping the windshield forward with shims under the rear post area.
I decided to reshape the rubber seal so that it matched the curves better. Essentially, I used a very sharp razor to shave material from the areas where the windshield rested on the cowl until it was a better fit.
I took the posts off so they wouldn't get in the way and marked the cowl so I could repeatedly put the windshield back where it would be mounted. I would look under the seal and see where it was in contact with the cowl and mark the glass over the area I wanted to shave (using a china pencil). Then I would remove the windshield and use the razor to remove rubber from the area that had been in contact. Rinse and repeat.
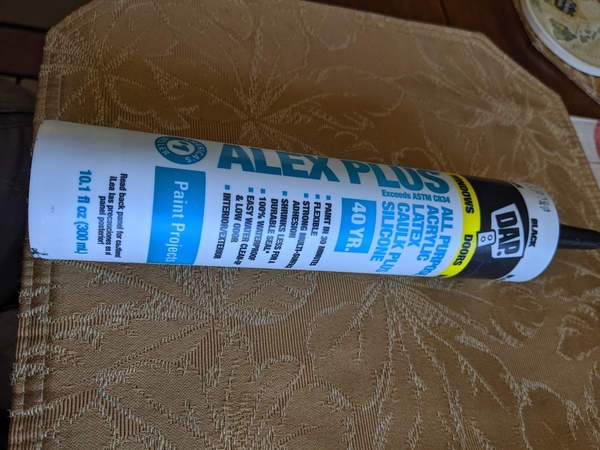
After about an hour I had a much better fit that would work well with the trim piece and should be easy to seal using Dr. Clock's recommended DAP black acrylic/silicone caulk.
I suspect there's a lot of individual variation between cars and brands of under windshield rubber. It like it because it lets the glass float with less tension than I used when I did my first fitting. Some pics: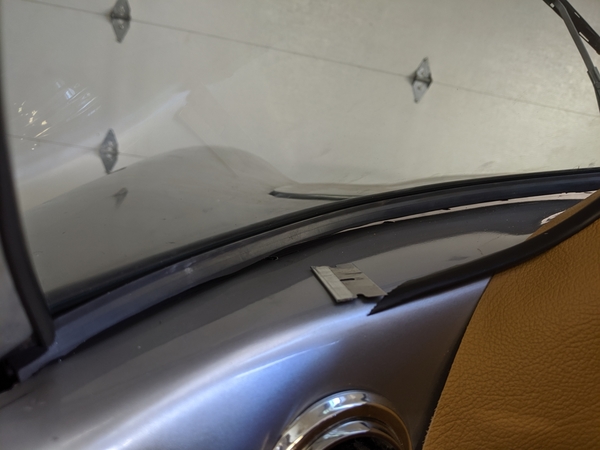
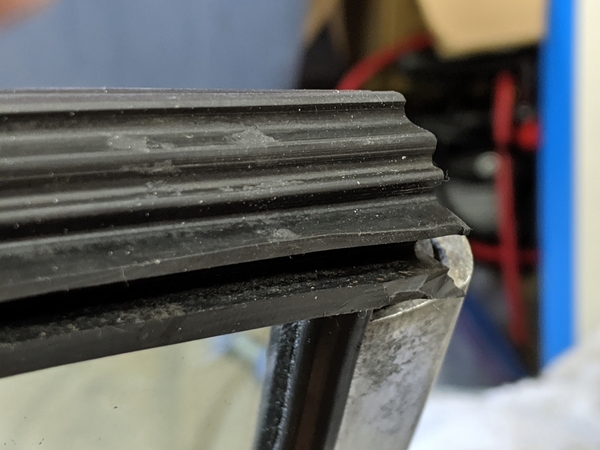
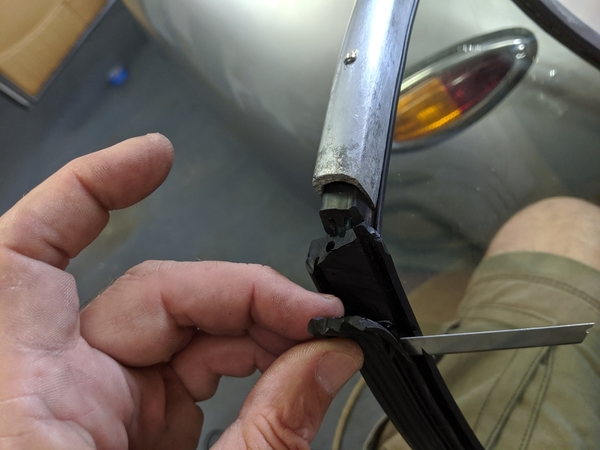
Leave enough rubber so the windshield can float in the frame and on the cowl.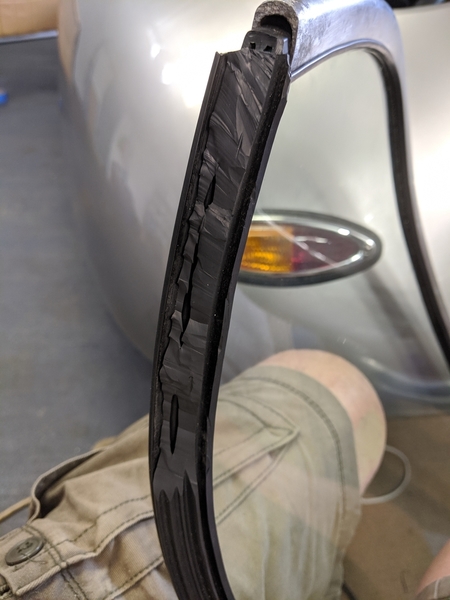
An hour's worth of rubber shavings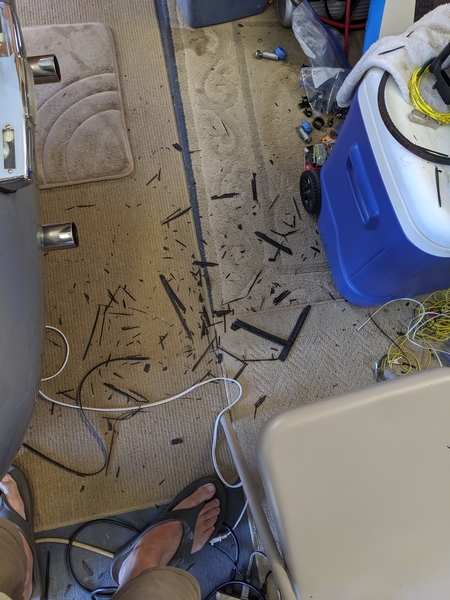
Marks on glass show where rubber makes contact. Check both front and rear of seal while tipping the windshield back (like the tension rod would do).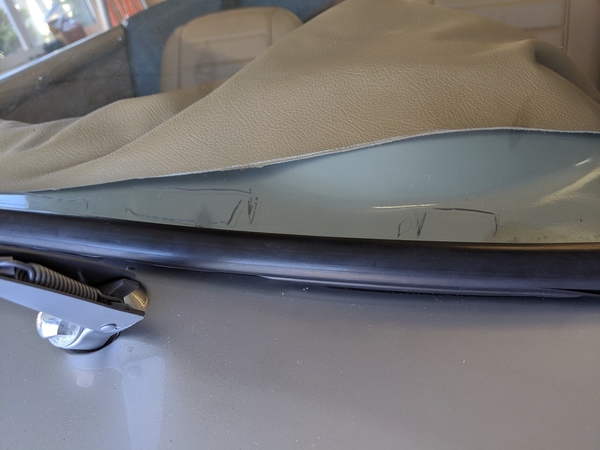
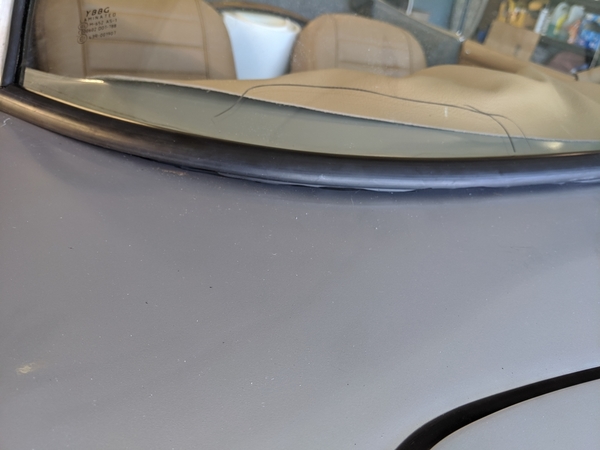
Attachments
On my CMC I have no gap in the middle. I have the bottom rubber against the back of the aluminum strip instead of fitting over it.
I think the rotation of the end posts affects the fit in the middle.
Maybe if you are happy with your end result it doesn't matter how mine fits.
As per Michael M. I too set the glass behind the aluminum base trim instead of setting the bottom rubber over the trim. Then the flat black latex caulk for a finished look. Mike P..... I am amazed with your many talents ~
Thanks, Michael and Alan. Just making I understand what you're saying about the aluminum base strip. I was planning on putting down a line of caulk, riveting the strip on top, putting down a line of caulk on top of the rivet area of the strip and pushing the windshield bottom rubber up against the back of the aluminum base strip. Then I'll do the small caulk bead under the front bottom of the aluminum strip. Right?
I know some folks have tried to put the top of the strip into the slot in the bottom rubber, but my understanding is that it is unlikely to work out. Am I on the right track?
Thanks,
Mike
You'll need to make a cardboard mock up of the windshield post w/o the " 7/16" pipe stem " and side that down along the frame to give you the exact post hole position. I then measure and install the base rubber to the windshield bottom, tap it on with a rubber mallet . Then the U channel rubber on the top of the glass using electrical tape every 6" to hold it in place the U channel rubber putts to the base rubber... Set the windshield top frame over than ..I use a rubber mallet to tap it securely in place and set that aside. I then run a 1/4 - 5 1/6 bead of caulk along the sliced area base aluminum strip and set the windshield assemble in place. Caulk 1/8 out from the hole in the fiberglass and attach the posts to the frame and lightly snug it down , then do the center rod snug that too but gently. Now go back and tighten the posts while you apply downward pressure with your hand on the top of the frame tighten until reasonably sung and re do the center post . Go back to the post again and apply light pressure to snug it up and the same for the center post. . Clean excess caulk with a damp paper towel . I then tape the aluminum base molding creating 1/8" gap at the base to fiberglass then run caulk in that with your finger giving it one last swipe with a slightly damp paper towel...promptly remove the tape . Lift the electrical tape away from the glass, stretch and cut it even it will disappear into the upper frame. after it sets up you may have to do a small amount of tough up caulk .
Great instructions, Alan. Thanks!
Alan Merklin posted:Set the windshield top frame over ...
Speaking of the aluminum top frame, is there a best practice for bending the two lips needed for the cabrio top latches? Thanks,
Mike
On my CMC the lips were not bent out for the latches either. I thought the CMC top frame was a little crude in the corners so I replaced it with a frame from Vintage Speedsters.
“Speaking of the aluminum top frame, is there a best practice for bending the two lips needed for the cabrio top latches?”
I don’t know if it is a best practice, but it requires three pair of electrical pliers.
Decide where you want your latch(es) to be and how wide you want the lip to be. Mark the inside lip of the top frame where the ends of the lips will be. Apply a couple of layers of electrical tape to the jaws of the electrical pliers and then attach a pair of electrical pliers to the frame at the ends of the proposed lip. Using the third pair of electrical pliers, attach to the lip area and while your assistant is holding the frame steady with their pliers, gently bend the lip up in small increments across the width for an even gap of 1/8” - 3/16”
Done.
You don't need to do the lips, if you clearance the U rubber away at that location the clips do fit in.
Gordon, I asked my assistant about wielding electrical pliers on the frame and she suggested that I could just use my third hand instead...
Alan, since I'm stuck with only two hand and have recent familiarity with trimming rubber seals, I'll give it a try your way. Thanks everyone!
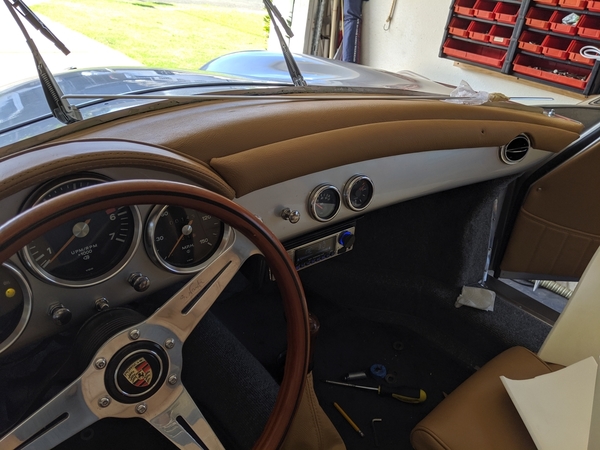
Ok, the dashboard upholstery has begun. I'll admit, it's easier than I expected. There are quite a few YouTube videos on how to proceed. My biggest worries were how to finish the edges near the windshield posts and whether I'd have enough material left to cover the bumpers. We'll see pretty soon how it turns out.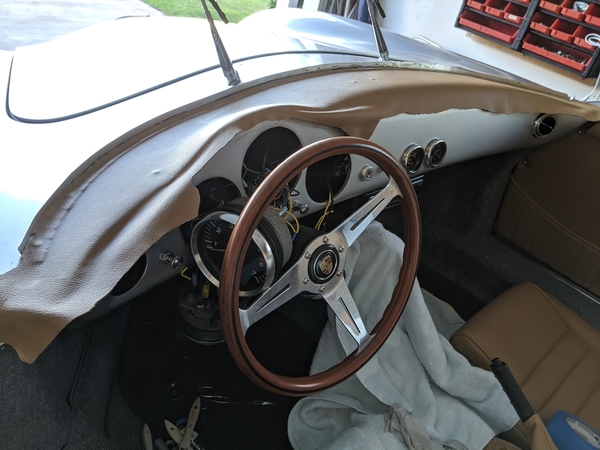
Attachments
I ran it under the windshield post to kind of act like a gasket.
I don't have anything under my corner posts ![]() and I finished off the dash cover to match the dash bumpers nicely, like this:
and I finished off the dash cover to match the dash bumpers nicely, like this:
Like Blind Faith said in their song; "Do what you like"!
Also, Dr. Clock often runs a length of rubber fender welting under the lower aluminum trim piece and around the corner posts to finish them off. Looks nice, but not worth re-doing the world at this point.
Attachments
Looks good. Thanks for the tips!
IM standard issue...
BTW, glue can make things a bit more fuzzy as you get high ![]() I love the smell of gaz which is funny too.
I love the smell of gaz which is funny too.
Did'jah see the trim strip under my dash bumpers? OK, so mine's gold tone, but they have chrome (silver), too.
https://www.walmart.com/ip/12m...-Protector/690126014
You an Amazon Prime member? This might be better:
https://www.amazon.com/ATMOMO-...573176358&sr=8-3
You only need like 5 feet to run under the bumpers and this stuff has an adhesive backing that withstands the rigors of being outside in that intense Hawaiian sun.
And that contact glue outgases more if you heat it a bit - but I bet you already figured that out...... ![]()
Make sure you have an AC vent to your feet and leg area... Not for the passenger. ![]()
Leave the silver trim off. Later, if you can't live without it, put it back on.
Once you drill the holes, especially on a silver car, tough to go back. In my opinion it will look cleaner.
No chrome strip , Just my .02
Eh, I decided to go ahead with the strip. Ooh, shiney things... Finished it up except for the dash handle. The replacement one I had bought fits a dash without bumpers. Drat. But the good news is with all of the fumes today, I can cut a glass of wine off of my evening imbibing. Oh, and Ray, there are AC vents under the dash on both sides ☺️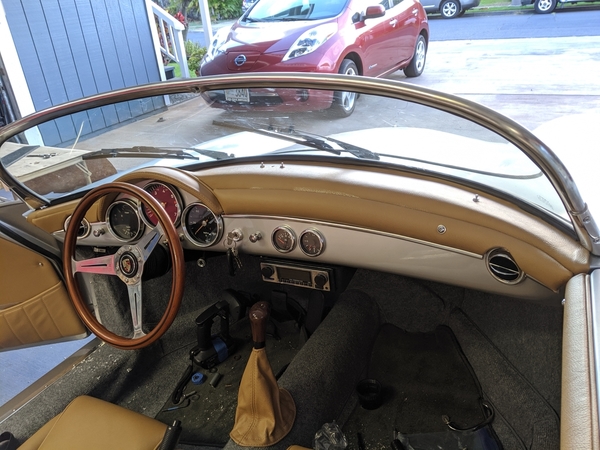
Attachments
The shiny things are looking great, Mike.
And it looks like some of them light up, too!
@Michael Pickett wrote- "I'll have to admit I'm really enjoying this. Maybe it's just the contact cement fumes talking, but this could be addictive."
@IaM-Ray wrote- "BTW, glue can make things a bit more fuzzy as you get high ![]() I love the smell of gaz which is funny too."
I love the smell of gaz which is funny too."
They're both brain cell killers, guys; it's a good thing you both won't be around long enough to suffer long term...![]()
I really like the way you integrated the A/C vents. Nice work, Mike! ![]()
That dash looks about perfect. Really excellent job! PM me if you want to sell your grab handle as it might work on my Spyder.
Mike:
That may be the coolest dash I've ever seen in one of these cars.
Stupid-Cool.
^^^What Stan said^^^ Looking really sharp, Mike.
The placement of the AC vents are rather unique to say the least as most times they are on a lower panel.


