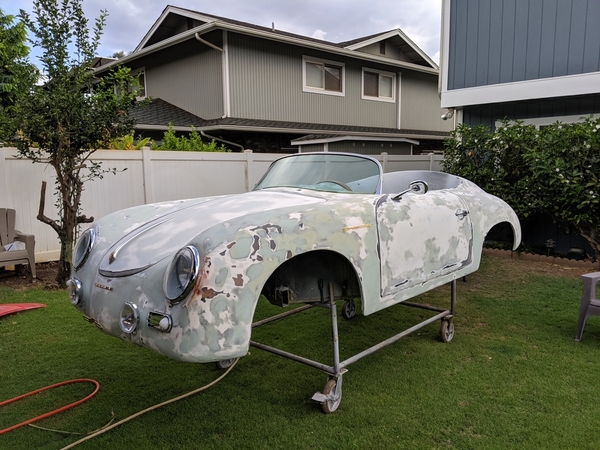
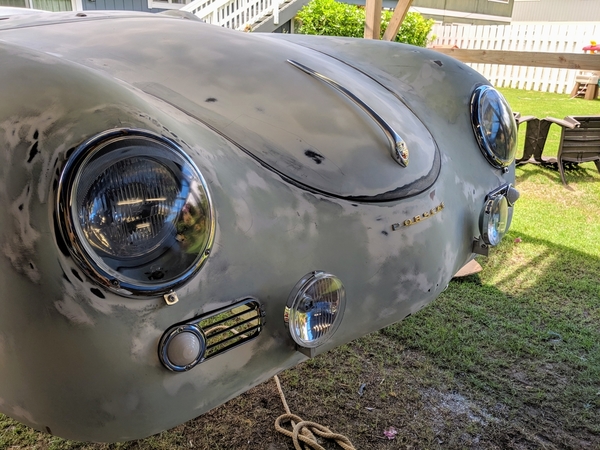
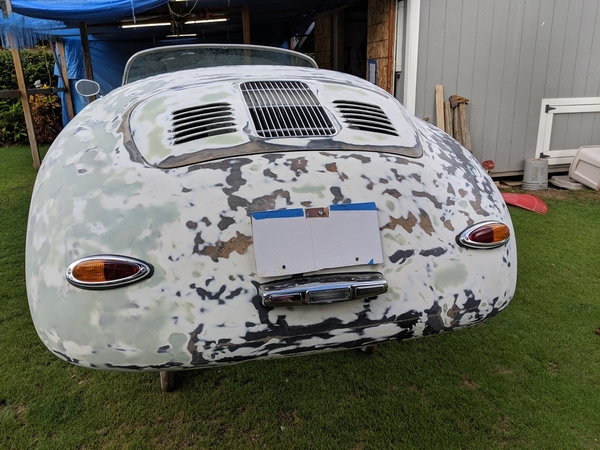
I kind of like it just like that.
@Michael Pickett - I was watching, "Iron Resurrection", and they were doing body work on a Vette. Shorty, their painter, explained that body work on fiberglass was difficult because sanding tends to make hills and valleys. I had never heard that before. What has your experience been?
Mike,
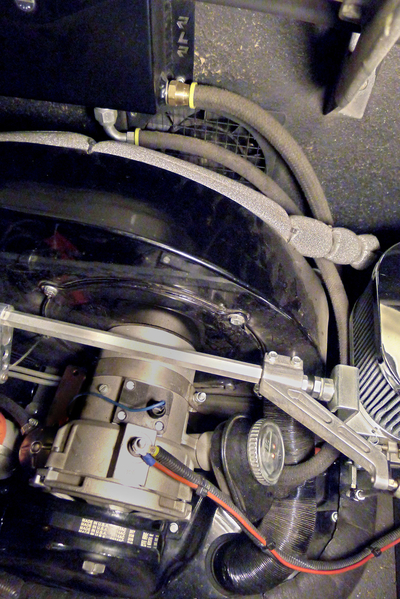
Regarding the belt-- if you find that the belt you have doesn't handle the load of the compressor, the 4L300 you have is the same width and length as an A28 (which has a much higher horsepower rating). 4L-series belts are fractional horsepower rated and A-series belts are made to transfer quite a bit more power. I've got no idea what an A/C compressor draws, but if you need more, a suitable replacement is readily available.
Any industrial supply store (Grainger, et al) carries A-series belts for industrial fan, etc. applications. I see that you have a "green" belt, which is the Gates brand lawn and garden 4L belt, if I'm not mistaken. As an aside, I greatly prefer Gates brand belts to anything else. I've found that a Gates 4L-series belt will handle as much power as a Browning A-series belt.
Looking good on the project!
Todd M posted:@Michael Pickett - I was watching, "Iron Resurrection", and they were doing body work on a Vette. Shorty, their painter, explained that body work on fiberglass was difficult because sanding tends to make hills and valleys. I had never heard that before. What has your experience been?
When I was removing the rotten paint and damaged gelcoat I tried using various power sanders. The disc ones were particularly prone to making valleys and the flat oscillating ones were better in some places. Our cars have so many curves it is tough for a non-professional with limited intelligence (me) to get good results with power tools. My bro-in-law built sports fishing yachts for a few decades and swore by his air power file, but I decided that I'd just get a bunch of rubber sanding blocks and build up my biceps.
I've done more fiberglass sanding than I want to recall. On flat surfaces you can use a long board sander on all other areas I use a rubber sanding block. Light guide coats of primer is a must do. 180 220 320 then final with epoxy filler primer . and sand that too. Unless you have a lot of experience with a air DA , I would not suggest using one . Lastly that stuff is extremely dangerous and you need long sleeves gloves, a good ventilation set up and a quality respirator mask and goggles.
Stan Galat posted:Mike,
Regarding the belt-- if you find that the belt you have doesn't handle the load of the compressor, the 4L300 you have is the same width and length as an A28 (which has a much higher horsepower rating). 4L-series belts are fractional horsepower rated and A-series belts are made to transfer quite a bit more power.
Stan, I should have thought to ask here about the belt. My decorating sensibilities were offended by having a lawn mower belt in the engine bay. It made it feel more like a toy than I was hoping. Now that I've got the right size, I can order an A28 and use the Gates as a spare. Thanks!
Alan Merklin posted:I've done more fiberglass sanding than I want to recall. On flat surfaces you can use a long board sander on all other areas I use a rubber sanding block.
Alan, I find myself switching between a hard rubber block and a softer block or rubber rod when the curve is concave and the rectangular hard rubber block doesn't easily fit. Any warnings about using the soft rubber block?
Thanks
mppickett posted:Alan Merklin posted:I've done more fiberglass sanding than I want to recall. On flat surfaces you can use a long board sander on all other areas I use a rubber sanding block.
Alan, I find myself switching between a hard rubber block and a softer block or rubber rod when the curve is concave and the rectangular hard rubber block doesn't easily fit. Any warnings about using the soft rubber block?
Thanks
I know that the thin rubber block ( pads) tent to allow too much finger pressure , can that telegraph those impressions onto the sanding surface. Guide coats are a tell all.
edsnova posted:I kind of like it just like that.
For some reason, seeing the car in guide coat makes me want to call it "The Great Speckled Bird." Having a grandpappy and two uncles who were fire and brimstone ministers seems to still be impacting my thought processes.
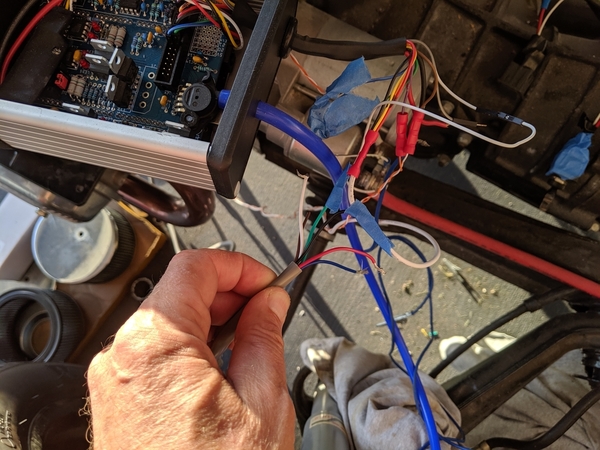
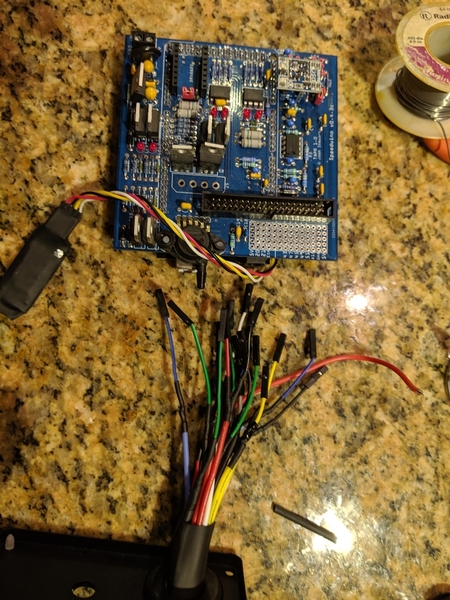
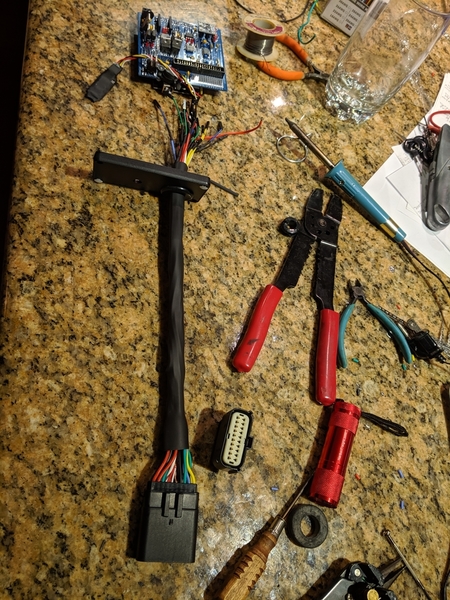
Took a break from the Bondo and guide coat world. Do you know how long it takes (me) to design and build a custom engine control unit wiring harness? One whole day. The tricky parts were making sure it was waterproof since the ECU will live in the engine compartment and guessing what functionality I might want to implement in the future (fuel injection, idle/choke control, etc). The ECU supports 40 pin outs but I was able to get away with a 20 pin waterproof Molex connector since I don't plan on ever turbo/super charging the engine.
Right now, I'm only implementing spark and air/fuel mixture monitoring, so most of today was "just in case."
Marianne and I got married when we were in college and we worked to support ourselves. I worked as a medical prototypes electronics technician so I got to dredge up some 1970s technology and skills. Not a speed demon, obviously.
Before:
After:
Attachments
mppickett posted:Todd M posted:@Michael Pickett - I was watching, "Iron Resurrection", and they were doing body work on a Vette. Shorty, their painter, explained that body work on fiberglass was difficult because sanding tends to make hills and valleys. I had never heard that before. What has your experience been?
When I was removing the rotten paint and damaged gelcoat I tried using various power sanders. The disc ones were particularly prone to making valleys and the flat oscillating ones were better in some places. Our cars have so many curves it is tough for a non-professional with limited intelligence (me) to get good results with power tools. My bro-in-law built sports fishing yachts for a few decades and swore by his air power file, but I decided that I'd just get a bunch of rubber sanding blocks and build up my biceps.
Admittedly, I watch a few car building tv programs, and at least during the filming it appears that they do most of the sanding without power tools. It seems they use different size sanding blocks with the longer ones bending.
I have a little experience with reworking and painting fiberglass, and an orbital/disc type sander is hard to control, especially when trying to remove an old crazed finish from something like an old buggy. It removes material quickly and it's too easy to "bite in" repeatedly. Al
carefully soda blast it. Saves hours and hours. Won't damage the fiberglass substrate.
Experts, how many inches between the top of the fan enclosure and the firewall on a type 1 engine in a IM/CMC/Fiberfab? I'm thinking about mounting something on the firewall and don't have the body on the chassis yet. Thanks!
Mike
Mike, I can measure mine and let you know sometime later tomorrow. Roughly, it is the length of my hand, finger tip to wrist, but better resolution when I get home.
Gordon Nichols posted:Mike, I can measure mine and let you know sometime later tomorrow. Roughly, it is the length of my hand, finger tip to wrist, but better resolution when I get home.
Thanks, Gordon. I really appreciate it.
Mike
Ok, so I have a really short hand to go along with my svelte stature.
I’m seeing exactly 5” from firewall to forward edge of the fan shroud at the top middle. YMMV......
A VS is Less...........Bruce
mppickett posted:...I'm thinking about mounting something on the firewall...
Maybe a good time to mention that the top of the firewall is usually considered the best place for an oil breather (if you were thinking about putting something else there).
Mounting a breather high makes it easier to give the output tube a steady, downhill run to wherever it's going. And a breather with enough volume to work well takes up more space than is available just about anywhere else in a Speedster engine compartment.
My VS has about five inches between the firewall and fan shroud, and the oil breather takes up about half of that.
Attachments
Oh, so NOW all these posts show up....... After I ran back from CAPE FRIGGIN COD early just to help out a fellow Rhode Island GoomBah with measurements since no one else had posted.
Thanks, you'se guys. I could still be sitting on Craigsville Beach, watching Bikinis. ![]()
Sorry, Gordon. I Jetted off to the Vanuatu's for a few days of diving, and you KNOW how spotty the internet is there.
Gordon Nichols posted:Oh, so NOW all these posts show up....... After I ran back from CAPE FRIGGIN COD early just to help out a fellow Rhode Island GoomBah with measurements since no one else had posted.
Thanks, you'se guys. I could still be sitting on Craigsville Beach, watching Bikinis.
Above and beyond, Gordon. When you come to see the finished product, I'll show you the beaches where you can watch bikinis (or I can point you to the beach where bikinis are optional).
Sacto Mitch posted:Maybe a good time to mention that the top of the firewall is usually considered the best place for an oil breather (if you were thinking about putting something else there).
Thanks, Mitch. I'm thinking about putting the ECU and the Golf ignition module on the firewall since they really don't match with the look of the type 1 engine and I wanted to keep them out of the rain. You make a great point and I will plan accordingly.
Mike
You could also install a CB Performance (1771) or Gene Berg (GB-206) breather, both of which attach to the alternator pedestal, not the firewall. I use the CB Performance model, but the Berg is really cool (and I think it works better).
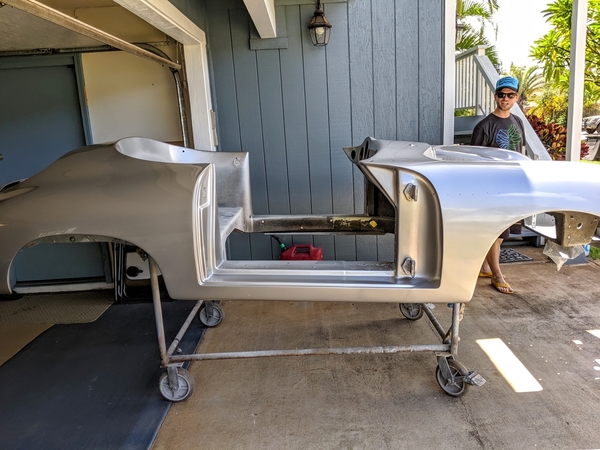
Progress is being made. Because Maui has been having brush fires covering over 10,000 acres (arson, they've arrested the firebug), there's just tons of ash and junk blowing around. The block sanding, gap setting and test fitting is done and it's ready for the final paint steps. I am sending it and the paint out for the final steps rather than wasting my time and materials in this mess.
Here's a few pics before I send it off.
My assistant is pretty good at taking things to other people and riding in the body when I move it around.
Hopefully the next pictures of the speedster will be a bit more attractive
Mike
Attachments
So great. Satin clear it with a rattle can and call it perfect.
edsnova posted:So great. Satin clear it with a rattle can and call it perfect.
Satin clear, my patootie. I'm springing for a whole case of gloss!
My apologies if you've told us before- what color will it be?
@ALB I thought the same thing and went back the page 1.
"We decided on silver paint and tan top/interior. I like the mild outlaw look, so it won't have bumpers and side trim. It came with silver fuchs that will be refinished with the black background, silver spokes Carrera look."
@Michael Pickett I am cannot wait to see it come back from paint and on the road enjoying a beautiful Maui sunset.
Yep, Joe got it right. It's going to be a Porsche silver from the early 2000s (Arctic silver 92U). Tan leather seats and top from Greg and gray carpet.
I got mine painted by a local place highly recommended by the Hot Rod guys and they did a fabulous job. Even though I was at a financially advantageous time in my life, it was still a bit of a shock at the cost of 8 gallons of paint; 4-coats base, 2-coats pearl and 3 coats clear at around 2 Grand just for the paint! It's no wonder I don't paint a lot of cars...
I find the time to go back to where it was painted every year (I'm about due....Right after I get the Dells back into shape) and show them that, even after 21 years, now, the paint looks like it was shot yesterday (yes, the front clear bra helps a lot to keep it looking good)......... Except for the spot where my gardening rake fell on it a while back in the garage. ![]()
It really is amazing how much good paint costs. I can't help but think that there's a wee bit of markup involved. But, if you want it to last...
Don't you hate it when something in the garage falls on your Speedster? I had a step ladder fall on mine.
Well, Mike, it was a gravel rake that fell from about 5 feet higher than the body after I slammed the outside door on the same wall. Made my stomach turn, for sure and the rake now resides in a gardening shed, rather than the garage. I don't get stone chips on the nose, so I guess it had to be something. ![]()
So, Mr. Pickett - Who's the Autobody Assistant and part-time Yard Pilot?
@Gordon Nichols - What clear bra did you go with?
Gordon Nichols posted:So, Mr. Pickett - Who's the Autobody Assistant and part-time Yard Pilot?
Granddaughter. Our son, daughter-in-law and 2 year old have been living with us since December while waiting for their condo to be built. They closed last week so I'm losing the only onsite expert help I've had.
Yeah, and it’s tough finding competent help these days, too!
Especially those who can put up with the Boss.
Todd: It was a bulk roll of 6-mil (might have been 8-mil) made by BASF.
A professional provided the material and installed it. I don’t have that patience.
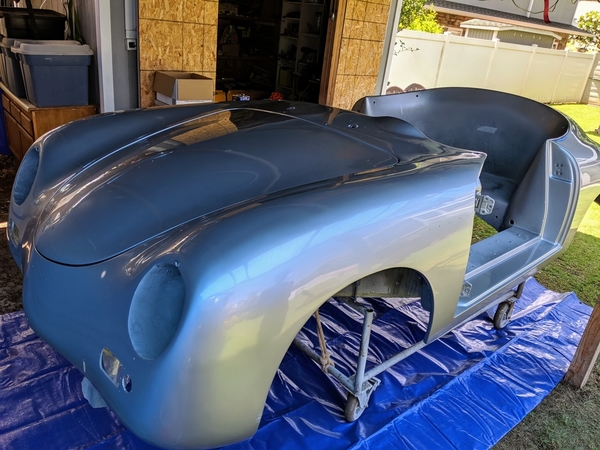
Tons of progress. Most importantly, the body just got back from the painter and he did a great job. This last week I've been finishing up the tasks that have to be done before the body is bolted to the chassis. Even more important, Marianne decided to help me clean up the 40 year old aluminum pieces that goes under and over the windshield! Several hours later they looked great!!!
The wiring harness for the engine is built, the alternator hookup and circuit breaker is installed, the carburetors have been synchronized and tuned, the floorboards have been painted with POR15 (rust prevention) and bracing for the seatbelt mounts fabricated. Plus, the oil cooling system has been assembled and the new super-sized gas tank has been scrubbed and internally sealed. It's been a busy week with lots of progress!
My son, David inspects the paint job:
Wheeled around to the backyard house of tarp for assembly and lifting onto chassis:
Engine tuned, sensor, ECU and ignition module wiring harnesses completed, alternator circuit breaker and charging circuit completed and oil bypass completed for assembly with body:
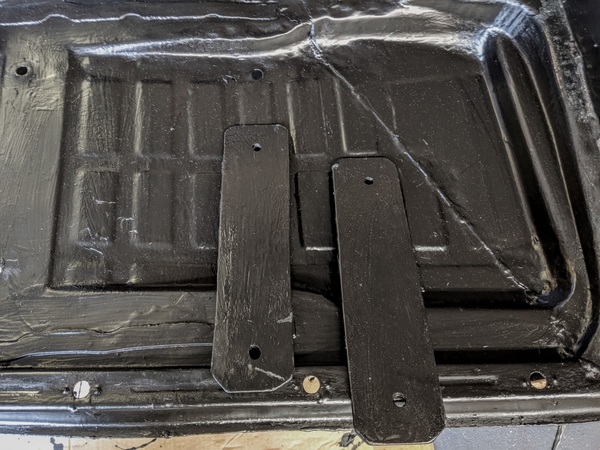
Floorboards recovered with POR15 (whole chassis has been treated now). Two oblong 3/16" steel reinforcement plates cut and POR15'ed. They sit under the floorboard and the rear seatbolts pass through them. They make me feel good about tying the seatbelts to the seat frames (important so that the seatbelts fit my 5' 11" frame as well as Marianne's 5' 2" (with an updraft) frame):
Marianne decided to find out what all the fun was about and cleaned up the 40 year old windshield frames. They're nice and shiny now!
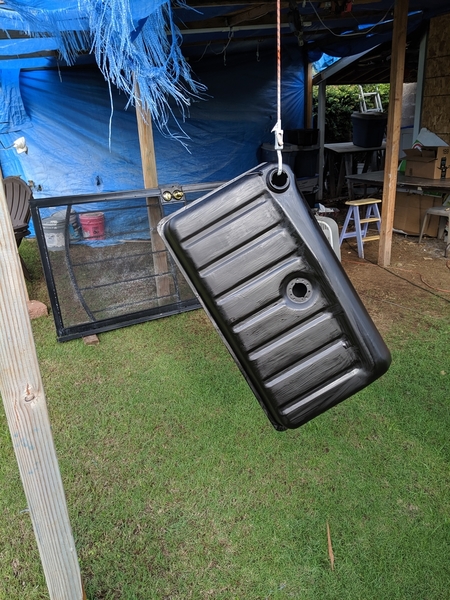
Finally, cleaned and sealed the new super sized gas tank. What the heck, gave the outside of it a coat of POR15, too. The screen door in the background just rated regular ACE anti rust:
Thanks again to all of you guys for your encouragement, ideas, help and mirthful comments. It's been a full year since we dragged this thing into the backyard and I'm feeling like I can see the finish line.
Mike
Attachments
Looking very nice! ![]()


