

Mango, I took a three day course, paid for by my job of course, about a year and a half ago. I already figured out most of it on my own, but there is always something to learn. Tig welding aluminum is fun, you just have to get into a rhythm. I have had a small Mig with gas for ten years now. Indispensable, especially with these cars!
Great job on the frame!
A nice inverted TIG would be on the top of my tool wish-list. I've got a small Hobart MIG, and I just use flux core wire. It's sufficient for tacking, but I take pieces I really care about to a welding shop after I've tacked it all together.
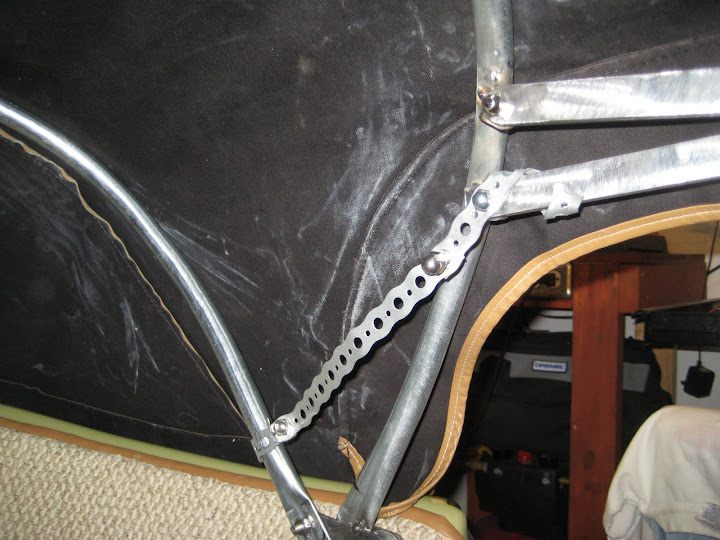
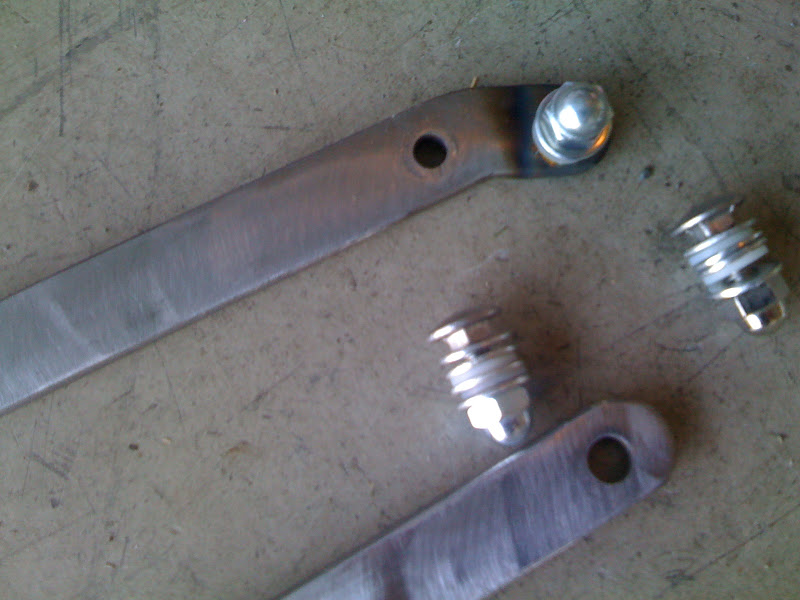
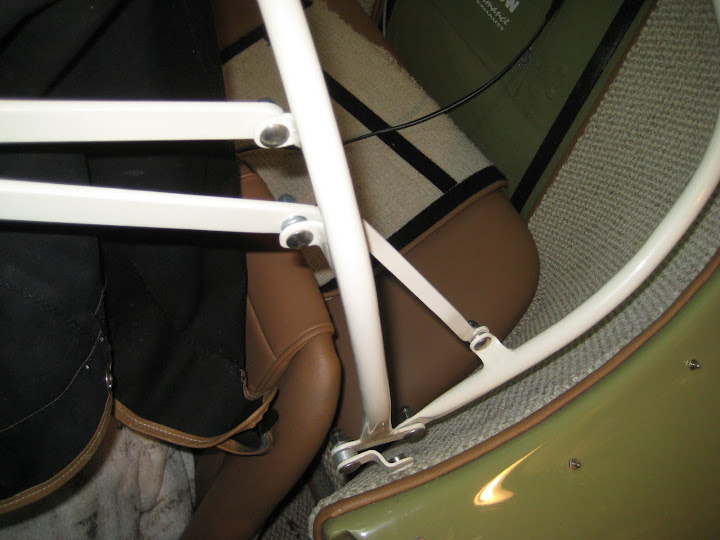
the rear bow to front bow metal connector /pivot is just round metal sstock right now. i kept going through 3/8" metal trying to get it right then i figured i could bent the round in 2 directions and it's easy to cut/file.
i may keep it (after i clean the whole thing up - welds, etc). i'm going to sleep on it.
that's it for tonight folks. going to bed with a smile on my face.
i may keep it (after i clean the whole thing up - welds, etc). i'm going to sleep on it.
that's it for tonight folks. going to bed with a smile on my face.
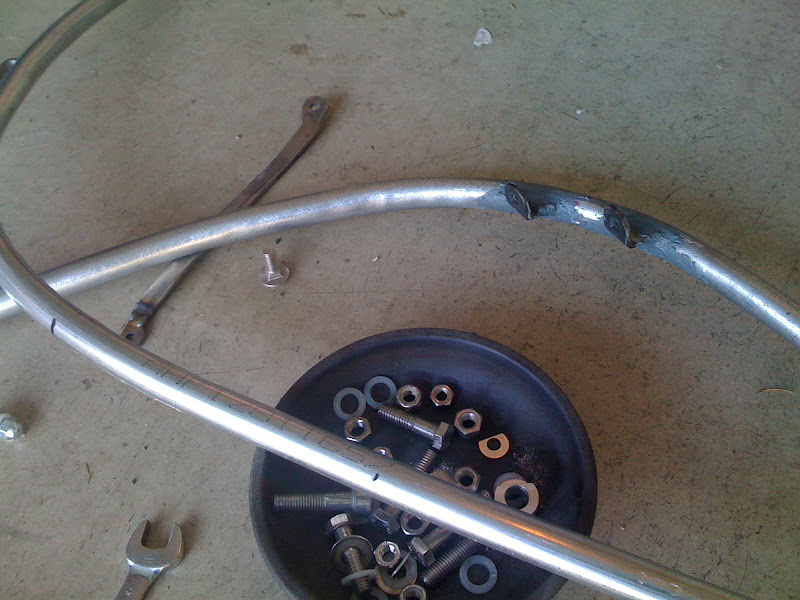
well, another few hrs in the garage and I'm making serious progress now.
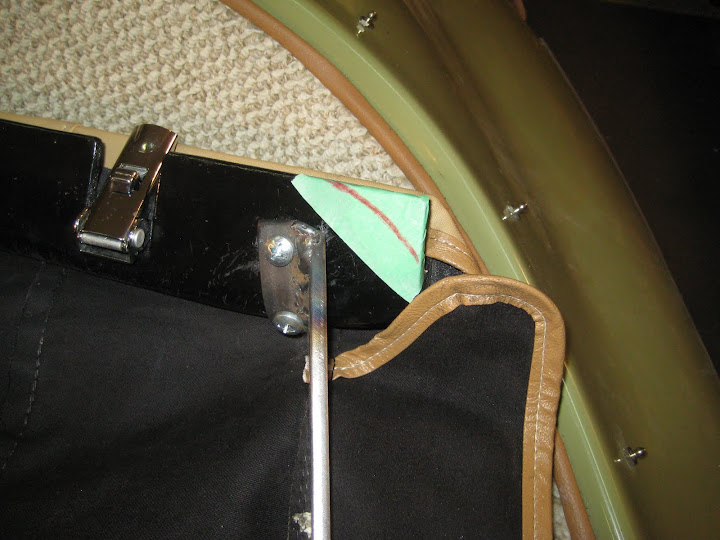
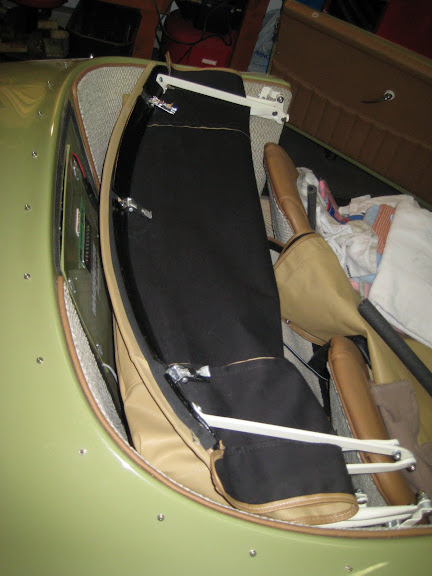
i fiddle-farted with this stuff to get the geometry in the ball park:
then took the welder out and spot welded a few times until i hit the sweet geometry spot)
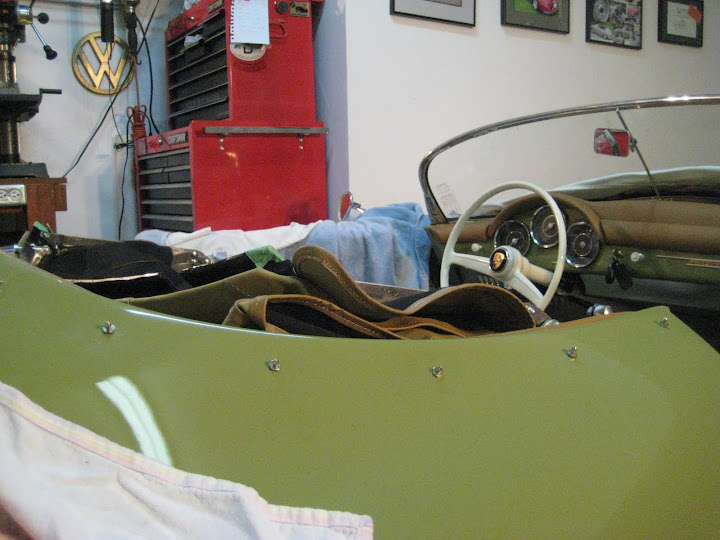
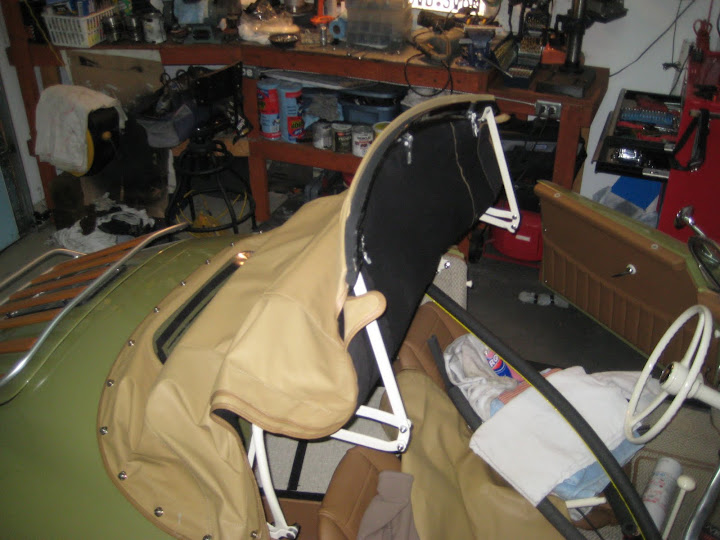
check this out (the top, not the amazingly clean garage):
honestly, i don't think it's physically possible to fold down any more flush. the header bow is going to peak above and i can't do anything about that (at least that i can figure out)
here are a few videos:
this one is sort of hard to show with one hand holding the camera. the motion is pretty smooth
this is the money video!
i fiddle-farted with this stuff to get the geometry in the ball park:

then took the welder out and spot welded a few times until i hit the sweet geometry spot)
check this out (the top, not the amazingly clean garage):


honestly, i don't think it's physically possible to fold down any more flush. the header bow is going to peak above and i can't do anything about that (at least that i can figure out)
here are a few videos:
this one is sort of hard to show with one hand holding the camera. the motion is pretty smooth
this is the money video!
If the rear bow was narrower, the top might rotate further down getting the header bow below the body line. But that may not stretch the top enough in those rear quarters.
Or if the top sides of the interior were more vertical, it looks like it would rotate further down. You could section out just the top portion and create an arm rest from the remainder of the bottom half. That way you're not messing with the seat pad area. Of course, that is a significant amount of fiberglass and carpet work in an already finished car.
Or if the top sides of the interior were more vertical, it looks like it would rotate further down. You could section out just the top portion and create an arm rest from the remainder of the bottom half. That way you're not messing with the seat pad area. Of course, that is a significant amount of fiberglass and carpet work in an already finished car.
cool ideas Justin!
i started this process with the ultimate goal of a top that is really tight. second goal is a flush fold-down.
i bent each of the 2 bows (5 bows bent in total) to make the top as wrinkle-free as i could (then added a turn buckle on the front one to fine-tune it)
i like the idea of notching the body. i really like it. let me mull it over. i have a bunch of extra matching carpet and vinyl (and fiberglass and resin), so it's definitely possible. Thanks for the suggestion!
Beautiful work, Mango but keep something in mind. Flush is good for the top and your tonneau will look great. Beat it to death to get it less than flush and you're eating up back seat space. Where will you put the beer and the baggage then ?
on my DIY luggage rack of course! :)
Paul-
FWIW, Henry has an articulating frame for the speedsters that folds nearly flat. He notches the body.
FWIW, Henry has an articulating frame for the speedsters that folds nearly flat. He notches the body.
Oh, sure!
After the guy jumps through hoops for three weeks trying to get an articulated mechanism that looks like something from NASA to look right when up and also stows completely flush to the rear seat cavity when stowed, after spending many, many sleepless nights trying to figure out how he might do this with ultimate class......STAN comes along and says "Oh!.......HENRY notches the body."
"Poo to YOU", Stan!
Gordon-
This dude needs no help from anybody, least of all me. I'm pretty convinced that Paul can get it done without notching anything if that's what he wants to do.
However... if he chooses to notch it, I was just trying to convey that there's absolutely no shame in it.
So... "Poo to me", I guess.
This dude needs no help from anybody, least of all me. I'm pretty convinced that Paul can get it done without notching anything if that's what he wants to do.
However... if he chooses to notch it, I was just trying to convey that there's absolutely no shame in it.
So... "Poo to me", I guess.
LOL - i totally appreciate the suggestion for improvement. seriously.
i took a good look at it on my way past (coming home from work)
without modifying the rear hoop - it's as low as it gets.
and with summer literally knockin at my door (23 degrees C today) - i gotta draw the line for this season.
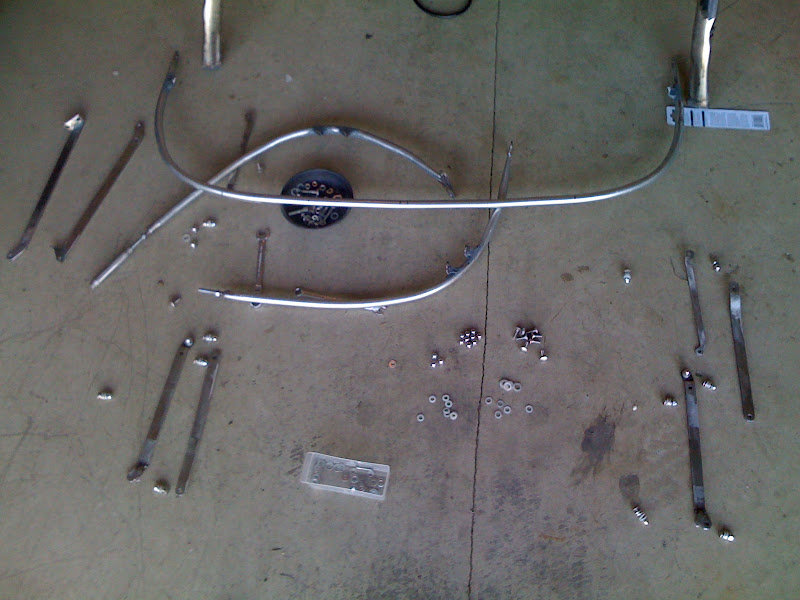
my focus is fabbin up the other side - you knew i just did one side, right? :D
take it all apart, photograph the whole shebang with measurements, then paint and reassemble.
i took a good look at it on my way past (coming home from work)
without modifying the rear hoop - it's as low as it gets.
and with summer literally knockin at my door (23 degrees C today) - i gotta draw the line for this season.
my focus is fabbin up the other side - you knew i just did one side, right? :D
take it all apart, photograph the whole shebang with measurements, then paint and reassemble.
Outstanding job. What will become of your old frame?
the old CMC one? i don't know. probably give it away here if anyone wants it ('buyer' pays shipping)
the folding one i bought from Mexico and added turn buckles? i'm going to sell it on ebay.
the folding one i bought from Mexico and added turn buckles? i'm going to sell it on ebay.
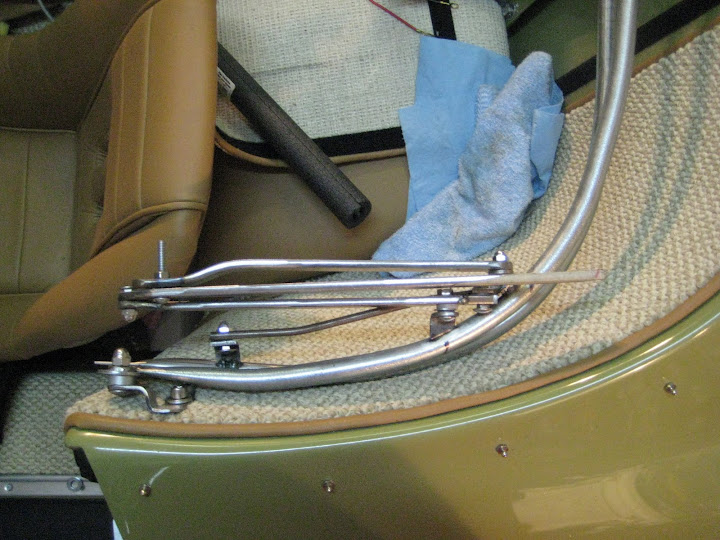
holy crap it's so much faster doing the other side.
how long did it take me to do one side? 4 weeks (of evenings and weekends)?
the other side pretty much nailed in 1.5 hrs. i put some metal rod through all the bolt holes to match up the geometry perfectly
added more weld to my spot welds (just need to grind them smooth now)
getting closer!
how long did it take me to do one side? 4 weeks (of evenings and weekends)?
the other side pretty much nailed in 1.5 hrs. i put some metal rod through all the bolt holes to match up the geometry perfectly
added more weld to my spot welds (just need to grind them smooth now)
getting closer!
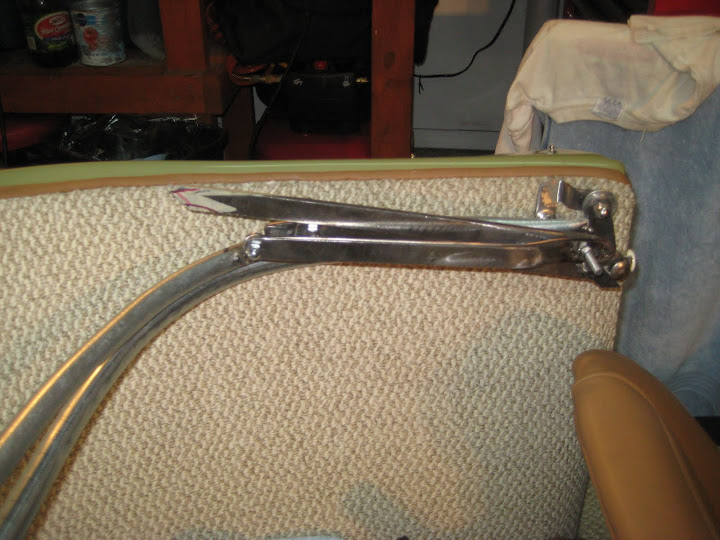
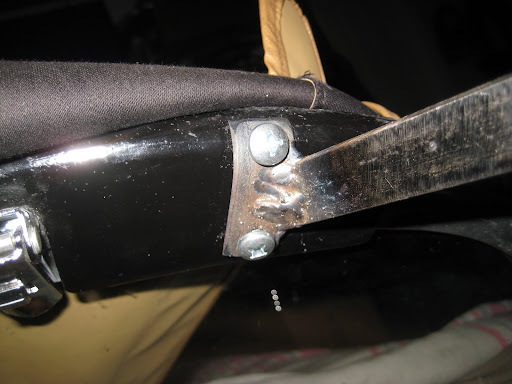
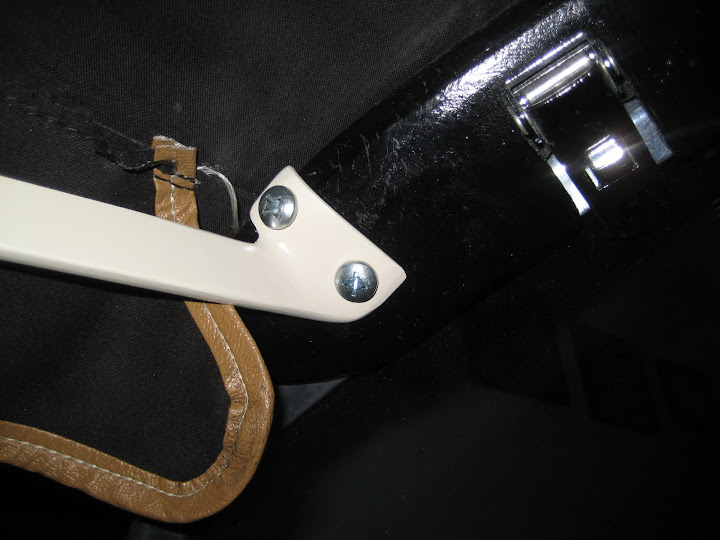
finished the passengers side - including the bow mount. i decided not to tempt fate and weld above my interior.
i held the metal there and took a good mental image (you know - the kind when a hot chick (or dude if that floats your boat) walks by) and then took the metal and spot welded it as close as i could.
then cooled it off, put it back on the frame and saw how far i was out - took it off and bent with pliers - installed, etc - you get the idea.
got it perfectly fitting & angled - then welded the crap out of it. :)
cooled it off and installed.
i decided to grind stuff smooth after all fabrication, not as i am doing it. i had to weld up some hold on some of the front folding mechanism, so i didn't want to waste any more time/neighborhood noise.
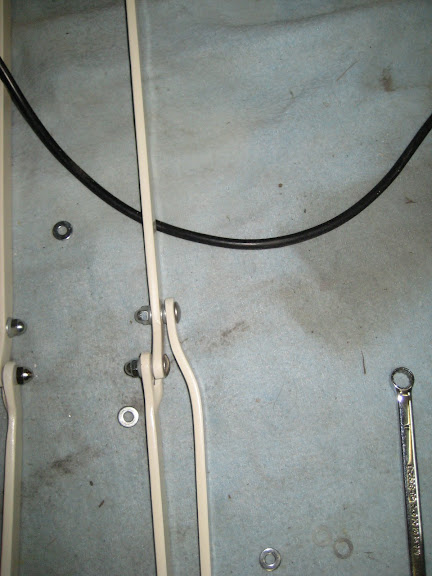
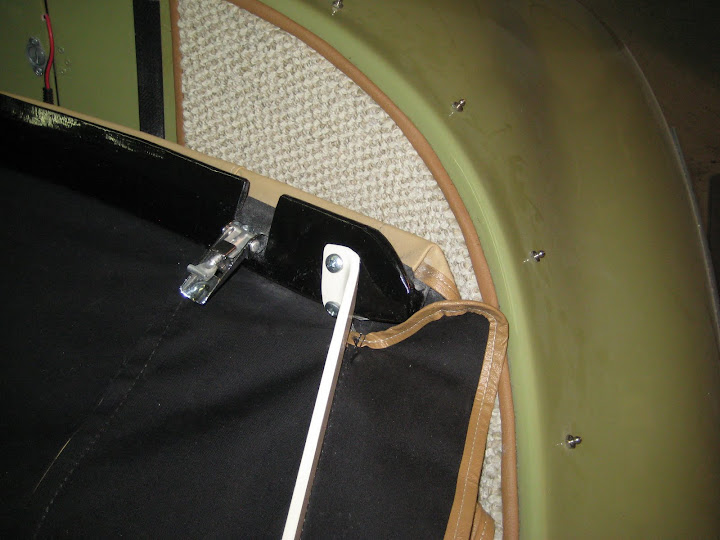
also - i decided not to use round stock to connect the rear bow to the folding mechanism. i used 1/4" flat and bent it all last night.
i know pictures are nice, but i'm making progress and sometimes i forget to take pictures. i have a few that i'll upload later.
i held the metal there and took a good mental image (you know - the kind when a hot chick (or dude if that floats your boat) walks by) and then took the metal and spot welded it as close as i could.
then cooled it off, put it back on the frame and saw how far i was out - took it off and bent with pliers - installed, etc - you get the idea.
got it perfectly fitting & angled - then welded the crap out of it. :)
cooled it off and installed.
i decided to grind stuff smooth after all fabrication, not as i am doing it. i had to weld up some hold on some of the front folding mechanism, so i didn't want to waste any more time/neighborhood noise.
also - i decided not to use round stock to connect the rear bow to the folding mechanism. i used 1/4" flat and bent it all last night.
i know pictures are nice, but i'm making progress and sometimes i forget to take pictures. i have a few that i'll upload later.
Former Member
Freaking awesome, Mango. HOO-YAH.
BRILLIANT!!
The nerve of you not posting pictures of this! I demand a refund of my ticket price :-)


and the other side - just need TIME to weld and grind... g'ah

i have 1.5 hrs set aside tonight if nothing pops up on the 'honeytodo' list
Mango, please don't let my comments interfere with your family duties...you're an amazing guy :-) Lookin' good as usual.
lol - no worries my friend.
oh man - i can taste it now...
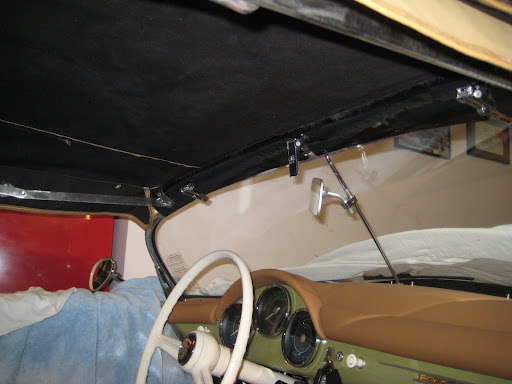
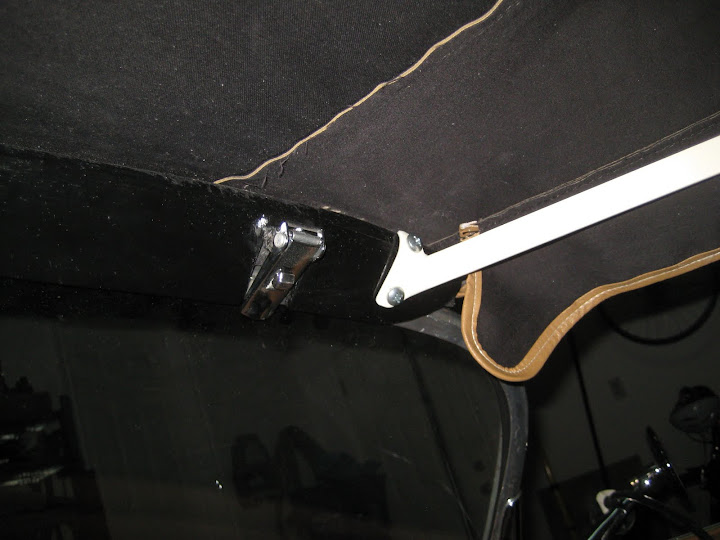
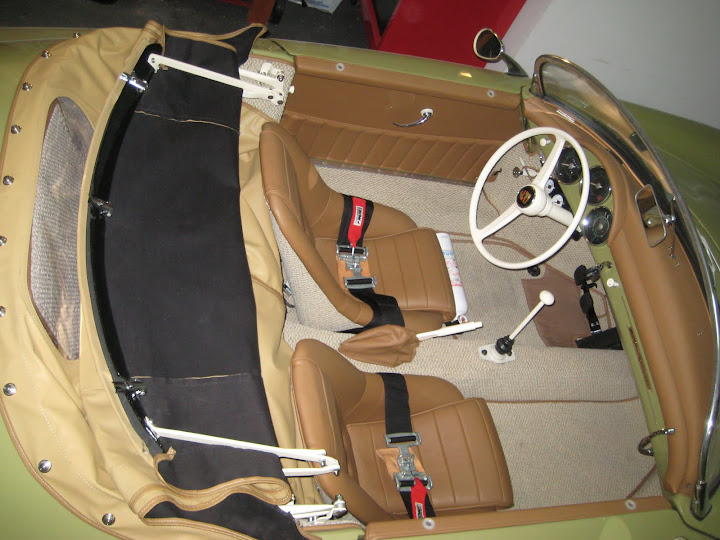
i did a full dry-run top fold down tonight. worked very well, but i have identified a few areas i need to tweak (grind to increase clearance) because they bind a little...
i'm pretty impressed on how it comes off the windshield frame.
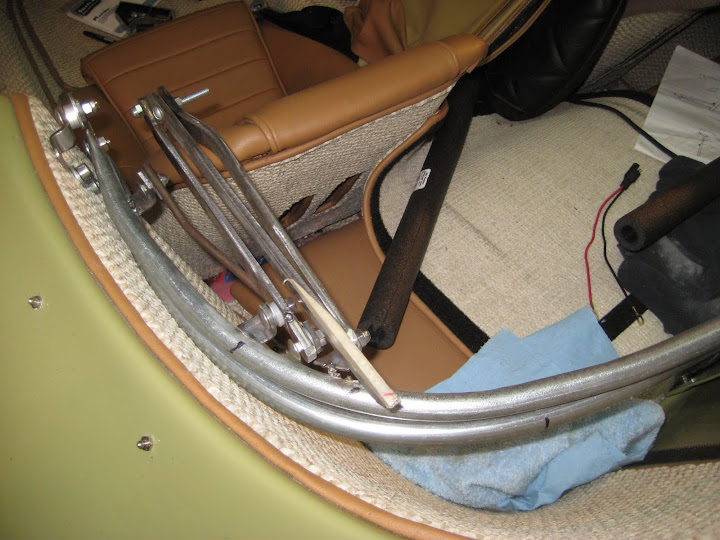
as a side note - for those running this type of top in their speedster - it's a little alarming how close to the head all that metal is.
i'm going to pick up some more pipe insulation and stick it on for when i travel with the top up (ie: no banging the crap outta your head getting in/out - never mind a car accident).
i can't do a lot more without making a hell of a lot of noise grinding.
that's all for tonight folks. enjoy!
i did a full dry-run top fold down tonight. worked very well, but i have identified a few areas i need to tweak (grind to increase clearance) because they bind a little...
i'm pretty impressed on how it comes off the windshield frame.
as a side note - for those running this type of top in their speedster - it's a little alarming how close to the head all that metal is.
i'm going to pick up some more pipe insulation and stick it on for when i travel with the top up (ie: no banging the crap outta your head getting in/out - never mind a car accident).


i can't do a lot more without making a hell of a lot of noise grinding.
that's all for tonight folks. enjoy!
"If the top fits, we can't nit-pick", I think Johnnie Cochran said that once. And I think it's gonna fit!
"as a side note - for those running this type of top in their speedster - it's a little alarming how close to the head all that metal is."
No kidding. Make sure that he edges of any piece of metal that you might hit getting in or out are rounded. Ask me how I know.
No kidding. Make sure that he edges of any piece of metal that you might hit getting in or out are rounded. Ask me how I know.
Hi Mango, where did you buy the first "mexican" frame?
well folks - the end (of the project) is near!
i am more than happy with how this is turning out.
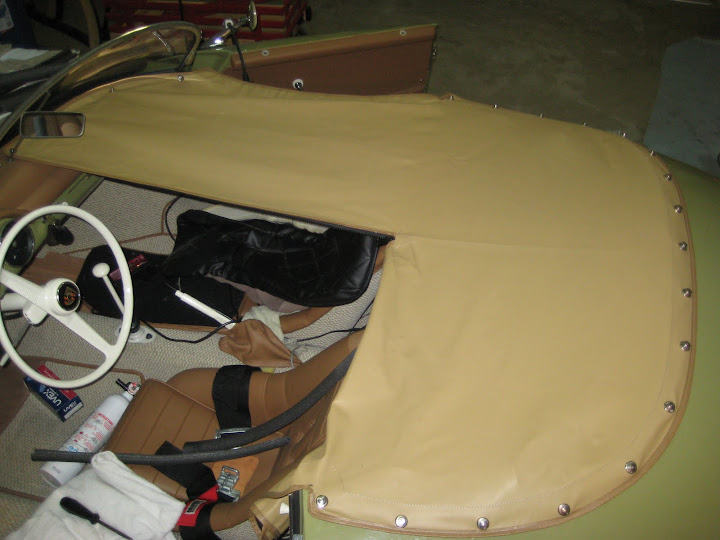
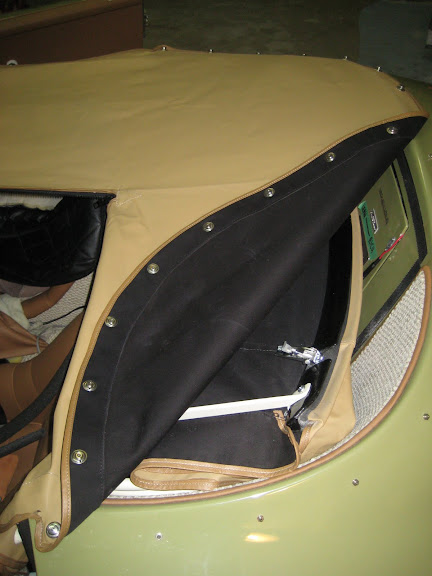
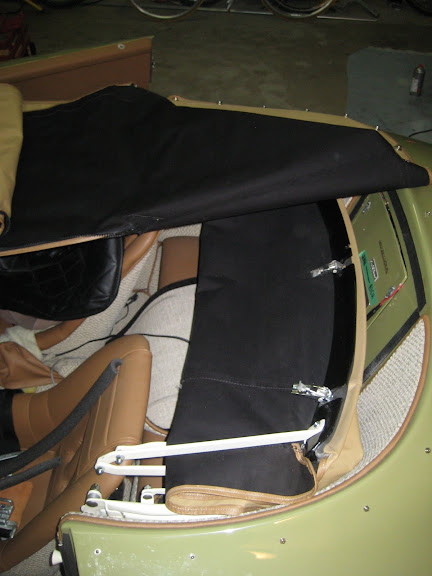
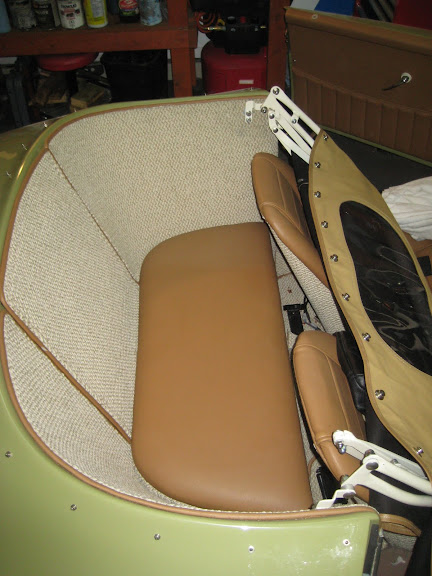
uber flush folding:

header bow pokes up:
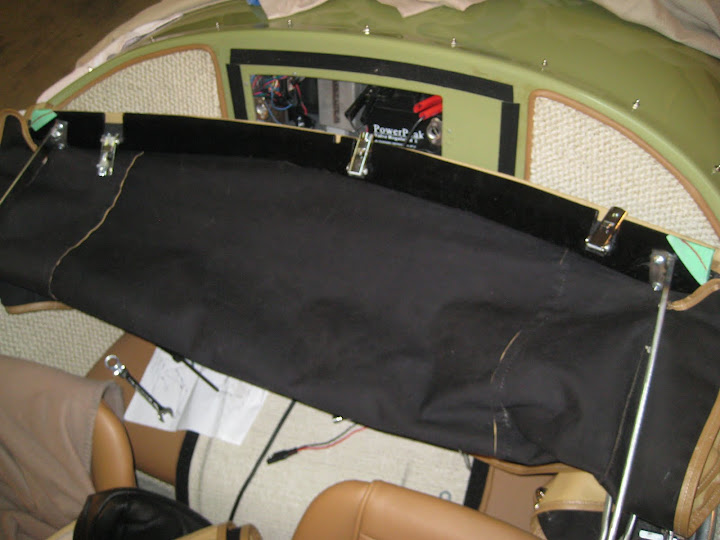
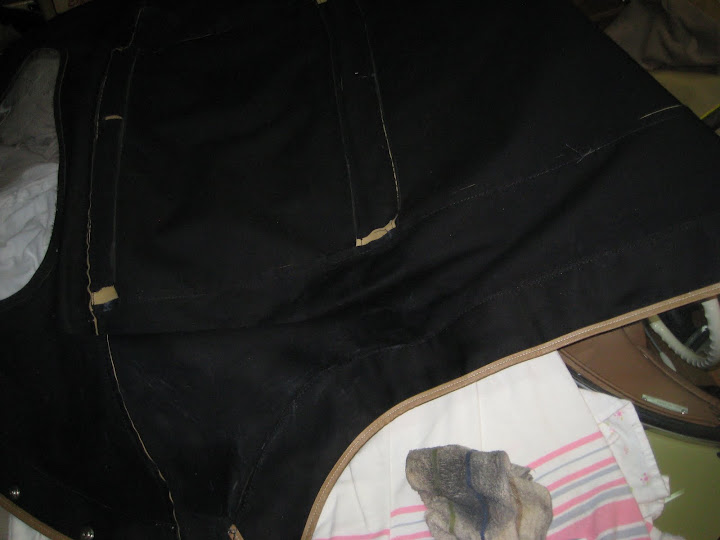
tonneau with two bow ends poking:

i'm going to trim / round them smooth like this:
oh - the top i bought from a fellow named rafael albiter. his email is: ralbiter@hotmail.com
that's it for tonight. happy weekend!
i am more than happy with how this is turning out.
uber flush folding:

header bow pokes up:

tonneau with two bow ends poking:

i'm going to trim / round them smooth like this:


oh - the top i bought from a fellow named rafael albiter. his email is: ralbiter@hotmail.com
that's it for tonight. happy weekend!
well, my neighbors love me.
1.25 hrs of non-stop grinding and blending/smoothing the metal.
but now - well now it's a work of art. i quite like this metal shaping process.
full disassembly, grind rough welds, flap disc/ blend...
i reassembled it - did another dry run, two areas i needed to tweak where there was contact - disassemble, weld, test fit again, success!
it's sort of hard to gather how much time i have spent on 10 pieces of metal, but, they all fir together like a jigsaw puzzle now.
i am going to do some body work on the frame to smooth out the welded areas that i can't reach with my flap disc (just like the DIY luggage rack i made).
no pics yet, sorry folks.
also - as an fyi as the search feature isnt that great on this site - i've updated my site:
http://www.mangosmoothie.ca/convertible-frame
http://www.mangosmoothie.ca/convertible-frame
wow...........I've had my head down in the engine bay for so long that I totally forgot about having to do my roof............thanks for reminding me.
Seems like a lot of work, but holy crap, it really seems like you've had some fun.
I've only said this about a dozen times in any of your threads......you do so damn fine work.
Seems like a lot of work, but holy crap, it really seems like you've had some fun.
I've only said this about a dozen times in any of your threads......you do so damn fine work.
thanks - it is/has been fun figuring this out.
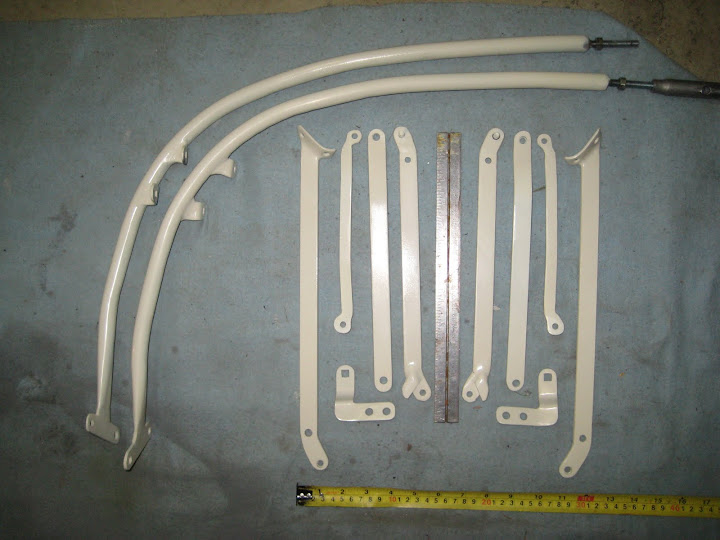
Last night - i sorted out all the washers / nylon washers / stainless hardware (bolts & acorn nuts)
i decided to lock-tight them on with the strongest lock-tight (red) instead of welding. welding is easier, but really limits your options and i don't think it will look as crisp against the painted frame.
i am also going against cory's advice and painting it ivory to match my other interior parts. it'll be covered up when the tonneau is on. Sorry Cory - i do value your feedback :)
Anyway - as prep for the final product - i also added some body filler over the smoothed out welds to make 'em niiiice and smooth
anyway - here are some pictures:
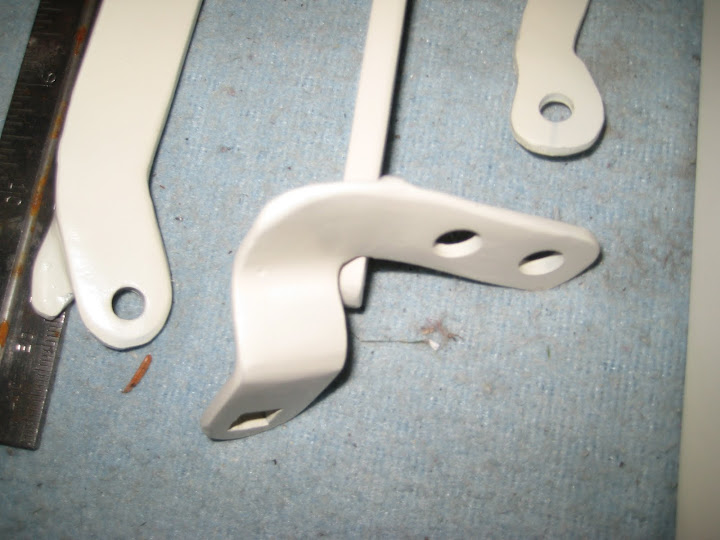
hardware:
body filler on tabs:
everything disassembled for the final time:
Last night - i sorted out all the washers / nylon washers / stainless hardware (bolts & acorn nuts)
i decided to lock-tight them on with the strongest lock-tight (red) instead of welding. welding is easier, but really limits your options and i don't think it will look as crisp against the painted frame.
i am also going against cory's advice and painting it ivory to match my other interior parts. it'll be covered up when the tonneau is on. Sorry Cory - i do value your feedback :)
Anyway - as prep for the final product - i also added some body filler over the smoothed out welds to make 'em niiiice and smooth
anyway - here are some pictures:
hardware:

body filler on tabs:

everything disassembled for the final time:

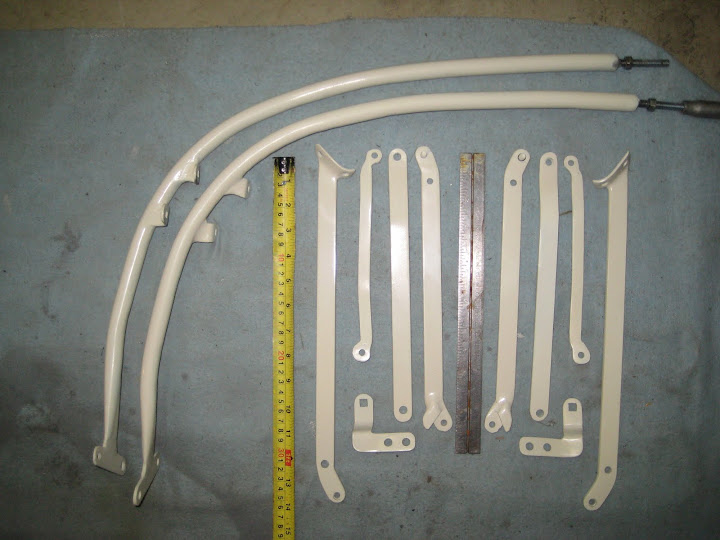
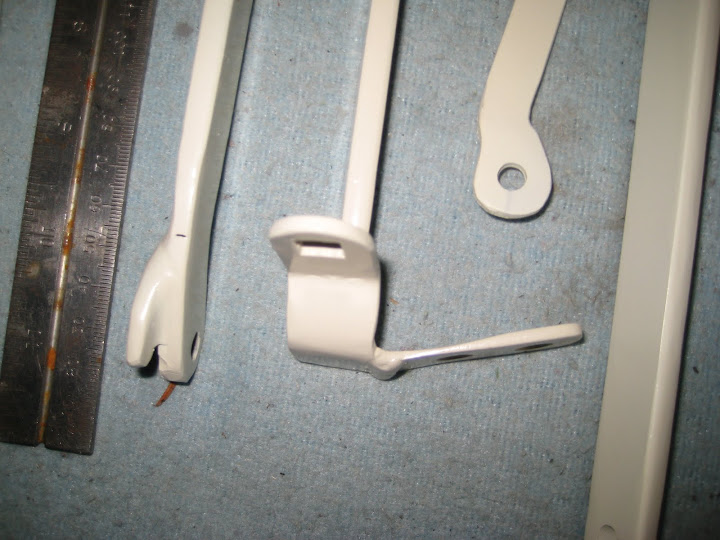
sanded the filler - did round two:

cut, smoothed and painted the header bow corners:


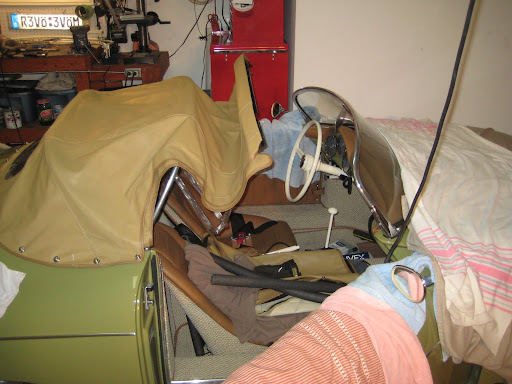
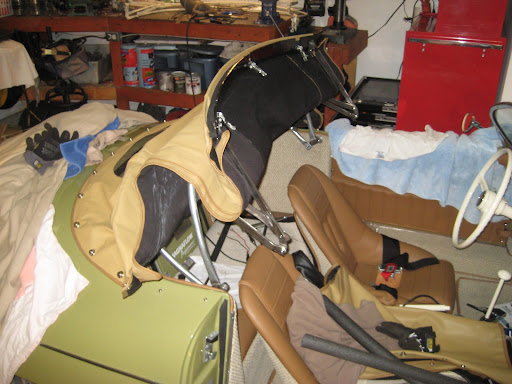
and started taking all the blankets and covers off in prep for a wash / road insurance and all that good stuff. Man my garage is a shit pit, but cleaning it is at the bottom of my priority list:

it's weird seeing my car again after the winter.

cut, smoothed and painted the header bow corners:


and started taking all the blankets and covers off in prep for a wash / road insurance and all that good stuff. Man my garage is a shit pit, but cleaning it is at the bottom of my priority list:

it's weird seeing my car again after the winter.
high build primer
sand
found a few pits
another coat of filler
sand
high build primer
paint - coat 1


sand
found a few pits
another coat of filler
sand
high build primer
paint - coat 1


Former Member
Mango, could you be bothered to take a trip to Baltimore? Say, for maybe three weeks (or until there's a top on the Jalopy?
I kind of feel like you're going to see what I mean about the ivory as soon as you install it, but that's a smooth coat of paint you've got going on there! Very nice!
I kind of feel like you're going to see what I mean about the ivory as soon as you install it, but that's a smooth coat of paint you've got going on there! Very nice!
mango consulting services - on call fabrication for the price of beer. i love it!
i do think my wife and child would have something to say if i took off for three weeks to play in your garage - however. we'd have better luck if you brought it here. oh geeze - i just checked - that is ~4500kms.
i do think my wife and child would have something to say if i took off for three weeks to play in your garage - however. we'd have better luck if you brought it here. oh geeze - i just checked - that is ~4500kms.
4th coat of paint is dry
have all the hardware
going to polish the paint on it, then assemble.
must... not... forget... to... take... measurements...
as a side note - wiped the cobwebs off the car last night and got her running after 7 months of sitting. still needs cleaning, but it's very close to being ready. :)
have all the hardware
going to polish the paint on it, then assemble.
must... not... forget... to... take... measurements...
as a side note - wiped the cobwebs off the car last night and got her running after 7 months of sitting. still needs cleaning, but it's very close to being ready. :)
ya ya ya ya ya ya
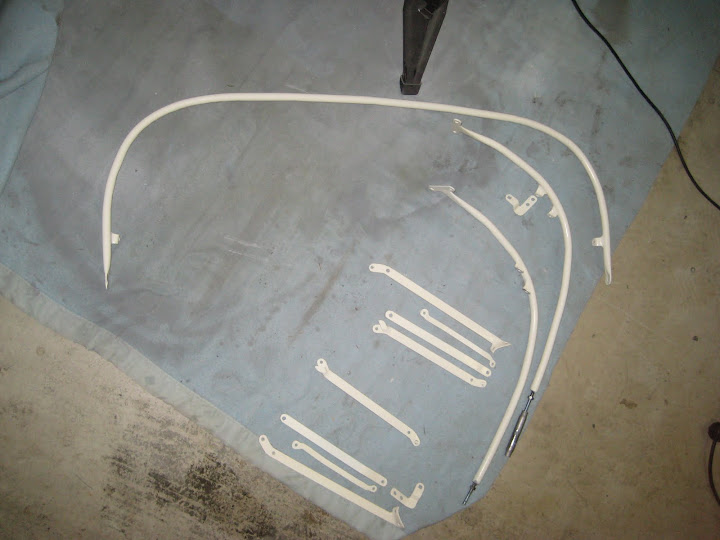
first - the measurements:
more:
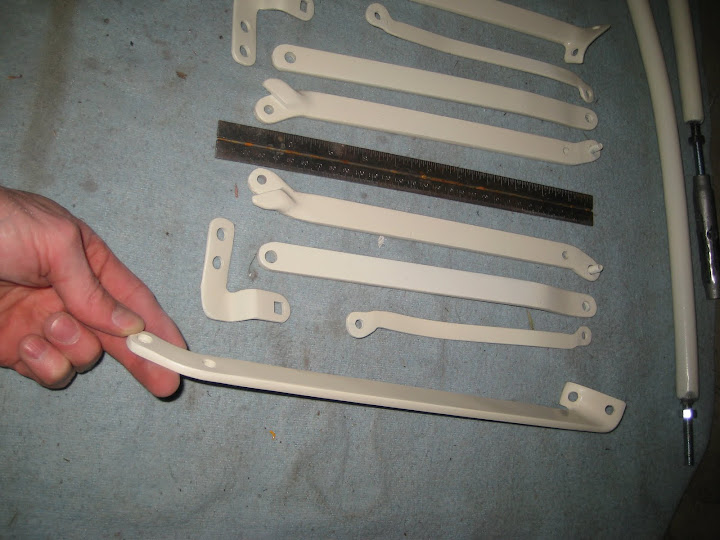
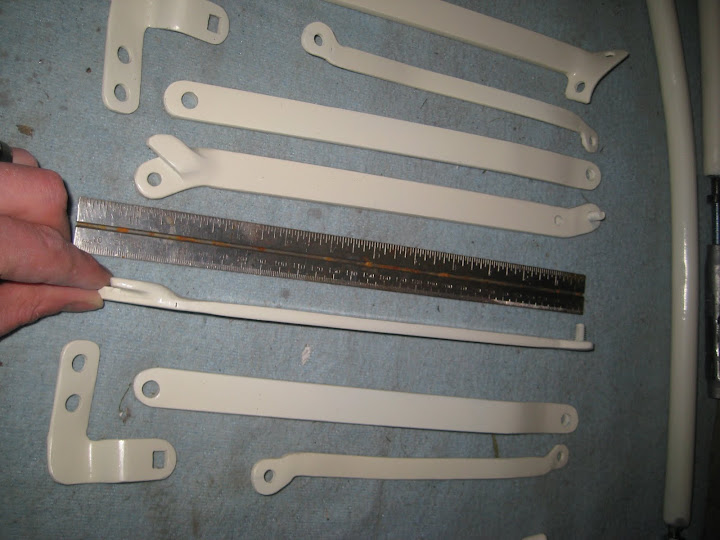

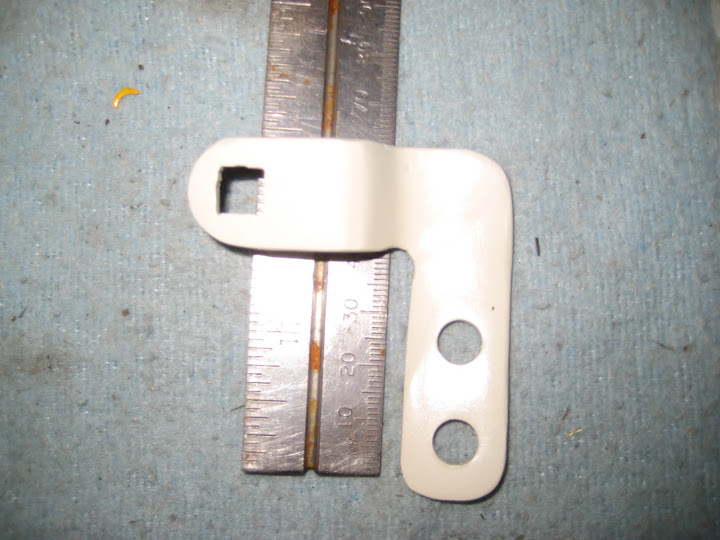
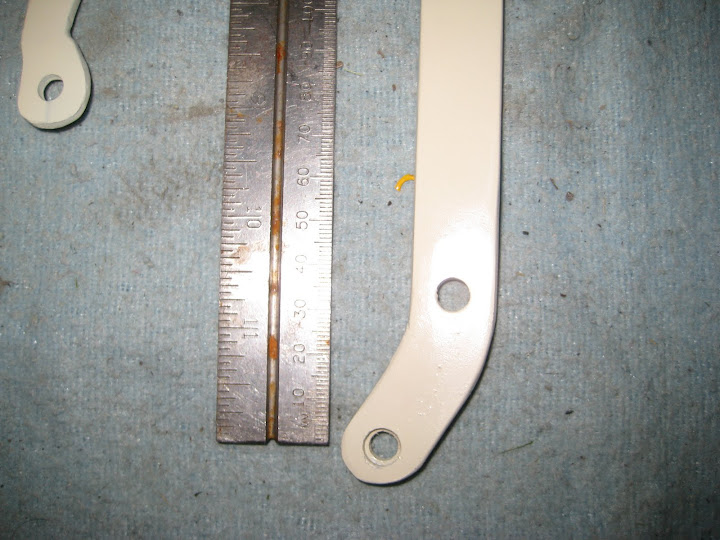
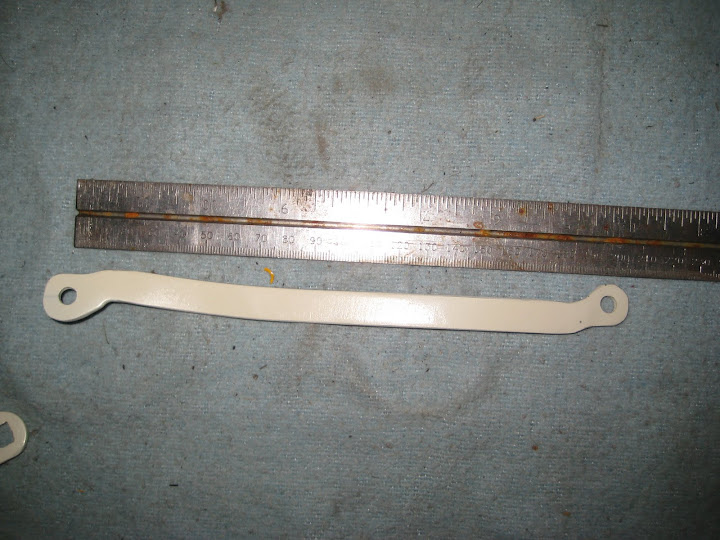
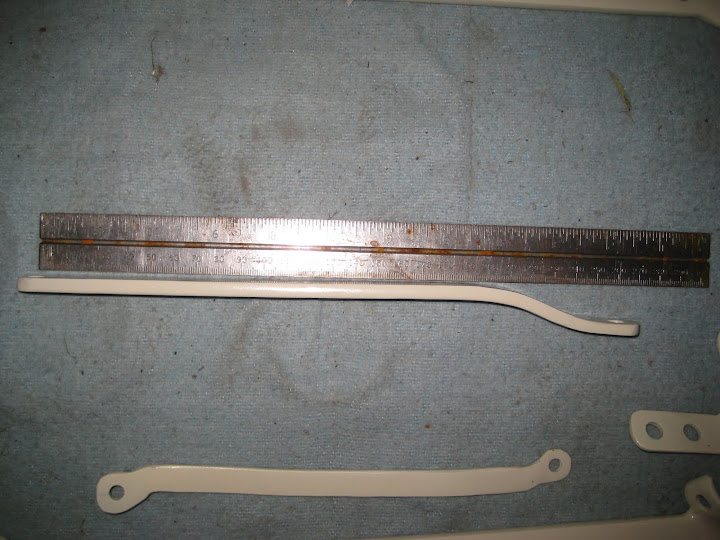
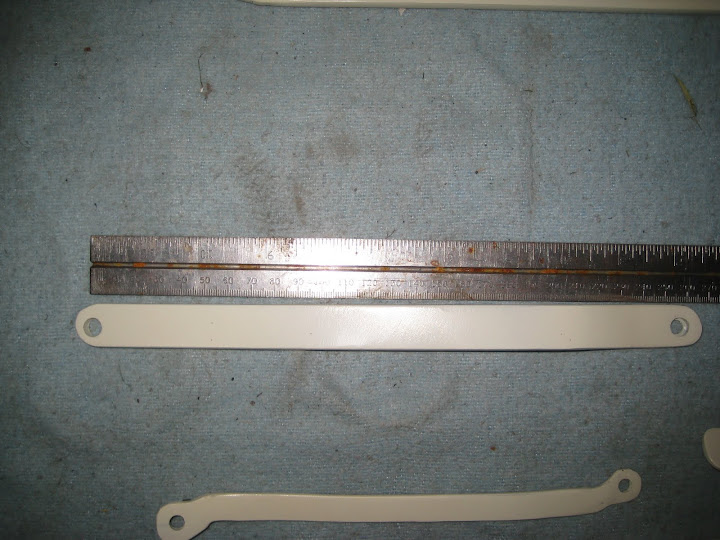
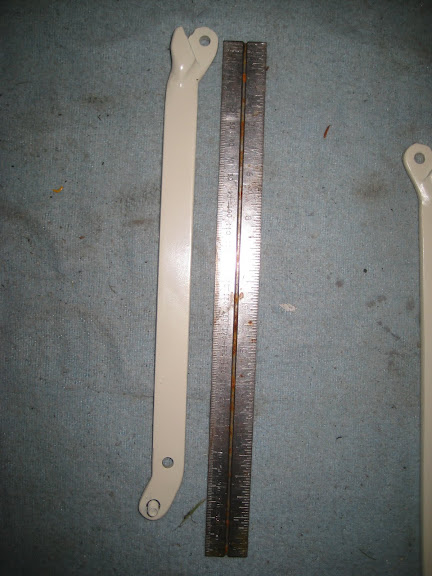
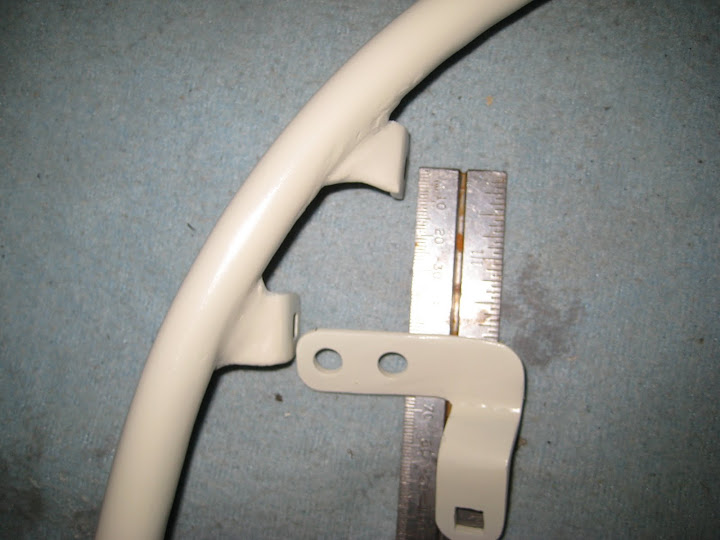
first - the measurements:

more:


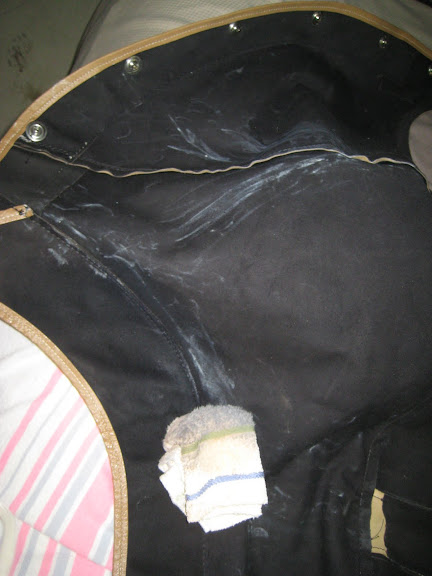
then the cleaning (paint thinner followed up with warm soapy water and a heat gun):
then about to be installed:


then about to be installed:

assembly (the fun part):

video of mechanism: sooooo smooth with those nylon washers...
closer:
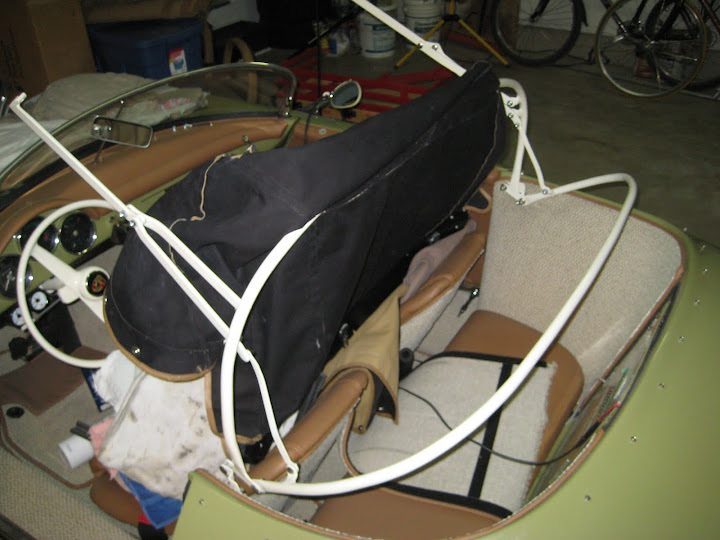
oh baby:
sorry Cory - i couldn't be happier with the ivory/stainless hardware on my interior scheme

(don't judge my mess of a garage - i literally cleaned it tonight :) )
folded down:


video of mechanism: sooooo smooth with those nylon washers...
closer:


oh baby:


sorry Cory - i couldn't be happier with the ivory/stainless hardware on my interior scheme

(don't judge my mess of a garage - i literally cleaned it tonight :) )

folded down:


annnnnnnd:
....
(keep in mind one of the primary goals was a flush fold down)
....
with the toneau on:

trimmed header bow:
folded forward to clean:
car's lookin a little cleaner (note my fire hydrant actually is mounted behind my seat - i brought it out for the first startup of the season the other day):
all that is remaining is to undo the bolts and lock-tight them on, but i am going to leave it like this for a while, just in case i need to disassemble it for some reason.
that's all for tonight (after 3 hrs in the garage!!)
....
(keep in mind one of the primary goals was a flush fold down)
....
with the toneau on:


trimmed header bow:

folded forward to clean:

car's lookin a little cleaner (note my fire hydrant actually is mounted behind my seat - i brought it out for the first startup of the season the other day):

all that is remaining is to undo the bolts and lock-tight them on, but i am going to leave it like this for a while, just in case i need to disassemble it for some reason.
that's all for tonight (after 3 hrs in the garage!!)