MangoSmoothie.ca posted:

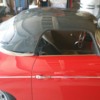
oh and i stopped by the plastics shop and got the ball rolling for a lexan rear window.  should work just fine.

Could you elaborate a little on what is involved here? I know almost nothing about this.  

I’m assuming the plexiglass will be formed, how exactly does that get done? Do you need to take them some sort of template, or how does that work?

Stan Galat posted:
MangoSmoothie.ca posted:

oh and i stopped by the plastics shop and got the ball rolling for a lexan rear window.  should work just fine.

Could you elaborate a little on what is involved here? I know almost nothing about this.  

I’m assuming the plexiglass will be formed, how exactly does that get done? Do you need to take them some sort of template, or how does that work?

my understanding is i bring in a cardboard template and then open up my wallet when i return the following day.

Lexan can bend A LOT!  i watched the guy pick it up from the rack today and bend it nearly 180 degrees (on a 6" radius).  This window is so small and only needs bending in  one direction, so i will just get it cut and install it on the rubber / in the hardtop.  the metal top will hold it.

@ Stan Galat  ,   Plexiglass and Lexan can be formed with hot air, i.e carefully with a heat gun after practicing on a small piece. I now use a Propane shop heater to slightly bend the forward edge of the side curtain I make,   Years ago I made a pair of Bradley GT large gull wing doors out of Margard Lexan, they had to be bent 90 degrees ... I made arrangements with a friend that owns a Pizza place and used the Pizza oven at 1:00AM .

Al;

That makes sense.  A late friend of mine was an aircraft mechanic.  He would place the Lexan in a metal locker with a heat lamp and Lexan strapped to  a "mold".  Once he had the correct shape, cut and screw it in place,  a new windshield.

Late in life,  he got  a check off on his bucket list,  a ride in a P-38 Mustang. They dived down on the deck and buzzed the boat harbor.  OMG, the power and noise like nothing else. 

Thread drift, sorry.

If I can remember I used polycarb for rear window , it bends without heat & tuff & no cracking ! may be called something else over the pond ? beetle rear window seal cut down .Fitting was a bit of a bitch  used auto electrical insulated wire to fit around seal with window in the seal & pulled in to get seal in roof  may need two sets of hands 

Lexan (polycarbonate is very flexible thus very "unbreakable". Without some heat it has a memory and wants to return to it's flat shape.  With heat it can be permanently formed.  It doesn't take a lot of heat either and Will form bubbles if it gets too hot. It's better to leave it on (or in) the form and let it cool all the way back to room temp.

Plexaglas is acrylic and is stiff and brittle.  It will accept color of nearly any intensity.  It too can be formed with heat using the same prudence as with Polycarbonate.

I use acrylic for my wing windows because I can get that green edge tint that looks good. Lexan would make a more durable wing but it wouldn't have that pretty green edge tint.

Cool trick Sr. Merkel !  bending the front corner of the  Lexan side curtain.

I used Lexan for the "Behind the head" wind screen and it was so flexible that I had to use more fasteners to keep it from vibrating from the wind.............Bruce

welded up more on the header bow:

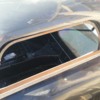
the side modification was laid out by thin painters tape, then a sharpie, then 1mm zip disc cut:

gently bend up the rounded base that was left and walk the spot welds

muuuuuch better

honestly, it would have almost been easier to cut off the whole side and fab up a new one.  soooooo much cutting / welding.  i did it to keep the smooth window opening.  hopefully it'll be worth it.

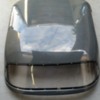
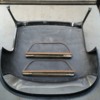
finished off the rear blends and flipped the top over (on a blanket) and started the spot welding process after i cut off the weather stripping lips.  this takes a while (hundreds of welds).  8 pounds of new wire and full new tank of gas.  just need more time now. 

The top is remarkably light!  i can easily lift & flip it.  i don't think i will try to install / remove by myself once it's finished though.

Oh ya - i also added some thin steel rod around the lower rear bottom.  this metal was a headliner bow from this top.  funny - the remaining metal from this top is not all that much.  a TON of work / cutting, but i think of it like lego.  cut, move, reshape, etc.

i feel like i am getting close to the bodywork phase.  i figure another 5-10 hours of welding / fabbing / metal prep.

Last edited by MangoSmoothie.ca

I have made molds for a fiberglass Speedster hardtop.  They are "sitting on the sidelines" as my fabricator is being a butt about finishing it.  The hardtop used to make the molds had a polycarbonate rear window that was glue sealer  and nut and bolt retained.

Hope these photos help in getting idea of the contours.  I am 6'3" tall and getting my head underneath the edge when entering and exiting the drivers seat was a pain ( literally!)

cheers,

Chris

Attachments

Images (7)
  • 20151030_084728
  • 20151030_084745
  • 20151030_103642-1
  • 20151030_104411
  • 20151030_104555
  • 20160114_094154 (1)
  • 20160114_094401

I think the point Chris is making is - Speedster hardtops are commercially available - if you don't have Mango's skills.  If Chris builds your Speedster, it will fit.  I like the full fiberglass front "leg" that cover the chrome windshield post (assume with gasket behind it). That would make for a great leak free seal - especially when using his fixed rigid side curtains. If your car doesn't have the windshield mounted yet or you were willing to alter its placement - you might have a chance of getting it to fit. It's like side curtains - unless car is built on an assembly line - each is a little different (if you want a good water tight seal). That big rear window is nice too. RustyTubs also has Plasticon hardtops - one even is longer to accommodate cutting to fit different placement of the windshield.

http://www.rustytubs.com/plast...ter-hardtop-356.html


If you all look at the windshield post location you all have, there is very little variation in the windshield placement. It can only be set so far forward to the wiper pivot mounts (  3/8" set back is correct) and rearward to where the mounting post under the cowl nearly hits the back side of the dash ( you need to be able to slip a sleeve over the post and be able to locate a large trimmed washer as a  back up plate for the post  sleeve)  In consideration of those two restrictions there is little room for the so called " windshield variation"...... I just went out to measure the one I just installed. The conclusion is there is no way to exceed the  total forward and aft location of 3/8". 

Merklin Motor Works: Elkins,   West Virginia Facility~

Last edited by Alan Merklin

It's been a while since i have updated this thread.  life kind of soaks up my time if i am not careful.

The front fitment is a major PITA.  i honestly have had the top on and off probably a hundred times. Nothing is straight or easy and it seems to be trial and error.

i wanted a very tight fitting front (i already have my weather stripping.  i added some 5mm steel rod across the whole front (and the rear edge) so that the edges are all metal in case something bumps into them.

The front latches are mounted and working great.  those were actually pretty easy to get sorted.

After modifying the tube, I drilled some holes then installed two 6mm nutserts.  The clips bolt on now

After I was happy with the fitment at the top edge, the support posts were fabbed.  i used the tried and true, make it in cereal box cardboard first. then trace to 22AWG sheet metal.

its currently very close to getting to the bodywork phase on the front.  the rear is done.

And for the record, i can lift it off pretty easily by myself with no rear window (i hold it in the opening).  I'll weigh it again, but my guess is maybe 20-25 pounds

Last edited by MangoSmoothie.ca

Kevin: i haven't built it yet.  i am going to nusert / fabricate a setup.  My tenax's provide excellent lateral stability in the rear.  front is sorted.  all i need to do is clamp the rear down via bolts. 

Ray: It'll be all painted mango green, except the headliner area.  My young daughter gets that whole thing as a canvas to paint whatever she wants on there.  i'll clear coat it after she is done.

Last edited by MangoSmoothie.ca
Post Content
×
×
×
×
Link copied to your clipboard.
×
×