Bought a cool exhaust from Vintage Spyders that I am going to install in the next couple days. Alex was great!

I think it makes sense to start by installing the drivers side J tube, then the passenger side J tube, then the collector, and lastly the muffler itself. 

I am concerned about the clearance between the passenger side rear wheel and the muffler, but we will see.

I may have to have the muffler inlet and exit pipes cut and changed to alter the angle that it sits at behind the wheel well.

This looks similar to a Sidewinder, all stainless, 1 5/8" merged, with a single muffler. Need to add an extension to get the center exit I want.

Do I need to add any sealant to the gaskets when installing? I will put a ring of Permatex around the male fittings where the J tubes attach to the "plumbing" into the merged header.

50/50 as to whether the muffler will need to come off for valve adjustments.

Bob


Original Post

Replies sorted oldest to newest

Any pics Bob?  I'm interested  in such a set up. I have currently have,  (I think Tri-Mil European,) 2 pipes exiting, slight  half moon cuts in the valance to accommodating both pipes. Sounds, to me pretty nice.  Would like something closer to what is called  Sebring. They sound VERY nice. Anand (sp?)  posted what he was going to use on his Spyder. I think his set-up was from Tiger at A-1. His  costs are above my pay grade.

I'll be honest..... form is more important than function. I have only a 1641cc with dual Kadrons, ......ooooooh.  that is questionable. No back-up.


Art

Art:

If you don't mind waiting a day or so I will take some pictures before during and after for you to see. The system ran me about $500 plus shipping, so I'm in for under $600. Alex at Vintage Spyders was a big help in making the decision and getting the whole thing taken care of.

This thing is good solid stainless, the welds are really well done and it looks like I want it too. Now we will see how it sounds in a couple days! 

My old Monza exhaust had an ok sound, no real rumble, but it was a poor match to my 2110.

art posted:

Any pics Bob?  I'm interested  in such a set up. I have currently have,  (I think Tri-Mil European,) 2 pipes exiting, slight  half moon cuts in the valance to accommodating both pipes. Sounds, to me pretty nice.  Would like something closer to what is called  Sebring. They sound VERY nice. Anand (sp?)  posted what he was going to use on his Spyder. I think his set-up was from Tiger at A-1. His  costs are above my pay grade.

I'll be honest..... form is more important than function. I have only a 1641cc with dual Kadrons, ......ooooooh.  that is questionable. No back-up.


Art

Art - I have a used A-1 Sidewinder. It needs a little touching up but it's still a very nice exhaust. PM me if you are interested.

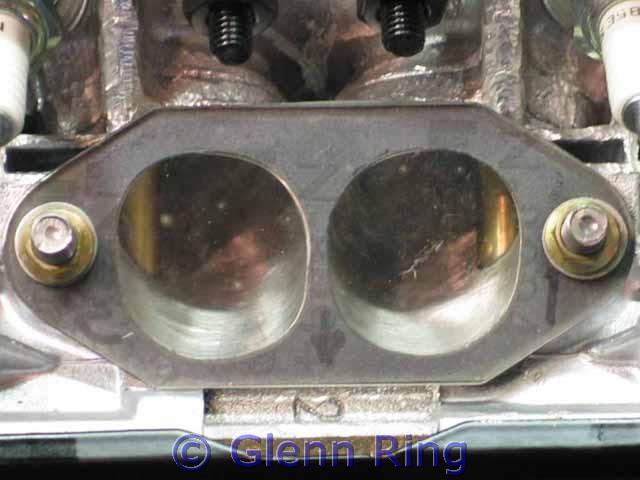
Put a little Ultra Copper on the exhaust gaskets. It fills any regularities in the flange and ensures a leak proof seal.

I also use Jet Nuts which are M8x1.25 pitch and have a 10mm hex head. They are flanged so they have plenty of clamping force, but the 10mm hex head allows room for a socket on large tube headers.


Here's what they look like on the intake studs. They are the same on the exhaust studs.


BobG posted:

 Glenn:

Are you using stainless, copper, ? I was thinking of using the same copper as the ones that came with the system, just for appearances.

Thanks for the information.

Jet Nuts have a coating, they are neither copper or stainless.

6 years after the engine was built, i had to remove it and take the exhaust off. The nuts came off with no problem. The engine has 25,000 miles on it.

Too many interruptions to get much done.....but....got the heat exchangers off and took off the necessary tins off the bottom of the engine to accommodate the new exhaust.

Next time I'll do this with the engine out. Getting at those nuts on the exhaust outlets at the front of the engine isn't a lot of fun. Also the tins that had to be removed had to be cut out because there is no access from the top and virtually none from the bottom to get to the retaining screws.

The tins I'm talking about are the ones that go under the push rod tubes and then go up between the block and trans. The upper tins don't have to be messed with and will go back in place with a new foam "H" shaped liner to seal off the outer rim of the engine compartment. That was what was in the car before I started this little adventure and that kept things cool.

I also need to order heating duct covers for the shroud. Looks like 48mm from Aircooled.net - $3.95.

Are there plugs for the heater hose openings on the tin that goes across the back and under the crankshaft pulley? If not I will just buy a new one without the cut outs.


BobG posted:

Too many interruptions to get much done.....but....got the heat exchangers off and took off the necessary tins off the bottom of the engine to accommodate the new exhaust.

Next time I'll do this with the engine out. Getting at those nuts on the exhaust outlets at the front of the engine isn't a lot of fun. Also the tins that had to be removed had to be cut out because there is no access from the top and virtually none from the bottom to get to the retaining screws.

The tins I'm talking about are the ones that go under the push rod tubes and then go up between the block and trans. The upper tins don't have to be messed with and will go back in place with a new foam "H" shaped liner to seal off the outer rim of the engine compartment. That was what was in the car before I started this little adventure and that kept things cool.

I also need to order heating duct covers for the shroud. Looks like 48mm from Aircooled.net - $3.95.

Are there plugs for the heater hose openings on the tin that goes across the back and under the crankshaft pulley? If not I will just buy a new one without the cut outs.


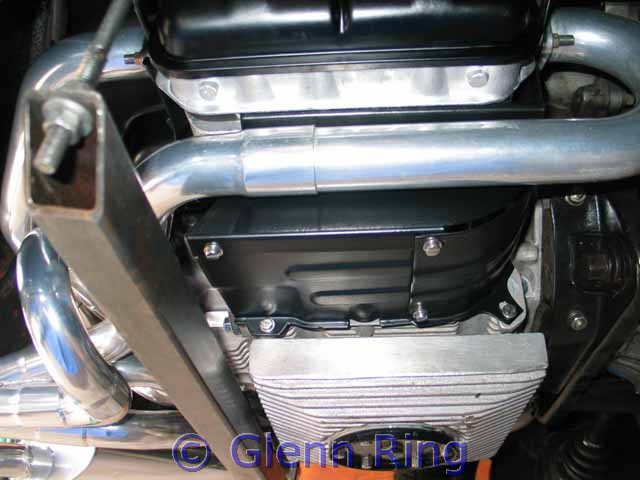
They're called sled tins, Bob, and make sure a set go back in. I've seen a lot of engines without run fine around town, but have temp problems on the highway when it gets hot. The sled tins direct the spent cooling air out back, where it can join in the airstream under the car. At highway speeds the air pressure under the car is as much as 2 psi more than around or over the car, and without the bottom tins the air comes straight down through the cylinders and hits that horizontal air pressure flow.. It can't join the under car airstream easily, so it becomes turbulent, most of it goes nowhere and creates air pressure downstream of the fan, seriously reducing flow (and cooling). The faster the vehicle speed (and more solid the layer of air under the car), the higher temps will go. The sled tins allow the air to turn the corner efficiently and enter the airstream behind the car.

Since the new exhaust has J tubes replacing the heater boxes you'll need some industrial tins to complete the package. Normally, the heater boxes keep the air channelled, so when you remove them they have to be replaced. The industrial tins are from industrial engines without heater boxes, and again, serve a very specific purpose. Al

PS- to cap off the shroud, look for the appropriate size frost plugs (available at any auto store), or if you know someone with a baby, Gerber baby food lids fit as well.

PPSS The tins can be bent up yourself; I'll find the drawings later if you (or anyone else) are interested.

- Soup can lids (or anything similar) screwed down to the rear tin will do the job, as a low budget (and quick) fix.

Last edited by ALB

Glenn:

Do you know where you got those additional tins?

So, ALB and Glenn, what is done with the addition of these tins is to create a tunnel for airflow, correct? 

I may have a bit of a challenge straightening and remounting the tins I removed, but they are clean and serviceable so I will try and use them.

One thing leads to another:

R/R front trans mount (original project)

R/R rear trans mounts

Relocate fuel filter out of cabin.

R/R grommets on fuel line and electrical wiring

R/R axle boots

Remove dune buggy "stirrup" trans support.

Install new 1 1/2 qt oil sump

R/R exhaust

Install new cooling tins

R/R trans gear oil

Engine oil change

Valve adjustment

When you are up to your neck in alligators, it's difficult to remember that all you wanted to do was drain  the little swamp!


I went ahead and ordered both the sled tins and the industrial tins from Aircooled.net. After cleaning the old sled tins this morning they are just not in good shape, paint peeling and bent from when I essentially pried them off yesterday. I'll keep them, but might as well start fresh. I will have to do some minor straightening on the tins they attach to at the rear of the engine coming down from the back of the shroud, but that should be no big deal.

Thanks, ALB, Glenn and Greg.

Some day this summer I'll be done with this!

Post Content
×
×
×
×
Link copied to your clipboard.
×
×