Aloha everyone!
My speedster didn't start today, I noticed the voltage was around 12V, when I cranked it dipped below 12. No sound from the starter at all.
I bump started the car and drove it home, Voltage gauge is around 11V when driving,
I suspect the generator was not charging the battery and the gps tracker I installed drained the battery throughout the week.
I'm also getting some belt noise while shifting gears, If my belt is stretching, do I just shim the generator up to tighten the belt?
I am installing the top I bought and have downloaded the CMC build sheets, The instructions told me to use 1/4-1 inch bolts to secure the metal bows/bracket in place. I found the holes that are molded in the body of my car.
The issue is that a 1/4 inch bolt is too small.
Am I supposed to put an insert in?
Which insert should I use?
Thank you!
Replies sorted oldest to newest
To tighten your fan belt you actually remove shim(s), be sure to move them from the middle to the outside (under the nut), retaining the same total number of shims, just relocated...
Your belt slipping could cause poor charging, but would have to be pretty darn loose to do so. Generally the batteries are fairly small so even a small power leech like a GPS tracker can drain a battery, but 11v while driving is an issue, you should be seeing just over 14v so I'd focus on that first.
Does your car have a generator or alternator?
If it has an alternator the idiot light MUST work or no charge. If it's not on when you first turn the key check the light.
It would have been nice if CMC had put captured nuts in place for the bow mounts but they didn't. You have to get a nut on there.
Metal bow body inserts are 5/16 -18 you may have the chase the threads with a tap.
There should be a threaded insert already in the fiberglass.
If you don't have a VW service manual, find a spot in the middle of the left side of the fan belt, looking at it from the rear of the engine. A place half way between the alternator and the crankshaft pulley.
Push on the fan belt towards the right until it stops. It should deflect about 1/2" or so if it is adjusted correctly. If not, see Carey's post up above.
Another thing that makes a noise similar to a loose fan belt is a dry alternator/generator bearing. Usually it is the bearing on the end by the pulley. If you remove the fan belt and spin the shaft or pulley, a dry bearing will usually spin by hand but not smoothly - You'll feel it catching or making noise.
If THAT is what's bad, then it's time for a new alternator.
So I took off the nut and all of the spacers are just under the nut. This means it's as tight as it will go correct?
I bought a new belt from AutoZone, I noticed when I took off the pulley there was no woodruff key, I was worried that was the issue, but I found the key down below the generator.
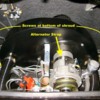
I'm not sure If I have a generator or alternator, I think it's a generator. Picture attached
I noticed that the generator is very loose, I can shake it back and forth, is this normal? Or do I have a deeper issue?
Attachments
You have an alternator. It should be imobile -- the alternator clamp locates and secures it.
Good catch on the key. They're slippery little buggers.
Jack, the pic of the alternator doesn't show an 'alternator strap'. This strap/clamp secures the alternator to the alternator stand below it. Also, there should be a screw at the bottom of both sides of the fan shroud. Hope you find this info and pic helpful.
Click on pic to enlarge...
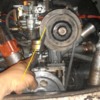
The pic below depicts the fan belt deflection as described by @Gordon Nichols
Enlarge the pic below to see the 1/2" deflection (white arrow) of the fan belt.
Attachments
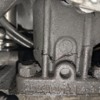
Well I found out why the alternator is moving around even while strapped right ..
The fill tube bracket has a big crack going 3/4 of the way around the base.
Looks like I'll be needing to take the alternator off to replace this bracket.
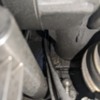
Fan started grinding on the shroud a little bit, I think this is because it's loose.
Here are some photos
Attachments
Well, then -- that'll do it.
Welcome to the madness.
I'm happy to say I found out last week that jbugs.c ships stuff super fast! I was gonna go for a cruise today but looks like I'm gonna hold off.
Thanks for all the replys! Now I have some time to install this convertible top.
@Alan Merklin thank you, the threads did need tapping but it seems like a 5/16th bolt is the right size indeed! Not sure why the CMC manual says it's a 1/4 inch...
This cars worth the madness! Nobody else has to know...
There is just no telling what new thing will turn up here on the SOC. I'm sayin' that the cracked aluminum you show is a new one on me. One wonders: WTF??! Good luck with the R&R. And let us all know how it turns out. And what else turns up along the way. WTTM!!
When I replaced my alternator stand I slotted the holes near the shroud and retained the studs At the other two locations I replaced the studs with bolts. That way I remove the stand and alternator and stand without removing the shroud.
Maybe you can back out all the studs to remove the old stand and then put 2 back. That way you won't have to remove the shroud.
@Michael McKelvey Thank you! I will do this!
I really like the idea of not taking off the shroud, that makes it much easier.
How do I install the male buttons into the fiberglass? There is one that was missing on the drivers door and I need to install two more for the curtain flaps.
I got the bows installed on the car and ordered the Pliobond I needed and it will be here next friday.
when I replaced my alternator, I found I could lift the shroud a little and allow the fan to clear the stand. I did not have to remove it, per se. One does have to find all the screws that hold the shroud down and get them out, but actually removing the shroud does not seem to be required. And I recall that there were some good articles here about removing the studs in favor of using bolts. I decided not to go that far as jiggering the shroud up a little was not that bad. YMMV.
@Jack Bolton Fan replacement without removing the fan shroud: S1 EP1
I slotted the base of my alternator stand similar to what @Michael McKelvey did to make servicing the fan/alternator easier, but later on I bought a new alternator stand and simply removed the mounting studs from the engine case and installed bolts in their place. Why?
Lurking under the alternator stand base are two paper gaskets sandwiching a louvered metal oil baffle. If you slot the base it allows you to move the base fore and aft and to get it up and away to remove the fan. That's good.
But I also found that it's a lot harder to install the base. If the fan shroud is in place you need to move the fan/alternator assembly, angled slightly down and towards the fan shroud, and then, at the last instant, drop the alternator onto the stand, all while keeping everything lined up AND not mashing the aluminum oil baffle louvers or smooshing the paper gaskets. Wait....
You hadn't installed the stand yet because it gets in the way of the fan on the way in? Oops..... But if the stand isn't there, then how are you going to hold the fan up and align everything so nothing is rubbing? You have three arms? Hmmmm..... 😡
So I found that I could, more easily, loosely strap the alternator to the stand, assemble everything without gaskets, screw in the fan backing plate to align everything properly, tighten the alternator to stand clamp once everything is lined up (using a couple of stand bolts to align the stand) , then remove the stand and fan/alternator as one unit, lightly glue the paper and aluminum gaskets to the engine case with gasket RTV and return everything in place, using the stand bolts to line up the stand base (I put lockwashers under the bolt heads). Be very careful of the oil baffle louvers on the way in. This is tricky and where the dry-run practice is important. You can practice with the old oil baffle to get the hang of this, then do a final install with the new one.
Tighten the four base bolts to "Hand Tight" or around 10 ft. lbs. and no more. Remember, you're screwing a steel bolt into an Aluminum case that can strip easier.
This has worked well for me several times, now, and it might work for you, too. Just practice without the gaskets in there, lining things up with two diagonal stand bolts.
OH! And when you put the new oil baffle in (do NOT re-use the old oil baffle - It will leak, for sure), the louvers go down and the flat side of the louvers goes to the right.
Happy Assembling and Welcome to the Madness!!
@Gordon Nichols Thank you! I will follow this advice and see if I can get done easily.
I have a question regarding the glue for the top. Pliobond is on order, should be here next week.
The buttons on the top are installed and i'm ready to glue to fiberglass bow to the top, Can anyone give me their tips/tricks when doing this? I'm curious, what should I use to mark the top for positioning of the bow?
I'm assuming I have one chance to glue this, if I mess it up the top is ruined, right?
Guidance much appreciated!
oh and another question! For the window curtains do the posts face the inside of the car? Or do they face the outside? Seems like facing in is correct but I want to be sure before I drill the holes in the bolsters.
Posts face in.
@Jack Bolton posted:@Gordon Nichols Thank you! I will follow this advice and see if I can get done easily.
I have a question regarding the glue for the top. Pliobond is on order, should be here next week.
The buttons on the top are installed and i'm ready to glue to fiberglass bow to the top, Can anyone give me their tips/tricks when doing this? I'm curious, what should I use to mark the top for positioning of the bow?
I'm assuming I have one chance to glue this, if I mess it up the top is ruined, right?
Guidance much appreciated!
I am not the biggest fan of "Pliobond" and prefer to use DAP contact cement. Everything you ever wanted to know to install a convertible top on one of these cars can be found here:
https://www.speedsterowners.co...t-top-on-a-speedster
If what you need ain't there, then ask and someone here will have an answer.
As for the side window mounts, those are covered in the convertible top article but here are some photos:
Outside looking in:
Inside looking out:
For the Ferrules going into the door top bolster, if you can't find them in your stash of parts, just get a couple of pieces of flared faucet risers from a DIY store (in plumbing) that fit your window pegs.
Attachments
@Gordon Nichols I'll follow your advice and get some DAP contact cement, I went to home Depot, Lowe's and ace hardware they did not have the green neoprene container.
Can I just use the red original?
Oops!
I should have mentioned that the Neoprene stuff got scarce a few years ago. I just found that I can edit that post, so I fixed it so it doesn’t confuse anyone else. Sorry!
Sure, the Red can of Contact Cement works just fine. I’ve used both and can’t really see any difference, other than smell. Just follow the instructions on the can. I bought an el cheapo paint brush to spread the cement on the top header and material.
@Gordon Nichols Today I started the glueing process and to my surprise the paint I used was not a good match for the DAP contact cement, it immediately bubbled up the paint, I used a spray can lacquer like you had mentioned but I guess this can isn't the right stuff.
Can I use a normal brush on lacquer instead of spraying it?
Thank you!
Attachments
Sure. I don't see why not. If you have some other paint kicking around and it is darker in color, try some samples to see how it reacts to the contact cement. It may not react to acrylic enamel or a water-based paint.
It's always something with these cars.....


