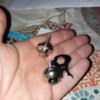
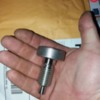
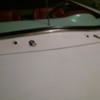
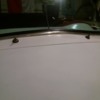
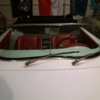
Should have paid more attention when I placed my order. lol I'm guessing they should be a little bigger.
TJ Ward posted:Should have paid more attention when I placed my order. lol I'm guessing they should be a little bigger.
TJ Ward posted:They should work fine. looks ok to me.
That's the way they look. The tension is mostly lateral and it's spread out over all of them if you're thinking the threaded part isn't long enough.
was thinking they would be more the size of a quarter.
"was thinking they would be more the size of a quarter. "
Naaaahhhhh.................... More like the size of a nickel.
They're little, tiny cars, after all... ![]()
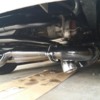
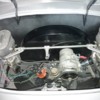
New exhaust installed. Plenty of room to adjust the valves.
https://www.facebook.com/type3...161529812070551/?t=2
Attachments
Is that an A1 exhaust system?
Jimmy V. posted:Is that an A1 exhaust system?
empi sideflow
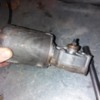
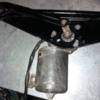
What's this sound? Piviot arm bushing? I didn't do those.
TJ The wiper motor rests against the fiberglass, there may be a OEM mounting tab hitting I cut the tab off then glue a piece of rubber to the motor housing so it doesn't rub the fiberglass and amplify the motor noise
Alan Merklin posted:TJ The wiper motor rests against the fiberglass, there may be a OEM mounting tab hitting I cut the tab off then glue a piece of rubber to the motor housing so it doesn't rub the fiberglass and amplify the motor noise
Thanks i'll do that. This motor was made to fit my assembly. I found a new motor that should bolt right up.
Attachments
My car had a loud thump from what felt and sounded like the steering column every time I hit a bad rut or pothole.
After reading here about the wiper motor, I jammed some closed cell foam between it and the underside of the dash, and the noise disappeared.
The "thump on a bump" locations are the wiper motor hitting the fiberglass and one of the two ( or both) rear body to VW chassis mount bolts coming loose.
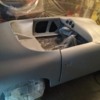
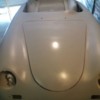
going with single stage silver metallic from eastwood.
Attachments
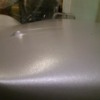
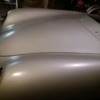
If you have enough paint on the car color sanding should take care of the dry spray issue.... Eastwood makes a " Diamond Clear" that I used on a black Harley that I painted with ......Dupli-color rattle cans ! I did the Eastwood clear , I have no idea what they put into that stuff but it's a high end show quality finish..... Two photos using Eastwood clear
Attachments
i also bought two quarts of euro clear from eastwood.
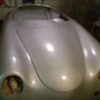
I finished up color sanding the passenger fender also added a Pegasus. This build was fun fun fun. I need the carpet and finish up color sanding and its done. Still might get some little detail parts(side mirror lol, hood straps, fog lights bumper guards)
Thanks everyone for all the help. Especially Alan. I owe you big time.
Attachments
Glad to be of help TJ
The car is looking fabulous, TJ !
You know, I thought of adding a couple of Pegasus decals to my car, but ended up with these instead. More in fitting with the "Outlaw" psyche....
Attachments
I've never been happy with the motor I built. I'm my worst critic. So I pulled it to be rebuilt to a 1915cc built by John Pierce here in San Antonio. That should give me a little oomph on the highway. While I have the motor out I wanna do something to the firewall. Any ides? What have you done?
Attachments
I used industrial degreaser, let it dry over night, and used spray on bedlinen to paint the engine bay. Others on here have done WAY more than that; padded letter, engine turned stainless, regular stainless, etc.
You could also use sound insulation to do the hole engine compartment.
Robert M posted:I used industrial degreaser, let it dry over night, and used spray on bedlinen to paint the engine bay. Others on here have done WAY more than that; padded letter, engine turned stainless, regular stainless, etc.
Bed-liner. I did not use the sheets on my engine bay.
I dunno, Robert, spray-on bedlinen could be a new product idea. You could get rich!
Right up there on the high shelves next to the 40-lb bags of Purina Bachelor Chow.
The dash material was not too difficult. I used DAP Weldwood Original Contact Cement. Brushing the glue is less messy than spraying in my opinion. Use a piece of material that is a little larger than the dash area in all directions. Mark where your trim will end on the front of the dash. Use the aluminum base for the windshield as a guide for the top edge.
Next, brush contact cement onto the dash and the back of the material, let dry to the touch, then apply material. Hold up the edges and start adhering the center of the material first, work out to the edges to avoid wrinkles. Do not stretch the material more than needed. The only area that requires a little stretching is around the eyebrow area. A heat gun may help, but be VERY careful to not get the material hot enough to damage it!
Trim the material as needed. Make sure to trim it snug to the aluminum strip that holds the lower windshield rubber. Any gaps in that area will be noticeable from inside the car. Trim the lower edge to the line that was marked on the dash.
Either end of the dash material will need to be folded back under and glued to create a finished edge. This is usually done at about the point of intersection of the windshield base and the chrome post. Hope this helps!
James
TJ: If your windshield bottom trim strip (the piece attached to the cowl) isn't already permanently attached, remove it, then run a 3/16" bead of clear silicon caulk along the length on the underside to seal it from rain intrusion later on and re-attach it to the cowl.
Some of us have not done this trick and regretted it.
Gordon Nichols posted:TJ: If your windshield bottom trim strip (the piece attached to the cowl) isn't already permanently attached, remove it, then run a 3/16" bead of clear silicon caulk along the length on the underside to seal it from rain intrusion later on and re-attach it to the cowl.
Some of us have not done this trick and regretted it.
wish i would have seen this couple hours ago. lol already install it.


