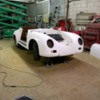
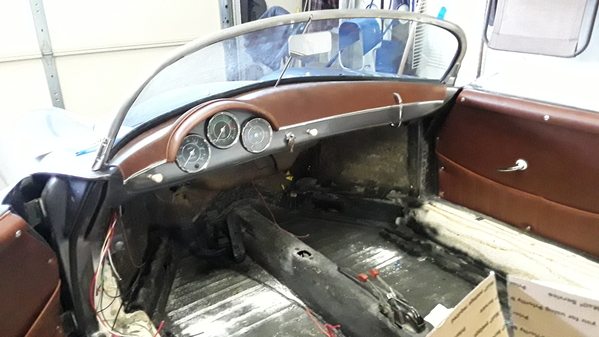
Project 48 a is very straight CMC classic body, it even has good door gaps. I'm surprised( best I have seen) "good bones" and mechanicals as it runs great. I towed it from NJ to my body paint guy in Pa today. In the next two weeks it will be finished in either Porsche Seal Grey or Jaguar Vapor Grey Metallic. I'll trailer it back home here in West Virginia then it gets baseball glove brown interior, w/ grey carpet, new 356 gauges, new top, 1/4 side curtains etc. Has chrome wide 5's, will replace suspension as needed and all electricals, lighting etc. . Should be completed in 12 -14 weeks.
Replies sorted oldest to newest
Can’t wait to see what you do with it!
Doc, when I grow up I want to be just like you!
(. . . . . . I’m still working on Project 1)
Countdown to the big FIVE OH!
Do I get a commission on this one?
Alan,
Friend of mine has the baseball stitching in his TT--is this what your are talking about? Who does this type of work and what would 1 expect to pay for front seats done up?
David
This will be the finished look for Project 48
Think he just means the baseball glove color of brown leather and not the leather shoelace stitching. I looked at several TTs with the baseball stitched seats - I like the look but they all needed total redoing after not many miles.

Attachments
Yes baseball glove …. color interior. I'm looking forward to doing this resto.
I have that dark brown baseball glovekleather in my Hyundai Genesis and am very fond of it. That's going to be another gorgeous Merklin production, Alan.
The Seafoam Blue Vintage regular body, that I am preparing, has the Tan "baseball glove" Speedster buckets and it's my favorite color combo.
Troy pls send me a pic drclock@pa.net
WOLFGANG posted:Think he just means the baseball glove color of brown leather and not the leather shoelace stitching. I looked at several TTs with the baseball stitched seats - I like the look but they all needed total redoing after not many miles.
I always loved those baseball stitched seats in the TT's - I heard they can snag up clothes though.
Bill
Alan Merklin posted:Troy pls send me a pic drclock@pa.net
I'm taking pictures and doing the video today and I'll send you some later today.
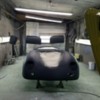
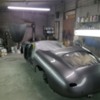
Project 48 was stripped of all externals, windshield, doors , deck lid, bonnet and bumpers. Pulled the seats, carpet, CMC gauges etc. Dash gauge holes and most other holes on the body were glassed in and all gaps to 3/16". Lowering the rear swing axle suspension a notch. Next up is the floors get coated with Chip Guard, body is amazingly smooth but will get a few guide coats and blocked then apply epoxy primer and block again followed by Porsche Seal Grey, color sanded and buff. In a couple of weeks I'll trailer from PA back home here to WV to complete the rest restoration.
Attachments
Attachments
Lookin' mighty good! Nice work!
Looking really nice, Alan!
Incredible color! The finished product will be stunning!
Just out of curiosity, do you paint the hood as it’s shown (hanging?), or shoot it laying flat? Does it matter?
Thanks !
Hood, deck lid, doors are painted while suspended , smaller horizontal surfaces limits dust settling.
Project 48: Have been taking my sweet old time on the resto. Now with four large cartons of parts are here, it's time to kick things it up a notch and get it done . Cut a access door into the tunnel, disconnected the shift rod, pulled it out the front ( always tie a wire to it to pull it back through I cut a groove into the rod cup to accept an bent back style early shifter that has the forward locator pin. Replaced the nylon bushing, greased things reinstalled the rod , resealed the tunnel door ....done in one hour flat ~
Nice! Love the paint job!!!!
That is a nice color - almost a molten metal look to it. Will look sharp with the baseball glove colored seats.
It's Porsche Seal Grey...looking forward to seeing how this one will come together. I may very well have this at Carlisle unless someone commits to owning it.
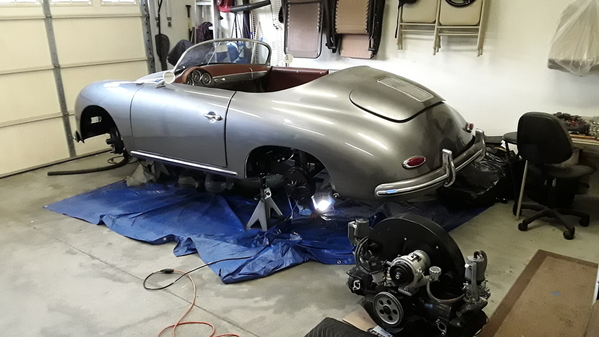
Project 48: It's been a month since the past update . I've let it sit for a couple of weeks then got back into it. Routed the wiring harness, installed the windshield, wiper motor assembly, dash vinyl, brow, grab handle , cut in the gauge openings, headlights, horn grills, taillights, door handles, door panels and door top rails, Aero mirrors, rocker deco' strips, bumpers, over riders, driving lights, New steering box, dry fit the steering column, pedals and cables, painted the engine bay and wheel wells. Disassembled the low mile rebuilt engine to a long block, painted. resealed, adjust valves, new fuel pump, alternator, distributor, plugs, aluminum degree pulley, 36HP shroud, dual carbs and clutch set. Today was a sad one, my ten year old Craftsman Shop Vac experienced a catastrophic life ending event with smoke pouring from every orifice and expired. The other witness present was the ceiling smoke alarm quickly saluted by playing it's own version of screeching Taps ~ ~ ~
Attachments
@Alan Merklin wrote- "Today was a sad one, my ten year old Craftsman Shop Vac experienced a catastrophic life ending event with smoke pouring from every orifice and expired. The other witness present was the ceiling smoke alarm quickly saluted by playing it's own version of screeching Taps"
I've had a rather hectic day, Alan, thanks for the laugh!![]()
A moment of silence, if you please. 😢
All protestations regarding flaming shop-vacs aside, it is pure sloth and indolence that has kept Al from completing this car in under 30 days. One would think he is retired or something.
Disgraceful.
Project 48 Update. It's been another month since the last post. This a first for me, 4 1/2 months and I'm still not done. With arthritis in my hands makes it a slow go. Engine and exhaust are back in the car (yeah the tins are done too :~) it's ready to fire, need to bleed the brakes, the baseball glove brown interior with grey carpet is done and looks great. Cleaned and polished the chrome wide five rims, installed the top yesterday, checked every not and bolt today. Waiting on P' multi gauge, side curtain posts and license light. Another week or so I'll have the steering column in and the few remaining parts done then the wheels will go on and I'll fire it up. Photos then and will keep it for Carlisle.
I'm sure liking the colour combo on this one, Alan.
Yep. That is one nice looking Speedster. ![]()
Project 48 update: I thought it best to have the speedster completed and dialed in well in advance of Carlisle... well that was, the plan. Last Thursday it was wheels on an off the jack stands, I rolled it out into the driveway to get rid of a miss and dial things in. Despite setting everything up right the miss remained, I found it at # 3 . I suspect a bad cam lobe to be the fault.I no longer possess specific tools, engine stand etc. so Thursday night I the pulled the engine back out and took it Saturday Am to John Brown a guy that does engines/ transmissions in Dunbar, WV a local trip of 144 miles each way. Waiting to hear back from John, stay tuned.......
That is a beauty Alan!! Love the color combination. Can't wait to see it in Carlisle, that is unless I convince my wife to take a road trip to WV before then.
Flatted cam lobe is like a nightmare though. Sorry that happened & hope your guy can get er replaced and rolling sooner than later.
Engine update Project 48. This engine was clean inside no smoke but when I pulled either #1 or #3plug wire the engine rpm's barely drop off yet these two cylinders pumped up 120 psi after 7 cranks of the engine seven( this was the first indicator of an issue) I also did all the usual diagnostic stuff like spraying carb cleaner at the manifolds etc, yet this engine ran great going down the road and idling the right bank would respond to a mixture screw adjustment but the left did not.....odd combination of problems so it baffled me . Last Saturday we took the engine to John Brown in Dunbar WV. to confirm my thoughts . John was highly recommended and has a home shop that is set up specifically for VW trans end engine builds. He confirmed my cam lobe issue and did a leak down rest and that told the tale . We decided to do a complete fresh rebuild on this AH case. His quote was just super reasonable. I'll get it back in two weeks after he dials it in on a test stand, so it's plug and play. This is a new scenario for me as I would do most of the rebuild work in the past. When I sell this Speedster early summer someone gets a nice resto's speedster and a fresh 1641engine.
Sorry for the engine surprise. It's great that you've got someone good to work with on the rebuild. At some point, it's nice to have someone else take care of things.
Mike
The less than 100 mile 2276 engine that came in my Fiberfab C. when I bought it in 2017 before I decided to go Suby had a flatted cam lobe on number 3. I think a batch of bad cams must have been floating around or the engine wasn't broken in correctly. No easy fix for that problem. What brand and number cam is your engine builder using for the rebuild Alan? Thanks for sharing the process with us.
Sticking with a stock Engel 100 cam with the .383 lift. The 1641 engine is for someone that wants minimum maintenance i.e. set and forget baby Webers, valve adjustments and regular oil changes. Dialed in, it's a decent performing and reliable long lasting engine.
Sounds Good. Thanks for the info.!
With these lightweight bodies on solid VW chassis, a 1641 can provide plenty of rush. I have been bombing around with the 1600 for a long time and no issues. My engine build is taking longer than anticipated due to work and a serious lower back issue. But, onward to get it rolling for Carlisle!
Good luck with this project Alan! Can't wait to see it in PA next month.


