El Frazoo posted:

wrt the body mods and then repainting, I am no body man whatsoever (all of that is very mysterious to me), but I can tell you that it is possible to do the filling and pathch work on the tail lights locally, and then just paint the worked area without repainting the whole car.  You  will need to know what you are doing, and have the paint codes or a machine that does that sort of color matching, but it can be done.  I had a deep gouge in my fender requiring FG or at least resin work to fill and the shop I used (they definitely know what they are doing) made it all disappear.  I know exactly where that gouge was, and in the brightest light, I cannot tell any difference anywhere on that fender.  And the paint is a metallic one.  It's possible -- but maybe not cheap.

Not only do you want to remember the name of the shop, Kelly, you want to know the painter that did the work. Matching metallics can be extremely difficult, and not every painter has the patience (or experience) to do it. One day, if you have the time, go back to the shop and see if you can meet him, and try to get him to let you know if he ever leaves that shop (if he doesn't own the place, that is).

More progress.

Lights installed and wired1

Headlights, parking lights, turn signals are installed, wired and tested.

________________________________________________________________________

Lights installed and wired2

Taillights, brake lights, turn signals and license light are installed, wired and tested.

______________________________________________________________________________________

Wiring under dash panel1

Wiring under dash panel2

Fuse blocks and other components on aluminum panel that fits under the dash.  Includes hidden switches for hazard lights, interior light, seat heaters and a 12V plug.

Wiring under dash

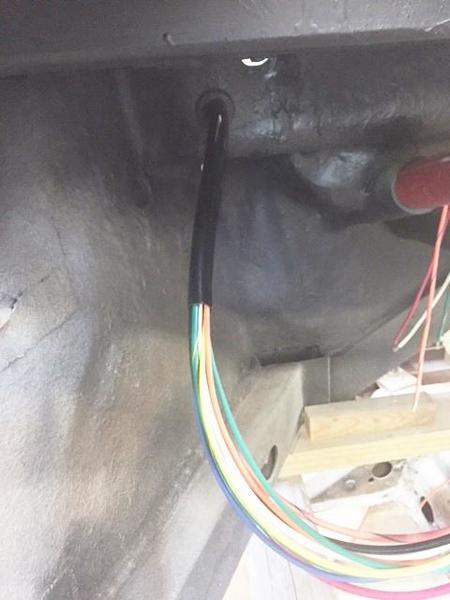
Building my own wiring harness.  This is the wiring to the front lights, routed thru the trunk.  Sorry for the poor quality pics!

Attachments

Images (5)
  • Lights installed and wired1
  • Lights installed and wired2
  • Wiring under dash panel1
  • Wiring under dash panel2
  • Wiring under dash

Thank you!  I have bought a tan/oatmeal carpet set from VS with a medium brown binding.  The seats, dash, door panels, etc. will be medium brown faux leather. The top will be black.

The seats will be upholstered like a typical Speedster seat except the outer aluminum shell will be left bare.   I am also debating houndstooth plaid inserts.   It will have a definite outlaw look.  

Robert M posted:

I don't have beehives but I think the outer lights as turn indicators would look better.

I agree, blinkers on the outside.

Very, very nice job!

I wish my wires looked so good as mine are a complete birds nest.  I'm afraid to touch them as everything functions but the horn that was once wired to the high beam stack on my column

More progress...

Front trunk is complete!  Black VS trunk carpet kit.  I have ordered trunk carpet, interior carpet and a new Stayfast top with bows from VS.  I have been very pleased with their service and products.

Trunk completed3

_____________________________________________________________________________

I have built my own steering column with steering wheel adapter.   The column tube is from a '67 Bug, the solid steering shaft is from an early VW and the turn signal switch is a '67 VW Bus unit.  My homemade aluminum Nardi hub uses a Grant adapter for the spline.

Steering column1Steering column4Steering column5Steering column6

____________________________________________________________________________

Odyssey battery - PC680 

Odyssey battery1

______________________________________________________________________________

I probably got a little carried away with the electrical, but I can't help myself.  It's a little hard to tell from the picture but everything is tucked up under the dash and not really visible.  A dedicated, fused circuit for each electrical item.   Relays on the headlights (separate relay and fuse on Hi-beam and Lo-beam), the fog lights, and the horns.  The under dash switches accommodate the hazard lights, interior lights and seat heaters.  I tried to label everything for easier assembly and if troubleshooting is ever required. 

Under dash panel1Wire labels1

_____________________________________________________________________________

Are these large pictures in the post annoying?  Should I just leave them as attachments with a thumbnail at the bottom?

James

Attachments

Images (8)
  • Trunk completed3
  • Steering column1
  • Steering column4
  • Steering column5
  • Steering column6
  • Odyssey battery1
  • Under dash panel1
  • Wire labels1
Alan Merklin posted:

With your flat floors, do  plan ahead with seat height as you loose 1.25"  compared to VW pan floors....A craftsman build all the way :~)


Thank you, Alan!  That's quite a compliment, coming from a true craftsman.  And I am mounting the seats as low as possible, the seat adjuster levers are almost rubbing the floor.  I really appreciate the advice and especially the answers to all the questions I ask you. 

Troy,

They are just standard 1157 dual filament, incandescent bulbs.  I'm surprised at how bright they appear.  However, this is in my shop, I have not tried them outside in the sunlight.  

I am a little concerned about the lenses getting hot and melting.  The bulbs are very close to the plastic lenses.   I may try some LED replacements for the 1157 incandescent bulbs.  

James


Well, I am managing to make a little progress in between trips to Singapore for work.  I built the door panels and the door top trim, now I just need to get them covered.

Door panel - bare

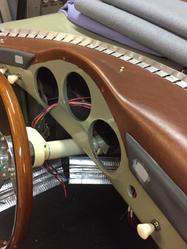
I have reworked the CMC dash trim pads to thin them up and I added t-bolts for attaching the pads to the dash (the little white squares are where I embedded the t-bolts and filled the holes).

Dash pad1Dash pad2

I have started the dash upholstery and I'm really pleased with how it is turning out so far.  I have not done much upholstery, so learning as I go.  With a little heat and contact cement I think it is looking good so far.

Dash covered1Dash covered2Dash covered3

The seats are at the upholstery shop and I am looking forward to seeing how my outlaw concept will look when completed.  But I still have to finish installing the carpet and the windshield before I am ready for the seats. 


Attachments

Images (6)
  • Door panel - bare
  • Dash pad1
  • Dash pad2
  • Dash covered1
  • Dash covered2
  • Dash covered3

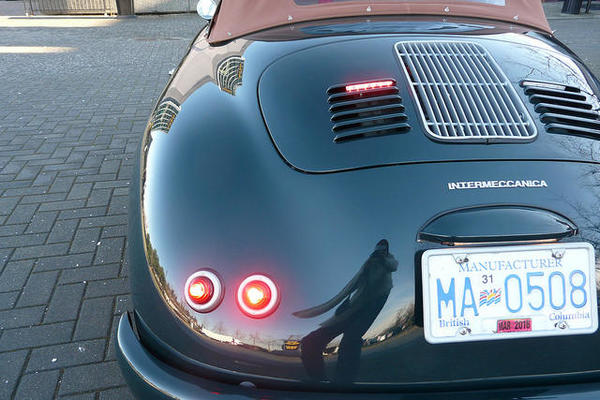
Beautiful looking car.  With my beehives, both lights on each side come on as turn signals - the more lights the better.  All four, plus the upper brake light in the engine grill, come on for braking. 

As an idea, I also have small LED strips in the upper louver on each side, and they work along with the beehives as turn signals.  You might want to consider that.

IM317

Attachments

Images (1)
  • IM317

Add Reply

Post Content
×
×
×
×
Link copied to your clipboard.
×
×