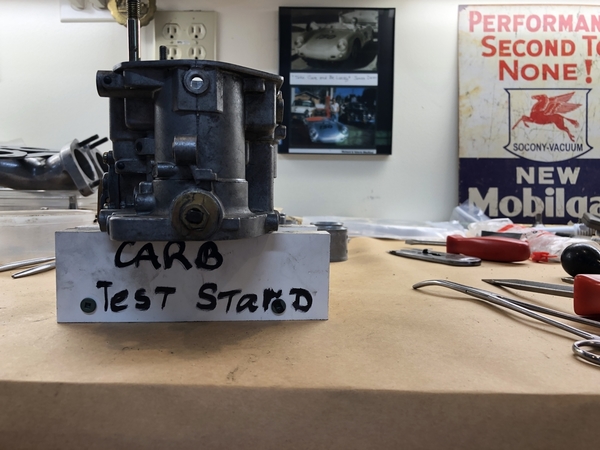
While I have generally had OK luck in getting carburetors to run right, I have occasionally had issues with one or another and this is one of those times.

I've had a mild stumble in my 40mm Dells from day one and have tried a bunch of stuff to overcome it - always going up in jet size.  Remember also, that I have converted to horizontal discharge tubes since day one, so I have no comparison to unconverted Dells.  

I reset the float levels per the Dell book a couple of years ago and fixed an issue with the accelerator pump drive and they seemed a tad better, but still stumbled whenever the throttle plates were increased (seemingly at any speed), indicating a transition lean-ness (which was why I always went to progressively larger jets).  I have not yet checked the fuel pump pressure - My pump is a CB Rotary so checking pressure is on the list.

Anyway, everything I have read gives these jet recommendations for Dell 40's:

160 Mains

180 Air Corrections 

60 idles

40 Accelerator Pump

I am currently running:

162 mains

160 Air Correction (per Pat Downs to help with the Horizontal discharge tubes)

70 Idle

70 Accelerator Jets

It definitely needs improvement, so I'm going to go totally back to the stock "out of the box" jets and start all over this afternoon.  If I can get the instructions for the horizontal discharge tubes and can un-do the conversion (I have all the parts but I remember inserting a few lead "BB's" into some passages to close them off and need to drill those out), then I'll pull the carbs and do that on the bench, re-adjust the floats again and so forth.  @Pat Downs Can you help with those instructions or whom should I call?  I can't find my old copy.

Any competent recommendations on how best to proceed would be appreciated.  Like how do I measure my venturiis to see what size they really are?  I'm assuming 40mm but they may be different.

Thanks,  gn


Original Post

Replies sorted oldest to newest

I've posted this for two reasons:  1. I'm selfish in that I hope to get some solid info and make these Dells much more drive-able, even if I give up some mid/high end power in the process and (2.) others may be having troubles and might learn a bit about how these (and Weber, too) carbs work and maybe can do a little simple tuning on them, too.  (Didn't one of the Todds on here just go through this??)

All I know is, whatever I have done to "improve" things for the past fifteen years has either made no change at all or made things slightly worse.  That's why I'm going back to basics to see (hopefully) what I've been doing wrong, correct it, get a pair of nice-running Dells and move on to something else I can be OCD about.

I have my first question for @Pat Downs

What was the purpose of inserting the lead plugs in the "idle circuit" (taken from a Hot VWs article).  What would happen if they were removed but I kept the Horizontal discharge tubes?

Last edited by Gordon Nichols

I'd increase the float height a little, should help richen the transition. I don't know how Dells are but Webers have different emulsion tubes, some richen at a lower rpm, some higher. You might try that. F11 and F7 for example richen at different places in the transition.

If none of that works, I'd be inclined to investigate your spark curve. As has been said many times 90% of carb problems are ignition problems.

Gordon Nichols posted:


What was the purpose of inserting the lead plugs in the "idle circuit" (taken from a Hot VWs article).  What would happen if they were removed but I kept the Horizontal discharge tubes?

I don't know their purpose but I'll bet they're there for a reason, and taking them out will make it run worse, not better. Or try it and report back what you find... 

Gordon, I'm confused:  Do you have a single Dell 40 or dual Dell 40s.

Since you refer to your "Dells" in the plural, I presume you have dual Dells.  If you have duals, you probably don't have 40mm venturi (I hope).  40 mm vents come on Dell 48s and are way too 'flat sided' for anything but driving WOT to redline between shifts, even on a heavy breathing 2332.  

Remove a vent, it should have the size etched somewhere on it.  If not, measure the inside diameter at its narrowest point.  For around town drive-ability you want vents shaped somewhat like an an hourglass; narrower in the middle, more open at the top and bottom.  You didn't say what engine size you have, but if it is maybe a mildish 2110, then 30-34mm vents sound about right.  The 30mm vents should be crisper buzzing around town.

I learned the hard way, bigger is not better.  On my 2332 I have Dell 48 tri-jets (big mistake), and they originally had 40mm vents (bigger mistake).  Until I choked down to 36mm vents the engine would fall on its face with any throttle input until eventually the rpms got high enough to suck some air through those big straight sided 40mm holes.  It didn't matter how I was jetted, nothing happens with throttle input if the engine is too small to generate enough vacuum in mid-range rpms to accelerate intake air through the vents.  

As far as jetting, I liked the look of your 'by-the-book' jetting better (again, assuming we are talking dual carbs).  It sounds way too rich now, and what lead you to the 70mm accel pump?


Last edited by RS-60 mark
DannyP posted:

 I don't know how Dells are but Webers have different emulsion tubes, some richen at a lower rpm, some higher.

Danny  --  Dellorto has a similar selection of emulsion tubes, for the same purpose.  And it could be that Gordon somehow ended up with 'specialty' emulsion tubes or tubes that have been alien modified which are causing him problems.

Ok, let’s see.....

Engine is a 2,110, 044 wedge-port heads, match-ported intake manifolds, Engle 120 cam, brand-new MagnaSpark II disti set precisely at 32° and the advance curve checked and set on a Sun Distributor bench.

The carbs are a pair of dual 40mm DRLAs 

I’ll measure the vents tomorrow to see what I’ve got.  Should be interesting, but they are slightly hourglassed.  I suspect that they’re 34’s but we’ll see.

Getting to the larger jets was a long, uneventful story.  Surprisingly, I’ve never seen any black smoke from the exhaust.

Remember, these had long ago been converted to horizontal discharge tubes so I guess they could be called “alien”, but they can certainly make gobs of power.  A little untamed, but lots of power, and I have never encountered anyone else on here or elsewhere running them.  The amount of acceleration “snap” up over 4 grand is always surprising.

What’s important is that I‘m going back to a baseline that is known to work and is drive-able in many other 2,110 engines and begin again from there.  Should be in interesting trip.  

I guess I’m getting less impressed by raw power as I get older.  

Loud mufflers just might be next!

Last edited by Gordon Nichols

The lead plugs block off the air inlet for the idle jets. This allows the idle jet extensions for the update kit to work properly. The theory is to raise the air inlet higher so debris doesn’t find its way into the stock air inlet creating a plugged idle jet. 

  You can always drill out the led plugs and go back to the stock idle jet holders. 

I would remove the discharge tubes and go back to the stock Venturi and booster Venturi. I see no issue leaving the lead plugs in and using the extended idle air jet. 

  If you don’t have your stock parts, I have modified the update kit allowing for a stock 34mm Venturi, keeping the discharge tube. The smaller 34mm Venturi signals the discharge tube harder, eliminating the flat spot

Pat!  Thanks for the info.

I dug in my shop attic and actually found the box of original parts from the 1990's

It pays to forever be a pack-rat, even after three house moves and three states.

I'm going to try installing the original stuff and see how that works out.  At my age, I'm willing to give up a little mid/high "grunt" for more smoothness through the range.

Thanks for the info on the plugs.  Since I've already got the extended idle jet holders (are those the same as "Jet Doctors?) I'll just leave the plugs in place.

I'll post on here how I make out, and thanks, again, for the help!

Gordon

Been too hot to be out in the shop working, but I looked closely at the original Venturiis and they are all 34's.  (You were right - they were stamped with the number).  When I found the original parts up in the attic of my shop I also found the original conversion instructions (Hoo-Ray!) and now feel confident that I can easily reverse the process and go back to stock.

As soon as it gets down below 90F in the shop.......

Hey, just thought of something:  The narrow part of the Vent is off-set to one end.  Can these vents only go in only one way or should I pay attention to which way the narrow end goes, up or down?

LOL, don't confuse me with those who actually do know what the heck they are doing!  I'm not in their league.  But if you have one of these, it helps:

 https://www.cbperformance.com/product-p/0101.htm

Maybe you can beg Pat Downs for an electronic copy since the hard copy seems to be out of stock.  In fact, maybe you could suggest CB offer all future reprints in an electronic format rather than restocking a publishing load of paper copy inventory.

One way or another, if you have Dells you need the CB tech book.  

I have both the Dellorto AND weber Thomlinson books.  For the most part, they get you in the ballpark and a line drive up the middle will drive in a run if you take it slowly and think about what your engine is telling you.   

Still, tuning carburetors is fast becoming a lost art in this world of commonplace electronic fuel injection.  Sometimes I feel like Doctor Zook - the dark-robed Druid from "Hagar the Horrible".

Doctor Zook

Attachments

Images (1)
  • Doctor Zook
Last edited by Gordon Nichols

Does anyone have a source for the fiber washers used on the Dellorto fuel supply banjo connections?  They are two different sizes on each connection and are showing as "no longer available" on the CB perf. website.  I assume we need to use fiber rather than rubber because the gasoline will attack the rubber.

I have a couple of carb rebuild kits on order and hope they show up in there, but would like to have a few extra sets in stock here, especially because they are often single use items that destroy themselves when you remove the fitting after they've been on there for a while.

Thanks,  Gordon

Thanks, PHB!   Got a source from Stan, too.  

Carbs are converted back to stock.  It was remarkably easy and took about 45 minutes per carb, including resetting float heights with a new gasket.  

Now, because I never looked for new washers before tearing them apart, they’re all dressed up with no place to go. 😖  Been looking locally but nothing so far.  When I order some I’ll get a bunch, for sure.   Thanks!

Re-reading that last post, it was kind of vague as to what I'm missing.

In order to set the float levels I had to pull the carb top covers and disconnect the fuel line banjo fittings, which destroyed the fiber sealing washers.  Practically no-one is using fiber washers on fuel lines anymore, but WE do.....   

I have a couple of carb rebuild gasket sets coming from CB (Thank you, Marieanne!) and I know they are in that kit, but they don't sell them separately and I would like to have some spares on hand for the future.  

What I CAN find is Chemical-Resistant Teflon PTFE washers just the size I need that should fit.

Does anyone on here have any experience using PTFE washers to seal fuel banjo fittings?  They certainly should be able to handle 15+ pounds of fuel pressure - people use them on EFI at much higher pressures.

I can't imagine that the fiber washers perform any differently than the Teflon replacements, but any feedback from you guys?

Last edited by Gordon Nichols

So I replaced the venturiis, got some seals for the fuel banjo fittings and took it out yesterday.  First thing I found was a partially clogged idle jet (I love how it "snaps" whenever an idle jet is suspect - makes my head turn to look at it and then I think, "I know what that is!")  

Blew out the jet and then a few other things surfaced (like it doesn't really like to idle when it used to idle steady as a rock) so, disgusted that my "quick fix" didn't work out and having received two carb rebuild kits from CB, I'm about to pull the carbs out, completely rebuild them to stock and start all over again.  I took a chance that I could just replace the venturiis and sneak it through, but no....Not gonna happen this time.

Hey, didn't someone else on here just go through this, too?  Ted?  Todd?  Beuller?

Someone with a 2,110 did a rebuild and then re-jetted to dial them in.  Don't remember if it was Dells or Webers, but I do remember someone.

Anyway, back to the shop.

Just finished rebuilding my Dellorto 40’s, yet again, to see if I can get over the mild transition stumble that I have had since day one.   I started out with the conversion kit to horizontal discharge tubes and I have to tell you, when that engine was pulling on the Main jets it is amazingly strong – the torque between 3,500 and 4,500 rpm (and higher) never lets up, but even up there it still had a slight hesitation when transitioning from any throttle setting (clue 1).  I overcame most of that with ever-increasing jet sizes and made it sort-of smoother, but not perfect.  Remember these are going on a 2,110 with MOFOCO 044 big valve heads and an aggressive port job, an Engle 120 cam, Berg 1-1/2" extractor and MagnaSpark II ignition.

Since there is nothing better than starting over when you're getting no-where, I went back to the stock, vertical discharge tubes and just returned my beloved Dells to the factory settings.  

Here's my collection of jets, the installed sizes in red, and the rest of the stock settings shown for reference: 

 Venturii size = 34

 Idle jet = 60   62    65    70

 Main jet = 130    135    140    162.5

 Air Correction =  160    180

 Accelerator pump jet  =  35    45   50    60    70

 Pump Squirt per stroke = .3ml/cc (I ran slightly heavy because it's a 2,110 engine) 

 Fuel Needle Inlet = 1.50

When I bought these Dells, back in the mid-1990’s, they were really different from anything I had worked on in the past, like Stromberg, Holley, Rochester, etc – all American production carburetors and all pretty simple – so I also bought the Tomlinson Dellorto Tech Book and referenced that to do the initial conversion to horizontal discharge tubes AND set things like the float height and drop (both of which were wrong out of the box).  I had a passing idea of the importance of float height as the basis for lean/rich idle circuit performance, but somewhere along the line I seem to have forgotten all that because American carbs are pretty simple to set and I hadn't touched an auto carburetor for 25 years when I got the Dells.

Anyway, Tomlinson seems to infer that you check float height by turning the carb top cover over and measuring the distance between the cover gasket and the float and set it to .1969” - .2364”. I chose something in the middle (.2185) which corresponds to a 7/32” drill which I used as my gauge.
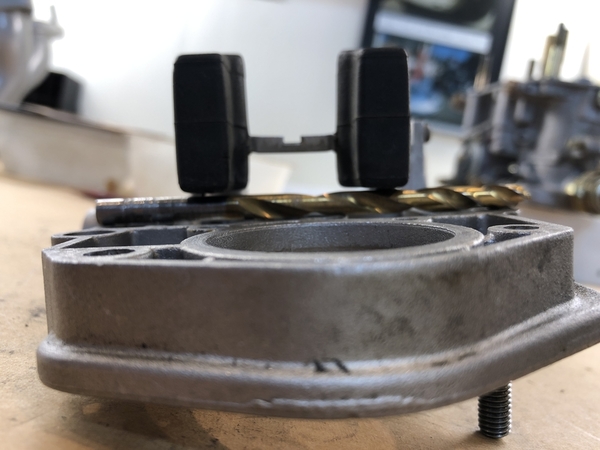
IMG_0244

For float drop, you flip the cover over to “normal” and measure the float drop to the same gasket surface.  Range is .4728” - .5122” so the closest I had in my drill collection was a .5000” so that’s what it is.  That's the way I've been setting things up for 20 years and about the only thing that I've never changed. (clue 2)

Just for the hell of it, I googled “setting float height on a Dellorto DRLA 40” and got a few hits over on the Shop Talk Forums and the consensus there was to measure float height without the cover gasket in place (clue 3).  That would give us a final float height about 1 - 2mm higher than setting it with the gasket in place and THAT should push the fuel level slightly higher up in the emulsion tubes and THAT should make things slightly richer as it moves past the transition ports. 

Ancient experience, from 45 years ago, reminds me that this was the way to overcome transition stumble on Stromberg 97s (remember I said they were pretty simple?) so it should work here, too (I hope).  Don't know why this never occurred to me sooner.  duh.

So, I have now finished going back to stock (using the Shop Talk float level setting) and have everything back in the car and now……..  I’m afraid to go out there and start it up, just to find that it might be the same as before and I’ve gained nothing.

Maybe I can kill time and get over the anxiety by cleaning the shop.  Yeah, that sounds like a good thing to do……  That, and a cuppa tea.  Maybe a walk around the neighborhood.   Sounds good to me...

Attachments

Images (1)
  • IMG_0244
Last edited by Gordon Nichols

So, I have now finished going back to stock (using the Shop Talk float level setting) and have everything back in the car and now……..  I’m afraid to go out there and start it up, just to find that it might be the same as before and I’ve gained nothing.

Maybe I can kill time and get over the anxiety by cleaning the shop.  Yeah, that sounds like a good thing to do……  That, and a cuppa tea.  Maybe a walk around the neighborhood.   Sounds good to me...

Be a big boy and rip the Band-Aid off Gordon. They will either work or they won't.

I know, I know.......   But this has been a curse of mine for 20 years now.  

I would think that the worst that can happen is that it improves but isn’t cured and then I’ll try raising the float level a tad more (next smaller drill size as a gauge) and see what that does.  It’s pretty easy to pop off the cover and reset the float but we’ll see what I get with the “factory” settings first.   Almost makes me long for fuel injection...

Gordon Nichols posted:

I know, I know.......   But this has been a curse of mine for 20 years now.  

I would think that the worst that can happen is that it improves but isn’t cured and then I’ll try raising the float level a tad more (next smaller drill size as a gauge) and see what that does.  It’s pretty easy to pop off the cover and reset the float but we’ll see what I get with the “factory” settings first.   Almost makes me long for fuel injection...

Gordon, you show what size jets you have now installed but how do they compare with the size of jets you removed ? 

Dave, with the old horizontal discharge tubes, I was running:

162 mains

160 Air Correction (per Pat Downs to help with the Horizontal discharge tubes)

65 Idle

70 Accelerator Jets

and the fuel level in the bowl was slightly lower.

OK, so my optimism was not rewarded.  I took it out around the neighborhood with everything back at stock settings and it runs terrible.

Popping through the throat on #4 and hard to get an even idle.  MASSIVE bog off-idle, like you have to pump it once, first, to get it to accelerate off idle.  All 4 accelerator jets are streaming, so tried backing off on the adjustment 1 turn - no change.  Tried to do a quick sync but when I turn the air bypass screws out to balance one side, the idle gets rougher.

I’ve had it.  I think I’ll just pull them and send them to someone who knows what the hell he’s doing and get this over with.  20 years of this is enough.

Gordon Nichols posted:


I’ve had it.  I think I’ll just pull them and send them to someone who knows what the hell he’s doing and get this over with.  20 years of this is enough.

If that's true, send 'em to Blackline Racing (801) 747-3342. Dave will hook you up. He's helped me when I've had something weird like a throttle shafts that were loose in the carb bodies, or return springs that weren't allowing the throttle plates to open fully. He does this all day, every day, and has for more than 15 years. It's not cheap, but you'll get everything you pay for.

If you're not ready to spend a bit of money (and I know about that Yankee thrift), remember how Bobby's (months and months long) odyssey was finally resolved-- with the discovery of a blown intake manifold gasket at the head. If your engine has ever backfired, it's a strong possibility. I'd take them off and figure on re-gasketing regardless.

Also: I know you rebuilt the carbs, but did you soak the bodies? I've pulled chunks of float out of one transition port or another that were worm-like, and at least 1/16" long. they didn't want to come out with normal cleaning. Blackline and Danny Pipereto completely disassemble the carbs and put the bodies and bits in an ultrasonic cleaner filled with a Simple Green or Pinesol solution, and leave them there at east overnight. Out at Blackline, they then soda blast them, and do it again. Once the bodies have gone through all of that, they blow carb cleaner down every single port before reassembly.

I'd do that at a minimum (blow carb cleaner through the straw down every transition port, with the jets and adjustment needle out)

Stan, I think that after 20 years of frustration and putting up with it, it would be money well spent to get this behind me.  

This last time, because I removed the carb from the manifold, I replaced the top manifold gasket.  The bottom is flange sealer, no gasket, but I removed the manifold (no indication of a leak, even between ports) and cleaned both it and the head flange with sealer solvent and 800 grit sandpaper - pretty much do that every time I have ever worked on them....  Gaskets are cheap - labor, too, when you're retired.

Both of these carbs look really clean both inside and out, but they are 20 years old, after all.....   I did not soak the bodies (while I agree that it certainly wouldn't hurt, if I had thought of it), but I blew out every passage after dis-assembly, first with Gumout aerosol (I use it pretty liberally) and then with compressed air.  Pulled the transition port inspection plugs, blew the ports out with both and then inspected them with a 10X eyelope - nothing in there.

Kind of thought about this all night and have decided that, even though I once was comfortable rebuilding (American) carbs (and have done a lot of GM 350 carbs), on the Dells I had nothing to tell me what parts, especially o-rings, to use where, other than comparing what came out to what I had in the kit.  What if I used the wrong rings somewhere, like on the bypass screws or mixture screws, because using the correct, larger one made it difficult to get the screw back in?  I would never know, but someone who does this daily certainly would and it would be done right.  It would be really helpful to line up the little o-rings by size, number them from #1 to #whatever and then in the rebuild instructions say "replace the airbleed screws using #2 o-ring" to eliminate confusion and error.

Anyway, that's it.  Time to get out the checkbook and end this drama.  I just want to drive it, Yankee frugality be damned.  I've already put enough time and money into this over the years to buy another pair of Dells.  I just want these to work right and I realize that I can't get them there.  I want to get them back from somewhere, put them on and have them work on my engine.  That's not too much to ask, is it?

Post Content
×
×
×
×
Link copied to your clipboard.
×
×