
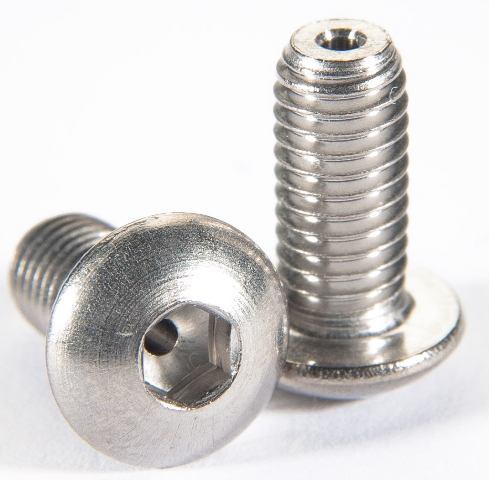
As some of you know, I picked up my Vintage Speedster in June of last year. It was a long wait, but It's here and I'm enjoying the heck out of it. I ordered it the way I had it pictured in my head. Greg and crew did a great job of building the car. The Subaru motor is a stroked 2.6L and I'm glad I went with it. As I have been tinkering with it lately, I've added a few things that made it different, more user friendly or just added to the look. One thing that has bothered me from the day I picked it up was the unfinished hole for my GT style gas cap. There wasn't even a dab of paint on the inside edge and the edge was rough with saw marks. I'm sure for most folks, this is small potatoes compared to the overall look of the car. But it bothered me........ Last week I started looking for an angle flange on line, that I could install on my hood. The hole is not what you would call a standard size. So the decision was made to make one. I took some measurements and got busy doing a working drawing so a few of my friends, who do this kind of work, would understand what I needed. My Hot Rod buddy John was ready and able to complete the task. I bought a 6 inch piece of aluminum round bar that was a remnant form someones job. The cost was $20.00. We headed to his house to chuck it up in the lathe and get it round. Lots of aluminum chips later we had the part. It was now time for the trial fit to see if my measurements were correct. Well, they were off just a bit and the diameter was too big to fit in the hole. So, luckily John is only a mile away from my house. So I drove back to his house with the part and he removed a bit more material. After looking at the drawing again he realized he had left the part too thick. With the part now cut to right size, I was on my way back to test fit it. It fit perfectly in the hole, with the right amount of space for the cap to fit and a nice even gap on the edge. I took a few pictures and began to draw out my idea for a bolt pattern. Tomorrow I'll drill it, after I make a trip to the hardware store, then I'll install it. I haven't decided if I will polish it to a mirror finish or just leave it more of a brushed finish. I painted the gas cap a nickel color right after I got the car. The cap had weld shadows showing and I wanted a more uniform look. It sure looks better now even without the bolt holes drilled.  I'll see how it goes in the next few weeks. This may be it for a while, with a vacation coming quickly. Stay safe......

DaveIMG_3908IMG_3954IMG_3956IMG_3957IMG_3958IMG_3959IMG_3962IMG_3924IMG_3922

Attachments

Images (9)
  • IMG_3908
  • IMG_3954
  • IMG_3956
  • IMG_3957
  • IMG_3958
  • IMG_3959
  • IMG_3962
  • IMG_3924
  • IMG_3922
Last edited by Butcher Boy
Original Post

Replies sorted oldest to newest

@WOLFGANG posted:

Why not just use silicon to "glue it on"?  Looks great - the unfished FG would have bugged me too.  Do you have some rubber gasket to seal water out of the trunk.  I have an old TR6 aluminum flip magnet seal gas cap that I've been saving for 30 years.

Monza Alloy Gas Cap Triumph TR3 TR4 TR250 TR6 Spitfire - Sports & Classics

Hey Wolfgang, I did think of just glueing it in place. I just think some nice button heads would also look good and add more to the outlaw look of the car. Yes there is a funnel type piece around the extended gas filler tube. It has a drain tube that allows the water to drain. I haven't tested it yet or driven it in the rain. I'm sure it's not completely water tight, just an aid. It would need a foam neck around the cap to make it waterproof. Or maybe a blue tape patch ...............lol

The flip gas cap it really cool !!

@Butcher Boy:

That's really very cool, Dave -- and I'm really glad you've got a friend with a lathe and the ability and material to make a piece like that. I had something similar made at the fab shop I used (before the 85 y/o man who ran it sold the building and machines) -- only mine was .080 Aluminum sheet, and my flange was Tig welded on the ring. I dressed the weld with a flapper-wheel, and it looks really good for the application (a ring for my cooling fan), but not nearly nice enough to put out on my hood. Yours is fantastic.

But candidly (and not meant to draw the ire of anybody)... a raw edge? Unpainted with saw marks?!??

Wow.

I guess all's well that ends well, but as a small business owner, the grace with which this is accepted is staggering to me. I've got great customers, but every one of them would explode on me for something similar.

Last edited by Stan Galat
@WOLFGANG posted:

Why not just use silicon to "glue it on"?  Looks great - the unfished FG would have bugged me too.  Do you have some rubber gasket to seal water out of the trunk.  I have an old TR6 aluminum flip magnet seal gas cap that I've been saving for 30 years.

Monza Alloy Gas Cap Triumph TR3 TR4 TR250 TR6 Spitfire - Sports & Classics

Dave, looks FABULOUS! I love the whole thing.

A gasket to seal? What are you thinking, Greg? It ain't no modern Honda!

On my first Spyder I made a cup underneath(out of a SS pet bowl) and had a hose to get rid of the water. On my new car I just use an old towel to wipe any water that gets in there. Pretty much only happens when I wash the car.

And yeah, having a lathe is INVALUABLE. There used to be so many things I'd have to bring to a friend's place to do. Now, I do it myself. It's amazing how much I use it.

Looks really nice.

What'cha thinking for screws?  IMHO a set of 5 or 6 dome-head, counter-sunk screws with socket heads would be really cool in an Outlaw kind-a way.  

https://www.ebay.com/itm/39492...zEAQYDSABEgL8DPD_BwE

Imho, nothing says vintage like a slotted screw.   I would use a slotted, oval head, stainless, probably in #10 size.  
Dave, if your buddy has a rotary table or dro, have him lay it out for you.  I would do a 5 bolt pattern, to match the wide 5 of the wheels.

Last edited by LI-Rick
@LI-Rick posted:

Imho, nothing says vintage like a slotted screw.   I would use a slotted, oval head, stainless, probably in #10 size.  
Dave, if your buddy has a rotary table or dro, have him lay it out for you.  I would do a 5 bolt pattern, to match the wide 5 of the wheels.

I agree with this 100%.

However, as a "form follows function" guy, I'm super-partial to plain 'ol Phillips. They have 10x the functionality of an Allen head, and nowhere near as easy to bugger up as a slot-head. Phillips makes it super-easy to put on and take off (not that this trim ring will ever come off, but you know what I mean).

FWIW, I've got slot heads on my steering wheel trim ring.

Thanks guys for the comments. I am lucky I have some talented and accessible friends to help out every now and then. I believe in having the right tool for the job, just no room at this time. As far as the hole pattern goes, John used my drawing to do a Cad drawing and also laid out a 5 bolt and 6 bolt pattern for me to use. I leaning toward a 6 hole layout. I also like the looks of a button head bolt over a flathead. I won't be using a slotted head screw even though its more nostalgic. I'll be looking at Allen heads and button head Torx or maybe Torx head security bolts just because of the look. I think a #10 is probable the right size for this piece. Still haven't made up my mind on whether to polish the piece or leave it alone for now. It looks good as is, but I will use SS bolts and polish those for sure. The contrast between the brushed finish and the shiny bolt might look really good. With the big gas cap sticking out of the hood anyway, you can't miss it! Right !! Might be best to make it look as cool as possible.

I'll add a few pictures for your enjoyment. One is from an Outlaw cap using a 4 bolt layout and my 6 bolt layout.IMG_3899IMG_3927

Attachments

Images (2)
  • IMG_3899
  • IMG_3927
Last edited by Butcher Boy
@DannyP posted:

I agree with Bruce. Silicone it in. It looks perfect as is.

After 3 hours of hand sanding this morning, I got the ring flat and was able to polish it to a nice finish. Bruce and Danny, I had to laugh when I saw your suggestion. After I finished with the sanding and polishing I took the piece inside to show my wife. She said, "Nice, let go see what it looks like on the car". We did and she said, "It looks perfect, leave it along". So it looks like it will stay this way and I will silicone it in place. Beside I can always drill it later in need be. Thanks for the advice guys!

DaveIMG_3928IMG_3929

Attachments

Images (2)
  • IMG_3928
  • IMG_3929

I have been reading this, and the whole time I wanted to ask if it might help if a water moat/catch with a drainage tube attached to the filler tube may be helpful.  I seem to remember photos of them when the through the hood filler cap is used.  And for some reason, I thought that Greg included that with the through the hood option.  If it were me, I think I would ask him.

@howdo posted:

I have been reading this, and the whole time I wanted to ask if it might help if a water moat/catch with a drainage tube attached to the filler tube may be helpful.  I seem to remember photos of them when the through the hood filler cap is used.  And for some reason, I thought that Greg included that with the through the hood option.  If it were me, I think I would ask him.

Hi howdy, Yes, Greg installed the water catch and drain tube as part of the GT Cap installation. I'm not to sure how well it works, as I haven't tested it yet. I would think it would work to drain water pretty well in a heavy down pour. But I'm sure it is not completely water tight in the frunk.

My next project is to trim off and round the front edge of the hood hinges and clean up the metal surfaces. They still have Bondo dust and sharpie writing on both hinges. This stuff drives me crazy when I see it. I'm just a little OCD with some stuff.


IMG_3937IMG_3932IMG_3935

Attachments

Images (3)
  • IMG_3932
  • IMG_3935
  • IMG_3937
Last edited by Butcher Boy

Kinda looks like someone in Greg's shop was going to round off the corner of that hinge leg for safety and forgot to do it.  Looks like a job for "Angle-Grinder Man!"

Kind-of like me forgetting where I put that 10mm socket last time.

Or looking for the ear muffs I lost a few minutes ago and spending 20 minutes looking for them to finally find them hanging on one of the nerf bars.  🙄

Sorry Gordon, that was my mark just to show where I was going to remove the corner. Yes, it will be an angle grinder move. The rest of the hinge will get some care with a green pad and the sharp edges soften with emory cloth. There are holes in it already, but not like Al would do. Lol !!  

Greg at Vintage does a nice job on the hinges for the deck lid. I mentioned touching up the rough front hinges on one of my visits to his shop, but obviously that never happened. It will get done and look way better. The next little thing I will do is paint the ends of the square tubing that supports the front of the body. The tubes were cut off and left to rust on the edges and inside the tube. I will paint the tubes and install square rubber caps to protect them.  I have a list of things to do to tidy up my speedster. Winter is almost over and I'm looking forward to hitting the road soon.

Today I set out to do a little grinding on pieces of the speedster. The first thing I wanted to address was the shape of the pedal covers. I liked that they were racy looking, so I added them to the build sheet. But after driving the car for a bit, I found that the square shape wasn't so great. When getting off the gas to hit the brakes, my shoe would get caught and the lower corner of the cover. So I began to look at other pedals and saw that Porsche had a nice looking pedal shape.  So today I took the pedal cover off and reshaped them on my belt sander. With a coarse belt, it didn't take long to get it to the shape I wanted. The hardest part was getting in the car head first and removing the tiny Allen screws and nylox nuts. Luckily my Granddaughter was here and able to help her old Grandpa finish the task. I think it looks way better than before and it doesn't interfere with my braking. More grinding to do so say tuned.

Dave. aka Butcher BoyIMG_2689IMG_3942IMG_3943

Attachments

Images (3)
  • IMG_2689
  • IMG_3942
  • IMG_3943

After a little break, I got my Dremel tool out and finally cut off the sharp corner on my hood hinge. The cutting wheel made short work of the corner and I followed it up with a coarse sanding spindle. It's nice and rounded off now. I cleaned up the Bondo dust with some steel wool and acetone. I feel good getting this stuff done. Tomorrow I will treat myself to a drive to breakfast with the local 356 Club. After breakfast I will take a drive somewhere on the backroads. IMG_3948IMG_3937

Attachments

Images (2)
  • IMG_3948
  • IMG_3937
Post Content
×
×
×
×
Link copied to your clipboard.
×
×