B3EEA8BA-BBFC-47DA-B5FF-D31F653C20453A9563C7-1267-46DF-A7CC-FEEA24A2ED57D112AAAB-99A6-4E2C-A29B-98B448AB92A4921A8F10-BC7E-47D4-AF94-AA4879A6A52BHappy Saturday SOC,

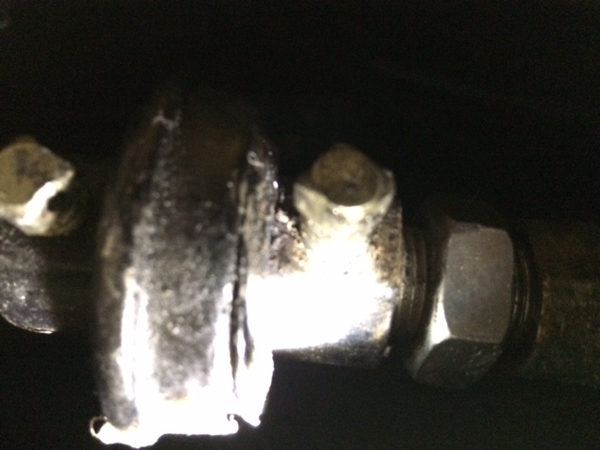
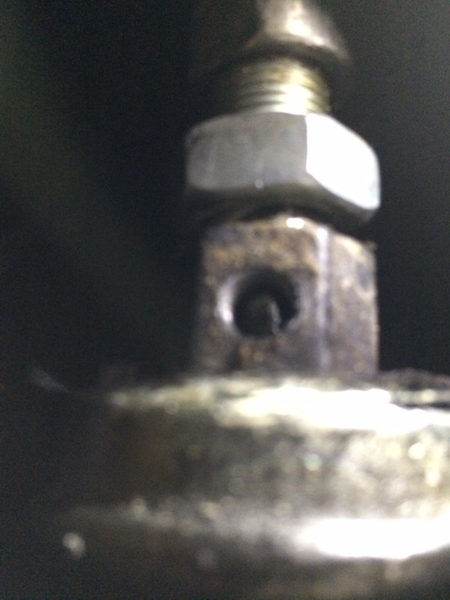
Just received my Vintage Speed shifter and had stocked up on a new shift rod bushing and H coupler to tighten things up. Now my JPS Coupe was built on a 74 V W chassis, so I felt like I had done the research on this site and You Tube and felt like I was reasonably ready to tackle the job. Got in the back nether regions of the car, stripped the carpet back and there it was .... wait a minute. That’s nothing like I prepared for. Come to find out the coupler was an early bug model, but the real problem is the way it is attached to the shift rod. If you look at the pics, there is a threaded piece that screws into the shift rod and the other end is smooth and slides into the coupler, fastened by a set screw.  The nut was tightened against the shift rod presumably to hold the threaded fitting in place. Now there is no way that nut is going to slide through the bushing up by the shifter, so I thought I could loosen it and slide it off the other end. No go. There really isn’t any room to wrestle with that fitting and for all I know, it might have been smeared with Loctite before assembly (And before the body was attached). Didn’t really want to cut open the body above the coupler in hopes to remove the fitting, but has anybody else came across this situation before? Because there is nothing to grab, I fear I am going to ruin the fitting and then I will really be up the creek. 

Thanks for looking;

Brian

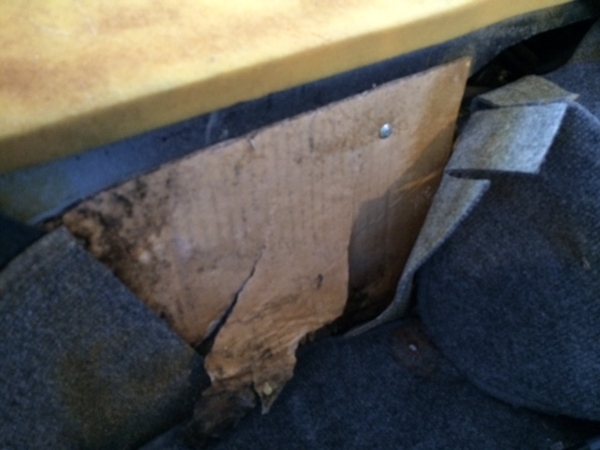
One good thing came of my demo job. I found that when it is time to re-upholster,  I need only go to the nearest grocery store dumpster. Yes right there, screwed into the side of the footwell is a standard flap off of a cardboard box. Good stuff!


Brian in Murrieta

Attachments

Images (4)
  • B3EEA8BA-BBFC-47DA-B5FF-D31F653C2045
  • 3A9563C7-1267-46DF-A7CC-FEEA24A2ED57
  • D112AAAB-99A6-4E2C-A29B-98B448AB92A4
  • 921A8F10-BC7E-47D4-AF94-AA4879A6A52B
Original Post

Replies sorted oldest to newest

Looks to have an aftermarket threaded adjuster welded onto the end of the shift rod. This large nut is used to dial in a the shifter rod length - adjustment, had the rod been cut exact,  it wouldn't have been necessary to use it....  In a few  cases I have had to cut the seat base above the coupler away to gain access ,  make the repair and fabricate a sheet metal panel.

Last edited by Alan Merklin
Alan Merklin posted:

Looks to have an aftermarket threaded adjuster welded onto the end of the shift rod. This large nut is used to dial in a the shifter rod length - adjustment, had the rod been cut exact,  it wouldn't have been necessary to use it....  In a few  cases I have had to cut the seat base above the coupler away to gain access ,  make the repair and fabricate a sheet metal panel.

I can deal with the patch job, Just not too sure how easy or possible it will be to remove the threaded fitting at the rod. It does not appear to be welded in. I can’t take the rod out the front, so whatever work needs to be done has to be performed at the rear’s tight quarters. I could try to cut it and use the Empi unit that slides in, if there is enough length left. If not, I may have to get a used shift rod and start from the beginning.

As always Thank You

If the adjustable shift rod end was installed correctly then you should not have a problem.  The “nut” portion with the ID thread is inserted into the cut shift rod and welded.  Then the OD is ground smooth so that it fits thru the shift rod bushing.  You will have to remove the inner adjustable, threaded portion and the jam nut in order to pull the shift rod out thru the front of the car.  

Also, looking at your pictures it does not look like the jam nut is locked against the threaded end that is welded to the shift rod.  I am hoping that you had just loosened this nut.   But it needs to be jammed against the end of the shift rod once the length is set and the small hole for the coupling setscrew is located correctly.  

Hope this helps.  

Last edited by James
James posted:

If the adjustable shift rod end was installed correctly then you should not have a problem.  The “nut” portion with the ID thread is inserted into the cut shift rod and welded.  Then the OD is ground smooth so that it fits thru the shift rod bushing.  You will have to remove the inner adjustable, threaded portion and the jam nut in order to pull the shift rod out thru the front of the car.  

Also, looking at your pictures it does not look like the jam nut is locked against the threaded end that is welded to the shift rod.  I am hoping that you had just loosened this nut.   But it needs to be jammed against the end of the shift rod once the length is set and the small hole for the coupling setscrew is located correctly.  

Hope this helps.  

Hey James,

It was as you said, the jam nut was snugg against the shift rod. Let's just say I don’t think my knuckles will ever be the same. After an unspecified amount of time, I was finally able to get the threaded portion out and now I can move forward. I will have to be sure to locate that threaded fitting back in the same position when I reinstall it. With the shifter going in, I could be doing quite a bit of adjusting otherwise at both ends.

Thanks for the reply,

Brian

Alan Merklin posted:

The factory end is used, when reattached the hole that accepts the coupler in it has to be exactly on a horizontal. If your shift rod has been screwed up I wouldn't bother trying to fix someone's mess and would replace it.

The car was shifting ok when I started the project. Just kinda loose and noisy. I can see the bushing is shot. Well I haven’t cut the body yet. Hafta see how the install goes though. Life is good!  I do get to stare at this H coupler until the correct early one get’s here.

Appreciate the help Alan,

Brian

Michael McKelvey posted:

I recently replaced my shift rod bushing with a bronze one.  I will never need to replace it again.  Be sure to get the installation tool.

http://www.ev4unow.com/VWShiftRodBushing.html 

Your shortened shift rod is short enough that you don't need to pull it out the front to replace the bushing.


Hey Michael,

Next time I am going with the Bronze. I replaced the sleeve this last weekend along with the coupler and put in a Vintage Shifter. It is making the adjustments a little more difficult because I changed things at both ends. I didn’t have to open the end cover or cut the body over the rear coupler. The one thing I did to make any future change outs easier was to replace the coupler screws with hex heads. What a pain!! I really hope that was the first and last time I have to do that. It was a kind of initiation for me. Probably many more of those to come .

Brian

Post Content
×
×
×
×
Link copied to your clipboard.
×
×