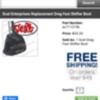
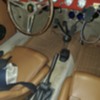
So, while I wait for tins from bug city I'm looking at easier things. Thanks for help, found local speedster shop through beck repair network so may have turned a corner after an appt next week. Anyone have sources for leather looking boots and cool knows for shifters? I dug through archives and saw someone posted this name so I searched it. Does this work on shifter?

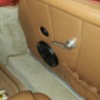
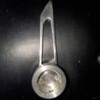
Also, the interior handle spins and was told need new inner parts and interior handle at least. Asked vintage and they didn't seem to have to send with my new windows.

Attachments

Images (4)
  • Screenshot_20210823-192448_Chrome
  • Screenshot_20210823-193801_Gallery
  • Screenshot_20210823-193756_Gallery
  • Screenshot_20210823-193751_Gallery
Original Post

Replies sorted oldest to newest

Most of the interior handle mechanisms have a course toothed gear.  The interior chrome handles are often pot metal and the teeth get stripped before the door mechanism fails.  Your looks like a set screw might be visible on your current one.  Most OEM ones (pre '67 or so) use a hidden pin to hold handle on. I'd guess just handle is bad.

VS assume now  VM had nice leather or vinyl emergency brake boot and shifter boots. Shown as part of kit here - but used to available separately.

Leather Interior Kit - Vintage Motorcars of California Inc. (vintagemotorcarsinc.com)

Attachments

Images (2)
  • mceclip0
  • mceclip0
Last edited by WOLFGANG

https://www.vintagemotorcarsin...ct/carpet-kit-trunk/ is this carpet kit one that I glue in or set it with snaps that i drill and do snap heads or is this this way to do the front trunk vs some other carpet source? My local upholstery shop (5 weeks waiting to get top to work with regluing the windshield bar) said they can carpet it. Not sure if I should do the kit or its better to pay someone to do from scratch? I contacted a bedliner place and it was $650 plus I have to remove the gas tank and there is no warranty due to being around gas tank so that is probably a nonstarter. I did put in a battery cover so I am emboldened by my mad skills in small amazon parts delivered....I have also gotten a powered 10" subwoofer to mount to rear seat area along firewall to connect to 6 speaker bluetooth setup i had installed. Speakers are loud enough but no bass really, which is not sounding right with the Colombian music my wife will want to play in it.

https://www.vintagemotorcarsin...ct/carpet-kit-trunk/

Attachments

Images (1)
  • 234833494_398438004953417_6793460703875876309_n

@John Bungen

The carpet kit from VS is applied with 3M Bond Adhesive from Lowes:

https://www.lowes.com/pd/3M-17...ose-Adhesive/1160531

Sprayed on where-ever you need the carpet to stick.  If you've sprayed around the tank you pro'bly don't need to put glue on the tank itself.

On that door handle - That looks like a SCAT after-market door handle for "customizing" a VW sedan.  It also looks like it has a setscrew to hold it in place, versus the roll pin used on the Speedster version that Wolfgang showed.  

Wolfgang's version expects to mount on a splined shaft that should be what's in the door and is held in place with a perpendicular roll pin.  

The SCAT version is kinda on the el cheapo side and subject to breaking and is held on with that setscrew.   Easy-Peasy.

Get some rubber hall runner and make trim covers for the hood hinges.  It will keep water and wind out of cockpit.  They just need a slot cut for the hinge. The plastic box (if original builder installed it) also cuts water and air intrusion.  You can glue or glue and rivet the rubber on. Do it before you add carpet.

As an alternative - you can spray inside the hood area with canned speckled trunk paint

Attachments

Images (1)
  • mceclip0
Last edited by WOLFGANG

The horizontal rod you see in the last photo should connect between the back of the handle assembly and the door latch assembly.

You’ll need to manipulate that to make sure the whole mechanical connection is good. Sometimes the bar gets bent from use and there is too much slop in the bar and doesn’t fully actuate the latch assembly. Completely remove the door card so you can access the inside of the door more easily. Using your vice grips you can manipulate the door handle spline to see if the latch works.

I had to shorten the rod on mine by bending it so the latch would be fully activated.

@John Bungen posted:

@Robert M yeah my bar is shot it just bends up easily when you turn vise grips. I should be able to change bar? Or are you say to just bend that rod a bunch and try to make it not straight?

I removed the door knob assembly from the door and manipulated the rod so it was shorter. Then with the door latch assembly loose I reattached it to the rod and tried it again and again until the door latch worked properly. It only took a couple tries.

I have a similar 3/8" "D" style, recommended by MUSBJIM and it works great.  It came with double-sided sticky tape on it which works great everywhere except around the button switches for my courtesy lights.  Something funky happens around those that rolls the weatherstrip, so I re-glued it with 3M Weatherstrip adhesive.  That stuff works great, but you really don't want to get any onya.  You'll need dynamite to get it off without using the 3M adhesive release agent.

Last edited by Gordon Nichols
Post Content
×
×
×
×
Link copied to your clipboard.
×
×