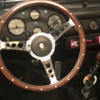
I found it impossible to see the feeble oil pressure light in my Speedster in the sun with the top down, so I searched for a gauge that would match the existing gauges.  I really like the combination gauge setup that Michael McKelvey showed in a previous post, but after a phone call to Palo Alto Speedometer I decided it cost much more than I was willing to spend.  

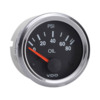
So I searched the internet for a an oil pressure gauge with green lettering, but came up with nothing.  I did find a gauge with a similar bezel as the existing gauges and it has some blue accents that help it tie-in with the high beam indicator on my existing multi gauge.

After much thought I determined that the slight miss-match of this gauge is offset by the visible oil pressure indication that the gauge provides.

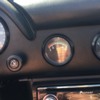
Attached is a photo of the finished installation.

Do you think it looks reasonably period correct?

Jason  

Attachments

Images (1)
  • 20230624_154944
Original Post

Replies sorted oldest to newest

I agree - It looks fine to me, too.

It's a lot more important to know what's going on with your engine than having perfectly matched gauges.  When people were actually racing some of the original Porsche 356 Speedsters (what they were designed and built for) many drivers went for an add-on oil pressure gauge just to know what was going on.  Some of those matched, many more didn't.  What you have looks great.

@JasonC posted:

It's a Faria Boat Oil Pressure gauge.

Thank you for the feedback.

Jason

In a year or 2 a winter project could be to send it to 1 of the gauge rebuilders and have the face screened to match your other gauges.  Such is the Madness that envelopes us who play with these silly cars.  Or, if you've learned to live with it, you leave it be...

@JasonC Looks good. Can you write up a quick install "story" for us? This is one of the first projects I have planned for my speedster that's shipping this Wednesday. This and replacing the combination gage with a Carrera replica gage that has degree markings for easier temp readings. Did you also move your ignition to the left or is that just the angle of the picture? In any event, killer job.

@JasonC posted:

Do you think it looks reasonably period correct?

Jason  

It looks perfectly “period correct” in that BITD, anyone who wanted a temp gauge would do exactly what you did, only with a white-face Stewart Warner gauge from the local auto parts store more often than not.

I bet if you asked them really nice, PAS or North Hollywood would put a VDO-esque face on that gauge for you.

@JoelP posted:

@JasonC Looks good. Can you write up a quick install "story" for us? This is one of the first projects I have planned for my speedster that's shipping this Wednesday. This and replacing the combination gage with a Carrera replica gage that has degree markings for easier temp readings. Did you also move your ignition to the left or is that just the angle of the picture? In any event, killer job.

Hello Joel and thank you for the comments. No, I did not move the ignition switch, but I did have to move the windshield wiper switch to a position just beneath the tachometer.

The tricky part of the gauge installation is cutting the 2-inch diameter hole.  I first drew a 2-inch diameter circle using a plastic circle template and a fine point Sharpy.  I then cut just inside the Sharpy line with a fine tooth shank bit installed in a Dremel tool, leaving about 1/16-inch of material.   Note that I do not recommend using a typical 2-inch hole saw that you see at Home Depot, Lowes, etc. as the teeth are too coarse and will chip the edges of the fiberglass. I then installed a small drum sander in my Dremel and very carefully removed the remaining material until the gauge just slides in and sits flush with the dash.

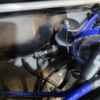
I was concerned about the vulnerability of the wire that must be installed from the gauge to the sender located on the engine. So to protect it I pushed the wire through a 12-foot or so section of vacuum tubing that I purchased at my local auto parts store.  I then supported the wire/tubing under the pan/frame using self adhesive plastic clips. I also put a bead of silicone around each clip to help ensure they would not fall off.

Hope this helps, any questions please holler.

Jason


Post Content
×
×
×
×
Link copied to your clipboard.
×
×