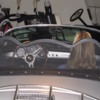
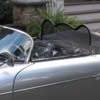
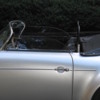
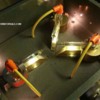
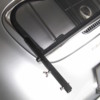
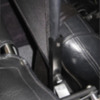
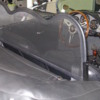
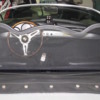
Got the first prototype started. I had five different ideas on how to easily make them, attach them and make the screen easily removable. It comes down to how much junk you want in your car permanently (Bracket), how strong you think it needs to be and what the final outcome looks like. First pass is do-able. I went to the hardware this morning and bought a bunch of pieces of aluminum angle, square tube and bar. Cutting it right now (on lunch break). Should have a completed install in a couple hours with pics.
Replies sorted oldest to newest
Standing by. I have all my McGiver tools and materials at the ready . . .
I always envy people with fabricating skills and tools!
Yes yes yes!
"Cutting it right now (on lunch break)."
Wow.....You get lunch breaks?
Gordon Nichols posted:"Cutting it right now (on lunch break)."
Wow.....You get lunch breaks?
Must be a long lunch break too. Craig said he'd have a few pics after lunch and there still aren't any posted. Someone should go out in the shop and check on him.
Here goes - prototype #A1a.356/SWB
I tried to use easy to work materials. All in for this <$18 so far. IF it holds the screen in place under driving conditions this should be easy to duplicate. I'll post a bill of material after I test drive this idea. I will also include dimensions, but each car is slightly different.
There are 3-4 other versions I sketched up using similar materials. My concerns again were, 1. Nothing permanent that would interfere once the screen is removed. Permanent bracket attached to interior side does not hamper roof going up. 2. Easy to install/remove screen from bracket. 3. Easy to duplicate
With my assistant Janet helping, it seems as if you can pull up the top with the screen in place (to be confirmed). With this version and the way I have added the supports to the sides to keep wind from bending the screen over, there will be no way to fold it down once the top is up. Given that, the removability is important if you need to place the top up unexpectedly. I used WING nuts so no tools are required. Everything will be painted black to match the screen frame once completed. MAY need additional bracing if permanent bracket does not hold under wind load, test drive tomorrow will tell. Keep you posted and include video showing insert/remove.
Attachments
Robert M posted: Must be a long lunch break too. Craig said he'd have a few pics after lunch and there still aren't any posted. Someone should go out in the shop and check on him.
Sorry, I also had dinner during that break. Had to be out of the house for two hours. We are selling and had someone come to view the house. Had to clean up the garage and put everything away.
...and then I took a break for Monday night football and one just because I can.
Very clever. I appreciate the use of simple materials.
Good job, keep the pictures and reports coming.
I'll PM my address to you, Craig. You know, once you get my set finished...![]()
Robert M posted:That looks real good Craig. What about putting a collar/sleeve between the aluminum upright piece and the fiberglass so when you tighten it up it doesn't distort the aluminum? Second bolt up from the bottom.
Not sure what you mean, but I am making very sure that the permanent bracket and the screen arm aluminum angles are parallel to the best I can get them. That is why it took so long. Tell me again in more detail.
I measured twice, bent once and had to do it three times. I should have used my Cad software but I decided to do all the dimensions and trig long hand. At least I cut everything LONG and not short. This may still only be a prototype. I'm making the right side this morning and then test driving. I need to figure a way to attach the permanent brackets without actually screwing into the car just in case I go with idea number 7 or 8.
craig posted:Robert M posted:That looks real good Craig. What about putting a collar/sleeve between the aluminum upright piece and the fiberglass so when you tighten it up it doesn't distort the aluminum? Second bolt up from the bottom.
Not sure what you mean, but I am making very sure that the permanent bracket and the screen arm aluminum angles are parallel to the best I can get them. That is why it took so long. Tell me again in more detail.
I measured twice, bent once and had to do it three times. I should have used my Cad software but I decided to do all the dimensions and trig long hand. At least I cut everything LONG and not short. This may still only be a prototype. I'm making the right side this morning and then test driving. I need to figure a way to attach the permanent brackets without actually screwing into the car just in case I go with idea number 7 or 8.
I just looked at it again and studied it for a longer period of time. I now see that the bolt I was referring to is used to secure the upright piece to the permanent piece.
Carry on.
Well, I ran into a problem. My wife asked me help clean out one of our attics. So i'm behind. But for those of you venturing into this production, keep in mind, these cars are not assembly line built, they are hand carved out of whatever rock is available. The molds used in the early years must have been made in High School shop class. When duplicating the first side bracket for the second side, I made three before I got one to fit. Don't do the math, if like my car, nothing is equal, nothing is centered, nothing matches. The slope on the rear side walls is a different angle, the seats are not centered in the body and while I was lucky that my car had threaded inserts under the carpet in the back under where the roof bows were attached (they were 1/4-20) one was in the perfect place to attach the bracket, the other was not. Hence, two different designs. I have three non-usable brackets due to dimensional differences to prove it. It was fit, measure, cut , bend, repeat ten times to make the second bracket. Maybe tomorrow I'll have it in. As it turns out I centered the screen on the seats, not the body. And for those novices out there, you cannot bend aluminum more than twice at 90 degrees. It doesn't like that. Luckily I bought enough to throw away two brackets. However, I am ever hopeful to be successful tomorrow morning. Unless we do another attic clean out.
Windscreen is done, sorry for the delay. I had to take time to put 50% of the attic stuff back into the attic, then carry the other 50% down to the basement. If you're married, you might understand. Test drive this morning right after coffee. From what I detect, there will be NO issues. The screen mounting is solid and immovable. Few pic here, more later with details. Self adulations and high fives all around. And a round for the bar as well.
Attachments
And a special thanks to Terry Nuckels for turning us on to the screen he bought. It is a good look for this car. It was very inexpensive and looks like good quality.
Terry, I'll send you my broken pieces to use as a template....![]()
Nicely done !
How awesome is that? Great job, Craig! I knew you could do it.
Your beautiful right-seater will appreciate you even more now...
For those venturing into this, keep in mind, I did this without welding. So essentially it was simple. If you want more strength, I would use carbon steel and weld up the permanent brackets. I did this for under $20 materials. All the fasteners were Stainless. It takes less that 30 seconds to install/remove. Adjustability is no more that drilling two more holes per side in the upright arms and moving the connecting bolts up or down. You need to attach the side supports to the screen first so you can determine their angle, mine were right at 5 degree. Dial that into the slope of the car side wall for designing the perm brackets. I had an idea for mounting where the side brackets on the screen had to be vertical not out 5 degrees, which can be done, but it looked odd, so I chose not to do that. The screen works well after a drive around the hood. Pissed the old people off here cause I got up to over the 23MPH speed limit to test. Oh well, I'm moving anyway. If anybody wants more pictures, let me know. BOM for the aluminum was: 1/16" x 3/4" - 3ft aluminum angle - 2 pieces (for side supports) two pieces combined to make a channel approx 13" long. I could not find 3/4 x 3/4 channel at Lowes. 3/4" fit nicely over the screen frame. 1/8" x 1" - 3ft aluminum bar (for permanent brackets). If I did it again, I would look for 1 1/4" - 1 1/2" wide bar for these. It will leave more meat on the bar after cutting in the slots and make it stronger if you want. The screen frame was hollow medium heavy tube. I drilled for self taping screws to make the side supports stay tight against the screen frame when you tighten the lone bolt on the frame. If not, it tried to straighten the side support perpendicular to the bolt. Let me know if you have more questions. Ask quick, by tomorrow I'll forget what I did.
Happy driving everyone....
....Ask quick, by tomorrow I'll forget what I did"
Isn't that fact for most of us :~)
That looks awesome Crag. I may have to do this to help my right-seater. Although it might piss her off that she won't need more scarves not that that would stop her from buying something else. I can always take it off for my solo drives.
OUTSTANDING, and a very good chronicle, w/ lessons-learned. Awesome pics. I think maybe you assume too much from the rest of us, wrt "simple". No welding is nice, and I'm not sure I'd have the patience to run through ten parts bent up until I got the right slant, etc. We shall see. I like and I want. Another winter project. Can do!!
Very impressive! I know it's supposed to cut down on wind but how exactly does it work?
That is a very nice steering wheel by the way!
OK, rocket science to the rescue. Aerodynamics, actually. What happens with the wind that scoots over the hood and windshield is that as it leaves the edge of the windshield, a shear layer is set up with the air inside the cockpit that is, relatively, hardly moving at all -- fast air above, still air below. the air viscosity begins to work and cause a vortex to form and the speeds and dimensions are such that the vortex directs air from just behind the driver forward. Looking sideways at the car from the driver's side, the vortex rotates clockwise, with the bottom just about head height. If you watch folks with hair (not me, for example) riding along w/ top down, you will notice their hair tends to splay out to each side, with a part right down the middle -- being blasted from the rear. This screen disrupts all that business, blocks the vortex return flow, and keeps that air off your head from the back, more or less. QED
Yeah, what Kelly said.
I would have said the screen blocks the air that blows into the cockpit from behind you.
Thank you. This is something that I just might try. I missed it somewhere but can you post a link to the screen?
Rusty -
http://raceland.com/mazda-coil...yle-windblocker.html
Robert M -
I like your style.
El Frazoo -
I have another design that does not include bending stuff. The permanent mounting brackets stick straight up off the deck where the rear seat cushion would sit. I can also (for a modest fee) come up with several other ideas that will work. It's a matter of how much do you want to poke holes in your car body?!? Like I said, I was standing in Lowes hardware isle, looking through the steel/aluminum angle/bar bins and had several ideas that would work. I picked two, bought the materials for both, came home, said "What would McGiver do?" and here we are. There's no limit to what you can dream and do. I only wish I had a Flux Capacitor....
Attachments
Very nicely done!!!
McMaster-Carr can supply the 3/4-inch channel aluminum.
"Good Night!"
Step 1: Order the screen . . .
I gotta get past Step 1.
The link to buy that Craig cited also has rounded one and one with a different hump profile. So you have to make yet another choice. $49 is a deal.


This price is a GREAT DEAL if you shop for them. I would not have bothered if I didn't see the $49 dollar price.
Is this the correct shopping list @craig?
$49.00 - Miata Windscreen (Regular or R-Style)

$28.98 - Anodized U-Channel, 3/4" Base, 3/4" Legs, 6 Feet Long

$25.69 - Multipurpose Aluminum Bar, 1/8" x 1-1/2" x 36"

+ Stainless fasteners
@Ryan (formerly) in NorCal - You got it! Just what you'll need.
Ryan, the windscreen frame is 3/4" thick. The U channel you linked to has a 3/4" base, not opening. I believe it'll be too narrow to fit the windscreen. You need to find a U channel that specifies an inner dimension at 3/4".
The thing is, you don't really need a U channel to keep the windscreen in place; a piece of L stock is all you really need. The screen only wants to move forward at speed.
Terry Nuckels posted:Ryan, the windscreen frame is 3/4" thick. The U channel you linked to has a 3/4" base, not opening. I believe it'll be too narrow to fit the windscreen. You need to find a U channel that specifies an inner dimension at 3/4".
The thing is, you don't really need a U channel to keep the windscreen in place; a piece of L stock is all you really need. The screen only wants to move forward at speed.
Good heads-up Terry. I just went out and checked mine for dimension. I put two 3/4" angles together to make the channel. That gives me 13/16" outside - 11/16" inside. On one side of the screen frame I have the angle right up tight against the screen frame and on the other side I still have a 1/16" gap except right at the very bottom where the corner of the screen frame is. I really think it is tight there only because of the way the vinyl was installed on the corner. There should not be any reason for the metal frame to be thicker at the corner. Given that the leather should be able to be compressed and that the channel could be expanded out at that small point, IMHO I think the channel with an inside of 5/8" should work. Measure your screen frame BEFORE you buy the metal pieces. Terry is right that you only need the upright on the front side of the frame for wind pushing it. I made mine with two angles more for strength.


