Hi All -

For the last three months I have done nothing but place orders for parts in my quest to correct some of the details on my Vintage. My car has been so reliable, that it has sort of been neglected in a sea of other car projects. Don't get me wrong, It has been very well maintained and looks new, but I have always had a laundry list of things that bugged me - from the unpadded dash that doesn't go all the way to the doors, to the gauges, to the missing bumpers/outlaw look, the e-brake handle, etc.. Well, I have everything I need to move forward, and this past weekend I started on the lowest hanging fruit: the door panels. There is nothing about the VS panels that look original. I totally get the functionality of the pocket, but that, combined with the stitching pattern just screamed 80's era "custom" beetle. Anyone remember the SewFine adds back in the 80's? The new panels offered look way better, but the long pocket is correct for the coupe, not the speedster.

So, I sourced all of the original parts. As expected, the radiused steel top rail on the real speedster door card does not fit the replica door. This piece also holds the backing for the chrome strip just below it. Both of these pieces are not cheap.

I decided the only way to get what I wanted and make it fit was to make it myself. My first attempt on the top rail looked good, but were really uncomfortable against my arm - which I thought strange. I forgot that the seats in our replicas are pushed outward due to the larger center tunnel. It's not a ton, but it mattered (at least to me). I decided to narrow the top steel (by almost an inch). This caused issues with the side curtain mounting holes. I then realized that in 12 years I had never used them  (knock on wood) so they were eliminated. The chrome strip is outside door trim from a beetle. I chose this as it matches the existing dash trim trim perfectly (hmmmmm.....). It is mounted to 1"aluminum fat stock using standard body clips. The flat stock is then mounted to the back side of the door top rail (after the rail was wrapped in vinyl). The actual door card is fiber board sourced from a local upholstery shop, using 1/8 foam (which is just a tad thicker than the original speedster).

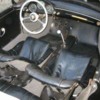
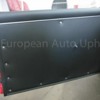
Here are some pics.  First is the original vintage panel, second is the real deal, third is a big buck replacement, then the one I built. The top rail screws have to be moved in from the edges due to the location of the rear striker bits. I decided to match the distance on both ends.

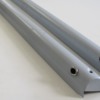
I also included a pic of the factory top rail structure as an fyi if anyone is curious.

I am pretty pleased. Now, that damned dash....

Attachments

Images (6)
  • vintage panel
  • 1957_Porsche_356_Speedster_Interior_1
  • Porsche-356-Speedster-Door-Panels-1-800x533 (002)
  • new panel 2
  • new panel 1
  • speed top garnish
Last edited by Scott S
Original Post

Replies sorted oldest to newest

While I absolutely bought this little car to drive (and not have the stress of a owning a real one), I am definitely a bit of a stickler on details. This little mess I created on another car kind of sums it up - ha! (yes, I combed through pics trying to count rivets and determine spacing - yet somehow I cant keep my garage clean........)

Attachments

Images (1)
  • c firewall 1
Last edited by Scott S

Hi Lane -

Yep. The build took four years. Right before the aluminum body was started we were contacted by gentleman who had recently retired from boeing and was getting into car stuff. He offered to build a carbon body for the car. Being as close to an exact reproduction as we could muster, we sort of brushed him off. However, after realizing that the body mounts would not be altered and the entire front and rear clamshells were simply bolt on (and could be swapped back to aluminum at any time)  we went for it. I like watching the looks on peoples faces when we open the bonnet at a car show.

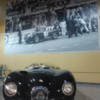
The car weighs nothing, is far more powerful that the original, and is running 1953 Dunlop racing re-pops. It is a beautifully violent car. Here are some pics:

Attachments

Images (8)
  • d_09681
  • ctype rolling chassis
  • brakes
  • d_10729[1]
  • d_10724[1]
  • c left side 1
  • c top view 1
  • WP_000397
Last edited by Scott S

Oh no no no.... building that car involved several folks. I wish I had that kind of talent. 

Quick back story: I have a D-type that was built in the early 90's. It is my mistress (way more so than the C type). When I found the car it was in rough shape, and started the process of getting it the way I wanted. In my quest for parts, I kept ending up dealing with the same guy. Not wanting to pay a middle man, I asked him where he was getting them. He replied that he was making them. I am talking crazy stuff - like cast hinges and beautiful brass fittings. He was an ex jag mechanic, that ended up as a nuke engineer in the navy. Decided I needed to meet this gentleman. When I got to his shop (pole barn) the amount of parts and cars was amazing. On his one workbench was a frame - a c type. he had owned the original car back when they were worth very little. After selling it, It had been subsequently raced and crashed hard. He somehow had received the frame back and had decided it was not fixable, so he was going to duplicate it and build up a car, with the intention of selling it. A deal was struck and we purchased the unbuilt car that day. He knew the cars very well, but still planned on simplifying lots of things - basically build a driver that more or less looked the part. Conversely, we wanted it perfect - down to the print font on the reverse rotation tach. We researched like crazy. He built what he could and farmed out what he couldn't. We sourced and built sub assemblies. There are a ton of "real" parts on that car - including the cylinder head.

It was quite the process. 

Those guys are out there, building under the RADAR.  When we were rebuilding our Austin Healey BJ7 I was told of a guy who rebuilds transmissions (those 150 pound wonders) and overdrive units - Quantum Mechanics.  I think he was once in the Nuke field, too.  His shop looks like it's right out of Oxford England, transplanted to Oxford, Connecticut.  You drop off your O/D unit or tranny on the day he tells you, and pick it up two weeks later, no more, and it is PERFECT.

Yup, they're out there.  You guys should follow Wray Schelin of ProShaper on Facebook.  He has several outstanding projects underway, including an aluminum 550 Spyder and a Studebaker "concept car" copied from an artist's sketch - the real thing was never built, til now.  and as Wray will tell you, "Doing the sheetmetal is the easy part" (relatively, I'm sure, given Wray's talent - gn).  "The hard part is everything underneath!"

Last edited by Gordon Nichols

I bumped into Wray at a funeral, yesterday, and was talking about all of the projects he has cooking with his metal working classes (like, half a dozen different cars and a commercial Still) and how his students really blossom in his classes.  Obviously, people coming to his classes have some talent to start with and a desire to learn more, but he is really tickled that they quickly learn how to do much more than they ever expected, and just in a few days.  Wray is a Rock Star and his students are all Super Stars.  I am so lucky to live nearby and can drop in from time to time to see what's happn'in.  Plus, the best BBQ joint in New England is just down the street!

The original garnish wraps the top edge of the door and then protrudes into the cabin a bit further than the replica stuff. At the time I was a much bigger guy due to an unknown illness. This caused the factory garnish to be uncomfortable against my shoulder/side and make the seat almost feel off center toward the middle of the car. They are steel, wrapped in leather/vinyl, so it was not like leaning up against a soft pad. It would most likely not be an issue for me now.

On a side note, one other thing the factory door top does: If you correct the dash  upholstery to correctly cover all the way to the door jamb and add the pad, the overhang of the factory door top creates the correct alignment between the edge of the dash upholstery  and the door top upholstery. 

If you're willing to vary a bit from the original look you could do as I did and make some nice wooden rails for the door tops.  I used sapele mahogany with faux rivets and then had my buddy Mike Lempert make a matching steering wheel.  Its a different look from stock, but I liked it.  The cost of the door tops was limited to the materials and a little time - all in under $50 if I recall.

Last edited by Lane Anderson

Add Reply

Post Content
×
×
×
×
Link copied to your clipboard.
×
×