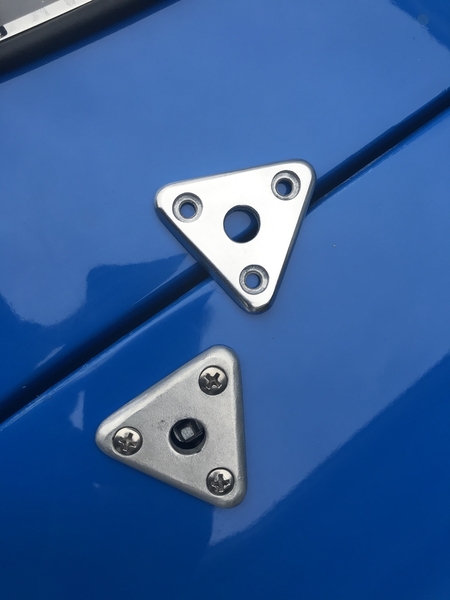
Ed, I'm glad the engine wants to run. That's a great feeling. I switched from some leaky EMPI bolt-ons to some stainless SCATs with tabs:

SCAT Stainless Steel Valve Covers with 5-Tab Gasket Securing, Pair (#80240T) around $30.

They seem to work better with cork gaskets than rubber. So far the leaking has stopped.

Be careful when putting them on. They're tight and have sharp edges unless you round them off.

Ahhhh, the dreaded gasket-suck. Lots of people get it at high rpm.....

You can weld little tabs to your stock valve covers. Or buy the Scat's, and heed Mike's warning, the Scat tabs are razor sharp!

Ed, you shouldn't have to change gaskets every time, or even every other. I think I used one set for a few years and at least three valve adjustments.

For what it's worth, I'm not a fan of silicone for gasket adhesive. I've had very good luck with contact adhesive on my cast aluminum fake-4-cam covers. Brush a coat on the gasket and the valve cover, wait ten minutes, and stick them in place. Zero chance of gasket suck. FYI, my redline is 6500.

You do have a Raby motor, Ed......

The rubber-impregnated cork gaskets are the bomb. Forgot where I got them though.

Last edited by DannyP

This works:  Clean the gasket surfaces on the valve cover and head with lacquer thinner. I use red RTV sparingly on the sides and bottom surface of the valve cover only (not the head is it's a machined smooth surface) there is no need to apply it to the top  of the valve cover.  Make sure that you have wiped away any excess. Set the valve covers back on the engine and wait over night ....before firing up the engine. Some are not fans of RTV but it works well for me.

Last edited by Alan Merklin


There's an easier fix.

Since you're getting 'the dreaded gasket suck' only over 5000 rpm, you should really eliminate the problem at its source.

It's easy to keep revs comfortably under 5000 with proper gearing. A close ratio five-speed transaxle is the way to go. You'll be able to effortlessly merge with high-speed traffic and shift at 4500 or less.

The cost of the five-speed conversion will quickly pay for itself in all of those valve cover gaskets you won't have to replace.

These are simple VW-based cars. Try to look for the simplest solution to any problem.


I did a Berg 5 speed in a Spyder,  Required cutting and replacing the rearmost crossbar to accommodate the added 1" in length (measurement is from memory), and then I made the matching changes to the shifter mechanism to fit.  Quite frankly I was less than impressed...  Maybe we could have gone back through the box and done some regearing to make it better, but the gear ratios were spec'd by the client.  It was essentially a 2nd overdrive and IMHO useless, especially for the money involved in making the change.  I think the client was into the box around $10K, plus the labor to change the chassis/shifter. (Suby spec (pro-drag) box built for a turbo STi  motor, plus LSD with all Weddle gears and HD everything, plus Berg conversion)

On gaskets, all of the suggestions above are valid and as much as I hate to even do it, we also use a gasket sealant on cover gaskets anymore (gask-a-sinch is my "go-to" and high temp RTV or permitex aero gasket sealer) when we have a hard time getting the gask-a-sinch.

I have the dreaded bolt-on CB valve covers.  I never use RTV.  I make O-Rings for the two bolts per cover out of 5/16" ID rubber hose 'cuz I'm too cheap to source and buy the correct O-Rings.  So far (20 years) the bolts don't leak.

I have used both composite and cork cover gaskets.  I don't really see much difference, but I prefer the cork.  Regardless of cork or composite, I smear a consistent spread of automotive grease onto both sides of the gasket just before I get under there to check the valves - before I even pull the valve covers - and then let them sit to absorb some of the grease.  Regular automotive grease from my grease gun.  don't remember the brand.  It's green but my last tube was black Molybdenum.  Either is fine.

Once the valves are checked and the gaskets have been sitting for 15-30 minutes, I use a paper towel to gently wipe away any excess grease, pop them into the valve cover (they always seem to be slightly too big) and gently put them on with new hose-made o-rings on the bolts.

Once in a Blue Moon I get a cover weep and once, like 15 years back, I had a pucker in one that I should have caught when I put the covers on but didn't.  Now I know what to check for and keep them nice and straight.

@chines1 a loooong time ago I used "Gas-K-Cinch Aircraft Dope" on a valve cover on a 350 GM truck engine that had developed a bad lifter.  Never again (I know - you're stuff is slightly different, thank God).  We mis-diagnosed which lifter was bad and we had to pull the cover again the next day.  

Thought I was gonna have to use dynamite.  

Tried prying from 15 different places around the cover to no avail.  Finally, in desperation, we called Bill Haynes, an ex-Navy CB and local heavy equipment mechanic and asked for his insight.  

He said, "Aircraft Dope!  What the hell did yah use THAT $#!+ for?  It's a F-ing CAR motor!"

He then told us to use a couple of propane torches and heat the pi$$ out of the cover all along the edge where the gasket sits to soften it up, while having a third guy start prying the cover off.  Must have taken an hour to remove it and by then the edge was toast from all the prying.  We ended up getting a new cover.

@DannyP posted:

Yeah, he should have left 4th alone, and put that final ration in fifth. Then spaced 3rd and 4th shorter and longer than the original 3rd. That would be more better LOL!

And to add to my previous post, "I've been trying to figure out how" without losing a kidney, a testicle, and a lung......$$$$$$

I think Danny, that is the main issue, as getting the right gearing is kind of difficult for the common guy where can he try it out to know if version 1 will be ok.   He should have custom made the whole 4 gears to duplicate an original  356 with a long second and closer spaced 3rd and fourth and finally the OD fifth.  

In any case if he was looking to quiet the engine noise he missed it as 3K is the sweet spot for ACooled as we all know for longetivity. 


I'm not a participant in this game, but a careful observer, so here are some observations.

@Anthony , a VW mechanic with about 35 years experience, does my valves. I watched him do it the first time and decided I'd rather have him do it than do it myself.

It wasn't that you have to jack up the car and get under (if you don't have a lift). It wasn't that you have two sides to do separately. It wasn't that you had to be really careful about sealing the valve covers. I think it was all of that combined.

Anthony will often spend more time working on the valve covers than setting the valves. He's meticulous about examining the channel where the gasket sits and making sure it's free of all the old gunk and perfectly clean. I've seen him take a drill with a wire brush to it to make sure it is perfectly smooth. He uses the cork gaskets and some simple grease to seal it, but it's more in the how than in the what.

Years ago, I always did the valves on my old 2002. One valve cover, an upright inline four, adjusters easily accessible and all in a line. You did the whole thing standing up. Nothing dripped in your face. But most important, the oil naturally drained away from the gasket in normal operation. There was no pool of oil lying against it.

A new cardboard gasket was recommended for every adjustment, but I soon learned I could re-use the same one over and over, without any sealant at all, and the thing never leaked. Twenty-three years, and the damned thing never leaked.

The VW valve covers are a whole other animal in this regard. They take some finesse to get right.


@Sacto Mitch posted:


I'm not a participant in this game, but a careful observer, so here are some observations.

@Anthony , a VW mechanic with about 35 years experience, does my valves. I watched him do it the first time and decided I'd rather have him do it than do it myself.

It wasn't that you have to jack up the car and get under (if you don't have a lift). It wasn't that you have two sides to do separately. It wasn't that you had to be really careful about sealing the valve covers. I think it was all of that combined.

Anthony will often spend more time working on the valve covers than setting the valves. He's meticulous about examining the channel where the gasket sits and making sure it's free of all the old gunk and perfectly clean. I've seen him take a drill with a wire brush to it to make sure it is perfectly smooth. He uses the cork gaskets and some simple grease to seal it, but it's more in the how than in the what.

Years ago, I always did the valves on my old 2002. One valve cover, an upright inline four, adjusters easily accessible and all in a line. You did the whole thing standing up. Nothing dripped in your face. But most important, the oil naturally drained away from the gasket in normal operation. There was no pool of oil lying against it.

A new cardboard gasket was recommended for every adjustment, but I soon learned I could re-use the same one over and over, without any sealant at all, and the thing never leaked. Twenty-three years, and the damned thing never leaked.

The VW valve covers are a whole other animal in this regard. They take some finesse to get right.


The nice thing is that he is in your neck of the woods so you can have him do it  

Meh. I have a strainer, which is perennially full of bits of Aviation Permatex, but no RTV bits, and a full-flow oil filter. 

So whoever assembled your engine used a whole can of Aviation/case sealant?

You really don't need much to seal the case halves. I think I've had the same 4 oz. plastic can for 30 years. It's still good, and there's plenty left.

I've never had chunks of anything. Just dirty oil.

I think a little blot of RTV on the rivet tails inside the valve cover would be unlikely to do any harm. It'll probably stay put but if a little ball of it should break off it's going to slide down the pushrod tube into the sump and either lie there on the bottom or get caught in the screen. 

Now, if you gunk up the flange on your oil pump and just smoosh it all together...well, I'd refrain from that.

Working on my "For Sale" photo/vid portfolio. I'm going to copy a few fairly excellent and well-known (at least among 550 obsessives) pictures, starting with the glamour shots of 550-0051.

Real deal:

Eddie Special:

IMG_6352

Real:

Wrongness:

IMG_6354

This shoot was spur-of-the-moment when I stopped by the neighbor's house and he happened to be heading up to the airfield to check on his plane. I do plan to re-shoot more carefully with a clean car and the proper "FAU X 6H" marker tag.

Car ran nice on the way up but of course now the Accusump fitting is dripping and also it developed a miss on the way home—probably an idle jet. 

Attachments

Images (2)
  • IMG_6352
  • IMG_6354


Ed, notes from a former photog:

The originals were shot from farther away with a longer lens. This softens the foreground and background and makes the car 'pop' more.

Also, if you've got any control over the aperture (f stop) on the camera you're using, open that up as far as you can (smaller f-number), for the same reason.

Otherwise, that looks like a great location for nice, clean backgrounds.

Finally, very late or very early light adds a bit more drama - not that the car needs that, really.


Last edited by Sacto Mitch

Thanks, Mitch. Yup. Next time I'll run early morning, back off 8-10 feet and telephoto to about 120-150mm. I'll see about opening the aperture on my iphone...

Also: The car should not be perpendicular to the the runway. I see now that the rear needs to be clocked toward the photographer about 10-15 degrees, the shot taken from roughly in line with the front of the rear tire. And a smidge lower.

I'll get the other one a little better too. Next time.

Actually, I miss all the applications that are now going to yearly liscences.  Talk about a business model that takes away from the individual. 

I mean, I have used PC's but mostly Macs for a long time and their strengths were beyond what PC could do at the time.  We developped a huge business application on Helix that was 10 years beyond the market.    Even so, Many Many programs that I use to use on different early OS's kept working and working.  An example, Daylite a very excellent CRM went yearly fees and they declared to us that they would provide a legacy non supported version,  but then they actually sabotaged the program so that it would no longer work or rather stop working with Catalina.  

It could work it just would no longer install and no matter what I did on the purchase of new hardware the program and 7000 contacts was toast.  It used to allow import of all emails, coming or going into the database... What a easy way to keep all the client's communication in one place.  

The CEO, took his name off being able to receive Tweets and/or emails.  Nice guy. 

Another great outliner was MORE 3.1 that Symantec tanked when word became king, but More did more than anything for the general users. 

Try to find a simple drawing program for drafting purposes. 

In any case this big brother liscence is not my favourite. 

There are some things that open software is good for but in my opinion, nothing beats a good relational database that is continually modified to maximize the efficiency of a business process, be that medical, para medical but in fact pretty much any business process.  Of course the process of developping such a tool is an art, and as many user interfaces are often developped with issues thatmake the end user babysit the terminal most times rather than it being a tool it hinders the process.  I mean if you have to have paper beside your terminal for what it won't do then the process software is lacking. 


A few words in defense of subscription-based software and, in my case, Adobe (words I never thought I'd ever be thinking, let alone writing).

(And apologies to Ed, as this has nothing to do with a Thunder Ranch build.)

When I got the e-mail a few years back about MY Photoshop going away to be unavoidably replaced by an unending stream of monthly payments, I was as indignant (the polite form of 'pissed off' ) as everyone else.

Beyond indignant, I was mad as hell and wasn't going to take it anymore. Except that I soon realized (also, like everyone else) that not taking it anymore would mean no Photoshop, and in my chosen profession, that would have been self-defeating. Adobe had us by the pixels.

So, I relented (also, like everyone else) and started watching monthly dings against my credit card.

Nine dollars and ninety-nine cents per month, every month.

Which, it turned out, was less painful than the $300 or $400 or $600 per incident that popped up unexpectedly every four or five years when I suddenly realized that, oh crap, Photoshop doesn't launch anymore after I just upgraded the OS which I've been putting off doing for a year but now have to do because this website I need freezes every time I go there.

Life, in this digital age, had become complicated.

As it turns out, the monthly payments add up to about what I used to pay, maybe less, and now I don't have to worry about having the current versions of six other pieces of software because it all happens automatically, while I sleep, thanks to the boffins at Adobe and their little bots.

I think it's like carburetors and fuel injection. You don't want to admit that some smug little black box is smarter and more talented than you.

But it is.


In your case your cost came out to be nearly the same cost but in my case the price went from $250 USA every 4 years to $250 per year, now if I had a business use, sure, but for a non business user and for mostly personal use now, it seems a bit much.  I do understand where their market is going but to disable a previously paid user who has a liscence to use it as long as you want,  I was yes indignant and Thanks Ed for letting us digress on your blue thread. 

We might get into as covid do or do not discussion on the wrong thread ... FYI, England and Sweden are sparring it out on the approach to protecting and closing down and the Swedish minister said only time will tell if either approach is right as when the people come out of being shut in the second wave may cause as many deaths as we have, but with a ruined economy.  He was talking about his infection and death rate now being very very low, and they feel herd immunity is being established that is why he says, but the total amount of people dying was high at first. 

No flame throwers!

The punch list is down to like a dozen items. Rattles (door weather stripping?). Double and triple-checking hose fittings and other oily-seepy bits (ordered a sump hardware kit from CB today). The fuel filter in the engine bay....

 IMG_6329

Which leaks so is now bypassed...

IMG_6365

Gonna install some Jet Doctors to bud-nip the dreaded idle jet clogging issue. (And of course I intend to heim-joint the linkage while I'm at it. I have those parts.)

IMG_6358

Steering wheel came off for centering and to make the turn signals cancel. 

IMG_6363

And I still have to pull the disty, lock it out and set up the CB Perf Black Box, which is on the firewall, the wires all curled up and tied down low where you'd have to look for them. Get the vac hoses routed, get the spark map made and dialed in, then pop the O2 sensor in the tail pipe and read the Wide Band as we motor through the gears, over hill and dale, etc. 

You know...tuning.*

Then of course the inevitable clay bar, polish/compound, final touch-ups and the photos and vids.

-=-

*So far, by the way, the engine seems to run well. Pulls strong from idle, very little if any "bog" at that common 1500 rpm spot, snappy throttle response in the 2k-4500 range. I've spun it over 5000 and it feels like it likes that, but I've not gone WOT to redline yet as my fuel filter and valve covers have been less than trustworthy.  

Attachments

Images (4)
  • IMG_6329
  • IMG_6363
  • IMG_6365
  • IMG_6358
@dlearl476 posted:

Only when it's running way too rich!


Mellowed we'd out the exhaust note quite a bit, and keeps to soot off the tail end. 

I hear that!

I bought a 3" mild steel exhaust extension from Jeg's, and made a one bolt clamp on it. Inside, I welded a Vortex cone insert. Zero back pressure increase, but takes the edge off the exhaust while idling, but especially during cruise. Plus keeps the soot off the car!

@DannyP posted:

I hear that!

I bought a 3" mild steel exhaust extension from Jeg's, and made a one bolt clamp on it. Inside, I welded a Vortex cone insert. Zero back pressure increase, but takes the edge off the exhaust while idling, but especially during cruise. Plus keeps the soot off the car!

My goal was twofold: dampen the note a bit, and de-soot.

Although not period correct, I wanted to go with the 911R exhaust look. I bought the "cookie cutter" inserts from GT Racing and a 2"-4" megaphone from Speedway, and a length of perforated pipe for a baffle from eBay. 

I dug deep into my memory and did some math for the right lengths. From memory, to make the megaphone fit in my pipe, I cut 3" off the small end and 1" off the big end, just where the cookie cutter ended up. (A huge stroke of luck: the angle on the CC blades matched the angle of the megaphone almost exactly. I had to do minimal grinding to get a perfect fit.) 

Then I had a welder friend put it all together. 

Since it hit my license plate when I raise my clamshell, it had to be removable, so I had the welder weld some half-washers to the pipe and cookie cutter and I use springs to hold it in, like a motorcycle slip on. 

Finally, I had it ceramic coated to match the exhaust. In the end, I also cut off 1.5"-2" of the tail pipe to get the proper length. 


Prior to getting coated:

image

Attachments

Images (1)
  • image
Last edited by dlearl476
@DannyP posted:

Here's what I did. This was last September after I did the top end rebuild:20190916_135423~2

I contemplated doing something similar. Even went as far as buying a nice 6" long oval tip from Auto Zone.  It would have been cool, because the oval looked more like an original exhaust, but there was no way I could figure to add some baffling. 

BTW, Danny, how do you check your oil?  Has anyone ever come up with an extension and a longer dipstick?  As is, I'm pretty much limited to checking my oil when the engine is cold. Otherwise I burn myself. 

So had a lot of fun this weekend! We noticed a bit of an oil weep from the fitting under the Accusump so I pulled it and made a new hose, a process that required removal of the oil filter, oil cooler lines and breather. 

IMG_6376IMG_6377

Fellas, have I told you how much I love installing AN fittings? Such a fun job! Pure enjoyment.

Anyway I got that done and decided after dinner last night to button it all back up and test. To my surprise, I got it all back together pretty easy. The fittings went on. The oil filter went on, as it does, with me reaching in with one hand and spinning it by feel until it catches the threads. The other fittings, for the cooler, no probs. So I went ahead and fired her up...

IMG_6379

And in 5.4 seconds dumped yet another quart of PennGrade all over.

Turned out the oil filter gasket had somehow dislodged itself as I was reaching the filter in. 

Oil on the underpan. Oil on the floor. I mean, what could be better?

IMG_6381IMG_6382

So I pulled the front half of the pan this am (with oil raining down on me, as is customary). Gunked it all up with degreasers a couple times. Ran the hose in there. Shop-vacced it out. Blew air.

It took most of the day, which was awesome!

Got it all back together by about 4 pm. This time, looks like, no leaks. 

So now it's down to sweeping up all the cat litter, putting down more cat litter, etc. 

Until next time, boyos! Livin' the dream.

Attachments

Images (5)
  • IMG_6376
  • IMG_6377
  • IMG_6379
  • IMG_6381
  • IMG_6382


Maybe this poignant anecdote will improve your mood, or ease those pangs of self-doubt.

Maybe not.

It was 1968. My first new car. Brand new BMW 1600. Knew nothing about wrenching. Took car to dealer for first oil change.

They screwed it up. Mucked up installing the oil filter gasket. It held for about 50 miles. Then let go right in the middle of evening rush hour traffic in downtown Philadelphia. In the winter. When rush hour happens after dark. And often in the rain. Very cold rain.

I was pissed. Really pissed.

I reasoned I could do at least as good a job as that. For less money.

The BMW owner's manual (not the shop manual, the owner's manual) had all these descriptions about how to do cool maintenance stuff. Set the timing. Gap the plugs. Adjust valve clearance. Change brake pads. Tune the carb. And there were all these pictures showing how to do everything.

They even showed the right way to put a gasket on an oil filter.

I could do this.

I went to Sears (it was "and Roebuck" at the time). I bought my first real tools. And a real toolbox for them. I still have them. I've never had to use the lifetime warranty for anything.

It helps to know that my dad was a dentist who grew up in the city during the Depression and never owned a car until he was 45. We owned exactly two screw drivers (we referred to them as the big screw driver, and the little one). We kept them in the top drawer in the kitchen. Just in case.

With my new tools, I changed the oil and the oil filter. Nothing leaked. I was on my way.

It all started with a mucked up oil filter gasket.

If you look hard enough, there's an up side to everything.


@Sacto Mitch posted:


Maybe this poignant anecdote will improve your mood, or ease those pangs of self-doubt.

Maybe not.

It was 1968. My first new car. Brand new BMW 1600. Knew nothing about wrenching. Took car to dealer for first oil change.

They screwed it up. Mucked up installing the oil filter gasket. It held for about 50 miles. Then let go right in the middle of evening rush hour traffic in downtown Philadelphia. In the winter. When rush hour happens after dark. And often in the rain. Very cold rain.

I was pissed. Really pissed.

I reasoned I could do at least as good a job as that. For less money.

The BMW owner's manual (not the shop manual, the owner's manual) had all these descriptions about how to do cool maintenance stuff. Set the timing. Gap the plugs. Adjust valve clearance. Change brake pads. Tune the carb. And there were all these pictures showing how to do everything.

They even showed the right way to put a gasket on an oil filter.

I could do this.

I went to Sears (it was "and Roebuck" at the time). I bought my first real tools. And a real toolbox for them. I still have them. I've never had to use the lifetime warranty for anything.

It helps to know that my dad was a dentist who grew up in the city during the Depression and never owned a car until he was 45. We owned exactly two screw drivers (we referred to them as the big screw driver, and the little one). We kept them in the top drawer in the kitchen. Just in case.

With my new tools, I changed the oil and the oil filter. Nothing leaked. I was on my way.

It all started with a mucked up oil filter gasket.

If you look hard enough, there's an up side to everything.


I still have my (well used) BMW 2002 factory service manual. I've considered putting it on eBay for a while, but I just can't part with it. Like you, it has a lot of sentimental value. It marks my transition from a piker to a serious shade tree mechanic.

@Sacto Mitch at least you had the sense to see the little red oil light come on and think, “Hmmmm....  A red light.  That looks bad.  Maybe I should pull over and stop.” Thereby saving the engine for another drive.

That is in contrast to my brother in law, who saw the same light come on in his car while crossing the Connecticut River Bridge during morning rush hour in Hartford, CT, many years ago, and he thought, “Hmmmmmm.....  A red light.  Wonder what that’s for?”  and kept on driving to work in Hartford.  Only, he never got there that day because the crankshaft welded itself to the case several blocks from his office, thereby creating a terrific boat anchor for one of the smaller Connecticut River Cruise boats.

Having to buy a new car to replace his seized mass of metal didn’t cause him to become an instant mechanic (or buy any tools, even to this day) and since he had never had an oil change done on his first car before the meltdown (Duh...), he has relied on his wife to remind him every three months to get it checked.   Seems to work for him........   Hasn’t had another meltdown in over 40 years.

Gordon.......Yup, 90 wt gear lube is the worst ! The smelliest of the 90wt  was the one required for Fords with positraction in the 60's. This one had a fishtoil based additive. If you didn't use it you couldn't even drive the car off the rack. Anyway, It really did smell like rotten fish. So that added to the already stinky smell of regular 90wt was just too much. At lunch time one day I heard a coworker look at another and say "Workin on a Ford huh ?"...We all laughed !...............Bruce

Spyder visited Hoopty Haus yesterday: 50 miles each way on the tollways without disaster.

IMG_6392

Mr. Drake was also kind enough to drive a lap of the Herald Harbor Hoopty Proving Grounds and critique my handiwork. This was a great honor to me, and moreso that the machine passed the audition:

Brakes: excellent. Handling/tires: excellent. Shifter: tight, but good after warmup. Throttle response: fair. He rightly notes a too-long ramp-up on the pedal, which I know I can adjust. Fit/finish: very good. Being Cory, he immediately noticed that all three gauges are just slightly off plumb/level. He gave me a pocket level to remedy this. 

On a wooded 2-lane straight, he wound it up to 5000 rpm in 3rd (i.e. 83 mph) and I got skeert.

With him and me both in the car I noticed some front tire rubbing again. So I will lift the nose up just a little bit more.

Now to the mishaps:

*Hood latch release pull failed. Needs tightening at the clamp end of the cable.

*My spare coil fell out at some point. Out of it's too-loose holder and out of the car. Gone; tumbling along the roadway somewhere probably at 50+ MPH. This is damn embarrassing.

*Headlight low beam relay failed again. Second time for that; I replaced the first one some weeks ago and have used the headlights most of the time ever since. That it would blow again so soon makes me think I've got a weird intermittent short somewhere—or a straight wiring fault that somehow heats them up and slowly cooks them. The high beams work but they're almost never on. Advice from wiring aces welcomed.

*Accusump is leaking. It's not my fittings, it's something in the unit itself. We had a couple tablespoons of oil pooled in the body cavity just outside the frame tube when I got to Cory's place. Apparently these things are trickier to operate than I realized. I will read all the instructions and notes associated with it and see if I can troubleshoot. If not, it's coming out for good.

Meanwhile, I received new sump hardware, valve covers and bails, and jet doctors from CB Performance. 

Attachments

Images (1)
  • IMG_6392

I was driving on a two lane very busy highway, going to cottage country, I was following a boat in my roadster, I get a thought that I should move over.  

A few miles up the road I see a boat chair, very big one, had flown and was on the side of the road, as well as a foam cooler. 

Personally all vehicles with open boxes, trailers etc, I just stay away from, you never know when the spirit of stupid, in this case forgetfulness also, has hit the driver and something will fly out.   Unintentional for sure but stuff happens. 

@Jimmy V. posted:

I arrived home from buying a rear axle/differential assembly for a chevy truck to find that I lost a brake drum someplace along the 100 mile expressway trip. It terrified me to think of a 10lb brake drum flying off the back of my trailer at 70MPH. I hope it didn't harm someone's vehicle. I hadn't considered that the brake drums were just sitting on the studs with nothing holding them on.

I got you beat. After I bought a three tier tire rack for the storage unit where I keep my 968, I decided to take all the Alfa wheels and the OEM 16" 968 wheels out of the place I keep my Spyder and use as a shop. Somewhere in the five miles between the units, my shoddy tie down job let one of the Porsche alloys fall off!

I retraced my route 3 times and no sign of it anywhere. I nervously awaited the "we got your fingerprints off the wheel that totaled my car and we need your insurance information" phone call for about a week.

More likely someone saw it fall off and grabbed it and put it on eBay. 

@edsnova posted:

*Headlight low beam relay failed again. Second time for that; I replaced the first one some weeks ago and have used the headlights most of the time ever since. That it would blow again so soon makes me think I've got a weird intermittent short somewhere—or a straight wiring fault that somehow heats them up and slowly cooks them. The high beams work but they're almost never on. Advice from wiring aces welcomed. 

Ed,

You didn't mention how the low beam relay failed. Typically, either the contacts burn out or the coil opens up. The former can be corrected by ensuring the power supply to the relay is properly fused. 15 amps is the correct size for a pair of 55-watt lamps at 12 volts nominal. Proper fusing protects the wire and relay in the event of a fault downstream. 

For best service life, the relay itself should be rated for 30 amps continuous duty, and be of reputable manufacture, such as Bosch, Delphi, etc. Steer clear of CCC (Cheap Chinese Crap) whenever possible. Coil life is also influenced by quality of manufacture. And make sure the relay is rated for 12V automotive use. Automotive coils are wound to withstand higher voltage when the alternator is running, whereas industrial relays are wound for the specified nominal voltage. The alternator increases voltage by roughly 20%, causing the coil to run hotter. Too hot, and insulation breakdown occurs, shorting the windings and further raising the temperature. In the end, the coil burns open and the relay quits working.  

Eric


Wondering the same stuff as Eric.

Another way to say it is did the primary circuit (the 'trigger' circuit) of the relay fail or the secondary circuit (the 'load' circuit).

That will tell you where the problem is.

In other words, if you remove the 'dead' relay from the circuit and apply 12V to the trigger circuit, does it still 'click'? If not, the relay coil probably saw too much voltage. You could check the car's wires that are connected to the relay's trigger circuit, with the engine running at maybe 3000 rpm, and see what voltage is there. If it's much over 14V, not so good.

If the relay still clicks but doesn't close the load circuit when it does click, the attached load may have shorted to ground at some point and burned out the relay contacts.

I have used a lot of the 'CCC' relays with no failures yet.


Last edited by Sacto Mitch
@edsnova posted:

Spyder visited Hoopty Haus yesterday: 50 miles each way on the tollways without disaster.

IMG_6392

Mr. Drake was also kind enough to drive a lap of the Herald Harbor Hoopty Proving Grounds and critique my handiwork. This was a great honor to me, and moreso that the machine passed the audition:

Brakes: excellent. Handling/tires: excellent. Shifter: tight, but good after warmup. Throttle response: fair. He rightly notes a too-long ramp-up on the pedal, which I know I can adjust. Fit/finish: very good. Being Cory, he immediately noticed that all three gauges are just slightly off plumb/level. He gave me a pocket level to remedy this. 

On a wooded 2-lane straight, he wound it up to 5000 rpm in 3rd (i.e. 83 mph) and I got skeert.


It's not easy to sit in the passenger seat of any Spyder at full song.

Personally, I'd like my throttle to be a little less sensitive. This may be a good thing.

“How do you test a relay to learn why it went bad?“

First, if you have an ohmmeter and a spare, working, similar relay, measure the resistance across the coil contacts.  There should be a diagram of the internals of the relay on the case somewhere that will show you which contacts to test.  If the resistance is the same as the spare relay, the coil is probably OK.  If the ohmmeter shows infinity on the dead one and some measurable resistance on the spare, then somehow you have overloaded the coil and you need to look at reasons for that, like a short on the switch side, but that would seem rare to me.  Usually a relay coil only succumbs to over-voltage or if it is a short duty cycle design that is constantly on.

If the coil tests out OK (same as the spare) then remove the case from the relay and look at the make-and-break contacts at the end of the long metal wiper.  If I’m right, they will either be (A. ) welded together, (B.) burnt and pitted (making lots of resistance and no longer working) or (C.) totally gone since they were burnt into oblivion.

I would go with B above.   That means that whatever current they were switching on that side of the relay (it could be a double throw, switching between two circuits/lights) is drawing more current than the relay contacts can handle.  That could happen if the headlight circuit shorted to ground between the headliht and the relay.

If they shorted, they might also weld the contacts together and that would indicate a short to ground somewhere on the light side of the relay, overcoming the rating of the contacts.

Regardless, the power side of the relay should have a fuse between the relay and the power source to protect both the relay and the headlights, so battery to fuse to relay to headlight, NOT battery to relay to fuse to headlight.  Got it?

Happy hunting.

Last edited by Gordon Nichols
Post Content
×
×
×
×
Link copied to your clipboard.
×
×