They're usually hinged, Gordon. The replicas have big swingin' hinges and the originals had flat ones that kept the front of the lid much closer to the body work (as seen above). The quarter-turn latches near the windshield are like the originals, which used a longish square-drive church key to undo both those and similar ones holding the front of the clam down. The Vintage and Beck variants have a more pedestrian pull latch in the center and (usually) a pair of non-functional turn-latch covers close to where they'd be on a real Spyder. 

My car came with (semi-) functional turn-latches in the hood, so they'll be retained....

Finished my battery hold downs today and made the gas tank straps.

IMG_3319

IMG_3316IMG_3315

IMG_3320

IMG_3322

Attachments

Images (5)
  • IMG_3319
  • IMG_3316
  • IMG_3315
  • IMG_3322
  • IMG_3320

Final fettling of my fuel tank cover. Damn it!

After painting my hold down straps I roughed-in the hinges for the sides of the covers, socked them in with a couple screws, then taped down the cotton straps and had Karen come out and help me reinstall the hood to make sure everything clears.

IMG_3337

IMG_3338

According to that shaving cream, nothing clears. We got five dots, and the hood doesn't latch.

The main culprit seems to be that brass thingie in the center. It's a replica tank vent, designed to be functional. And I re-soldered it lower and then ground it down pretty good after the last test fitting with Cory.

It's still about 3/16th too proud. 

We'll get there tho. 

Attachments

Images (2)
  • IMG_3338
  • IMG_3337

Blog update. Everything mocked-up and it all fits. 

Need to extend the sides of my tank covers because the bottom edges are visible and that won't do. 

IMG_3356

IMG_3357

Gonna get another quart of kitty hair/filler to smooth out this mess in and out, and plug the holes I blew in it. Then we're into final prep and paint. 

I told you guys this would be special and I wasn't kidding. 

Attachments

Images (2)
  • IMG_3357
  • IMG_3356

Yeah, I was wondering that, too.   Seemed like a nice kid and his parents are nice, too, but way above my pay grade when I was 17.  I asked for a car and was told "you can use your brother's Bronco from time to time while he's away in the Service"......That's it.  

So, that was when I built my first Dune Buggy.  The rest, as they say, is History.  Nothing but good came from my parent's decision.

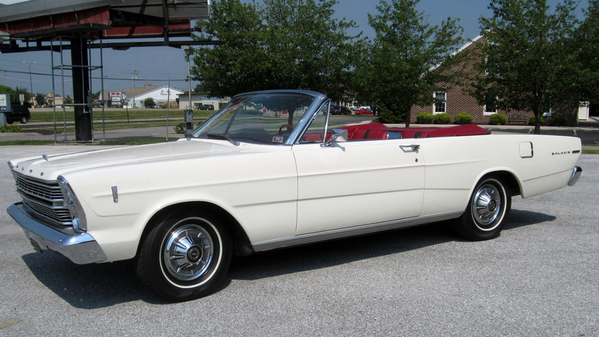
Oh, but don't feel too bad for me.  My mom got a new Ford Galaxie Convertible every two years all through the 60's so it wasn't like I had to drive "Ugly Betty" or anything like that.  This was my favorite, for a lot of reasons.  Life was good in the '60's.

1966 Galaxie

Attachments

Images (1)
  • 1966 Galaxie

I dunno, Gordy. What you've made looks actually useful!

Here's the latest on the gas tank: I welded up skirts to the end pieces, filled them and then molded a new, functional, correct-looking vent for the back of it and glued that on with kitty hair (which it's made out of). 

IMG_3374

Installed the vent piece in the filler neck with epoxy. . . IMG_3384

(Those two pieces will connect with a hose under the tank cover so the vent will actually work)

Primed the tank cover

IMG_3375

Fit the (functional, relay) sending unitIMG_3393

(The real sending unit will be wired to this one under the cover)

Nut-certed all the holes so when it's assembled it might hold together

Epoxied studs in on the driver's side when I discovered that neither nut-certs nor a reinforcement plate would fit without interference from the steering box. 

IMG_3394

IMG_3398And then test-fit the whole mess one final time before paint.IMG_3401

IMG_3402

Hood closes, and latches, and the hood pins work as they should. Snazzy, eh?

Now I just gotta paint the cover, attach the straps, shorten those silly studs jutting out from in front of the steering box, and source and install the actual fuel level sending switch so the gauge will work. 

Oh, yeah, and two bits of velcro for the top edges of the tank cover ends to keep them from rattling about when underway. 


Attachments

Images (8)
  • IMG_3393
  • IMG_3394
  • IMG_3402
  • IMG_3401
  • IMG_3398
  • IMG_3374
  • IMG_3384
  • IMG_3375

Spent about two and a half hours this am re-doing oil lines, shortening the short hose little by little, trial and error, until I got it too short. . . 

Kept at it and now they're almost good. 

IMG_3515

I don't like how the top one impinges on the lower line though. May muck about with these some more tomorrow before lunch.

Tonight I got my new clutch fluid reservoir, flared the hard line sticking out of it so the 7mm braided cloth hose won't fall off, and made the bracket for it. 

IMG_3516IMG_3517IMG_3518IMG_3519

IMG_3520

Tomorrow I'll paint the bracket blue and give it three rivets, fill the cup up and that's done.

Attachments

Images (6)
  • IMG_3515
  • IMG_3517
  • IMG_3520
  • IMG_3518
  • IMG_3519
  • IMG_3516

The latest brackets are like 22 gauge sheet steel; very light. The "tractor seat" spare tire holder is part of an old aluminum frying pan (the originals were steel). I also made the brake reservoir bracket out of sheet aluminum, and also the central clam pins (those were steel on the originals too). 

Nothing I added is all that heavy, with the possible exception of the chassis tube extensions up front which by necessity (i.e. to be able to support the weight of the front end of the car over a jack) are DOM steel and weigh maybe 6 pounds each.

The gas tank cover is probably another 10-12 pounds.

I guess all-in I've added 40-50 pounds of nonsense to the car in my quest to make it look more like what Wendler released in 1955. Running the plastic windshield and alloy wheels probably puts it back close to where the kit would have been if assembled as McBurnie intended. 

Returned to the brakes today thinking I'd pull the front calipers off and tilt them a bit to get the last bit of air out. Instead, noticed a little drip where the passenger rear braided line attaches to a coupler. Tightened it up. Then I looked at the other braided line and it was wet at the T junction so I put a stubby wrench on that one as well.

Next thing I know it's raining brake fluid.

IMG_3528IMG_3529IMG_3533

Got bad enough I put the car up and pulled the hose off the rear reservoir and drained it back into the bottle.

My God. Did I split that brass fitting??

The weird thing: all that stuff is off the shelf. The junctions I was worried about were the ones I flared myself. So far those are all dry.

Anyway, chime in, experts, if you see something idiotic I've done that needs fixin'. Otherwise I'll just order a couple more of those T-junctions and try again with the same stuff.

Are we having fun yet?

Also painted my clutch reservoir bracket and, while I was at it, the hood pin housings.IMG_3524

IMG_3527

Still pondering those oil lines. 

Attachments

Images (5)
  • IMG_3528
  • IMG_3529
  • IMG_3533
  • IMG_3524
  • IMG_3527
Last edited by edsnova

Answer: Yes. I split the brass fitting. Me, reaching through full arm, crouching, with a stubby 14mm wrench, cranking the flare nut against like a 3/16th bolt through fiberglass. 

I must've put about 4 ft-lbs torque on this thing.

So I guess this sucker would've burst the first time I took the car around the block and tried to bed the pads.

 IMG_3534

Anyone else ever seen anything like this? 


Attachments

Images (1)
  • IMG_3534
Last edited by edsnova
Post Content
×
×
×
×
Link copied to your clipboard.
×
×