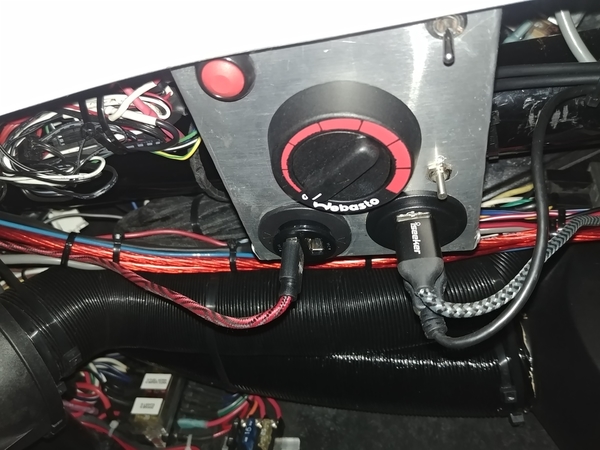
Wrapping wires and tucking them up. It's getting there.
It's looking more like a car than a project!
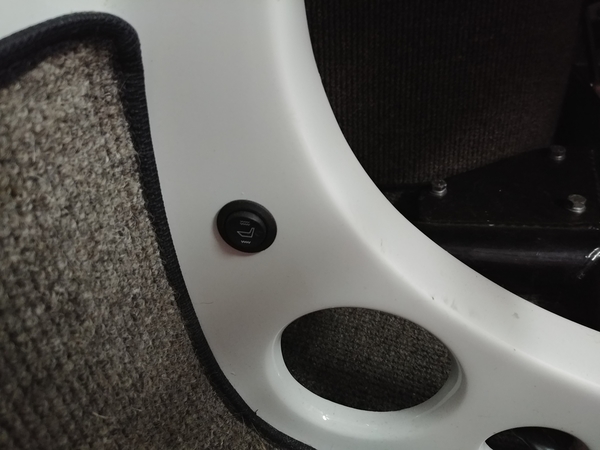
Seat heater wiring is in. I decided to put the relays for these on the back firewall rather than completely rebuilding the stock harness. Waiting on the little relay brackets.
After that it's down to the cig lighter/accessory plug. I want it under the dash out of sight but in reach, and there's nothing to mount it to. So, pondering.
Once that's in I'll tie everything up and complete the loom wraps, test all the circuits again and then start putting the car back together. Really looking forward to getting the shifter, e-brake and seats in.
Attachments
Ed, I fabbed up an aluminum panel under the dash center. It has a couple toggle switches, a cig. lighter socket, a dual USB, and of course my heater control. Can't be seen, but you can access and use it easily. Aluminum panel is screwed to the crossmember behind the dash, and double-sided foam tape to the backside of the dash.
Crossmember behind the dash, eh? That must be nice.
Her's my goober-ass solution.
In my defense...my heater controls are behind the shift lever, on the...erm...console?

Attachments
Oh, I meant the gas heater control! The carbon electric jobbies are on each side on the cockpit bulkhead, down low. Vintage Greg copied me and puts them there now!
That's friggin' sweet, Danny. You're a craftsman.
Electric is done and tested good (except the gas gauge b/c there's not enough gas in the tank to check that & I didn't feel like pulling the sender to play with it).
Also done: Hood release, throttle return spring, gauges secured in the binnacle and shifter is bolted in.
Attachments
Ed this old man leaves two float screws out and using a capture wire to raise and lower the float with the key on to confirm correct float to tank adjustment, then pull the wire and replace the two screws. Don't over tighten those screws but if you strip one a self tap 5/16" head hex screw is the perfect fix.
Shifter's hooked up. All 4 forward gears and reverse seem to work. Reverse lockout lever works. Now to the e-brake cables.
Attachments
E; Brake cables: Fortune Cookie say : Better to cut the cables few time, than first cut too short.
Cut these months ago, Alan. Tinned the ends with solder. Fortunately I've got a big ol' threaded rod to make up the difference between the cable lengths and the bottom of the stick.
I put the ends on tonight. Didn't like how little past the set screws the cables went.
Dabbed a little JB Weld on the cable ends before sliding them in and tightening the set screws nice and snug. By tomorrow afternoon they should be good to go.
Attachments
Update: e-brake works, shocks are in (mostly, see other thread), seats checked in again and I fit in there nicely—and you can too!
Gonna pull the front hubs tomorrow and inspect and re-grease the wheel bearings, then snug in the shocks and maybe try to do a violent brake bleed like @DannyP recommends.
Then we're on to the rear clam: putting it back on, installing the tail lights, maybe putting in the reverse light.
Hang the driver's door. Screw the floor back in. Take her over to Mike's muffler shop for the final bit of bending/welding on me pipes.
After that it's down to stuff like emblems and windshield. I'll trim out the interior with vinyl too but that might wait until after I take it to The State & see about getting a title.
I just love the look of that big-fat fan shroud leering up at me. That car has to be fast just by the looks of it !! A lot of us are anxious to see how the whole project performs on the road ! If you ever sell this car, the new owner is going to get one hell of a build document. It's not un-heard-of but it is rare, like the car. . Saludos !!!!!...........Bruce
I'm really excited about your work here, Ed. This is one of the great builds and your creative approach to precision makes it even more so. Don't be surprised if the whole DMV wants to come out and see this beauty when you go for your title!
You'll probably have this beauty sold before next year's Carlisle, but the selfish part of me hopes you don't so I get a chance to see it.
Thanks for that Lane. Thanks also to Bruce, Arjani & @Michael Pickett for the encouraging words.
I'm hoping to show it off. And I will need to drive it a few hunnert miles for sorting purposes, which probably will be hazardous adventure. It's not like I'm Dr. Clock & get the mechanical bits aligned and tight on the first or second try....
So there's a fair to good chance I'll still have this bugger circa next May.
Gotta take some pics today for the insurance company....
The silver accent stripes on those fenders is the Cat’s meowwwww!
Attachments
I always find that this kind of project seems like it will never end, there's always something that still has to be done or re-done. Then one day you realize that you are finished ! Oh, there's going to be the little tweak things here and there but that fits in the tinkering category of ownership !...........Well done Mr Ed !!...........Bruce
Pretty nice Ed!
Mr. Erickson, I want to publicly grace you with a multitude of kudos for maintaining a steady path and never wavering in dedication to this build ….well that we know of :~) You have produced a stunning build and what astounds me is your ability to engineer your way through any issue then fabricate a resolution in a craftsman like manner. Your skills are something to be proud of Ed ! It is with great honor that I bestow upon you the...….…
Limited Edition Seal of Approval !  Congratulations my friend!
Attachments
What you have done is bloody amazing, Ed.
All in your little garage.
![]()
Dude. Hero status! I love this. Those silver pinstripes are superb. Those clamshell latches look excellent, too.
Great job, Ed.
Anand
EDSNOVA: One day, you have to describe what it's like to be talented.
Ewatub posted:EDSNOVA: One day, you have to describe what it's like to be talented.
Amen!
Thanks, all. I'm humbled.
Insurance lady sent the cards today. I'll see tomorrow about getting us over to the muffler man for some final exhaustion.
Working on the interior stuff now but this weekend I'll get under there and set the ride height and alignment, then see if I can pump up the brake pedal some.
Then it's off to the DMV. Oooh, boy!
Trimming out the interior today. Here's the driver's side top rail with the end roll and the little "holder" for it. The roll gets wrapped in vinyl with a flap the extends under the rail, then gets secured with three screws through that little 1/3-round aluminum tube bit.
Before moving to the other side I decided to template all the remaining pieces and lay them out on my material.
Oh ****.
Not quite enough for the other top rail!
I've got a work-around but now hoping to find a 24 x 5-inch scrap piece. Anyone happen to have? I'd order another yard but the exclusive distributor of this material took six months to deliver the current order...
Attachments
Mufflers and tailpipe are on the car. Much quieter now.
Still needs that nifty upsidedown U hanger (where can I get one of those?), plus a repaint of the welded-on pipes (Mike, my muffler guy, redesigned the exhaust, saving some weight and weirdness in the process).
Gotta do more hydraulics bleeding after that. The clutch does not yet engage—a fact I discovered last night when, sitting in the car at the edge of my lift, with the clam raised behind me, I pressed the clutch pedal to the floor and hit the starter button with the car in first gear, rocking the clam out of its stay and slamming it down behind me. I looked and saw no damage...
Until today, when I checked it in daylight.
So we'll add that to the to-do list.
Attachments
Oh nooooo! Is that a crack I see?
Ouch! Another 1 of those 'you won't believe what happened' moments! I'm sure you'll have it fixed up in no time, Ed. Looking amazing, btw, and you're almost there!
I'd just leave it that way.
The clams in the original cars must have gotten slammed down all the time in the heat of battle.
This is just another authentic detail.
Weekend update:
Added a rear exhaust mount and test-fit some cardboard for the underpan back there. With the mufflers inboard like this it will have to be a little different than stock, but it should work.
Installed Gordon's 5-Cent Racing fuel gauge calmer-downer thingie (thanks again, @Gordon Nichols) and tested my sender with the gauge.
Bent the sender arm a bit and, using a bit of wire to manipulate it in situ (thanks @Alan Merklin) got it so it shows empty just right but with the tank full it reads just under full. I may bend it just a little more to make it read full on full and empty just a little before it's really empty.
The calmer-downer thing did not noticeably affect the swiftness of the needle's movement but I chalk that up to the kind of jerky way the sender gets moved on this test.
Did a little more welding on my beam gussets and painted the bare metal black. This photo obscures the truly atrocious spatter and blobs I made with the welder, and I'm totally OK with that.
Finished alignment today and to my surprise and joy, I was not obligated to drill or saw on the torsion arm holes. Toe in front is 1/8 inch, rear about 3/16, front camber about 1/3-1/2 degree negative on both sides, rear camber is about -1. Here's the toe measurements I got before checking the overall front-to-rear squareness.
Yesterday I wasn't sure how I would do it. Today I rummaged around the scrap pile and found an old bed frame. Set one side across the lift, snug up to the front of the front wheels. The other went behind the rear wheels....
The initial measurements were not encouraging: Almost half an inch longer on the driver's side.
The left rear wheel was already kind of tight forward in the wheel well, and some earlier toe-in measurements had left me with the impression that I was going to be out of adjustment before I got it in spec. But it turns out the slots are long enough.
Right side back 3/8 or so...
Left side forward a bit less than that:
Check toe again...
Front/rear wheel base length is maybe 1/16-inch off side to side, slightly longer on the right which maybe is good because it should bias the car to a slight left turn to counteract road crown(?).
Rear ride height is a hair more than 5.5 inches and front is about 5.65; 60 lbs fuel in front and the spare in back should bring it very close to even at 5.5 inches all around when underway.
Alignment done, I returned to the hydraulics.
Passenger front caliper may be leaking. Wiped away some and pumped the pedal, will check later for wetness. The clutch still doesn't work & I'm almost out of adjustment on the slave cylinder. No air on the bleed. I'll dig into it again tomorrow but curious to hear from fellow Spyder people running the CNC hydraulics.
Attachments
On alignment: I use jackstands and string touching the tires at hub level to set toe, front and rear. On my car the front track is a bit wider than the rear, so it does take a few minutes and some adjustment to get them straight. I don't need to tell you this, but always set camber first and toe last. Camber changes toe, but toe doesn't change camber.
On the clutch, you may need to tighten the slave a bit. Physically push the clutch cross shaft lever until you feel it touch the throwout bearing, then back off a tiny bit. That tiny bit at the slave will translate into almost an inch at the pedal. Are you using a 5/8" master and 3/4" or 7/8" slave? What is your pedal/MC pivot ratio.


