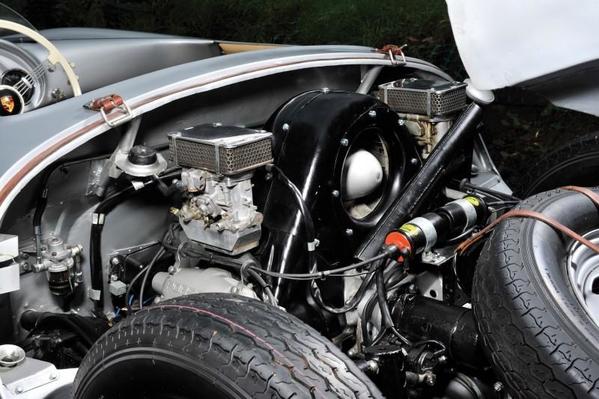
Like I said before, Huge details.
Just amazing Ed. Very cool.
Incredible, Ed. 👍👍
Ray, as you know, in the 550, the flux capacitor is not period-correct. You're thinking of the 550A.
Here's the very long, extremely wordy, lavishly illustrated story of why and how I made those manifolds.
Holly S... ED super job! So cool![]()
Pete
Ed I think Disney has some set and prop building for you if you give up writing. ![]()
Exactly.
At some point, I do plan to start building the actually-functional parts of this car.
"Fabricator Ed" wrote: " if you know what a working Autopulse sounds like, you’ll know that ain’t them."
Well, yeah, but you've already (wisely) bought that Carter-style rotary pump. You could have bought a couple (1 in series for redundancy) Facet clicky-clack pumps that would have made the same clicking racket that the originals did!
Then you would need a really loud exhaust to be heard over the noise of the Facets...
You guys are hilarious but I have to admit this very humiliating fact: I actually did ponder buying some kind of 10-second timer thing and wiring that in series to the 12-volt Autopulse so when I turn the key/pull the "pump" switch the thing would make the clacky-clack noise.
We rightly complain here all the time about shoddy Chinese knock-offs and such, but one thing this little endeavor has brought home (again) is the sheer betterness of new stuff. Each of those Autopulse 500s weighs about as much as a loaded Colt 45. And they leaked notoriously. And, at the time, these were aircraft parts.
The Carter, by contrast, weighs as much as an empty water pistol, costs about the same and reportedly never leaks. You look at stuff like this and wonder how anyone managed to hotrod anything back in the day.
Those guys were doing 180 mph down the Mulsanne driving absolute rubbish: 600-lb straight-sixes lit by Lucas electrics. Bloody drum brakes! The mind just boggles.
...and big gonads too ~
And how many ended up DNF, or worse?
That's back when racing was dangerous and sex was safe. Now, it's the other way.
Auto-pulse?? WTF?? I am completely blown away by this. Unobtainium = cast aluminum -- what could be so hard? I gotta believe that you could start from scratch, and not have to spend 8,000 bucks to do it. But what do I know?? If you have a real one, laser scan it, rapid prototype the pattern, sand casting, or whatever, pump 'em out $20 each. I mean, they did not spend that kind of money to make the real ones, albeit they did so for mass (1,000s?) market. And they did not have computers.
Ed, the advice about the Disney shop is good. I could see you running the shop in five years.
Kelly I think the $8k price is mostly in the working pumps, which are fiddly and very old. The copper(?!) bellows at the center of them are interesting. There are dozens of other parts in there too.
You're right about the manifolds though. If I were a better man I'd make wax copies of my bogus ones and then sand-cast them out of aluminum and tap them for functionality. Heck, maybe it'll even happen.
You're probably right about the pumps themselves too. There appears to be a lot of P-car pricing at work here.
Well, one-off, all parts made by hand, maybe $8k of time and materials. So here is a thought, if not already posted. If you made the canisters as decribed, or could somehow use the ones you have, gut them, and then find a modren (obviously pretty small) FP that would fit inside, well wouldn't that be the cat's pajamas?
And yes, we guys -- mostly the other guys -- ARE indeed hilarious. But You Ed, you are incredible. Whacking away with croquet mallets and what not, and making a car. Holy Sheet Metal, Batman, look what that boy is doing!!
I don't know about you, but even using hard metal lines, I'd prefer not to have a fuel pump sitting next to my left leg! I don't even like the steel line running through down the center tunnel!
Ed, great work, keep it coming!
Thanks, Danny. I've thought of that but finally figured the fuel pump's gotta be somewhere, and I think I've got a safe and practical design laid out.
The plan is for steel lines down the driver's side, as original, through the rocker box and around to the firewall. The pump will be at about the lowest point in the system so it should like that—I'm told they like to "push" and not "pull." I plan to put a fuel cutoff right before the filter to facilitate changing that, and in-all it should be more accessible than the typical spot just under the tank up front, where it's easily forgotten.
Could it leak? Sure. Would a leak there be worse than one above the beam? I don't think so. First of all, you'd notice it much sooner.
There's to be no carpet in front of the bulkhead, and no vinyl either, so a leak there would be easy to clean.
Now, the rocker-boxed fuel line is indeed more vulnerable than a centered line in the event of a driver's side T-bone event. But in a Beck frame, such an accident would likely result in a closed-casket scenario anyway. And, even so, the fuel line would probably not rupture, given the looped rubber line over the pumps.
So that's how it's gonna be on this car.
And I'm also going to tempt fate by installing the correct glass bowl fuel/water separator in the correct spot on the firewall, since I have one and they look cool. Stan's already warned me about this folly, but I'm putting it in, and if it doesn't leak, it's staying put.
(If it does leak, it might still stay put, albeit bypassed).
We listen to Stan, because what else could we do, he is the Ruler of Stanistan, and all who hear must at least listen. But we do not always obey, because we are mere, sinful mortals, and well . . .
Your paean (?) to authenticity is going to be outrageous. Do not give up the dream. at least not until after the fifth try, it still don't work. I am learning so much here . . .
It's gonna be something, for sure. I don't know exactly what yet.
There it is, lower left. The bracket looks easy to make and, as I said, the filter thingie came in a box with the rest of the stuff. Missing the banjo fittings but probably just as well to bend up some L fittings . . .
Attachments
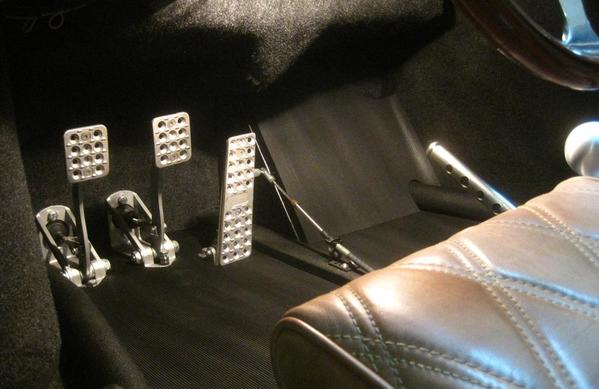
Stood one of the pedals in the car and set the seat in to measure height and depth.
Time to start putting the mf together.
Attachments
Does that hump, where the drain for the gas tank is, interfere with using the gas pedal? Mine does, that's why I have to drive shoeless on that foot.
I'd love to remove mine one day, but this is something that needs to be done at your stage of the build, not when the car's done like mine. I was thinking the removal will coincide with a custom gas tank. I can dream....
I did build a foot rest for the passenger. I made mine out of wood and covered it in some ribbed vinyl and black paint. I also made some floor mats of the vinyl. I do have plans on making one from aluminum. My original plan was to hide a small electric heater behind it, or install the heater behind the front beam and use the space behind the foot rest for hot air plumbing.
Attachments
Carlos: I know you're looking for a heater physically smaller than my BN2 heater, so check the dimensions for an Airtronic B2 here:
https://www.eberspacher.com/pr...ng/airtronic-d2.html
The Webasto is about the same size (323*120*121mm ![]() and I keep seeing them on ebay for under $400 new, but at that price, it is undoubtedly a Chinese knock-off.
and I keep seeing them on ebay for under $400 new, but at that price, it is undoubtedly a Chinese knock-off.
I've been all over that site, and it looks like my only choice. I wouldn't go Chinese for something that can be a fire bomb in a plastic car. I just need to get the funding. I have a Chinese distributor that I want to replace first.
Carlos, your pedals look great and that pic is helpful. Thanks.
Yes, I think I want to cut that scrotal intrusion out. It interferes with my feet and I'm a size 8. I don't know how any normal-sized American man could drive this type of car with that thing there.
My neighbor has had my gas tank now for going on six months. He welded a plate on top so I can put the filler neck in the right spot, but last time I asked him about it he said he wasn't done. I guess it's about time to get it back.
Hoping I can fit it in, check clearance and put a fuel outlet bung up near the front, then cut out any unneeded stalagmite.
Then I can glass it back, and glass over my gauge holes at the same time.
Meantime it's on to the steering column. Apparently there'll be some trimming.
I might have to get out the instruction manual...
Attachments
Made some seat track supports/floor reinforcements today.
These will be drilled for lightness (of course!) and welded in. The seat adjuster studs bolt through them. I made holes in the floor for socket access and I have plugs so they'll end up about flush with the bottom of the car.
These and the adjuster tracks will raise the seat bottoms off the floor about 1 7/8 inches. There'll be 4-5 inches of adjustment front to back, and room to shim the front or back of the seats up about 3/4 of an inch. To go lower you'll have to cut out these bars and/or lose the seat tracks.
It was interesting to note that the seats that came with the car are different sizes. One (arbitrarily I'm using it as the driver's side) is about 12 1/2 inches wide across the bottom, the other is 11. That's some serious Jet Blue-sized seating right there!
Attachments
Attachments
THAT's a buncha drillin'......
Gordon Nichols posted:The Webasto is about the same size (323*120*121mm 
and I keep seeing them on ebay for under $400 new, but at that price, it is undoubtedly a Chinese knock-off.
Yes, Gordon, much more likely $1000 for petrol, although the ones that run on diesel can be had for about $750 pretty regularly. I personally am not buying a Russian,Turkish, or Chinese knockoff. The real deal Webasto is a quality piece, and about $500 beans cheaper than a comparable Espar. I was honestly not expecting how nice the heater is. Every part was packaged and labeled clearly, and the wiring harness is clearly German. Instructions are VERY clear and concise. And I can get replacement parts here in the USA if need be. Doubtful spare parts on knockoffs.
Carlos $840 free shipping:
https://www.ebay.com/itm/WEBAS...0677%26rk%3D1%26rkt% 3D30%26sd%3D122808557292&_trksid=p2385738.c100677.m4598
I bought T and ducting and outlets from Espar of Michigan, and ended up around $1000 all-in.
Ed, it's really coming together! Yeah, some seats are different L and R.
Attachments
Ordered the correct tapered Porsche pedal covers. When they get here, I'll trim these to fit those. Otherwise, we're down to a little prep and paint.
Next up: the elusive gas pedal. I think I understand the design...
Attachments
Will we be seeing this at Carlisle.
We are all hoping so. ![]()
I certainly hope so. This is a work of art. 👍
I think someone posted it in Facebook when your doing VROOM VROOM with some giggles. Just kidding 👍😎
Anyone on this forum who hasn't sat in their car and said, "Vroom, vroom!!", at least once is a liar. And not just a liar but a d@mn liar.


