
I've head plenty of days like that recently with my wifey's coupe build. It's taken me three months to finally get a hard brake pedal. Really? Three months? It ultimately came down to replacing the entire front disc brake kit (EMPI was the first kit - yes, I know about EMPI brand, but that is what Greg gave me and what he will be getting back). Once I switched it out, I had to make two new hard lines (which I've mastered doing) and FINALLY - it worked.

There were several beers and Jameson involved the past three months...

The wiper motor works and I'm only two or three wires from sorting it to the switch. What a pia though.IMG_1308

Took a break from that and dry fit my windshield. Drilled the holes, cinched it up loose without the tensioning rod and started CAD-ing up the side screens.IMG_1324

Question: are there rubber gaskets or something to fit under the windshield posts? Looks like there ought to be and I'd rather buy than make 'em if they're not NLA. Someone chime in please.

Also, excellent news today from SMS: a UPS tracking number for my interior material. Supposedly it's coming tomorrow, a mere six months after I ordered it. 

Attachments

Images (2)
  • IMG_1308
  • IMG_1324
Last edited by edsnova

Motor: Low High Part and Ground...tap the wires quickly with low amp setting from a battery charger and see how it moves 


From memory ..I think,

  52a low   53b  high   53 to 12v hot ( for park )    31b 12v in    31 ground

Windshield posts, in the past I made rubber gaskets, now I just squeeze a ring of black latex caulk around the post hole in the body, secure the post and wipe away the excess caulk

I recognize those side curtains templates from Merklin Motor Works:~)

Last edited by Alan Merklin

Thanks, guys.

Alan: my wiper motor has no markings for 52a, etc. Just wires that went into a plug you're supposed to plug into the one on you Super beetle. hence the hassle. I got high and low power, and the ground, and I have to ground the body again. There's also a blue wire that kind of goes off somewhere. probably for a washer motor? And then two in the bundle that don't seem to do anything. I can ground them, leave them loose, twist them together or touch them to the + battery terminal. Nothing happens whatever I do with them...

But I'll sort it. It's just a dang wiper!

Per the template: I just made those. I should have looked in my pile of Merklin Magic (TM). 

New blog to catch up on a lot of not-posting.

This is basic half but this is what I do with wiper motors when there are no terminal numbers . 

Using the lowest amp setting on a battery charger I clamp charger negative to the wiper motor housing .....stay with me. 

Then I very quickly tap against one wire at a time until I get movement, if I do then go to another wire until I find the one that moves then stops ( mark that as your constant 12v for the park position. Now go back to find two wires that will energize the motor..One will move it faster than the other  ( mark low and high wires)    REmove the black off the motor housing. Lastly keep your red from the battery charger to either the high or low wire and then take the battery charger black and tap that against one of the couple remaining wires until you get motor movement ( this is your ground wire)........ It's now beer thirty ~

Last edited by Alan Merklin

I have received five yards of "Barberpole" vinyl from SMS. Just under six months after I ordered it.

This is the stuff that was in Spyders in the day. Called my upholsterer for a long-delayed appointment & hope to get the seats, seat heaters and material over to him this week if possible. 

Also handed off my gas tank to a machinist buddy. He couldn't drill the stainless welds either so he plans to cut the whole thing out and mill a plug/flange to fit the hole. So, fingers crossed that'll get it.

Cut my shorty Troy-inspired cruisin'/Ralleye side windows tonight.

IMG_1332

I've got the hardware to make them fit and now just have to get the gaskets from McMaster Carr. Thinking this should do it. But would like advice.

I've got more Lexan to make the taller side windows but I'll wait until I have a top before I cut those.

I'll finish up the wiper system this weekend I think. Gonna go with the super skinny early wipers to make them look more like they might have come with the car. 

Attachments

Images (1)
  • IMG_1332

Sorry I haven't been updating. The lift broke last week. Got a seal kit for the hydraulic cylinder and just pulled that heavy bugger out of the lift.

Meanwhile I got my gas tank filler sorted, I think. The guy I sold Bridget's old engine to a few years ago thinks I gave him such a great deal that he owes me some work. And he's a machinist. I said "naw, man" but he insisted and so I felt cornered into letting him solve my problem.

(BTW this is the guy who built the fake Lambo I posted here a few weeks ago. He also made parts for police and Coast Guard helicopters).

I think we're ready for final welding on this. Then I can finally Por-15 the tank and be done with that little adventure.

IMG_1378IMG_1380IMG_1382IMG_1383IMG_1384IMG_1387


Attachments

Images (6)
  • IMG_1378
  • IMG_1380
  • IMG_1382
  • IMG_1383
  • IMG_1384
  • IMG_1387

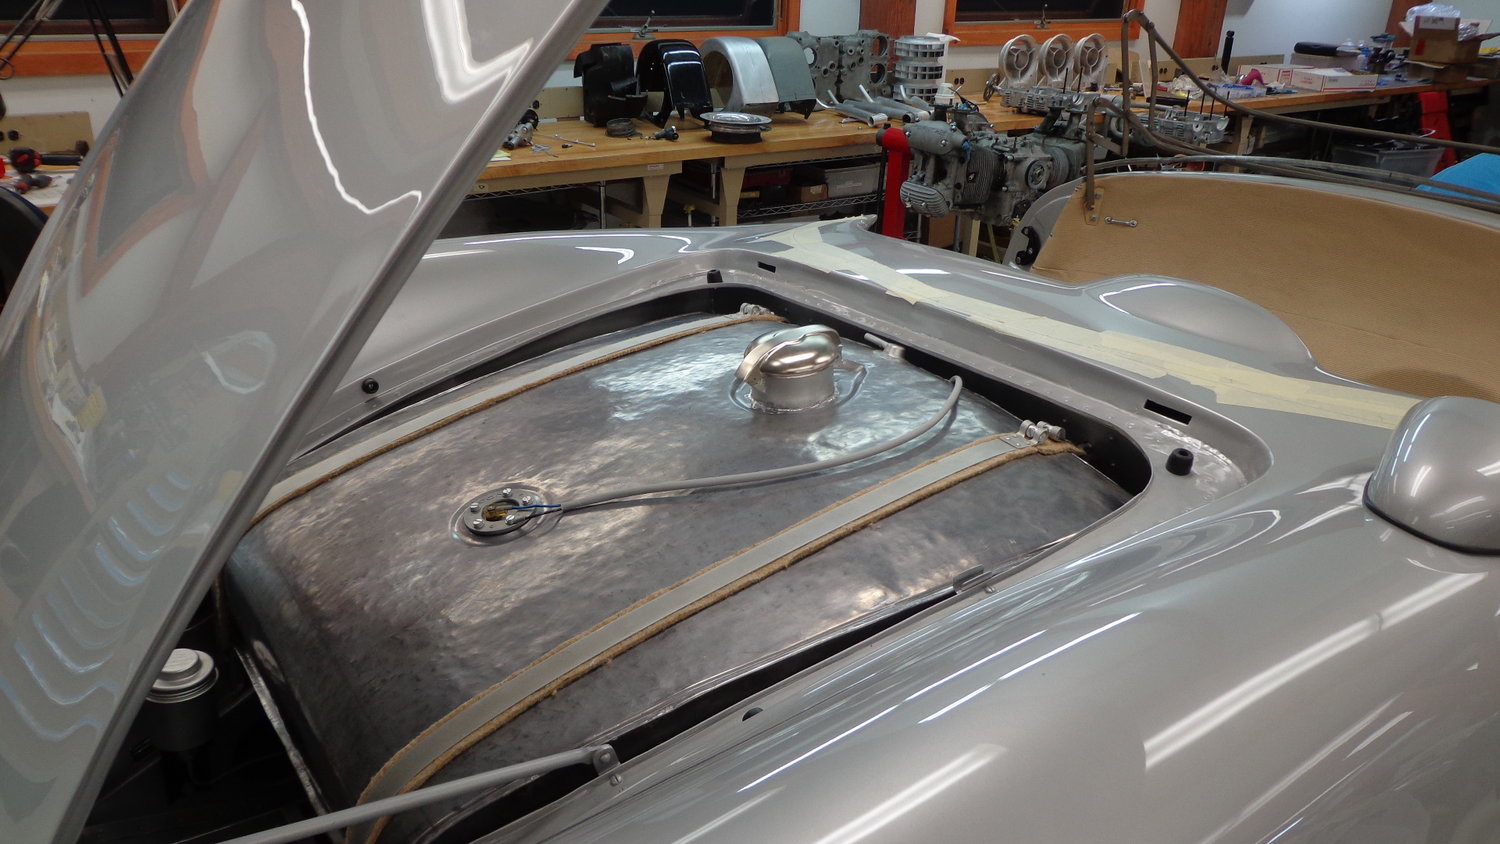
Yep, that's what I'm shooting for, Anand. I hop you don't mind if I steal those pics for my upholsterer.

In other news, I got my lift cylinder out and apart, and I'm pretty pissed off. I noticed something odd last night when I set the thing in the vices:

IMG_1414

That's the spot the fluid has been leaking from, right at the top of the tube. The hole faces up so it's out of sight, about a quarter inch from the bottom of the ramp. You can't see it without removing the cylinder.

I know what you're thinking. You're thinking, "Hey. Ed, that's just a threaded hole. Shouldn't there be some kind of one-way check valve screwed into it?" At least, that's what I was thinking.

I set that thought aside while figuring out how to get the thing apart. Managed that feat about a half hour ago, and

IMG_1419IMG_1420

Wow. Kinda gunky innit? Let's clean off that gunk and see what we have here....

IMG_1422IMG_1423IMG_1424

Rust. How about that? Kind of surprising given how young this thing is, and it's never been wet and...oh but wait. It's had a hole in it the whole time I've owned it. Plenty opportunity for some lovely condensation—to say nothing of the shop dust I've been making—to get in there.

I checked the innerwebs and guess what? Turns out there is supposed to be a pressure relief valve. Something like this.

I know what you're thinking though. You're thinking "well, that rust isn't gonna hurt nothing. Now, if the cylinder walls were pitted, THEN you'd have some problems." Right? 

So why don't we shine a light in this ol' tube here and see, shall we?

IMG_1421

Yep.

So now I've got something of a dilemma. I could rinse the cylinder out with a mild acid, make a big copper wool Q-tip out of PVC and clean it with that, flush it out with water, hose it down with WD 40, put new seals on it and see what I got.

OR I could raise holy Hell with Derek Weaver on Monday because this **** is bullshit.

What would youse guys do?

Attachments

Images (7)
  • IMG_1414
  • IMG_1419
  • IMG_1420
  • IMG_1422
  • IMG_1423
  • IMG_1424
  • IMG_1421

Thanks guys. Yeah, Derek Weaver, Direct Lift Pro Park 8, purchased new just about two years ago. They were good on my first call. The unit shipped missing a one or two of the big hanger bolts for the ramps. I was able to assemble it with the almost-as-long bolts that shipped with the steel "crate" they used to ship it, and swapping those out for the right ones a week later was painless. 

When it leaked the first time a few months ago I called them and was told it could be normal. A little juice often gets past the seals when you first assemble it, yadda yadda. I wanted good news so I cleared it (raise it to the max with no load) and carried on.

The bad leaks a couple weeks ago were much worse than the first one, and the ramps weren't very high. That's when I called again. This time they're like "you need new seals." I was all like "Fair enough, you should give them to me." They answered, "your warranty on the hydraulics is one year."

So I paid $110 or something for the seal kit, grudgingly, thinking why should the seals fail so quickly on a little-used lift that seldom has much weight on it?

And now I know. 

The old seals are very clearly abraided flat where they ran along the now rusted bottom of the tube. 

So yeah DW gets a pleasant call tomorrow and they will be given the opportunity to send me, at no charge, a new cylinder. 

But if they decline I'm not sure what I can do. It's maybe a $600-$800 part retail, I guess (so far I can't find the exact one for sale), so there's no way I win with a lawsuit. 

I suppose I could just clean it out best I can, buy a proper one-way pressure relief valve (also not apparently available on the DW site), muddle on and bad-mouth the company forever but that's not a real palatable option either. 

Guess we'll see how they do. 

Ed,

In your case, Maryland Small Claims Court would be a viable option, with its $5000 limitations.  You may want to mention to the maker that you hope you can avoid the above, but you will exercise all legal options if you can't work out a deal that is satisfactory to you.

Suing a corp. has some specific conditions, but nothing you can't overcome.  PM me for more info if needed.

Thanks, all. Jim, as a function of my current job I visit four different courthouses every weekday. I know I could file but I'd hate to have to; never yet sued anyone or been sued and I like it that way. I will be contacting you however if this goes wrong. Ray: yes, me too. I've written many a persuasive letter over the years, and so far almost everyone I've had to contact has been reasonable. Greg: thanks very much for your kind offer. Don't dig that thing out just yet; instead please use the time to attach parts to your Speedster and wait for my contact.

I just emailed DW my illustrated story. I'll follow-up by phone tomorrow and hopefully we can sort it.

@edsnova Let me know if you need any more info -- I'll send you as many pictures as you'll tolerate!

@chines1 has done a really nice job with these seats. We've put a slightly thicker cushion like the speedster on the bottom (it isn't as thick as it looks in this photo). Carey's in house upholsterer, Bill, is unreal. He's got an original Pfaff sewing machine too. It's pretty cool. 

IMG_0076IMG_1781

Attachments

Images (2)
  • IMG_0076
  • IMG_1781

Arjani, thanks. I wonder how they made the back panel on it. My guy suggested using carpet & I figured that's fine, but what've you got going?

All: Derek Weaver says Direct Lift (the mfg) is not gonna give me anything: "If you would like to replace your cylinder the part # is

YG02-9100G                  633.40

Freight to zip 21085 is      87.63
"If you don't replace the cylinder, I would check locally to see if you could have the cylinder honed before rebuilding it."
 
So, I'm bagged for $700+ after two year's light use of a $2,200 item. Not too cool.
 
Best I can figure is I should have stored the lift at max-up during the winter, so the tube would be filled with oil instead of air and water condensate. I'm gonna review my owner's manual and look around the inter tubes to see how common my complaint is.
 
Meanwhile we'll see if my local lift guy thinks a hone job is in his wheelhouse, and how many smakeroos that might be.


Update: The lift broke and I ended up honing out the hydraulic cylinder before replacing the seals, plugging the breather port on top and tapping a new port underneath which is now plumbed back into the oil tank so that any future leaks just return to the source and any air getting into the tube is from the tank, five feet off the floor, instead of two inches from the concrete. PITA, as they say, but it seems to work now.

Gas tank is sealed with POR 15, the few pinholes in the exterior welds (which did not leak) were epoxied, and the tank is primed and painted matte black for now

Yes.

Here's the cylinder back in, with the hydraulic line reattached.

IMG_1466

Here's the new drain line on the other end. It's 180 degrees and about two inches inboard from the old one, which was drilled into the rough iron "cap" that's welded to the end of the pipe and carries the big holding pin (not visible) that anchors the unit to the ramp.

I tried to do this one the same way at first, but trying to drill an L-shaped hole into that stuff cost me a few drill bits. After the second one broke off below the hole I just called it a day, filled it with epoxy and started over.

I tapped the new hole just at the outside edge of that weldment, and had to dig around for adaptors to get the elbow with that quarter-inch hose to screw in with a low profile so the ramp won't land on it when it goes to the floor.IMG_1467

strung the hose to a spot near the main hose and drilled a hole, added a grommet, and...IMG_1468

Taped (and then zip-tied) the two hoses together, and drilled another little hole in the top of the oil tank. The drain hose extends in like an inch or so. You don't want it down in the oil, or the cylinder will suck oil into the "air" side when the lift is lowered.IMG_1469

Lift is back as good as new. Better, probably—except there's some pitting inside the cylinder I couldn't do anything much about.

IMG_1472

Decided to get after the front inner fenders today. Smoothed out the "lip" where the body meets it and skimmed the rough fiberglass mesh and chopped areas.

IMG_1473

IMG_1476

Another skim coat or two, a bit of sandpaper and this part will be ready to prime. Still pondering whether to close off the inners around the shock mounts like Arjani did. Leaning toward not.

IMG_1474

Attachments

Images (8)
  • IMG_1466
  • IMG_1467
  • IMG_1468
  • IMG_1469
  • IMG_1472
  • IMG_1473
  • IMG_1476
  • IMG_1474

Stuff I got is branded "Custom Coat." It's a urethane 2-part and the hardener is from UPol. It's got some texture and I plan to at least get it inside the tops of the fenders to keep any rock chips from spider cracking it. There will be some in the frunk too and inside the body voids along both sides behind the seats but in front of the clam shell. 

We'll see how it lays down then figure how much to put where. 

It's also gonna be tinted silver, the idea being that anywhere that is not covered with French Blue paint will reflect light in a manner similar to aluminum. 

Inside of front fender (per Spyder Factory):

Looks to me like a little roughness in there is "period-correct."

Fuel tank is very big and made of hammered steel.Hammer-tone paint is a start...

IMG_1516...but we'll see if there's something that can be made to make it look better.

IMG_1487

I like how they painted the gear ratios on the trans so the pit crew would always know what was what. That's an easy one!

IMG_1514


Attachments

Images (3)
  • IMG_1516
  • IMG_1514
  • IMG_1487
Last edited by edsnova

Broke out the old-school spray gun for the primer and bed liner. Got it done but, in retrospect, a modern ultra-cheep HPLV gun from Harbor Freight or somewhere probably would have worked better. The #30 tip on the '60s-era Devilbiss seemed a bit miserly with the coverage.... 

But anyway.

IMG_1530IMG_1532IMG_1535IMG_1536

It's hard to see the silver color of the bed liner in some of these pics, and the texture is very slight—it's a bit like 120-grit sandpaper.

IMG_1537IMG_1538IMG_1540My rough finish is very apparent in the driver's fender well, where these wheel marks look like hammer marks. You can't even see the silver in this shot, let alone the roughness of the coating, but my tastefully-sloppy body work shines right through!

IMG_1541

(again, for reference, Spyder Factory's meticulous high-buck all-aluminum recreation):

As this product is a 2-part urethane, I believe it can be top-coated with my body-color paint directly, but will double-check before trying that. 

All-in-all a good learning day

Attachments

Images (8)
  • IMG_1530
  • IMG_1532
  • IMG_1535
  • IMG_1536
  • IMG_1537
  • IMG_1538
  • IMG_1540
  • IMG_1541

Still fettling those last couple of inner panels. Remade one of them today, testing to see if the clam latches can still be installed with them in place. drilling for wires and such to go through.

I also re-bent my middle fuel line to go inside the frame rail instead of outside. Turns out that's the correct routing on the original car.

IMG_1589

These will be clamped to the tubing.

Kelly, come on by. I'll beer ya.


Attachments

Images (1)
  • IMG_1589


I actually don't mind wiring in new stuff.

From figuring out what needs to be done electrically, through laying it out to be neat and unobtrusive, to the actual soldering and connecting, it can all be kind of satisfying and almost therapeutic in a way. Especially if it all lights up as intended when you finally throw the switch.

It's untangling and making sense of the mess that someone else has created that can bring tears to a grown man.


Last edited by Sacto Mitch

Thanks, guys. This is a complete wire harness from Thunder Ranch which came with the kit. It's supposedly tested good but also has some wonky switch gear I'll need to change out and of course the gauges I have are a little different and then there's the Accusump and some other details. So it's sort of half way between DIY and sorting-out the PO's mess. 

Ray I'm wrapping these with a nylon mesh loom that sort of snaps around the wire bundle and then stays put. Easily removable and similar to the OG stuff, though it's the wrong material and black instead of off-white—which I think will look better on my firewall and lashed to my frame rails anyway so I'm leaving it that color.

Also, zip ties. 

Once I get the back end roughed-in I'll get under the dash, and yeah, there will be redundant grounds and grounding lugs in the car. The - side of the battery is getting its own wire all the way back.

With the wires in I'll move on to final body work, placing the mirror, cinching up the windshield and testing the wipers, drilling for the emblems, block sanding, before taking it all apart for paint.

(There are one or two more WTF detail projects I'm planning to do before final-final reassembly, but both could as easily be done after paint, so...)

Sacto has nailed it wrt wiring.  Back in school us MEs had to take some EE classes and labs, and I was the only one on my team that could take the wiring sketches for the lab that we dreamed up, and actually hook the shyt up right.  As to the Speedster, I have lived the nightmare of having to deal with what JPS scrabbled together under my dash. Wires are either white or red, and that's about it. One time, Dealing with reworking my tach so it actually functioned like a tach, when putting all back, I switched the alternator light wire with the instrument illumination wire. Was a pretty big mystery for a while trying to figure out why the dashlights would dim and brighten when running at night and the battery would run down when driving during the day.  You figure it out.

Noticed just the slightest bit of slop in the homemade pedal action and the copper pipe bearing/bushings still had the tiny bit of swage on the end from the tubing cutter, which made me think they'd tend to get sloppier over time. So I bought these nylon bearings from McMaster-Carr and spent some of the weekend re-bushing my pedal set to make them better. 

IMG_1634IMG_1636IMG_1637IMG_1638IMG_1639

Did some similar cleanup on the gas pedal action. Re-painted the left two, added a lil grease and popped the covers on, then installed them in the car. 

Ready for final adjustments.

IMG_1657IMG_1658IMG_1659

Now they're smoove, baby! Back in the car so I can make the floating floor pattern and knock that chore off my to-do list.

Attachments

Images (8)
  • IMG_1634
  • IMG_1636
  • IMG_1637
  • IMG_1638
  • IMG_1639
  • IMG_1657
  • IMG_1658
  • IMG_1659

Thanks! It's close. Might need to shift the pattern about 3/8 to the left.

Frazoo (re the plastic bushing/bearings) These are McMaster-Carr PN 1281N19 rated at 110 pounds at 40 rpm "dynamic radial load capacity," which I have no idea what that means, but 110 pounds sounded like enough for this application.

I bought them to fill the very small gap between the ID of my copper pipe bush and the OD of the bolt/shaft that the pedal rides on, and they do that very nicely. They look a lot like the ones I pulled out of my '67 Nova's pedal set when I changed over from the Powerglide to a manual transmission, and those were vintage 1967 when I looked at them in 1982 and put them back (with a little grease), and they were still working fine in the car when I sold it in 2003.

The EMPI pedal set I scavenged to make these features a steel-on-steel pivot hinge—no bearing or bushing and no grease fitting. I thought my copper idea (plus grease) was an improvement on that, and the new nylon bushings would improve it still more.

And that's about all I know about that.... so:

If you or anyone here knows something relevant to this install and application about the forces a driver puts on brake and clutch pedals, please chime in publicly or privately. I'm keen to learn new things, and  if it's necessary, I'd much rather re-do this now than hear gripes two years from now from some dude who paid me a lot of money.

Re "rats nest:" That's a fresh wire harness with most (not all) of the wires already labeled. But you're right, it's still going to be a pita.

Last edited by edsnova

Well, my first thought was “Why not bronze bushings, drilled for grease fittings?  They would last Fo-Evah! 

But then you wrote that Chevy used Nylon bushings on their pedal pivots and those worked OK, so what the hey?  I remember some REALLY beefy clutch pedal effort in a lot of those old Chebys and if they survived, then your Spyder (oops....Can I call it that?) should be just fine.

Rave On, Spydah Man!

Oh, and don’t listen to ALB’s potential advice on that floating floor thingie-jingie.   He’ll try tah get’cha tah drill it fullah holes, fah sure.

(Sorry, Al...)

Last edited by Gordon Nichols

Upholsterer says the seats are coming along.

DSCF4265

Meanwhile I've got the floating floor mostly assembled. That's just 1/4-inch birch ply so I stained it, painted the edges then sealed it on all sides with Pelucid

IMG_1695

before gluing and screwing the purlins to it. They're seasoned, treated pine so all done shrinking. They got a coat of Pelucid as well, and then one of Minwax Helmsman's spar urethane. I also put a reinforcement "plate" of additional 1/4-inch plywood under the driver's heel. 

IMG_1692IMG_1694

Attachments

Images (4)
  • DSCF4265
  • IMG_1692
  • IMG_1694
  • IMG_1695

Amazon. 

Rubber-Cal 03_167_W_FR_04 Fine Rib Corrugated Rubber Floor Mats, 1/8" Thick x 3' x 4' Runners, Black

(I know it's not exactly correct; the original cars had vinyl down there, basically the same as the barber pole stuff on most of the seats. But this is pretty close and it's made to have feet and shoes on it alla time so).

Last edited by edsnova

Installed. I still gotta rivet in a couple of little tabs on the front firewall for this to slide under, and I plan to drill a couple holes through the rear corners, tap through the floor with rivet-nuts and use black, allen-head furniture bolts to cinch it down. But...later.

IMG_1704IMG_1705

It's not a perfect replica, but not a bad likeness—if I do say so my own self—for an amateur making stuff out of junk. Here's 550-0056's pedals (courtesy Type 550.com)

0056 pedals

And mine:

this car pedals

Attachments

Images (4)
  • IMG_1704
  • IMG_1705
  • this car pedals
  • 0056 pedals
Post Content
×
×
×
×
Link copied to your clipboard.
×
×