"Nope, what y'all are lookin' at is a 8 FOOT sub-floor space, an' that's almost totally filled up with old cables" (as he gives Mr. Pentagon a cold look).  "When they reconfigure any-thang they just cut off the connector ends of the cables, leave 'em lyin' there and drag new cables through on top for the new stuff.  Someday, their Devil's payment's gonna come due and they'll have to pay someone to remove all those cables and some guys're gonna sell all-a them cables for the copper value and they gonna make a killin".

So there it is........   Your Gum-mint, hard at work.

Similar to an episode early on in my career. I was an installation supervisor at a company that did 90% of its work for the RBOCs (regional Bell operating companies). New Jersey bell hired us to mine out abandoned power cable from overhead cable racks (think cable tray, but everything is laced instead of ty-wrapped) in a block-long multi-story, decades-old central office in Newark. I placed six guys on that job for 9 months on T&E (time & expenses). They mined out I don't recall how many tractor-trailer loads full of scrap insulated stranded copper cable, most of it 750 MCM (about an inch in diameter with the jacket removed) from 80+ years of abandoning old cable in place. In some spots, the abandoned cable was piled over 3' thick.  It's a wonder the 5/8" anchors supporting the threaded rod which the cable racks hung from didn't pull out of the structure.  


You know, IIRC 750 MCM 1" diameter cable weighs about 3/4's pound per foot which, at today's copper scrap pricing (I just looked it up) would be about $2.00 PER FOOT!

A trailer container is 48 feet long so a single length of cable would bring $96 bucks at scrap prices.  Multiply that by 100 cables across the floor for $960 per layer and 100 layers high and the copper scrap price alone, per trailer is around $96,000  

Holy Moly!

Most companies (especially RBOCs) usually depreciate stuff over 12-ish years so they've already written it all off, so they pay a contractor to remove it after 20-30 years and only recently have been getting a cut of the scrap prices - They used to just give it all to the removal contractor.

But enough of how the phone company (and many others) spend the monthly payment you send to them.

Let's get back to Ed's Spyder sorting.

Sorry, Ed!

Last edited by Gordon Nichols

Thank you, Gordon. 

A few weeks ago when I did the airport photo run my neighbor followed on his bike and told me he thought the car was "crabbing." The front and rear wheels are within about 1/16 inch of the same distance apart (a smidge longer on the driver's side) so it should be pretty straight, I told him. Front track is a little wider than the back, so maybe he was seeing that? 

The car "felt" straight.

Still. I decided to center the car on the lift and run strings to measure off of to re-check toe and camber. My camber measurements were as I'd left them. A little more on the passenger than driver's rear to account for the driver's weight. 

IMG_6456

I did find that my track width, as measured from the outsides of the tires, was virtually identical front to back. So my neighbor was right.

Rear toe-in measured 3/8", almost all of it on the driver's side. The rear end of the car was constantly making a wide right turn. 

That meant setting the driver's rear wheel backward a little—with the salutatory effect of centering it better in the wheel well. I set it back around 3/16" and the new measure was 1/8 toe-in with a very slight LEFT turn. As making these adjustments requires loosening the spring plate bolts and then rocking the car/turning the tire until their relative positions diverge—an operation difficult to achieve with micrometer precision—I decided to leave well enough alone.

This also makes the left wheel base of the car about 1/4 inch longer than the right. 

?

Front toe measured zero+, or maybe just 1/16" in. I assume that's because I raised the front a little—toe seems to go out when the wheels go down and in when they go up. So we'll see if this causes any issues at high speeds in crosswinds and adjust later as needed. So far, probably not.

Took it for a 10-mile spin: very nice. The steering wheel is now maybe one spline off center, but the car feels livelier without being squirrely. Tracks and stops true. Spun it up to 5500 in second* to test the valve cover gaskets and such, and checked around the engine for oil leaks when I got home. Looks like no drips above the underpan now. And I have a new sump gasket and hardware to fix the one stud leaking under there.

Hated to do it, but...front license plate bracket.

IMG_6460IMG_6464

This attaches via the last two (or probably any two) of the top grille screws to put the plate low and on the left. I drilled for lightness and painted it body color to keep it inconspicuous as possible, though still best to delete it I think.

This car is for sale, if anyone is interested.

IMG_6457

--

*A word on the engine: it is loud, but very pleasant to hear. Quite "authentic" right now in its low RPM softness and hesitancy. Even in its present state of tune it feels like it's rarin' to go above 4000, and very eager still at 5500. I feel like once I get a proper spark map dialed in and then tweak the air-fuel ratios it should be even better.


Attachments

Images (4)
  • IMG_6457
  • IMG_6456
  • IMG_6460
  • IMG_6464

Yeah, not going to list it until the final tuning is done but open to offers.

Turns out I can't program the Black Box ignition module without a laptop running Windows 7 or previous...so I've got my bro-in-law setting up an old box to send me.

Hope to get that sorted before the weather goes away. And after that it's onto the Webers, which seem to work pretty well after Carey & co. went through them. But the wideband will tell the tale.

I figure it'll be spring before I can list. Not in a big hurry.

Short update: test-drive yesterday including some highway felt very good. No more tire rubbing in the fenders on sharp, fast turns; stable at speed, just a subtle hint of cowl shake at 60 mph. Revved it up to 6k in second gear getting on the beltway and the engine felt and sounded very willing to do more.

On the way home I pulled into the landfill and drove onto the scale, which read 1720 with about 2/3-3/4 of a tank of gas. Weighed myself and my briefcase when I got home: 171.

So, 1549 pounds wet/empty. Seems about right.

Idled down to Mariner Park to try a couple pics, but it was pretty busy down there & a trio of students were trying to rehearse their lines for a Shakespeare play so I didn't stay long.

IMG_6471IMG_6479

Checked the engine: no oil drips apparent. Everything in order.

Attachments

Images (2)
  • IMG_6471
  • IMG_6479
Last edited by edsnova

From one Journalist to another (through me), a genuine "Tip 'O the Hatlo Hat" from Jimmy Hatlo, Illustrator for the Hearst Syndicate newspapers and one who brightened everyone's day for many years, just as you have done with your Blog and posts here.  Now we can all watch Merklin the Magician build his Dune Buggy.....  But it won't be the same.

Well Done, Ed!

hatlo-hat-tip-300 

Attachments

Images (1)
  • hatlo-hat-tip-300

So all week I've been playing with these carbs. Finally (I think!) got them dialed in today.

To recap: last Saturday a.m. I headed out to maybe show the car at an unofficial gathering nearby. I was a block from home when I aborted the mission: popping, blurby backfires, rough going told me I should once again clean some idle jets.

So I decided to install the Jet Doctors, and did that, and pulled out all the idles and mains and doused them with Gumout and blew a little air through some orifices on the carbs and splashed carb cleaner and/or gasoline on my face, as one does.

IMG_E6533

Got it back together and went to reset the mixture screws and it wouldn't set.

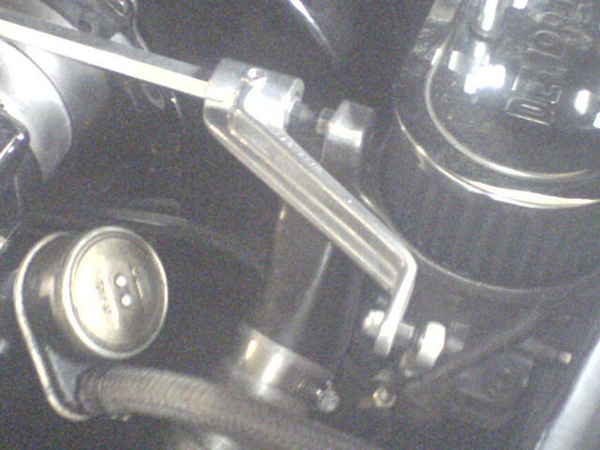
Noticed just a tiny bit of slop in the hex bar on the driver's side so i figured what-the-hey and cut the mount towers off the air cleaner bases, drilled and tapped and socked in a couple 5/16 heim joints, and epoxied some artfully cut down bolts in the hex bar ends. Crossed that off my punch list and returned to trying to set the carbs right.

Long story even longer: they wouldn't set. Three times I started over, warmed up the car, detached the linkage, set the mixture screws a half turn out from gently seated, set the idle stops a half turn in, checked the pull with the snail and got them even, and then went after the mixture screws for best idle.

Oh, it idled just fine. But underway I'd get those same symptoms, more or less: A bit of a stumble on takeoff. Popping on light acceleration. Popping on decel. Blurgy transition to the mains.

I mean...drivable. Almost not bad. But I know what it's supposed to act like, and this wern't it.

I pulled out the carb cleaner again...DWIA2126

Turns out that left side carb, with the linkage attached, was not quite setting back down on the idle stops. Oh, it got mighty close! So close I didn't see it—three times.

It was less than a paper's width off the stop. I loosened the lock nuts on the down rod and turned the rod about a half turn. Tightened up. Rechecked with the snail. Went around the mixture screws again. Took a ride and finally we're back to normal.

Oh, it still needs attention. Nothing like Danny's yet.

But now we'll be working from a slop-free (slop-proof!) linkage kit as we try to get this beast the best it can be.

Attachments

Images (2)
  • IMG_E6533
  • DWIA2126

Good catch, Danny. My error. I actually started with the mixture screws one full turn out, and after adjustment I think they are out something close to 1--1.5 turn all around. Turning them in a quarter turn made it lose rpms, so I turned them out a little....

Half turn in from where they touched was where I put the idle speed screws to start.

The idle jets all say 50, but I don't know if Jake reamed them when he built the engine. From what I read on the innerwebs it seems likely they're a little bigger than 50.

Pump jets say 50. I don't know what the mains say.

Ed...The only thing I can add to your punch list is this. The two aluminum bars that slide onto the hex bar may have their holes drilled at different lengths. This changes the throttle positions on the carbs in relation to each other all thru their rotation except at idle. The best way to check this is to remove the hex bar and slide the two aluminum bars onto the hex bar, then look to see if the holes on the opposite ends of the aluminum bars are in perfect alignment. (mine were off by 1 mm)   It can get worse. Tighten the aluminum bars onto the hex bar with the set screws and again check for perfect alignment in the opposite holes.  What I found is that the alignment changed every time I moved and reset them.  This is why I went to the  Vintage Speed Throttle linkage and never looked back.  It also looks more "period relative" !...Bruce

Bruce, I'm cornfused:  Are you talking about these arms?

Oldhex

And if so, wouldn't any differences in the angle of the arms in relation to the hex bar be compensated for by the adjustable downlinks?

Danny and I adjust the idle stops with the linkage disconnected at one end, then conect the linkage and adjust the downlinks at 2500 - 3000 rpm to tune them in which makes them even.  

Are you talking about something different?

Attachments

Images (1)
  • Oldhex
Post Content
×
×
×
×
Link copied to your clipboard.
×
×