That should do.
Something like this?
That should do.
Something like this?

Well the screens covered vents are cool but with the lights on top it does start to look a bit like a French Citroen or something from an animation studio ![]() .
.
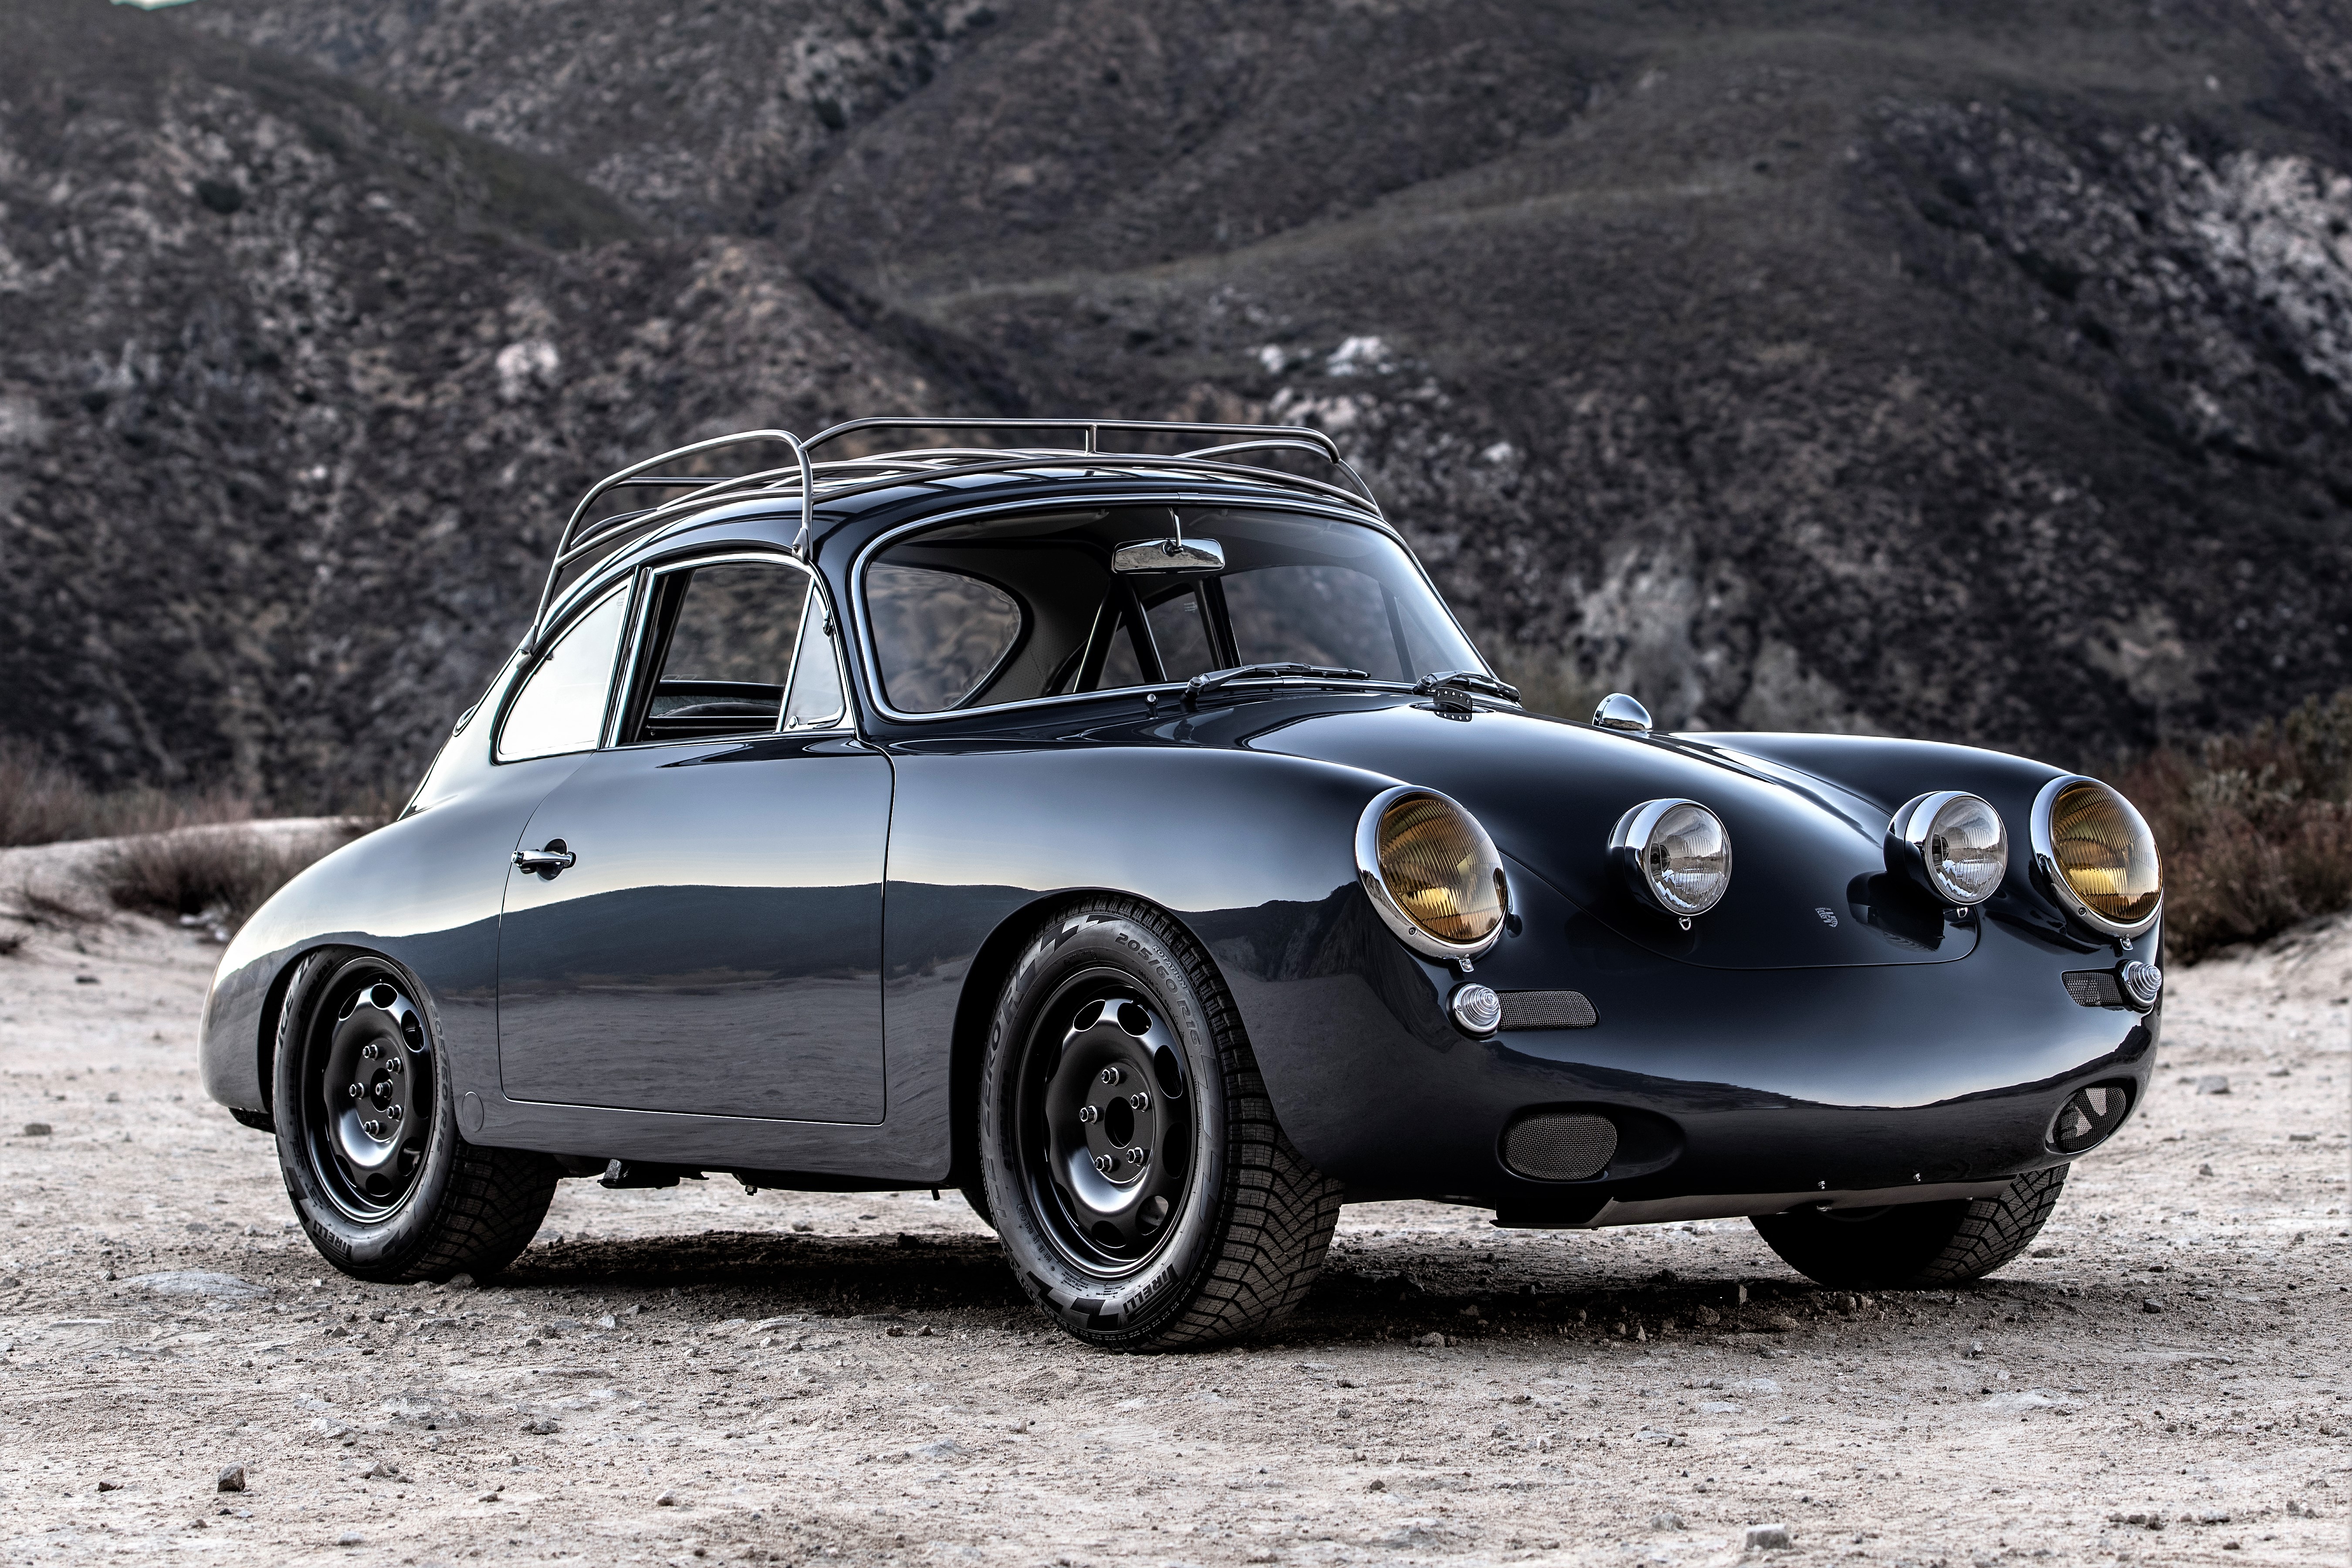
Look at this: https://silodrome.com/porsche-356-outlaw-car/
I used this as a guide for my build appearance-wise, but it's closer to yours with a 911 drivetrain.
Bob:
I like the look of that car. I also like the extra clear driving lights which I am also adding to my car. Just not mounted on the hood, but in the area where the front bumper would have been since we are deleting that. I am also adding yellow fog lights in the lower part of the front bumper cover.
I wanted the air intake to be more pronounced. So, right now the choice is the 550 Spyder type air intake or the RSR style air intake. I find choices like this are very hard to make. Carey is helping with advice, but he is more of a purist. I like to push the envelope a little. The hard part is knowing when to stop.
I must say that I love the look and size of the wheels are tire combination we picked as well as the fender flares.
I am leaning towards not adding the rear ducktail rear spoiler and not using the RSR style front air intake and going with the 550 Spyder style front air intake. I am afraid that using the ducktail and the RSR intake would be pushing the envelope one step too far.
Lane:
I read that article before. That car is beautiful, and the build was first class. I like that they made a lot of modifications to modernize the car, but keep it looking period correct. They did not go over the top, which I need to remember. I love the look of their engine. If I did an air-cooled motor that's what mine would look like. Thanks for the reminder.
Worth noting Joel that a lot of 550s ran with shark mouth intakes. And with a fair amount of variation.
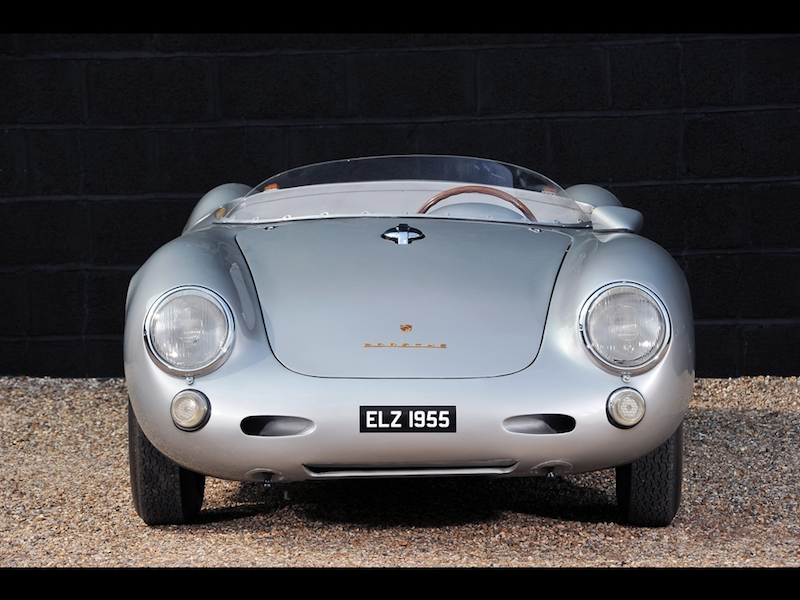
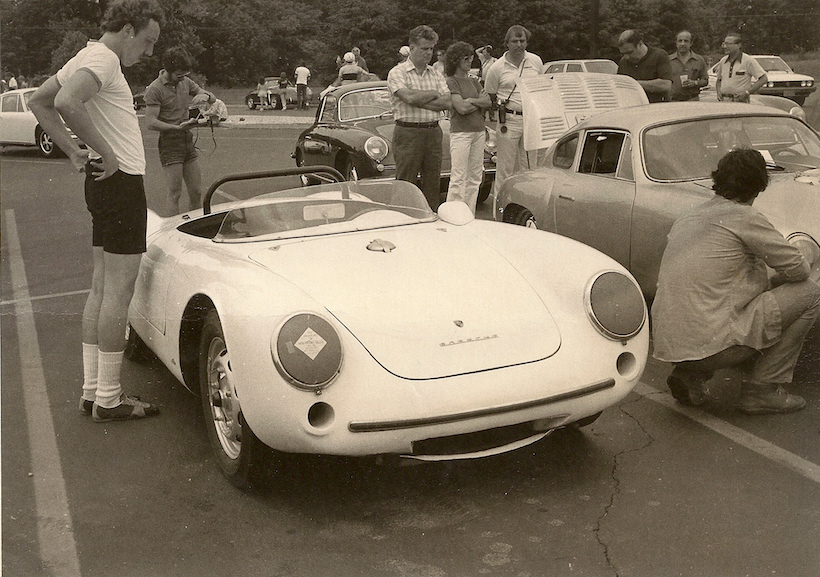
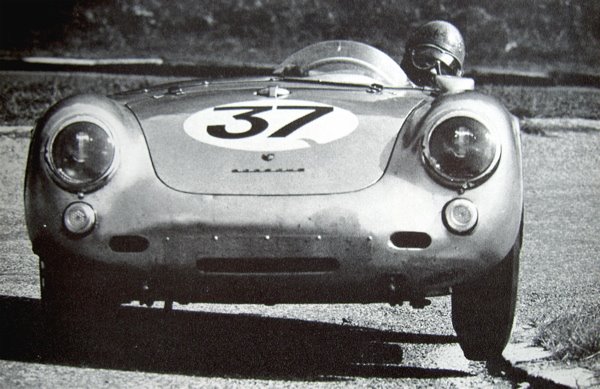
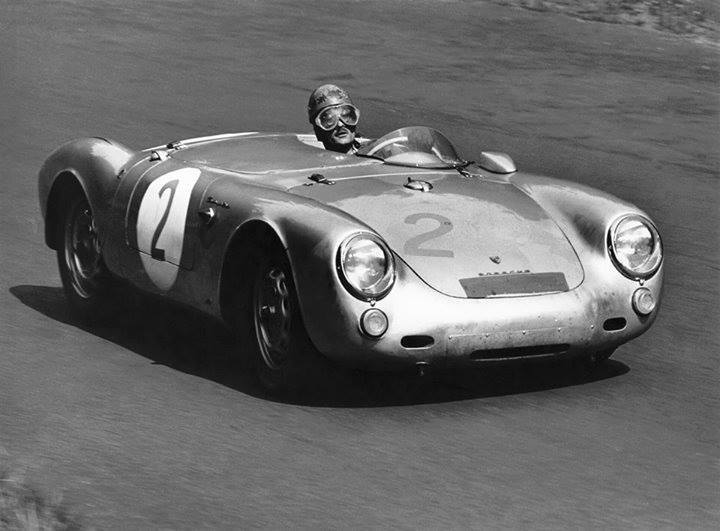
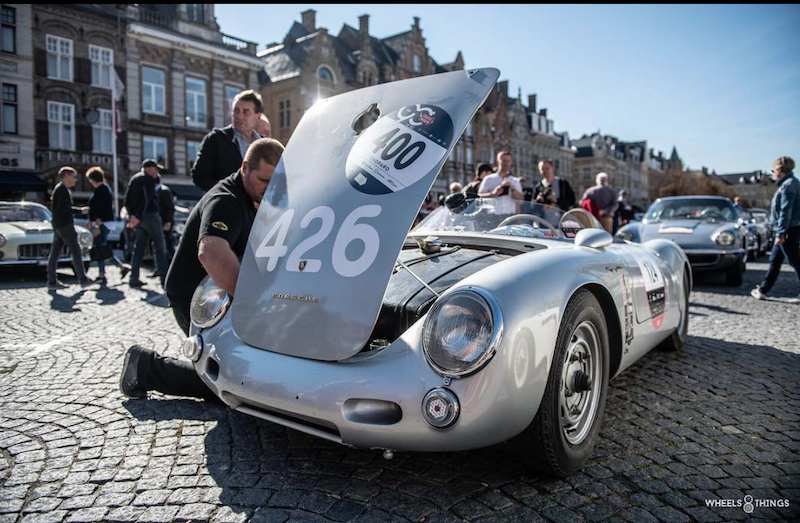
Variation on these cars is the norm. Especially now with water cooled motors.
I want an Outlaw look and an overall style that is "aggressive", but still retains enough elements to look "period correct" without being too "over the top".
I’d just go with a standard 550 grill. But you’d want to do some kind of ducting. A standard 550 grill (if it’s open like mine is) just go into the frunk. Most are simply cosmetic.
IIRC, Sierra Madre or someone offers an aluminum grill in the proper dimensions.
Fibersteel offers them. (S-M lists them as out of stock)
Rusty Tubs lists a fiberglass version, and his website is still up, but I’m not sure if he’s still in business.
On my car this will be functional. I believe the front air intake is for the radiator for the water-cooled engine as well as the AC. I think the oil cooler is in the rear.
@Joel Roth - Yeah, that car was my inspiration. What I was wanting to point out was the way Emory did the oil cooler opening up front. That's the best example I could find on a 356C front end.
If you go with the opening rather than an underreported car scoop it'll give you more ground clearance. That's one reason I reworked my scoop to be wider, but higher, and added the side scoops for increased airflow. It cools very well and doesn't scrape every dip in the road. The opening like you're planning would help even more.
Lane:
I did not realize that the Mike Colucci car had that air intake on the lower front bumper until you mentioned it. It is a little had to see in the pictures. Now that I see it, what we are planning for my car is very similar, but with the 550 Spyder type grill. The more I see it, the more I like it over the RSR style oil cooler air intake. It is simple and clean.
New update.
Carey and the crew have been working hard on building, shaping and finishing the flares. One side is done. But these are only temporary. Once both sides are done, they will make a mold of them and then form them from the mold and re-install the real flares and finish them.
I must say that I love how the flares look on the car and their shape. They give the car a totally different look. Especially with the larger and wider wheels and tires. The car has a much more aggressive and muscular look. But not too much so that it does not have that bubble look. It looks like a retro modern 356. It has a 911 look.
Carey and the crew have done a fantastic job.
Joel
@Joel Roth posted:
Hmmm, that gets me thinking...


Years ago, a body shop-owner friend of mine grafted 911/912 headlight buckets onto a Karman Gaia. Changed the look of the car significantly, in a good way. I think 993 headlights might do the same for your car. (Don’t shoot me Carey!) ![]()
“Carey and the crew have done a fantastic job.”
They usually do.
I like the idea. I also appreciate good lighting. That's why I am adding a set of clear driving lights mounted in the front bumper area and a set of yellow fog lights in the lower pockets.
But I don't want to change everything and end up turning it into a 911. I am already pushing the envelope. I do not want to cross that imaginary line and I think that would be a bridge to far.
@Joel Roth posted:I like the idea. I also appreciate good lighting. That's why I am adding a set of clear driving lights mounted in the front bumper area and a set of yellow fog lights in the lower pockets.
But I don't want to change everything and end up turning it into a 911. I am already pushing the envelope. I do not want to cross that imaginary line and I think that would be a bridge to far.
I think you're making a lot of sense, Joel. The more modern lights would be too much. I am interested to see how the driving and fog lights look, though.
And I (along with a few others, I'm sure!) am waiting with bated breath to see what those flares look like with a couple coats of paint...
Re. the headlights, the LED units that Carey installed in my car are incredibly bright. They are functionally fantastic without changing the look.
ALB:
You and me both. I can't wait to see the body finished and get painted.
Don't forget the wheel centers will be painted Black with the polished rim.
I picked a Porsche paint called Graphite Gray. It is a non-metalic medium gray that they used for the 50th anniversary 911. I also like Nardo Gray which is also a non-metalic Gray, but is a little lighter, but darker than Chalk Gray.
Interior will be either Burgundy/Red or Autumn/Tan.
Gauges will be a custom set made by Speed Hut in a 911/VDO style. Black faces, White numbers, Red indicators and Black bezels. The picture shows them with chrome bezels. I am switching them to Black bezels. We are customizing the quad gauge and taking out the Fuel Gauge and adding an Oil Temp. So, the Quad gauge with have Oil Temp., Oil Pressure, Water Temp., and Volts. We will then use a stand-alone Fuel Gauge mounted where the Clock is now. The 3 main gauges are 4" the Fuel Gauge will be 2 5/8".
The front seats will be a custom set made by Carey modeled after the Monte Carlo Seat with headrests and Grommets.
WOW!
That will be stunning, I may have to take a tip to Bremen to see it upon completion.
2 excellent color choices,my 17 is graphite blue metallic(looks close to graphite)the Nardo is an excellent choice also,,Chalk is my favorite right now but Im Porsche maxxed out with my 17,,no new P for meunless i win the Powerball
Not too long ago a friend of mine made some CGI images of what my car might look like with the design parameters we were using at the time I post some of those images here. It is now interesting to compare them to what Carey actually built.
One of the images is a head on image of the front with the Clear Driving lights and lower Yellow Fog lights. This is the design and layout of what we will do. (The image shows the car with the RSR style oil cooler front air intake which we changed to the 550 Spyder style front grill. We also are not using the Ducktail Spoiler either.)
I will post some of these images again to compare to the actual build.
I will say that I like the actual build much better. The flares on the actual build are more pronounced.
Front looks good from here. ![]()
Latest update from Carey:
They have been working on finishing up the fender flares. The fronts are done. They are almost done shaping the rear flares. They are still looking to smooth out the transition area on the rear flares where they meet the body to eliminate the "bubble look". I think the flares look fantastic. Initially, Carey was a little hesitant about putting flares on a 356, but now he told me he changed his mind. He LOVES the flares on my car. Pictures attached below.
I have also been speaking with Carey about re-working the location of the mufflers. Currently, we have twin mufflers located in the space between the rear of the engine and the rear of the car. Spacing is very tight and too much heat will be generated from the mufflers being so close to the body. So, we have decided to move the mufflers to the traditional 911 location, next to the engine/headers and behind the wheels. We will probably be using twin Spintech mufflers. Because of space constraints, we may also have to switch from the twin tip center exhaust to individual tips exiting through the body (Frenched) in the lower corners.
I am not a fan of flares on 356 either but Joel those look very tastefully done. Congrats to both of you ...
@IaM-Ray posted:I am not a fan of flares on 356 either but Joel those look very tastefully done. Congrats to both of you ...
Ditto, that. My problem with nearly all flared cars is that they tend to look more cartoonish because the tires don't tuck up in the wheelwells at all. The CGI renderings you had looked cool because the car was slammed. It'll be interesting to see what this looks like with the actual ride height.
@Stan Galat posted:Ditto, that. My problem with nearly all flared cars is that they tend to look more cartoonish because the tires don't tuck up in the wheelwells at all. The CGI renderings you had looked cool because the car was slammed. It'll be interesting to see what this looks like with the actual ride height.
I'm with Stan. The photoshop pictures look sooo good. I think the only way to get that look would be no flares and a big pie cut.
@LI-Rick posted:I'm with Stan. The photoshop pictures look sooo good. I think the only way to get that look would be no flares and a big pie cut.
I dunno'. Carey's pretty good with this stuff.
If the flares are done right, they could look "tucked". I'd like to see it with all the weight in the car, ride height set, in profile. They look pretty darned good right now.
@Stan Galat posted:I dunno'. Carey's pretty good with this stuff.
If the flares are done right, they could look "tucked". I'd like to see it with all the weight in the car, ride height set, in profile. They look pretty darned good right now.
Looks 911 to me, not 356. As long as Joel is happy is the only thing that matters! 
flares or no flares..that car is going to be DOPE!...it's gonna make ALL our cars obsolete....i'm insanely jealous
Carey has told me that the ride height is set. What you see will be the actual ride height. He is not done fine tuning the rear flares. When finished they should integrate a little better. The wheels and tires do tuck up under the flares. Maybe a little less than the CGI, but still tucked.
The flares do have a 911 look. That is because that was the look I wanted. If you remember I originally wanted to copy the look of the 1974 RSR. I have now decided not to use the rear ducktail spoiler or the front RSR style air intake but will use a 550 Spyder style grill for the air intake. We kept the flares but made them smaller to avoid the bubble look. In fact, Carey copied the look and shape of the flares from his own 911.
We are using a 550 style grill. Our grill may be wider and taller.
Just one correction, the earlier photos show the proper ride height, I had to raise it all around to roll it over to the body shop, ut the interference we are experiencing at ride height will not be existent with the permanent flares and modified inner wheel wells. Thus, in the latter photos the front is raised several inches and the rear about an inch.
Thanks for the clarification Carey.
Final shaping of the fender flares is almost done. Once they are done, they will make the molds for the "real" fiberglass fender flares then strip off the temporary Bondo and foam flares and install the "real" permanent flares. Photos attached. You can see from the photos that Carey and his team did an excellent job blending the flares into the body to eliminate any "bubble" look. The flares look great.
Nicely done, as you'd expect.
It's going to be a beautiful car.
Very nice .. With Fuchs you’ll be there …. Well almost ![]()
The Fuchs are already "there" and so is the car.
"There" is where I want to be.
@Joel Roth posted:The Fuchs are already "there" and so is the car.
"There" is where I want to be.
Dude, you need to chill out. Almost there, as in the car is progressing.
After a while, you'll understand Ray.
Access to this requires a premium membership.
Supporting members have donated about $4.00 a month ($49.00 US per year) paid annually.
AUTO RENEW: You membership will auto-renew after 12 months. If you prefer not to auto-renew, you can cancel your premium membership at any time and it will remain in effect until the end of the 12 months. To cancel, sign in at SpeedsterOwners.com and navigate to: (Your User Name) > Premium Membership.
PLEASE NOTE: Your credit card will receive a charge from CROWDSTACK PAY, the payment processor, not SpeedsterOwners.com.