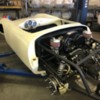
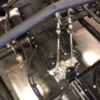
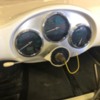
Excited for my new Spyder---but hurry! Summer is slipping away!
Replies sorted oldest to newest
That's looking really nice. Insert video for the song Aniticipation here. LOL
It is looking good. Greg Leach is building it for me at Vintage. It has a Stroker Subi and upgraded transmission. Apparently he is swamped so it is taking longer than I had hoped.
Yes, I spoke with Greg a few weeks ago. He said he's had to turn customers away he's so busy.
I don't know how I'd balance that many customers with my personal life(kids, wife, etc.) but I'd be thankful to be this in-demand with the current world we live in.
Dr. Dan, Greg will build you a beautiful ride. It looks like you're into final assembly so it shouldn't be long.
- Fast
- Cheap
- Good
Pick any two.
You'll love your car, and it'll be worth the time it took to build it correctly.
Thanks guys. I am looking forward to the car---I pretty much am having him do everything to make it the coolest and fastest vintage spyder possible. Let me know if you have any suggestions as I am a newbie here. Dan
Dr Dan.....Is this your car ? I took photos of it because I'm going for white too with Burgundy frame and upholstery. Are you using a metal plate behind your gauges ?
How many CC's is your stroker ?................Bruce
Attachments
Bruce, are you going to match your engine turning on polished stainless steel and put that plate behind the guages? It would be a neat idea but would it be too glaring in the sun? Just saying.
That car is beautiful. But not mine. Mine is a bored out Subaru engine and is silver with blue interior. Looks like Greg is very busy.
If you are out there and see my car. Take some more photos! Greg is probably too busy.
@Stan Galat posted:
- Fast
- Cheap
- Good
Pick any two.
You'll love your car, and it'll be worth the time it took to build it correctly.
I am just hoping for good at this point.
Ray...Yes, I will have an engine turned panel on the dash and yes, if it's too much of a glare problem I will remove it. Perhaps spray over it with a smokey non-glare transparent acrylic so the mill marks still show on the panel. The entire firewall will be engine turned also. Greg got me the fiberglass firewall before it was installed in the body. I bent up a sheet of engine turned, (1.5" circles) 20 gauge stainless to fit the contours of the firewall. Before the body goes on the frame this will be in place and thus be sandwiched between the frame and body where there are major fitments. It looks like there are more than 20 bolts that keep all this together. The bolts are stainless and countersunk in from the inside so the carpeting inside is flat the engine side with stainless acorn nuts.
I haven't decided what trim I will use on the outside body. Perhaps the Spyder emblems and a Porsche badge front and rear. I'm trying to develop some sort of magnetic license plate fixtures which don't show when the plates are removed.
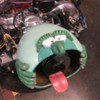
The air cleaner will be a trip ! The colors in the photo are not what I will be using. I am currently making one in Burgundy and some sort of other comparable colors. Fun stuff !!........Bruce
Attachments
Dr Dan....I may go down to see Greg this week so I'll be sure to take some photos of your car. Silver with blue interior right ?..........Bruce
Air cooled...I have a removable front license plate bracket I thought you made. Nothing you make is adaptable to a Spyder?
You can expect a lot of spyder stuff once the spyder lands ![]() right Bruce.
right Bruce.
Yes! Would appreciate any photos or updates! Silver with subi stroker engine and blue interior. Thank you!!
@drdantodd by all accounts you absolutely will get "good" from Vintage.
@edsnova posted:@drdantodd by all accounts you absolutely will get "good" from Vintage.
At the very least.
Hey. Dr Dan. Think we have the same engine. 200hp EJ25 from outfront. My Spyder is crazy fast. After break in period the engine sings past 7000 rpms with a flick of the throttle. I hope you got a limited slip in the tranny or you will never get hooked up. You are going to love it.
Idaho.......Yup....I do make a removable license plate bracket for Speedsters. They are available from Sierra Madre Collection and Vintage Motorcars. Currently I'm developing something for a Spyder front plate. Also a cup holder that has a very masculine look and fits up to that wide door post area adjacent to the door sill.
I developed my own version of a "Transformer" looking/working cup holder as well, but the cost to manufacture it was cost prohibitive..............Bruce
Any pics of the cup holder?
k, definitely interested!
@aircooled posted:Ray...Yes, I will have an engine turned panel on the dash and yes, if it's too much of a glare problem I will remove it. Perhaps spray over it with a smokey non-glare transparent acrylic so the mill marks still show on the panel. The entire firewall will be engine turned also. Greg got me the fiberglass firewall before it was installed in the body. I bent up a sheet of engine turned, (1.5" circles) 20 gauge stainless to fit the contours of the firewall. Before the body goes on the frame this will be in place and thus be sandwiched between the frame and body where there are major fitments. It looks like there are more than 20 bolts that keep all this together. The bolts are stainless and countersunk in from the inside so the carpeting inside is flat the engine side with stainless acorn nuts.
I haven't decided what trim I will use on the outside body. Perhaps the Spyder emblems and a Porsche badge front and rear. I'm trying to develop some sort of magnetic license plate fixtures which don't show when the plates are removed.
The air cleaner will be a trip ! The colors in the photo are not what I will be using. I am currently making one in Burgundy and some sort of other comparable colors. Fun stuff !!........Bruce
Where do you get the Spyder emblems and Porsche badges? I won't put a front plate on, but would be interested some of the fun stuff you guys are talking about. At this point I am just doing anything and everything---budget is already blown....Dan
Budget blown, oh yeah, just keep saying, while I am at it.... (repeat) watch it go
@drdantodd posted:Where do you get the Spyder emblems and Porsche badges? I won't put a front plate on, but would be interested some of the fun stuff you guys are talking about. At this point I am just doing anything and everything---budget is already blown....Dan
You can get them just about anywhere. The OEM ones from Porsche are kind of pricey, but afaik they're brass, not pot metal.
Aren't you getting a Vintage? Greg sells 'em. I'd just have him put them on.
I don't believe the manufacturers are allowed to install P emblems.
Following...
Thanks for the info. I want all of it!
While we are building a tribute, reissue, Doppelgänger
Replica: noun 1 I cannot confirm whether it is a replica or a real firearm at this stage: copy, model, duplicate, reproduction, replication; dummy, imitation; carbon copy, facsimile; informal knock-off, dupe.
ANTONYMS original, genuine article2 Amelie was physically a replica of her mother: perfect likeness, exact likeness, double, lookalike, living image, mirror image, image, picture, twin, clone; German Doppelgänger; informal spitting image, dead ringer, ringer, dead spit, spit and image.
It is not a P. ![]() I have no badges on my IM, but I do have a wheel cap that has a crest.
I have no badges on my IM, but I do have a wheel cap that has a crest. ![]()
Today, I felt like I was channeling @edsnova and the obstacles he's had to overcome.
Maybe his ears or the little hairs on the nape of his neck were twitching.
I've been putting off doing a very slight worm (front) adjustment on my steering box because, well, I'm inherently lazy during Covid and haven't gotten around to it and it wasn't that bad, after all.....
But today was different..... I took Pearl out for a spin to the next town over (Upton, where absolutely nothing ever happened and no one important ever came from) where I heard that "Cousin's Lobstah Truck" from Bahsten was set up selling both Maine-style (cold Lobstah and Mayo) and Connecticut-style (warm Lobstah and Buttah) Lobstah rolls and on the way home I thought, 'How hard can it be? You've already got the tools - It's like a ten minute job!'
It's not like it was wicked bad loose, but compared to the Rack and Pinion in my Rogue it felt a little loose, even though the play was only about 3/4" - Enough to irritate someone with OCD (like me).
My "special" Steering Box tools consist of a plumber's adjustable drain wrench (for the steering box front locknut for the worm adjuster) and a special 90º angled 'wrench' I made to fit into the 52-point hex-ish front adjuster. (I'm kidding about the 52 points - it's more like 24 or maybe 18).
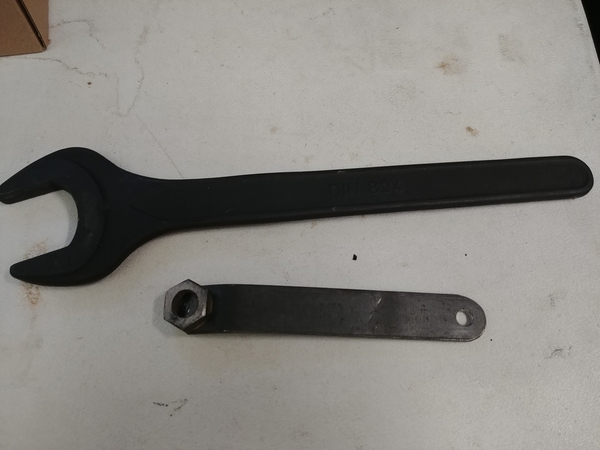
Anyway, I got the locknut loosened in about a minute of messing with the adjustable drain wrench but when I put my specially made worm-adjuster that I found in the kit up there into the hex adjuster it was waaaay too small. Oops! Guess I made that one for some other job! Here's the old and new wrenches for width comparison on the left:

Guestimating that it needed a flat piece of metal about 1-1/8" wide to cram into the hex hole and turn it, I scrummaged in my scrap box (I know Ed has one of those, too) and found a piece of flat, 1/8" thick metal stock 1-1/4" wide and got it bent to 90º on one end (gentle pounding with my BFH) and then cut it down until I could just get it squeeked up in there between the steering box and the car body and into the hex hole to turn it. That all took around 40 minutes of bending and making it narrower and narrower until it fit tightly. So after getting the car up on jack stands and making a new tool, I'm into this now for over an hour - Way longer than the original 10 minute estimate - and still haven't adjusted anything.
I literally gave the adjuster about 1/16 of a turn tighter, held it with the new wrench and re-tightened the locknut, all the while listening to a seemingly endless parade of old "Hall and Oates" 70's classics. The same era that gave us those terrible "Earth tone" colors on so many cars that we would like to forget today, and other memorable songs from people we all would like to forget (just click on "really bad songs of the 1970's")
Anyway, if you are yearning to adjust your steering box and feeling brave, here's what you might buy for front adjuster tools: A piece of 1/8" thick flat barstock 1-1/4" wide and a plumber's adjustable drain wrench (Home Depot/Lowes plumbing tools) and you'll be out about $20 bucks. You'll need a bench grinder (OK) or an angle grinder (better) to make the adjuster tool. The top adjustment screw, for the roller, seldom needs adjustment but you can get at the locknut with a regular wrench and turn the adjuster with a 90º flat blade screw driver, so no big deal.
Here is the lineup of both tools (ignore the small wrench at the bottom). I labeled the new wrench so I don't lose it this time.....

Attachments
That plumbers wrench will never fit into a Spyder, there isn't enough room.
The open end for the locknut is 41mm. I bought one for $16 on Amazon, Lisle tools made it.
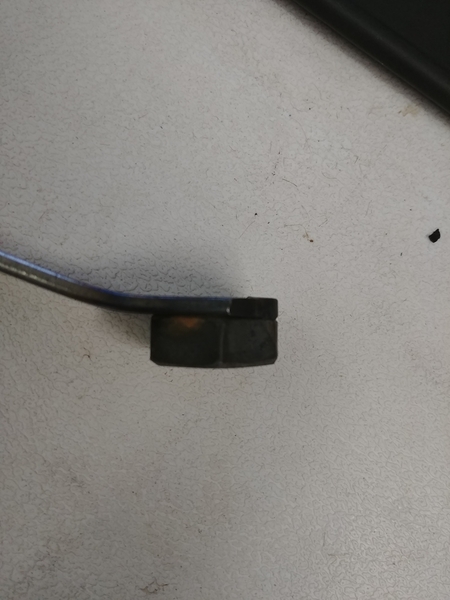
I believe the "Allen" center adjuster is actually a 12-point. Anyway, a 22mm or 7/8" hex nut fits just fine. I ground mine down so it could engage but still fit with the fiberglass trunk wall. I welded it to a piece of 1" steel 1/8" thick and put a small bend in it to get it away from the open-end, making the home-made tool hang vertically from the steering box.
The plumber's wrench fits, but as you say, there's not a lot of room up under there. I'll look for a 41m open end at Harbor Freight next time I'm there.
I love the welded nut trick. If this Covid stuff lasts long enough I'll drag out the welder and make one of those, too, just to say that there are two of them in the world (and it looks just like the "special tool" they show in the Bentley service manual, so I'll feel more "official" when I use it).
Thanks! As an un-named West Coaster often says, "I learn something new every time I log in here!"
Al and Danny....There are three of them........Bruce


